Sometimes you just want to cosplay a character that has a highly stylized ponytail or giant accents that don’t physically make sense. Spiking it up may appear thin or floppy and adding more wefts can get heavy fast. I once made a large Chibi Moon pigtail wig with 3 packs of wefts and I thought my neck was going to break. Fortunately, stylized wigs don’t need to break your neck. You can fake it and use a pillow underneath the wefts to get the volume without the weight.

I’ve used the method a few times before, though Noriaki Kakyoin from JoJo was a big test of this method. I needed a large squiggly noodle bang on one side, and it had to be light else the wig would be constantly pulling my head to one side. With the pillow inside the bang, this wig weighs close to nothing and I felt no tension on my head or neck the entire day at the con.
The first trick to this method is felt. I’ve used a few materials but felt holds tacky glue best, and tacky glue is how you get the wig fibers to stay put. The second trick is teasing the fibers. This makes the fibers appear thicker and you get more coverage with less weight.
This tutorial will require some styling experience and a lot of patience, but get your felt and tools and let’s get started! This covers how to make most shapes like small ponytails or squiggly bangs or even large spikes. If you’re doing something round or a cone, you will need to pattern differently but the resulting technique is the same.
Skill level: intermediate
Cost: upper end of moderate
Materials:
- Felt that matches somewhat closely to the wig color. Brown for brown, blue for blue, white for white, etc. A few sheets of soft felt from the craft aisle should do.
- Polyester fiberfill. I used a few handfuls for Kakyoin.
- A pack of wefts. Kakyoin’s bang noodle took 1/4 pack of short Arda wefts. A pack will go a long way.
- A base wig
Patterning supplies
- Poster board or printer paper
- Pens
- Paper scissors (don’t use your fabric scissors!)
Felt sewing supplies
- Sewing machine with matching polyester thread and a standard universal needle
- Standard sharp hand-sewing needle
- Fabric scissors
- Stick pins
- Curved needle (if sewing the pillow to the wig)
Styling supplies. Note that these tools do not have to be expensive top-of-the-line tools. Basic $10-20 tools from Walmart or Amazon work just fine.
- Wig head, foam or fabric
- Wig styling stand, tripod or table-mounted
- T-pins
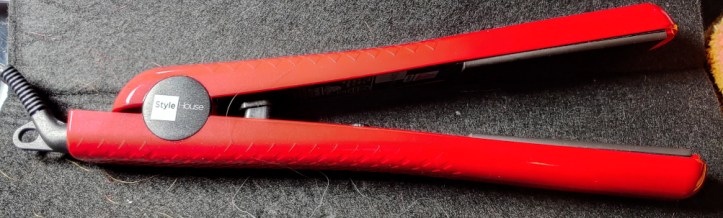
- A flat iron with a heat dial
- A hot mat or a towel to put the flat iron
- A thin comb with the teeth close together. The best kind to get is one with the handle on the side of the teeth.
- A hairdryer with a hot setting
- Mega-hold hairspray. Any brand will do. I use Aussie Mega Hold because it smells nice
- Tacky glue. I use the basic Alene’s tacky glue in the brown bottle
- Hair-cutting scissors. The budget $5 pair works fine.
Creating the pillow base
Before you get your hands on any wefts, you need to pattern the pillow. It’s best to start with some paper or poster board to get a good idea of how big the pillow will be.

The pillow will need to be bigger than the hair feature as we’ll be stuffing it later. The larger the pillow, the more stuffing will go inside. For smaller pieces, the pattern piece will be closer in size to the final hair feature.
When patterning, thinner details will be much harder to stuff and sew. For Kakyoin’s hair squiggle, I made it nice and fat so I could get the fiberfill inside without difficulty.
You won’t need to worry about turning this pattern inside out as turning felt is obnoxiously difficult.
Hold your pattern up to your wig on a wig head to get a good idea of what the final pillow will look like.
Are you making a Kakyoin wig? You’re welcome to use my template!
Once you’re satisfied with the template, trace two identical pieces (a front and back) out on felt. Pin the two pieces together and sew them at about a 1/4″ seam, leaving the section facing the wig open for stuffing.

Once sewn, trim the raw edges down to about 1/8″ to reduce the visibility of the seams.
Now it’s time to stuff the pillow. You want this pillow densely packed full of fiberfill to ensure this pillow never collapses or moves. Take the fiberfill by small bunches and shove it inside with your fingers. Pack it until the fiber is nearly at the opening.
Then with the pillow packed, trace the opening on a scrap piece of felt to create a cap.
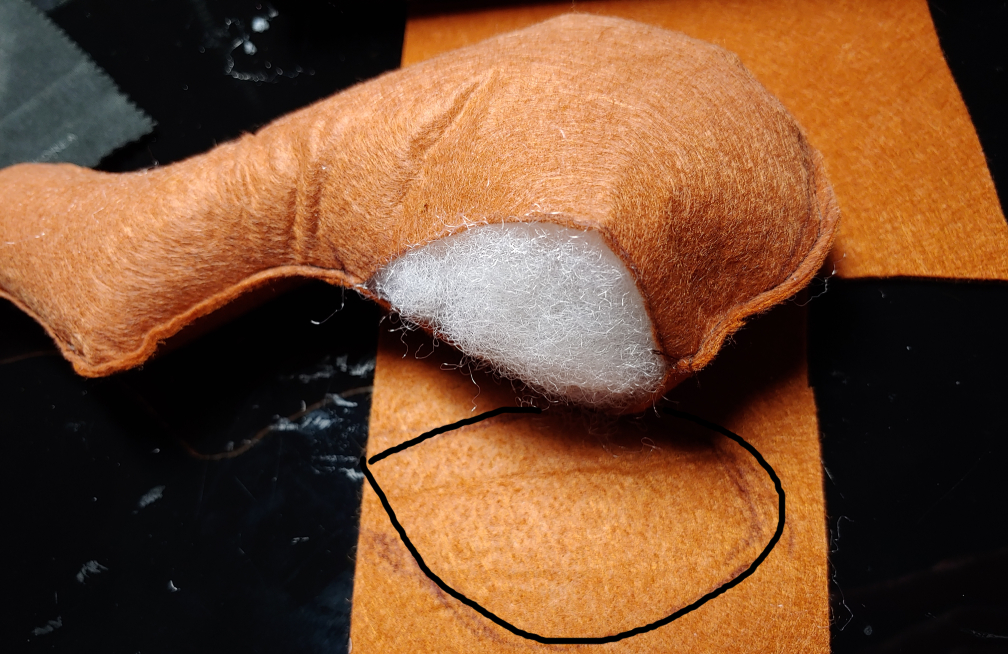
Cut the cap out and attach it to the pillow using a whip stitch. Before you close off the cap, shove more fiberfill inside to make the cap area nice and stable.

Once the pillow is sufficiently stuffed, finish up the seam and knot your thread.
Prepping the fibers
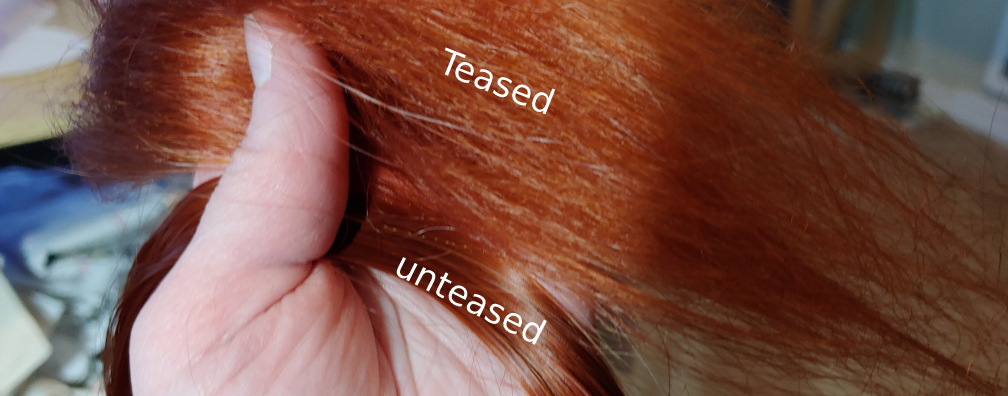
The biggest secret to lightweight hair accents is that the fibers are teased. They’re fluffed up to look thicker than they are right out of the bag, letting them cover more area with a lot less weight.
If you use unteased fibers, the weight of the pillow gets heavy fast. When I first made a pillow wig, it required three packs of wefts, and I found my head sagging after an hour from the weight. So let’s get those fibers nice and fluffy to reduce the weight.
We’ll be working with heat, so if you have sensitive fingers, make sure to protect your hands. For the wig side, most wigs are heat-resistant now, though the fibers are only resistant up to a certain point. To figure out where the heat should be on your flat iron, test the heat on some spare wefts. Start with a lower temp and pull the fibers through the flat iron. They should feel hot but not crispy. If you smell anything that smells like burning plastic or the fibers start getting stiff, turn the heat down.
I keep my flat iron at about medium heat, but it may be different for you.
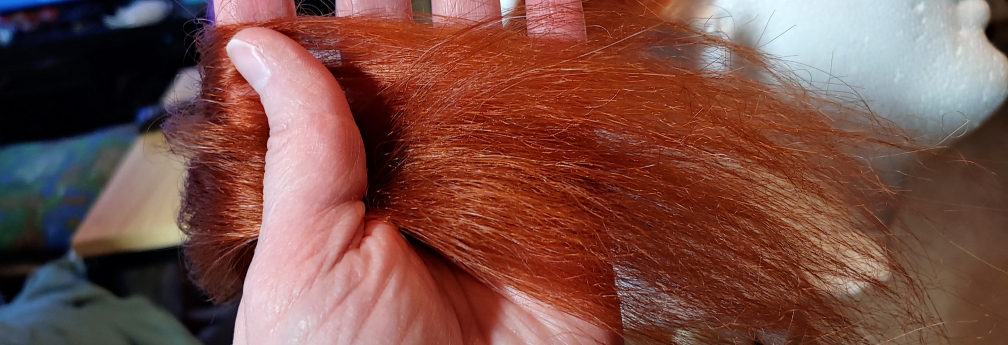
Once you’ve found the right temp, it’s time to start teasing. Pull the fibers apart with your fingers then cut a small section of the wefts off with a pair of scissors. Gently pull the cut wefts out of the pile. Don’t yank else the fibers will get tangled. Once free, pin the wefts to a wig head with some t-pins.
Work one section at a time, clipping sections out of the way as needed. First, heat up the fibers with your flat iron. Pull the flat iron from the top of the fibers down 1-2 times. It should feel hot to the touch.
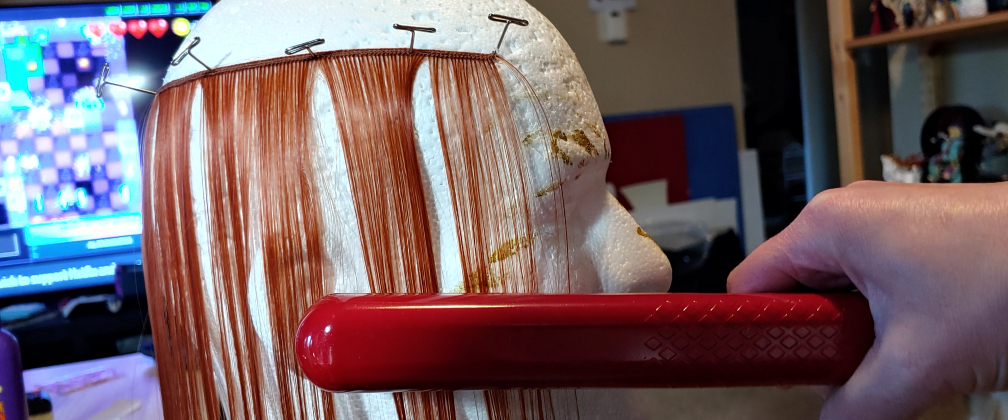
While the fibers are still hot, back-comb them with a thin-tooth comb. Hold the bottom end of the fibers and comb upward toward the stitched roots. This is going to create a bit of a rat’s nest.

While the tangled fibers cool, work on the rest of your wefts. Once cooled, gently comb the knots out. Start at the bottom and start combing the tangles out towards the base of the hair. This process requires patience and time, as yanking on the fiber knots will only cause the knots to get worse.
Once detangled, the result is coarse, fluffy fibers that appear much thicker than the original wefts. The fibers are stressed out, causing them to become puffy and spread out. This makes the fibers much more lightweight and easier to work with when covering a base.
Adding wefts to the pillow
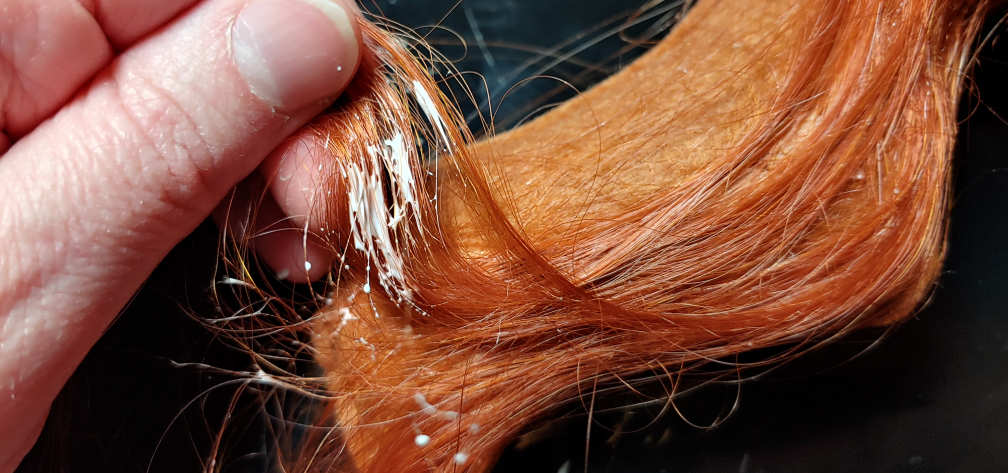
The trick to getting the wefts to stay down is regular old tacky glue. That all-purpose glue you find in the brown bottle in the craft aisle. It doesn’t look like it, but this glue is a workhorse and exactly what we need to get the fibers to stay down.
The glue takes about 15 minutes to dry, but it’s easy to accelerate the drying time with a hairdryer. And while working on the pillow, you’ll want to use that hairdryer to keep this process from dragging out immensely.
Before getting started, lay the fibers over your pillow to check how long they need to be. For smaller pillows, you can get several cuts of fibers from a single weft, but larger pillows like Kakyoin’s bang squiggle, the pillow length was almost the length of the short weft.
Work in small sections of wefts, and you want small sections else the fibers get a bit unruly. You’ll be gluing along the wefts to mimic the natural direction of hair, whether it’s a ponytail, a bang, or something else. If you work opposite the natural direction, the pillow will look more like it’s slapped on than a natural extension of the wig.

When starting to glue down wefts, you want to start gluing at the base of the pillow where it meets the scalp and work out from there. Depending on your pillow’s shape, the wefts may also squiggle or curl, but as long as the hair is pointing in the proper direction, it’ll look natural.
So let’s get to gluing. Cut a length longer than the pillow and straight across the wefts. Taking your tacky glue, rub some glue along the fiber ends. About 1/2″ or so of glue is enough to get you started.

Stick these wefts to the base of the pillow, pressing down on them a moment. Once they’re stuck, hold the rest of the wefts away from the glue and use the hairdryer to start drying the glue. It doesn’t need to be 100% dry, just enough that the wefts stay put. Holding the wefts further up ensures they won’t try to move before the glue fully dries on its own.
But gluing just the base won’t be enough. You need to secure the fibers down the pillow. You don’t need to glue every inch of the fibers to make them stay put. They just need to be secured every so often. If you have curves in the pillow, you’ll want to secure them each time the fibers change direction.
Rub some glue on the pillow-facing side of the wefts. Try to keep the glue only on that side. Tacky glue does dry clear, but it does give the wefts a bit of a shiny look, so the fewer visible glue spots, the better. With glue now applied to the fibers, press them down onto the pillow or existing fibers for a moment before hitting it with a hairdryer to dry the glue faster. Like with gluing the base, make sure to hold the remaining wefts in place to keep them from moving.
Continue until you’ve reached the end of your pillow.
Filling in larger sections without the bulk
Sometimes you might have a curve that’s wider at the curve than the two endpoints. This happens with pigtails or squiggly forms like Kakyoin’s bang. Or you might have something wide that transitions into a thinner point. While you could feasibly lay wefts the full length from top to bottom, it can get a bit bulky, especially at the end. So we fake it.
The trick is to use partial lengths to fill in those larger spots and cover the ends with a full-length weft.

The partial weft is placed on the pillow and glued down, making sure to glue and secure both ends of the partial weft. The full weft is glued next to it. As you glue the weft down, use the full weft to cover the ends of the partial weft completely.
After layering the partial and full wefts, the result becomes difficult to discern which is partial and which is full as the fibers blend together like natural hair.

Covering the seams
Before you finish off your pillow, you need to make sure the seams don’t show through the fibers! You can’t quite trim the seams all the way down to the stitches else the pillow will bust open and your hard work will be ruined. So we need to cleverly cover the seams instead.
Since the seams are sticking out slightly, covering them involves layering. Place fibers along either side of the seam as you’ve done with the rest of the pillow. This will serve as the foundation.

For the wefts over the seam, glue them a bit looser and stick them to the seam instead of the rest of the felt. This will take several layers of gluing wefts to make the seam completely disappear from sight. You can glue the wefts on top of each other much like gluing the wefts to the felt. Rub glue on the back of the weft, lightly press down to avoid contouring the wefts to the seam, and then blowdry dry.
Keep at it and the seam will vanish from the wig pillow, hiding beneath the wefts and layers.
Styling

After finishing the wefting, it’s time to style your pillow’s hair. You can do this before or after you’ve attached it, though doing it before is a bit easier. You may notice some flyaway hairs or require some trimming or curling. Your best place to start is with some hairspray.
The best kind of hairspray is megahold or freeze. Any brand will do, honestly. Pin your pillow to a wig head. If you’re worried about your wig head getting sticky, cover it with plastic wrap before pinning.
Spray hairspray on your pillow, using your fingers to smooth out the fibers and stick them down. Once smooth, use your hairdryer on high heat to set the hairspray. Wigs work best when you set them with heat, so when you hit them with the hairdryer, it freezes the fibers in place.

Your wefts are likely longer than you need as well. Cut the wefts at an angle to trim them. If you have trimming scissors, you can also feather the edges to make it look more natural.
If you plan on curling the edges, you’ll need a curling iron on low heat. Take the curling iron and carefully wrap the wefts around it, curling it into place. Leave the curling iron there for only a brief moment, just to get the fibers warm. Remove the curling iron, setting it aside and holding the curl in your palm in shape until it cools. You can also wrap the curl around something like an empty thread spool to let them cool in a circle. Once cool, spray heavily with hairspray and blowdry in place while holding it in your hand. Heat manipulates a wig, so by letting the curl cool in your hand, it trains the fibers into that shape.
Attaching the pillow
Now that your pillow has been wefted, it’s time to attach it to the wig. Let’s talk about two different methods to attach the pillow to the wig.
Removable

If you have a smaller pillow, you can make it removable! While there are a number of ways to do this with wire, magnets, or other methods, let’s talk about the easiest one. Alligator clips! These little clips are easy to find in the hair styling aisle or online. Get the kind with teeth. They work best at gripping the pillow.
Removable types also work best if you have some sort of band or accessory to hide the clips behind. It makes the transition from the pillow to the wig more natural. When I made May’s wig, I hid the clips behind a very large bow and ribbons. It was impossible to tell it was detachable with the clips hiding snugly underneath the accents

The easiest way to make a detachable pillow is to use the pillow base you sewed when stuffing it full of fiberfill fluff. This is made of felt, and tacky glue works great on felt.
Cut a small strip of felt, wide enough to span the width of the ponytail. You’ll want the clips to sit vertically on your head, so make sure the felt works horizontally.
Scribble some tacky glue on either side of the band, gluing it down to the base with enough room in the middle for a clip or two to slip through. Stick T-pins or sewing pins into either side to apply pressure to the glue and give it time to dry, about 15-30 minutes is sufficient. I’d leave it overnight before sticking it in a wig to allow the glue to completely set. Once set, you can slip an alligator clip into the band from the bottom up, then slide the clip into the net of the wig to keep it in place.
Attached
Sometimes you just need to permanently attach the pillow to a wig. It could be that you want to style the hair around it and with it, don’t have any bands or way to hide the edges, or just want it to never move.
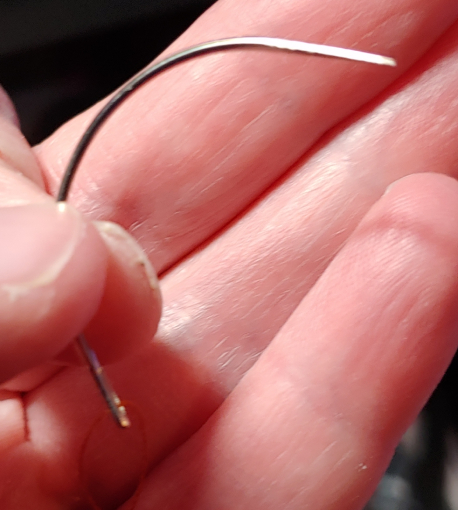
Whichever the reason, sewing it to your wig is the best method. And for this, you’ll need a curved needle. You can find curved needles with upholstery and doll-making needle packs and they are like the name says: curved. You need the curve to properly hook the pillow and the wig at the same time without moving either.
Before you thread your curved needle, you need to plan out where the pillow is going to sit and to make it look like a natural extension of the wig. You may need to style the rest of the wig, leaving an unstyled section for sewing the pillow to. Leaving strands hanging straight down might not look natural unless it’s a half-ponytail, so pay attention to the direction of the hair.
For Kakyoin’s hair, his hair is windswept backward with spiky bangs. When sewing in the large side-bang, I styled the back but left the side where the bang sits and the wig’s bangs unstyled. You need a section unstyled, as you need to pin the wig hair out of the way while you work.

Once planned, it’s time to sew. This works best if you have a foam or solid wig head as you won’t need to worry about catching the curved needle on the wig head fabric.
You cannot pin a pillow to a wig cap, though you can stabilize it with some T-pins speared through the pillow into the wig head while you work.

Using a curved needle will feel a bit different than using a straight needle. You do not need to lift the wig net or the pillow to get the needle into either. Since it has a curved shape, you can use it to slip underneath the wig net and then curve it up through the bottom edge of the pillow and out the side.
Once the needle pokes out the other side, you can’t just pull it upward. Instead, you have to rotate the needle until the eye is free then pull the thread taut.
Due to the size of the curved needle, you may need to do 2 rotations around your pillow to fully attach the pillow to the wig net. During this process, make sure to not move the wig net at all. If it gets bunched or stretched strangely during this process, the wig may not properly fit. You can clip the thread, reposition the wig and the pillow, and sew again if you find this has happened.
Once the pillow is secure, knot your thread and clip it.
Final touches
Once you’ve affixed your pillow, either permanently or by clips, you may want to put some final touches on your styling to complete the look.
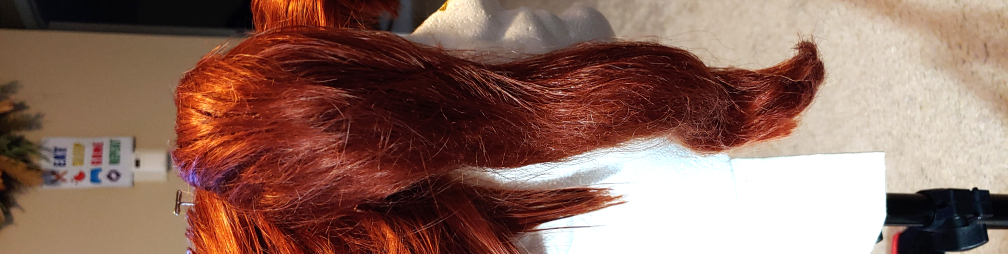
For Kakyoin’s wig, I wanted to blend the wig hair more with the pillow to make a seamless transition. Top and front hairs are swooped back and glued down securely to the side bang before being smoothed out with hairspray. The method is much the same as gluing the wefts to the pillow.
After that, the rest of the wig is styled, fluffed up, and swooped backward to conceal the back of the pillow to make the side bang look like it’s a natural extension of the wig.
Your styling may have different requirements, though if you have a permanently-attached pillow, I highly recommend blending the wig fibers with the pillow to make a seamless transition. With a detachable pillow, you may not need to style anything extra. What you do now is up to you to complete your look and make an awesome wig.

I hope you enjoyed my wig pillow tutorial! This was a fun one to figure out and learn how to make lightweight so my head doesn’t start tilting sideways an hour after putting it on.
Kakyoin definitely put this technique to the test and is one of the wildest pillows I’ve made so far. I plan to use the same technique for highly styled wigs from Pokemon and possibly Yugioh plus using it as a large bump-it for tall and structured ponytails. Pillows are great for all sorts of gravity-defying hairstyles. I hope they’re as helpful for you as they’ve been for me!
Let me know what pillows you make! @ me on social media so I can admire your work.
