My sister hates wigs. A lot. Lately, I’ve been working on wig alternatives for her to help her with her headache problems, and when a friend suggested paper ribbon as a hair material, I had to try it out.
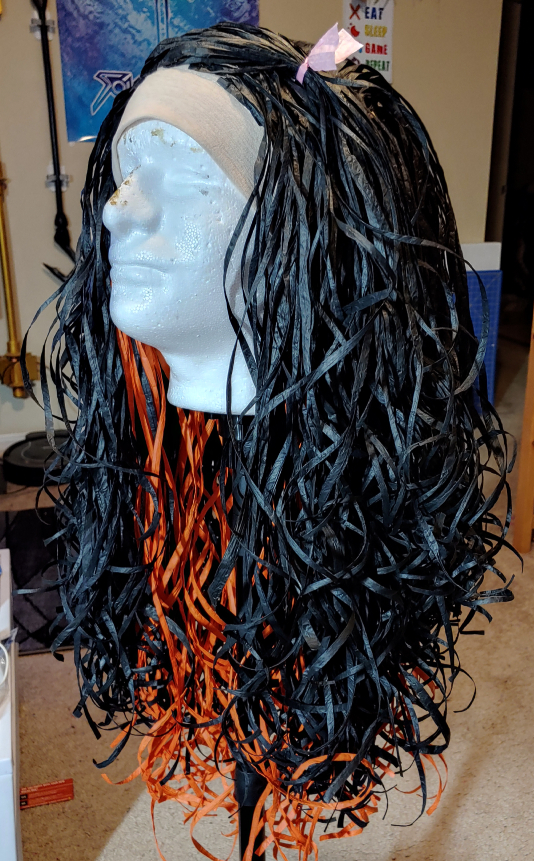
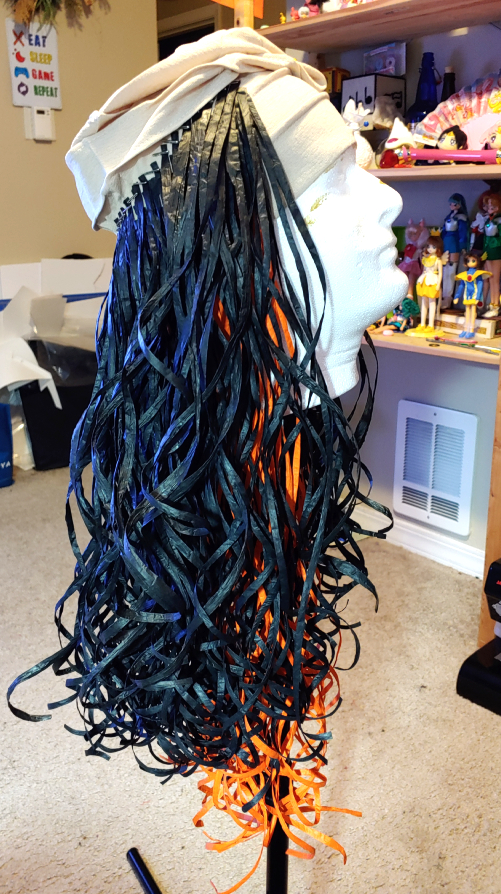
The result is a very full, fluffy wig with a wide comfort band for her forehead that matches her skin tone and plenty of room for her thick hair underneath. The paper raffia is easy to curl more or leave with the natural curl it has from being rolled up. This wig reaches down to about my waist when I wear it and makes a delightful swishing sound when worn.
The wig itself takes only a few materials and a lot of patience, but the result is pretty cool. You can make them longer or shorter, and you can combine colors like I did to make an underlayer for Nezuko’s two-tone hair.
This tutorial covers a full head of long wavy hair with bangs parted to either side. There is no back part. You can cut the bangs to make short parted bangs or leave them long and pulled to the side like this wig has.
Skill level: beginner-friendly
Cost: lower-end of moderate
Materials:
- Slouchy beany. Make sure it is solid and not too tight. No mesh beanies.
- About 200-400 yards of raffia ribbon for a waist-length wig. You will need more if you have a larger cap and less if you have a smaller cap. I used about 350 for this one. You can buy bulk ribbon to save a lot on costs.
Supplies
- Tacky glue. I use Alenes, the one in the brown bottle you can find almost anywhere crafts are sold.
- T-pins or wig pins. Stick pins won’t work here.
- A wig head
- A wig stand (table-mounted or tripod) or something to keep the wig head from scooting around
- Scissors
- Yardstick
What kind of cap to use

The type of cap is just as important as the technique you use. The best caps are going to be solid with no gaps, likely cotton or similar fabrics with an elastic in the back, or a loose-fitting knit cap. Make sure there is enough room for your hair underneath.
My sister likes to wear her cap pulled down her forehead and over the ears, so I needed something that suited her comfort.
Slouchy caps, sleep caps, and turbans are a good place to start when searching online. The important thing is to find something that is comfortable but is also tight enough that it won’t slip off your head at a con.
Basic raffia techniques
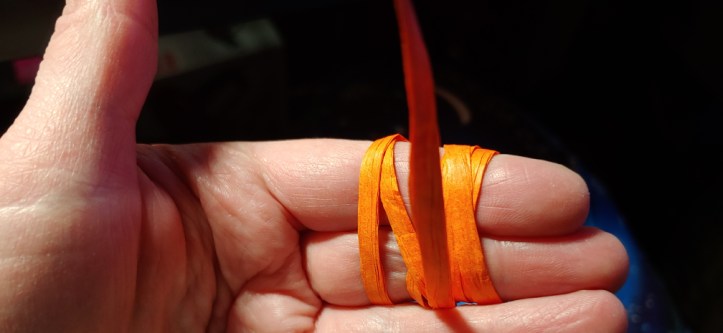
Raffia is a paper ribbon folded a few times in on itself then wound around a spool. It adheres to glue pretty well and can be curled or relaxed pretty easily. The ribbon will have a natural curl to it from being wound around the spool, but you can make a tighter curl by winding it around your fingers. Two fingers will make a looser curl and one will make a tighter one.
To relax the curls, simply stretch the ribbon out until it’s nearly straight. No need to pull on it.
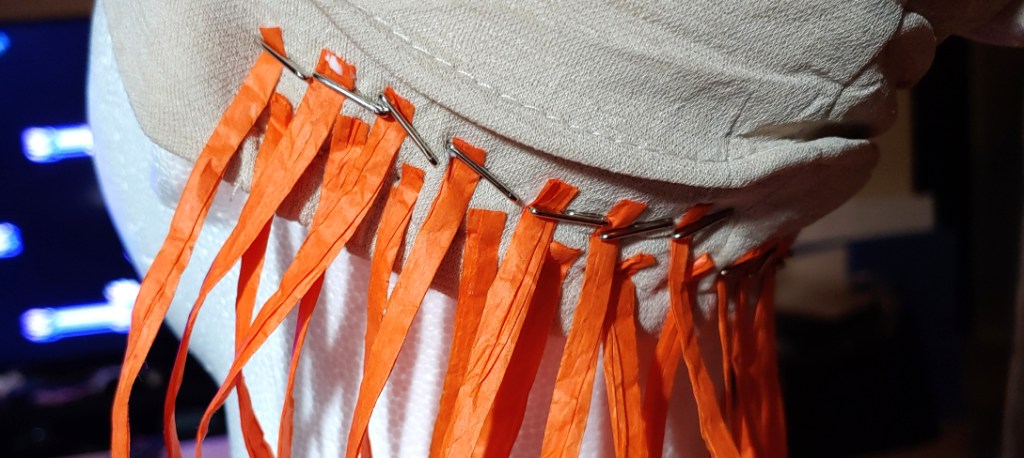
Attaching the ribbon involves a little bit of tacky glue.
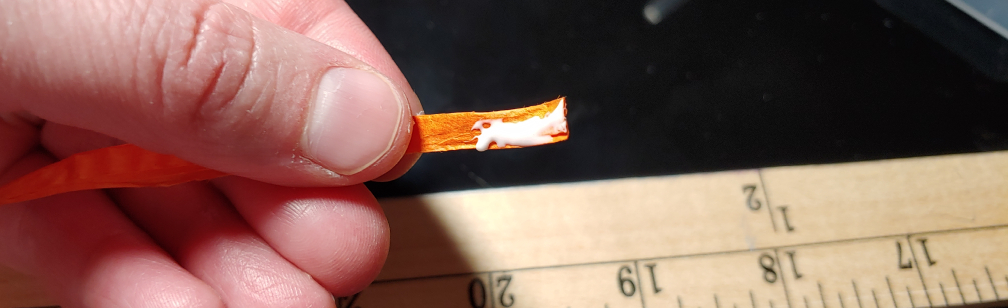
Tacky glue has the benefits of being washable and non-toxic, so you can do all of this inside. It seems like it wouldn’t hold, but tacky glue is the champion of general-purpose glues. Once it dries, it is pretty permanent until an adhesive remover is applied. It requires a little bit of pressure to make sure it achieves a tight bond, and we can get that with t-pins.
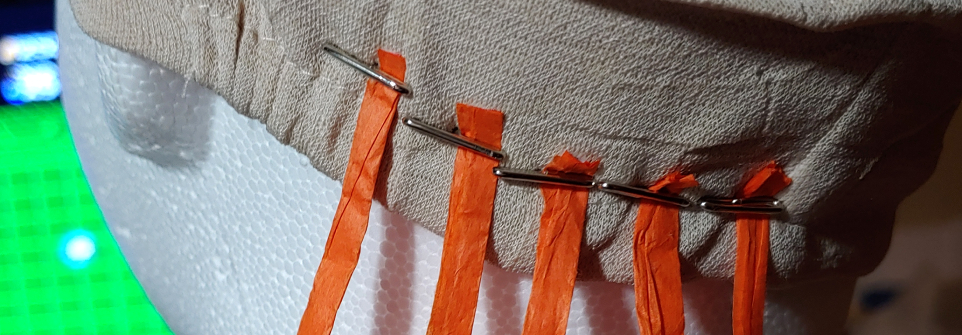
Trying to drive the t-pin through the ribbon tends to make it bend in on itself, so once you’ve placed the ribbon where you want it, stick the t-pin into the wig head next to the ribbon and press down. The pin needs to be pressed against the ribbon to apply the pressure needed to set tacky glue.
Allow the glue to dry for about 15 minutes before removing the pins.
Alright, let’s glue a wig.
Building the wig
Wigs are built from the bottom row up so you’re not trying to glue underneath fibers that you’ve already placed. The paper wefts are staggered between rows to allow the cap to stretch and move with your head and not rip the paper.
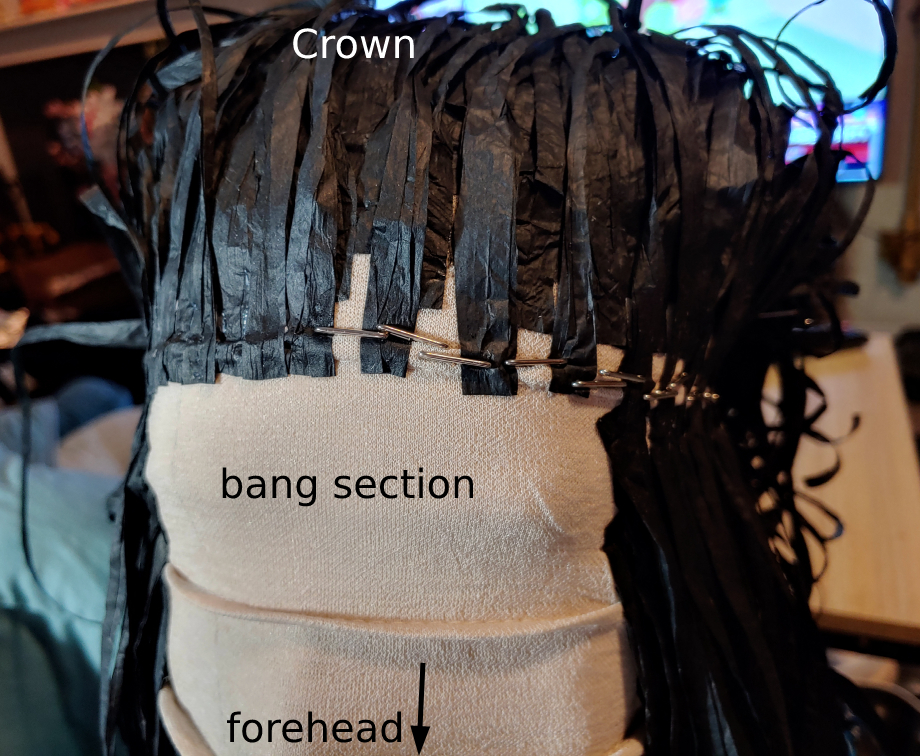
This tutorial covers making parted bangs. Slip the cap on a wig head or over your head and lightly mark with a pencil where the part in the bangs will sit. If you want a comfort band in the wig, make sure not to mark that section of the cap else it will be visible when worn. The part goes about halfway back from the hairline towards the crown of the head. Anime characters tend to have very noticeable parts, so making a larger bang section and part will be easier to work with when gluing the wig.
Gluing the back
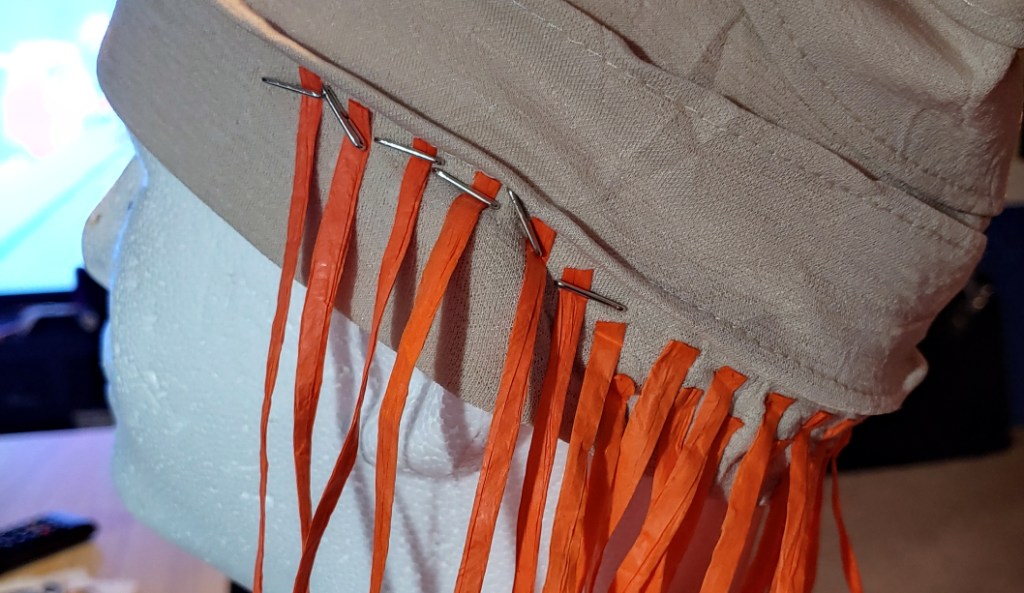
Slip the cap back on the wig head and turn the wig head so the back is facing you. Start by gluing the bottom row just above any elastic in the bottom of the cap. Don’t glue on the elastic as when the cap is stretched, your raffia ribbon will snap. Glue from the back of the ear, across the back of the head, to the back of the opposite ear to make a full row.
Once that row has dried, remove the t-pins. The next row will sit around 1/4″ – 1/2″ higher than the previous row. To stagger the strands, instead of gluing this row directly above the previous strands, glue the strands above the gap instead. This covers the gaps and allows the cap to stretch more.
Once this row dries, it’s time to work on the next row. If you’re doing a separate color underneath like with Nezuko’s hair, it’s time to change which ribbon you’re using.
First glue a row of strands over the ears in the underlayer color (or in the main color for single-color wigs.) These strands will be higher than the previous row as we’re starting Row 3. If you want to cover the ear, glue towards the front of the wig about 2-3 strands. Else, stay closer to the ear and glue only above it.
Matching the height of Row 3 and the ear strands, continue to stagger this row across the back. If you have two-tone Nezuko hair, change colors to the main body color (in her case, black).
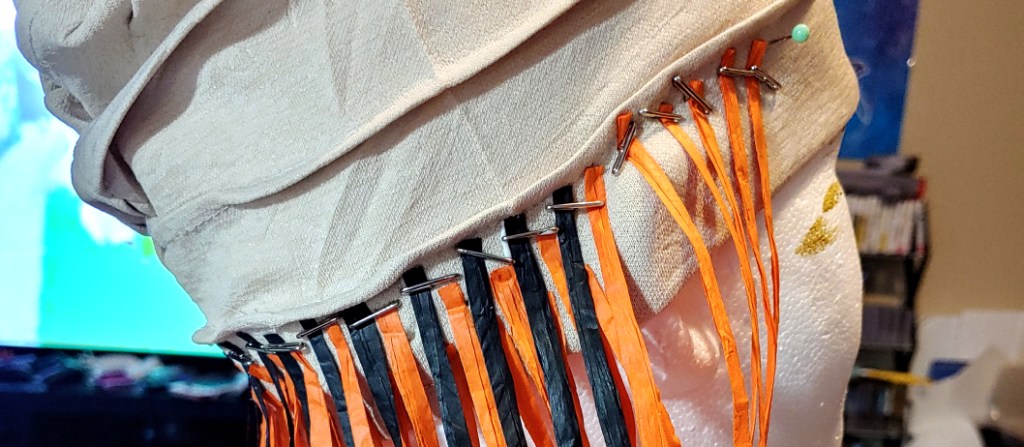
Row 4 will have the same color variation over the ear and around the back as Row 3.
Row 5 will be your first single-color row if you are using two colors. This row and those above it will continue the same staggered glue pattern but using a single color.
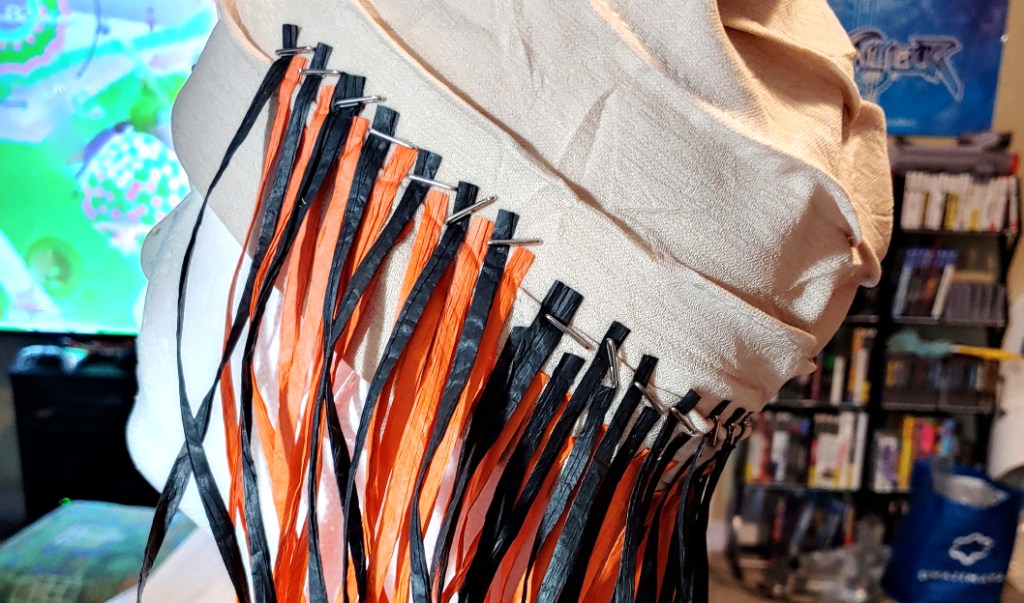
As you work your way upward, continuing to stagger the rows, there will be a gap along the forehead. This gap will serve as the glued bangs section to make a more natural-looking part. Keep gluing upwards toward the crown of the head.
You may need to remove all your pins at some point during this process and pull the wig cap down over the face of the wig head. this will keep the cap properly stretched as you work and give you a solid working surface.
Continue gluing each row until your top row reaches the end of the bang section. It’ll be about halfway up the head towards the crown. This will be the stopping point for the lower section. The rest of the hair will be glued backward to make it look like the hair is brushed back naturally.
Once reaching that stopping point, it’s time to fill in the gaps and make sure the cap isn’t seen through the paper ribbon when the wig is worn. This point in the cap doesn’t require a lot of stretch (most of the stretch is needed around the forehead and lower bottom) so the paper ribbon doesn’t run the risk of tearing when the cap is pulled on.
Once you’ve glued the final row, remove the pins and glue a strand in the gap, staying on the same row and completely filling it in.

Creating the top layer
Now that the bottom has been sufficiently glued, it’s time to fill in the top and give the wig a brushed-back natural look. This is where the bulk of the wig’s volume will come in. The technique is much the same though the direction in which the strands are glued is actually opposite.
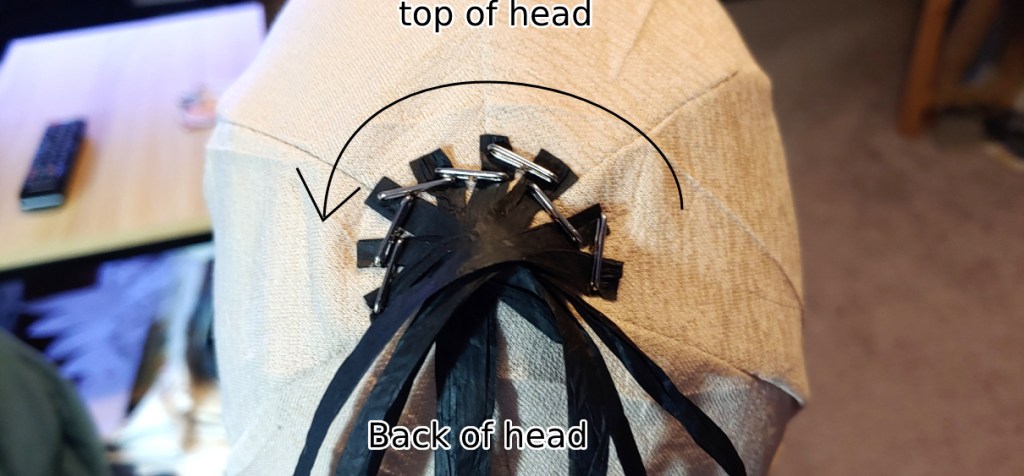
Pull the cap completely over the wig head so that the top fabric is completely flush against it. If you’re using a slouchy cap like mine, start around the crown seam of the cap. If you are using a tighter one, you’ll need to start a bit further down from the crown towards the nape of the neck.
Glue the strands in a semi-circle, using the shape of the cap as a guide. Glue about 3/4 of the circle around the crown of the cap. You do not have to glue the whole circle as the strands hanging down will cover the cap. The gap is facing the bottom of the head while the top of the head has the full coverage
Much like with the bottom section, glue the strands staggered. The strands are glued in a semicircle around the head, following the same shape that you glued for the crown. Leave the underside of the cap untouched as it creates too much bulk.
Continue staggering the rows until you begin to meet up with the lower layer that was glued in the previous section. During this process, you will need to unpin the t-pin and pull the cap outward, letting the upper wefts hang backward as you work on the rest of the cap. Much like pulling the cap downward for working on the lower section, pulling it upward here will give you a nice flat work surface to ensure you don’t accidentally glue a fold into your cap.
Once you reach the top edge of the bang section, it’s time to double-glue the wefts in this row once again. Start by staggering the strands then once that dries, glue inside the gaps to create one solid hairline. This hairline is extra important as it will be partially visible behind the bangs.
Next, it’s time to fill in that gap and complete the wig.
Filling in the bangs
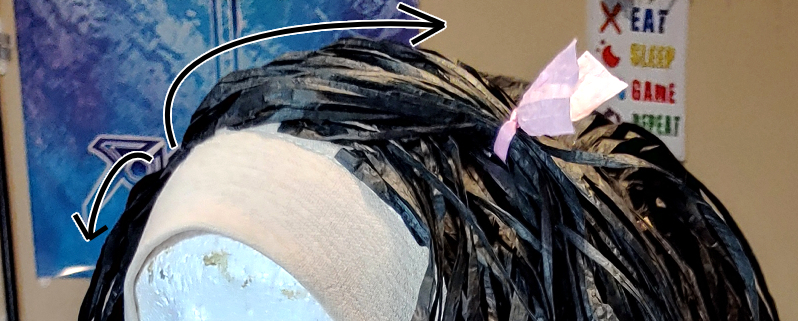
Like the top of the head, bangs are directional. As the bangs for this style are side-swept, each side will be placed downward towards its side’s respective ear until you reach the part.
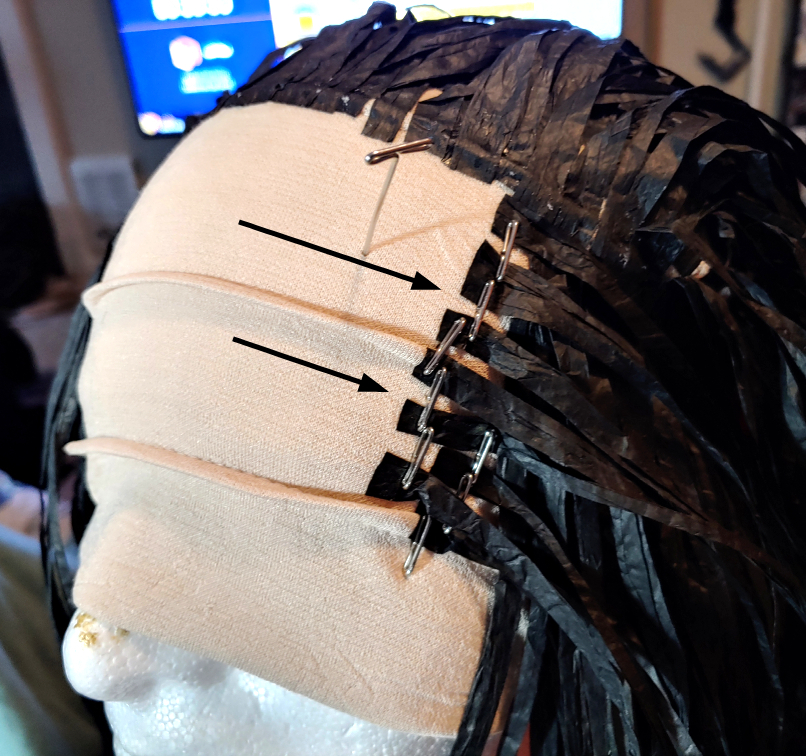
Start with either side of the bang section. Glue the paper strips perpendicular to the bottom section and close along the edge of the glued strips to start your first row. The strands are glued flat with the non-glued end facing that respective side’s ear.
Glue only down to the comfort band (if you have one). If you do not, glue near the edge of the cap, leaving enough room for pulling the cap on and off without pulling at the raffia.
Like with the rest of the wig, glue the strands staggered from each other to give the cap some room to stretch. You need this wig to stretch across your forehead and be headache-inducing because it’s too tight.
Continue staggering the strands until you reach about 1 row’s distance from the part you marked at the start.

Glue the other side and have the two sides meet near the part line.
Pick one side to have the flat half of the part. For a side part, pick the side with the shorter amount of bangs. For a center part, it could be either side. Like with the edge of the other sections, glue a filled row up to the part line.

To mimic a natural part, we need to hide the cap underneath and not make it look like a bunch of paper ribbon glued in next to each other. The ribbon is glued in the opposite direction then pulled over to make a hairline.
Glue paper ribbons in the open gaps but face the ends of the ribbon towards the opposite ear. Match the direction of the filled row you created. When the strands are pulled toward the part’s own ear, it creates a bit of a fold.
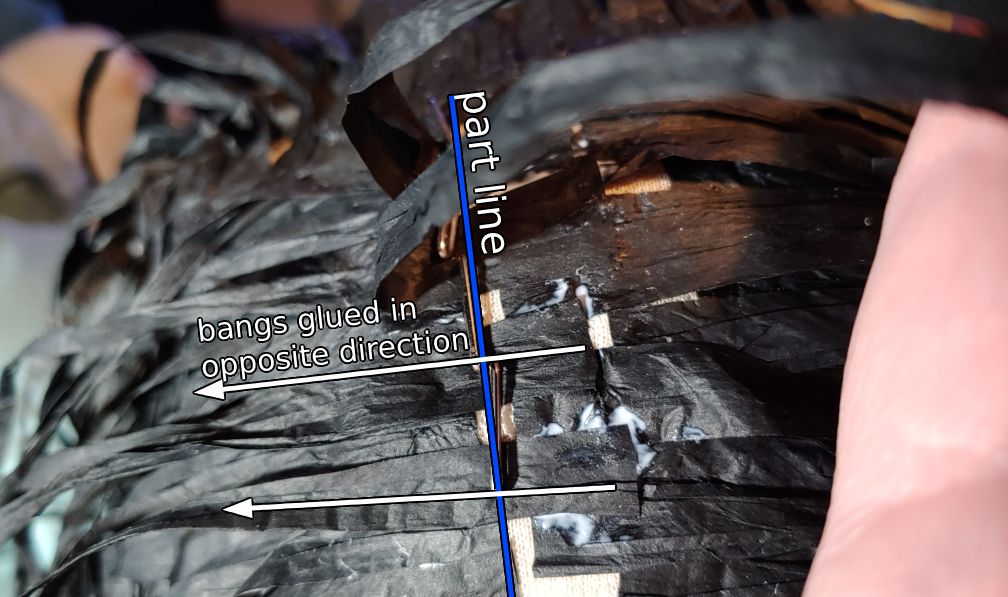
Once these strands are dry, fill in the gaps with strands in the same direction.
Once this row is completely dry, pull the strands back toward the proper direction to create a natural-looking part. You can optionally tie the strands together with another raffia ribbon to create a hairbow.
You can optionally press down on the part to make it sit flatter but the ribbon will naturally flatten itself out the more you let the wig sit.
Now enjoy that wig!

I hope this tutorial is helpful in creating a wig alternative that is lightweight and comfy (and makes an amazing swishy sound). it fits pretty comfortably over my glasses and my sister’s thick hair.
My sister had a lot of fun with this wig at a recent con. She tells me the wig does dampen noises, which makes loud con noises much easier to handle as well.
To transport something this large, you can use vacuum storage bags. This may take out some of the curls, but you can always recurl it later. This survived two flights and still is as big and fluffy as when I first made it.
Let me know if you choose to make a raffia wig. @ me on social media so I can admire your work! I hope your journey to comfy wig alternatives goes well!

could you use a wig cap from the beauty store as a base? if not, how do i find a cap like the one you described? i’ve never done this before so i don’t know where to look
LikeLike
beauty wig caps tend to be quite tight so it might not work. I found these on amazon. You can search things like “slouchy beanie”, “loose beanie”, “sleeping cap”, or even “cancer hat” since they’re soft for cancer patients.
LikeLike