Acrylic felt is one type of soft felt that’s both versatile and easy to work with. It may seem like it’s “just a craft material,” but those “just craft materials” have a lot of uses with cosplay and, of course, fun crafts. It’s one of the best fuzzy materials to start with given how many ways you can attach it to stuff and how many uses there are for it. I’m sure I won’t be listing all the uses here as projects in the future may present me with even more ways to use this versatile craft material.
Skill level: beginner-friendly
Cost: moderate. Good, durable felt can cost around $12/yd at time of writing
Common supplies for working with felt:
- Sewing machine with polyester thread, a medium-weight universal needle, and standard foot
- Hand sewing needle, sharp
- Stick pins
- Tacky glue
- Hot glue
- Pens for marking
- Fabric scissors, regular-duty rotary cutter

Additional common plushie supplies:
- Buttons, teddy bear eyes, or wiggle eyes
- Fiberfill
- Weighted plastic beans
- Dog squeaker (optional but fun!)
Additional hat supplies:
- Sew-in buckram
- Heavy wire (usually about 14-16 gauge)
Other supplies you might use:
- Zippers for pockets
- Ribbons
- Key rings or clips
So which felt is actually acrylic felt?
With multiple types of felt, it might be confusing which one is acrylic. Let’s briefly talk about common felts you may come across online and in the store.
- Craft felt: this is the cheap stuff that comes in multipacks in the craft aisle. This is a cheaply woven felt that is made either of polyester or acrylic. I do use this on smaller projects or for accents and details.
- Acrylic felt: this comes in bolts in the fabric aisle and online, you can find it sold by the yard, the half yard, or in smaller sample packs. If the bolt isn’t labeled, you can tell it’s acrylic because it doesn’t feel like a winter wool coat. It’s soft to the touch and flexible. Online it will generally be labeled. For the most part, if it doesn’t say wool, it’s likely acrylic.
- Wool felt: this is why I mention “doesn’t feel like wool.” The other type of by-the-bolt felt you’ll find is a wool blend. When you touch it, it feels like a wool coat and actually can be made to make coats. It’s warm and slightly stiffer and thicker than acrylic felt. Wool felt is usually labeled since if someone wants wool, they’re specifically looking for wool.
Other felts include:
- Polyester felt: made with 100% polyester fibers instead of acrylic fibers
- Rayon felt: made with rayon fibers (usually cotton or bamboo base)
- Woven felt: fabric woven instead of felted then treated to make it feel like felt
I don’t think I’ve seen any of the three above in a store, though I have found rayon felt with textile dyeing sites. You may be able to find the others online.
So let’s talk acrylic felt!
Fabric rundown
Time to start with the basics, fabric statistics!
- Common names: acrylic felt
- Fabric weight: medium
- Material content: synthetic polymer (specifically acrylonitrile, which is wearable acrylic fibers)
- Opacity: opaque
- Stretch type: dismissable
- Grainline: none
- Drape and flow: not good
- Strength: low. It’s not going to support a lot of weight.
- Does it fray: no
- Original use: crafts such as plushes, fake food, holiday ornaments, kids’ bags, cat toys (it is actually safe for cat teeth!)
Felt is a strangely unique fabric. Unlike woven fabric, which is long threads woven together, felt is made by repeatedly combing and combining short fibers together then heating and pressing to shrink the fibers densely and create large sheets of fabric. This creates a fabric with no discernable grainline and you can see the fibers that make up this fabric with the naked eye.
With this whole felting process to make the fabric, the type of fibers will generally determine how soft, flexible, thick, and heat-resistant the fabric is. Acrylonitrile fibers which make up acrylic felt are surprisingly soft. I’ve made multiple plushes with acrylic felt, and that plush friend always becomes the huggable stress buddy backstage at competitions due to how soft the fabric is.
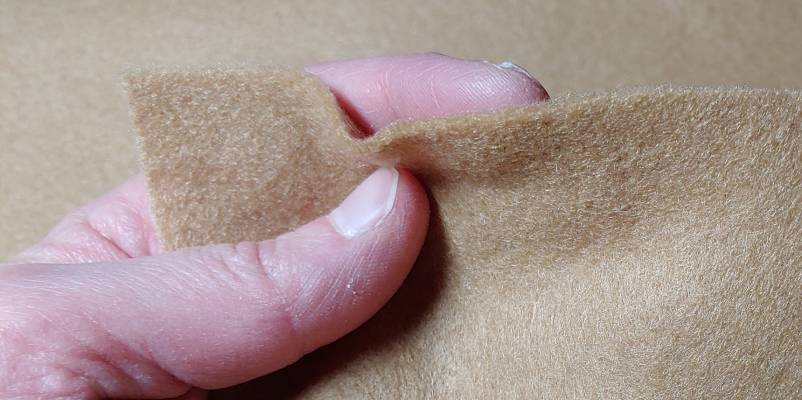
Despite being made of a scatter of fibers, acrylic felt does not fray. Lower-quality acrylic felt may see some fuzziness when you cut it with scissors, but even that won’t fray. Good acrylic felt like shown above will have a rather sharp edge and tend to keep that edge when you cut it.
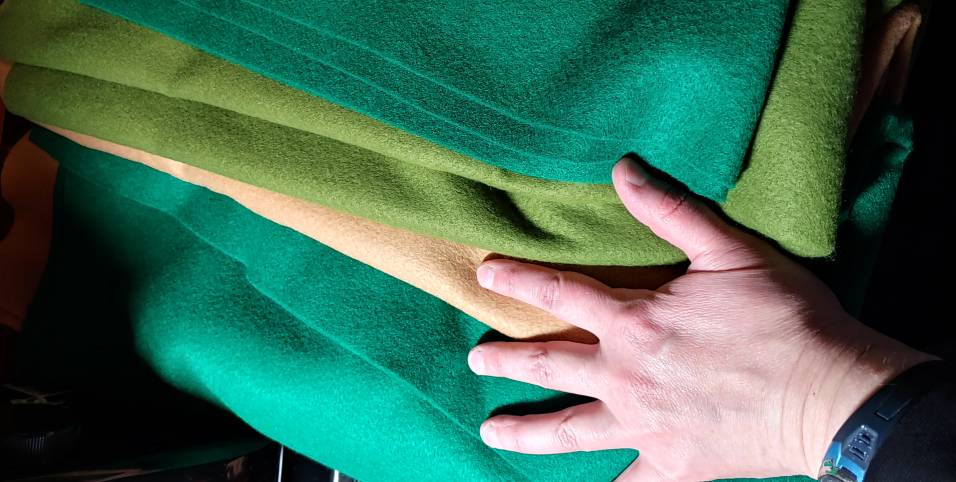
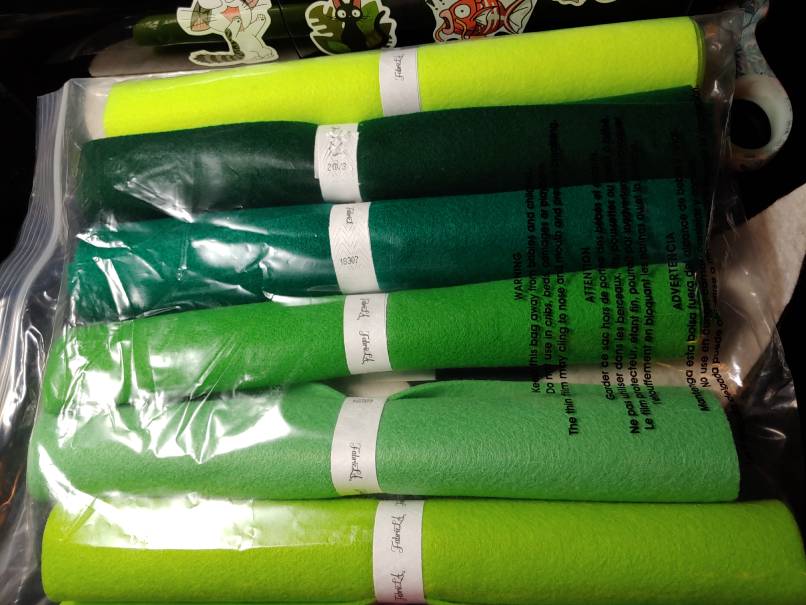
Acrylic felt comes in a pretty large variety of colors so there’s a good chance you’ll find the color you need for a project. Despite being thick, this type of felt is also flexible and soft, so you can make all sorts of details and projects with it.
Storage and Cleaning
Storing acrylic felt is pretty easy. You can fold it up and store it on a shelf. You can roll it up and store it in bags or bins as well. It’s a rather forgiving fabric that doesn’t easily wrinkle when stored.
Washing, however, can be a bit more difficult as this is acrylic. The safest way to wash your felt or remove stains is to gently wash the felt in the sink with some mild soap using cold water. Do not wring the fabric to dry it. Instead, after rinsing it clean, press the fabric with your hand onto a flat surface to squeeze out the water. Dry flat on a towel away from sunlight and heat.
Sewing
Let’s talk about how to sew acrylic felt:
- Machine needle: medium-weight universal needle. An 80/12 is usually sufficient. If you’re sewing a lot of layers, you may need a 90/14
- Machine foot: standard foot
- Foot pressure: medium
- Thread type: polyester
- Hand sewing: standard sharp
- Edge finishes: raw edges are fine! If you’re hand sewing, you can finish them with edge stitches like a blanket stitch if desired for decoration.
Acrylic felt is a medium-weight fabric, and sews pretty much like other ones. The big difference that you have to remember is thickness. This fabric is much thicker than cotton or polyester and multiple layers may be difficult to sew through simply because it’s too tall for your needle to fully go down during its stitching cycle. You can move the hand wheel to manually advance the stitches until you get to a thinner section of the fabric.

Honestly, any standard machine foot will work. Zipper, clear, open-toe, and standard feet all work pretty well. I personally use the zipper foot a lot as it helps me align tight stitches when working on details for plushes.
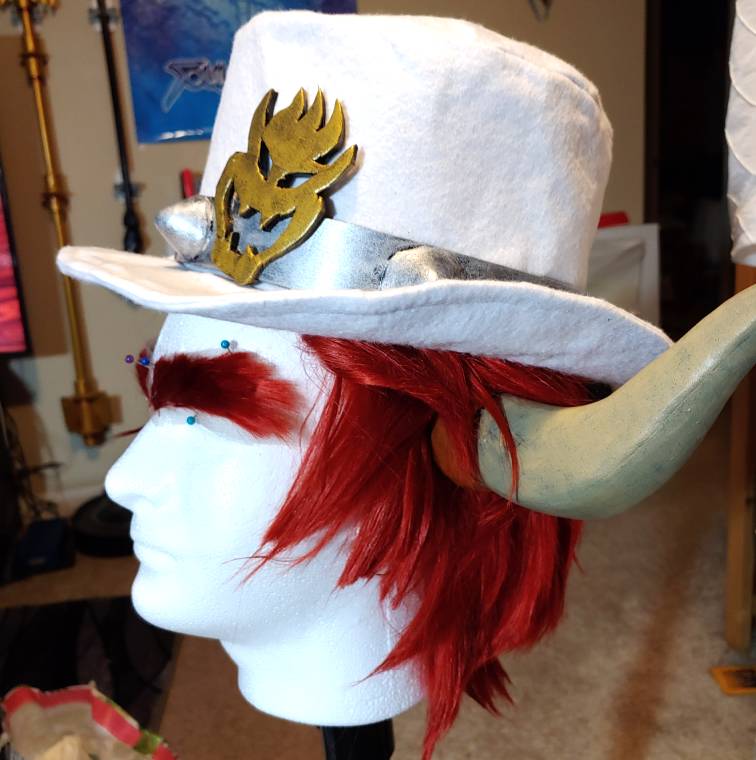
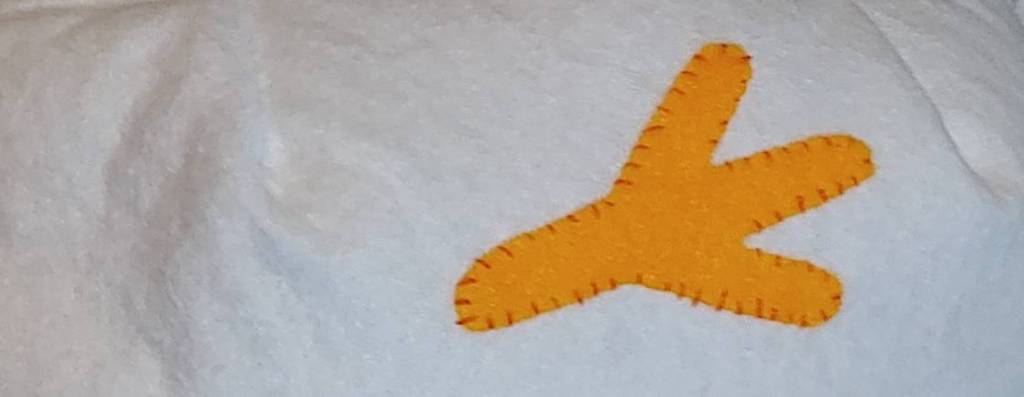
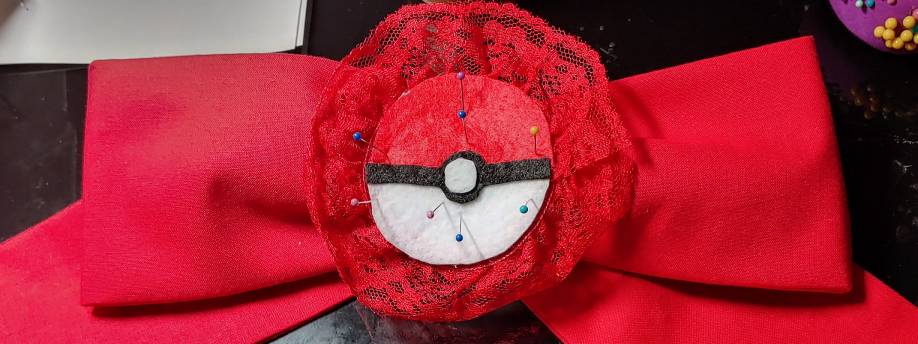
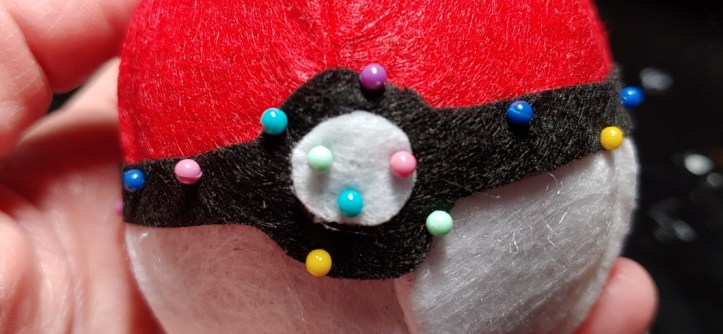
When sewing pieces together, pins work great. You don’t have to worry about pinholes. Use long stick pins like quilting pins when pinning multiple layers together and small detail pins when working on small sections like my shell detail above.
When it comes to felt, you may not always be sewing by machine. Hand sewing is pretty common when working with felt, especially anything that needs to be stuffed or requires a lot of details. The stitches you need to work with felt are some of the most common hand stitches you can use.
When sewing on details, you can always use a tight running or straight stitch. Another stitch you can use is a whip stitch.
You can also use a whip stitch on the edge of felt if you’re making something like a detail piece, keychain, or ornament. You can also use a blanket stitch, which is similar to a whip stitch.
If you’re working with something stuffed, you can use a whip stitch to close the stuffing opening. But the best stitch to use in this case is called a blind or ladder stitch. The stitch invisible once sewn.

When hand sewing, you can use a standard sharp needle. It doesn’t have to be heavy-duty. Most likely you won’t need a thimble either, but it’s always good to have one on hand just in case.
Patterning
When looking for patterns, look for plush and stuffed animal patterns or look for ones that specifically say felt. Hats, flowers, accents, and many other things can be made with felt. If you aren’t familiar with reading the back of a commercial pattern envelope, you can check my how-to here: How to read the pattern envelope (check out the Fabric Requirements section)
So let’s talk about patterning
- Scissors: regular fabric scissors, make sure they’re sharp
- Rotary cutter: regular rotary cutter for medium-weight fabrics.
- Can trace the pattern on the wrong side of the fabric with pen. Felt doesn’t take to pencil or chalk well.
- Can pin patterns down normally as pinholes are invisible
For the most part, you can pin and cut felt much like you can cotton. The fold might get tricky as felt tends to resist getting flattened along a fold. If you have a piece to cut out along the fold, pin the fold itself along your pattern to keep it flat and in place.
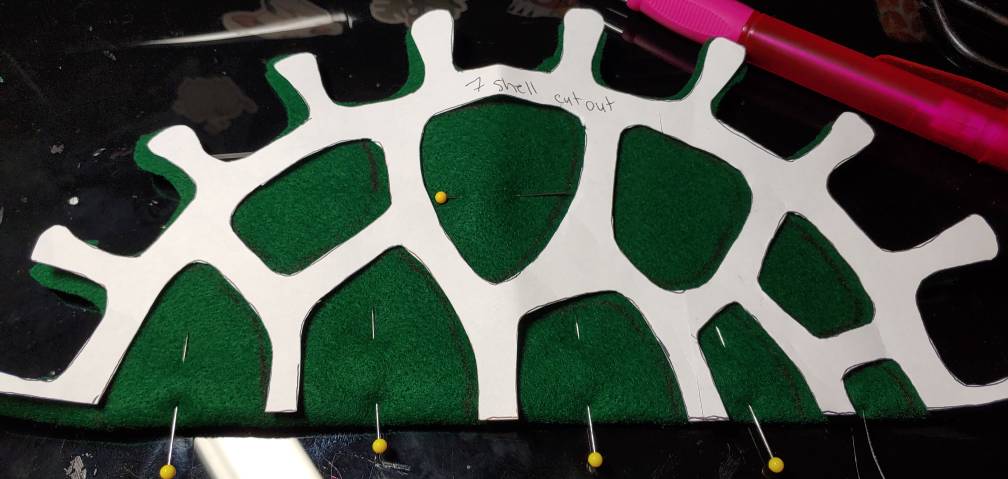
You can also draw on felt too for markings such as the cutout details on the turtle shell above. Pen doesn’t show up the best on darker colors, especially not in photos, but it is noticeable enough in person to use as a guideline. You may need to go over a section a few times to get the pen to be visible. Don’t use marker as that will bleed into your felt.
Heat
While acrylic felt doesn’t tolerate much heat, it can actually tolerate some. In fact, you can get acrylic felt heat transfer vinyl to make fuzzy details and use a heat press to set it. So let’s talk about heat tolerances
- Ironing: polyester or synthetic setting, steam allowed. (Use the wool setting if neither is available) Use a white press cloth or parchment paper
- Fusible interfacing: sew-in interfacing is more common. The most common “interfacing” I’ve seen for felt is quilt batting. There are a few that are used for ornaments to make them stiff too or fusible and gluable ones to make your own patches.
- HTV: yes! 280F for 30s, light pressure. Use parchment paper for cover sheet
Acrylic felt can tolerate quite a bit of heat. The trick is to use a cover cloth or parchment paper to protect your felt (and your iron) and not crisp either of the two.
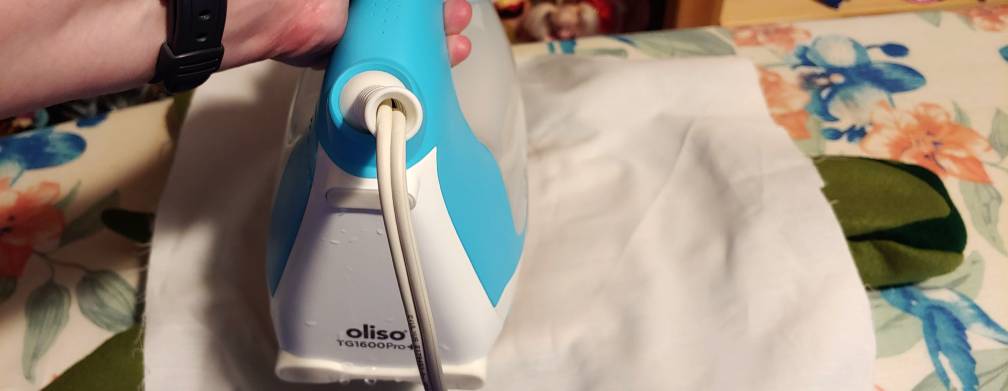
The second trick is lower heat. Acrylic is plastic, and this type of plastic tends to have a lower heat tolerance. The polyester and synthetic settings are safe to use on felt. I have used the wool setting as well effectively. When ironing, make sure not to linger in one space for more than a few seconds and keep the iron moving.
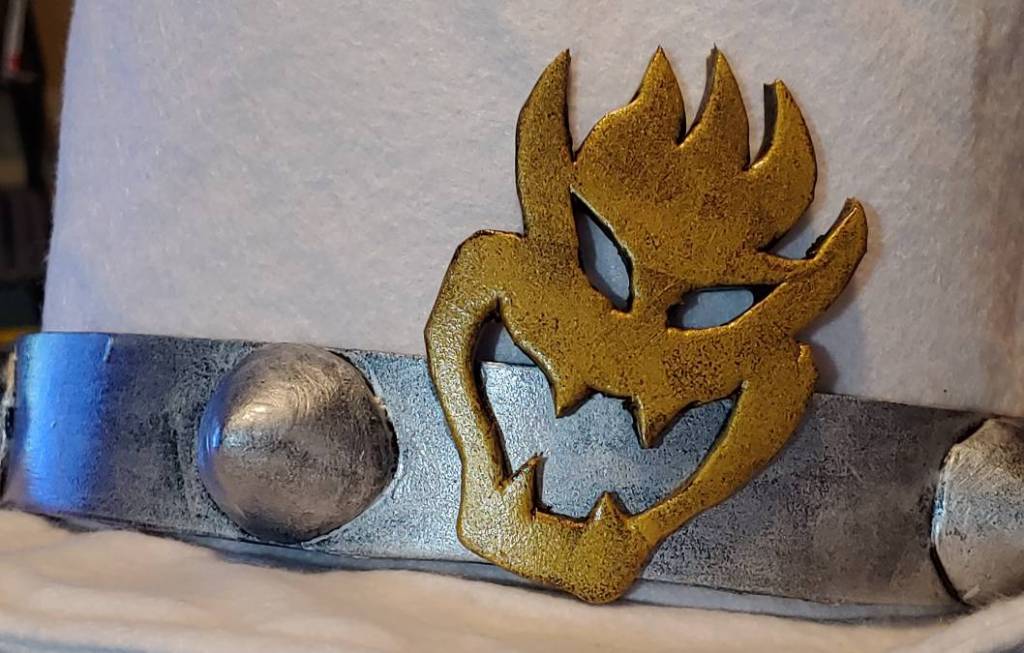
When pressing, you can’t exactly move the heat press or you won’t get the HTV to properly adhere to the felt. The heat press temperatures are roughly the same as the synthetic setting on a standard iron. If you’ve worked with HTV before, you probably set it in about 10-15s. With a much lower heat setting (280 compared to around 320 for most fabrics), it takes longer for the glue on the back of the HTV to adhere, so you need a longer press time. By pressing lightly, you won’t flatten your felt or risk scorching it. You can use this process to make your own badges and patches.
Glue
I use glue a lot with felt. It’s a good way to attach details without stitches visible or to attach something that cannot be sewn at all! There are two types of glue that I primarily use with felt.
Tacky glue
Tacky glue is my favorite. It’s indoor safe, non-toxic, and cheap. You find it in the large brown bottles in the craft aisle. It can be used for both flat and stuffed projects, and the trick is pressure. It requires pressure to adhere the two surfaces and make a bond.
With flat objects, you can use a book to create pressure, though I worry about the book slipping and the felt adhering crooked. Instead. I use stick pins instead. Just a little pressure is all you need.
This same trick works with gluing details to stuffed or larger things. If this is a plush, you’ll want to stuff it and sew the seams up first before gluing and pinning.
Tacky glue adheres in about 15-20 minutes so you don’t have to wait long for your project to finish. If there is any weight applied to these accents, you might want to leave it overnight before tugging on it.
Hot glue
Hot glue is great for large stiff stuff that cannot be sewn or can’t be pressed with pins or a book. Foam details are a good example of this.
Felt can tolerate both high and low temp hot glue. Personally, I tend to use high temp as it gives me more time to glue the back of something and stick it down. It is hot, so use a ruler to press the felt against your detail and let the cooling process do the rest for you. Don’t touch hot felt with your fingers as fresh hot glue can burn your fingers right through the felt!
I wouldn’t use hot glue for attaching felt to felt as you risk glue lumps showing through your work.
Embellishments, fasteners, and closures
For the most part, you probably won’t be using fasteners and closures in the truest sense. Felt isn’t good for clothing, but you can use them on bags, accents, and even hidden in plushes.
- Zipper: yes. Use a lightweight zipper
- Velcro: yes
- Snaps: yes. Any size really. The snap cannot bear weight
- Hook & eye: Not really effective
- Eyelets: fabric might be too thick
- Buttons: yes. Buttons are often used for plush eyes
- Other embellishments: anything lightweight! Beads, ribbons, twine, anything that strikes your fancy
Anything in this category can be attached to your felt as long as it can be sewn, glued, or lightly pressed. Anything that requires high heat is off the table due to acrylic felt’s lower heat tolerance.
One of my favorite things to do with plushes is to add hidden pockets. You can build the pocket first much like you would a purse and sew it right into the seam before you stuff the plush. I added a large enough pocket to carry my phone and wallet into the bottom of my turtle plush
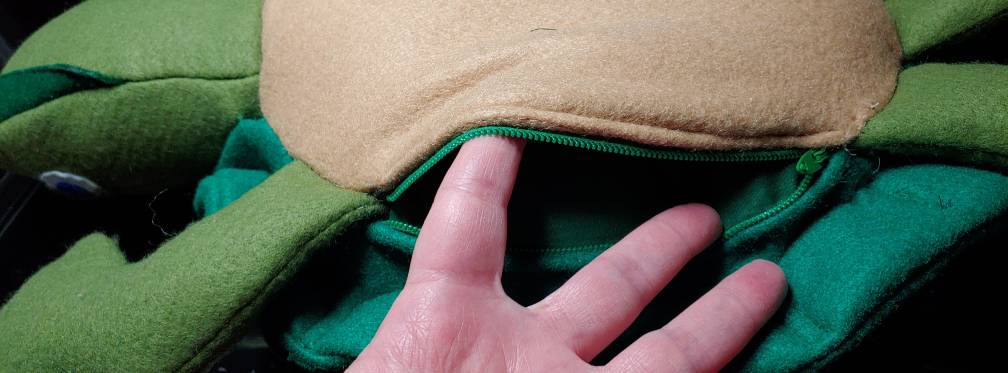
Zipper pockets are great as you can store your stuff and keep your hands free when walking around the convention center. It’s also a safe place to store your belongings if out on a photoshoot.
Plushie tips
I talked about plush things a lot so far. I use felt for a good variety of things, but admittedly I have a soft spot for making my own plushes. So let’s talk about some additional things you might use when making a plush
- eyes: buttons, felt, teddy bear eyes with plastic backing
- stuffing: fiberfill, beanbag beans
- stability: weighted beans
- fun things: squeakers, scent packs, voice boxes
Eyes
If you’re making a plush with a face, you’ll want eyes. I usually make creatures, so my eyes will vary from project to project. Here are the ones I’ve used:
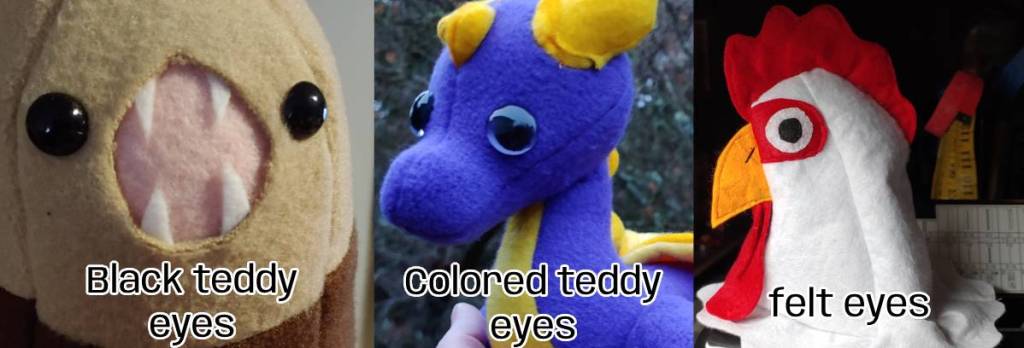
Felt and button eyes are going to be your most budget-friendly options. You can buy buttons and felt in packs and use those for small felt pieces. The eyes can be stitched or glued to the face.
The teddy bear eyes come in a few variants. I have used solid black and colorful ones that have a colored iris in my plushes before. I’ve been tempted by cat and dragon eyes a few times but haven’t used them yet. You can buy teddy eyes in bulk online pretty easily. The back is a plastic spine that pokes through the felt with usually a stopper on the backside to keep them from falling out. They definitely look cool if you want something 3D and to really pop.
stuffing
It’s a plush. You’ll want to stuff it. I generally use fiberfill as I bought a 5lb box of it and years later still can’t finish it off. 5lbs of featherweight stuffing is a lot.
Fiberfill is going to give you a lot of density, especially if you pack it tightly. Beanbag beans is also a common one though it won’t have as dense of a fill. You can fill it with other recycled materials as well such as cut up furniture foam, old fabric scraps, and whatever else you have lying around. Fiberfill is probably the smoothest, but don’t let that stop you from filling it with whichever material you like.
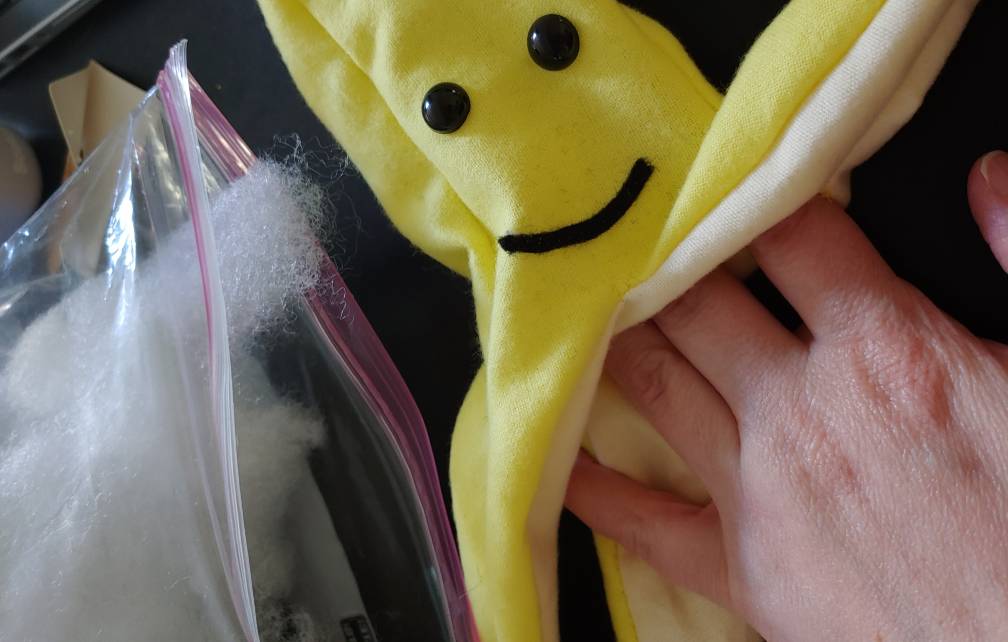
When filling, you’ll need a hole large enough to stick your hand in. For smaller plushes like my banana, I just needed enough to stick my fingers in. But the chicken and turtle were so large, I needed to fit my entire hand inside.
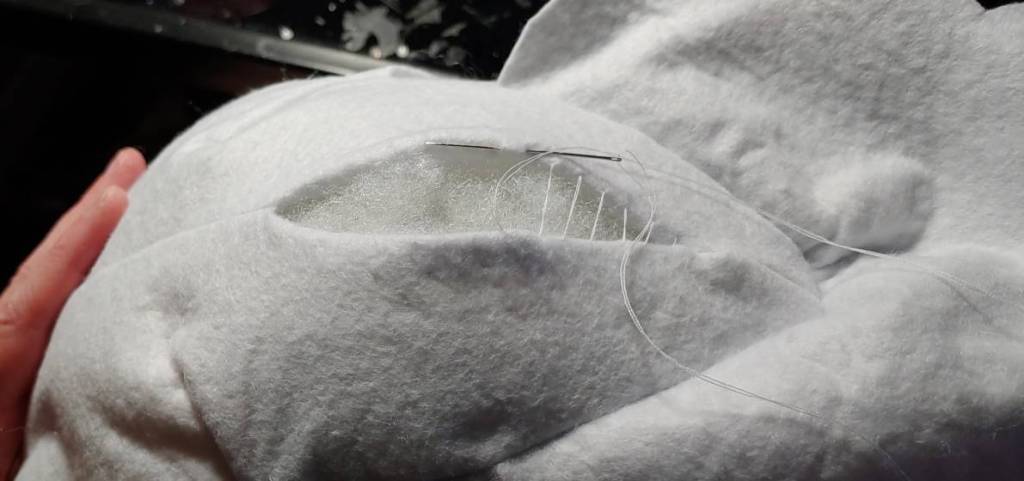
You’ll want to stitch up your stuffing hole with a ladder or whip stitch but before you do, you may want to consider other things to put inside.
balance
Not all my plushes need this, but if I want a plush to sit up or balance on my hand, I use weighted beans. These are small plastic beans that have some weight to them. Wherever the weight is, is where the plush will sit upright. Small plushes need a small amount of beans but larger ones need quite a lot.
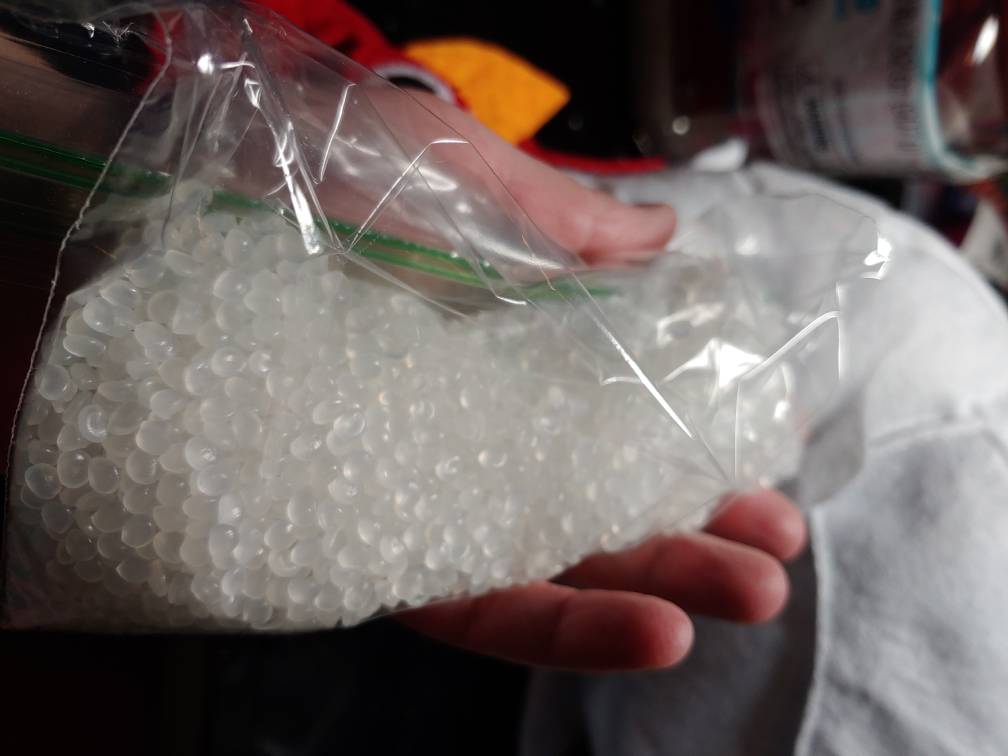
You can make a custom pouch for your weighted beans, but honestly I like to stick mine into baggies then roll the top down and tape it. This gives me more control with how many beans I put in and test the balance before sewing the plush up.
You can find weighted beans at craft stores. I found mine at Michaels and keep them in a plastic trail mix container on my shelf.
Fun things!
You can stick a lot of extras into your plushie but honestly, my favorite is dog squeakers. You can order them in bulk for making dog toys. I like to stick them in the head or at a place I can easily reach to squeak the toy and make people smile.
I’ve added the squeaker in for fun. The Great Serpent of Ronka in the video says “scree” in game, so naturally I needed a squeaker to mimic this. I’ve also added it to my Mario Kart banana because why not? Who doesn’t love a squeaky safety banana?
When you add a squeaker, a scent pack, or a voice box, you want to first plan out where this should go. It should be in a place not too thick and somewhere you can remember where it is. When stuffing, you want to firmly nestle the object in place before adding more stuffing around it. You’ll likely want to use a softer stuffing like fiberfill with squeakers or voice boxes so you can feel it inside and get to it. Scent packs can go anywhere as the scent permeates through the fibers and makes your plush smell good.

I hope you enjoyed this fun rundown of how to work with acrylic felt. It’s really a great fabric to start working with, whether it for crafts, plushes, hats, or accents. It’s also soft and fun to hug. Everyone loves a good plush too. My chicken was a hit at the con. Everyone loves chicken.
Let me know what you use this crash course for. @ me on social media so I can admire your work! Make sure to take a video if you add squeakers. I want to hear the squeak!
