Getting started with your first sewing project can be rather daunting. Sewing sites and projects will often list 1735987234 different supplies, and each one seems more specialized than the last. It can get confusing and the cost to get started can get larger and larger. But what do you really need to get started with your first project?
Truthfully, you can get started on a pretty small budget. I began cosplay on a college budget, sewing on the floor of my dorm room. I had minimal supplies, but it was enough to make my own cosplay and even start in competitions. When you’re just starting, you don’t need to go get high-end equipment, specialized machine feet, or an entire library of sewing patterns. You can start on budget equipment then expand from there if you decide you like what you’re doing.
Let’s talk about each piece, including budget options, and some optional things that’ll make your life easier once you get more into sewing.
Necessary equipment
Sewing machine
Technically you could go and hand sew an entire cosplay, but it’ll make your life a lot easier if you have a machine.
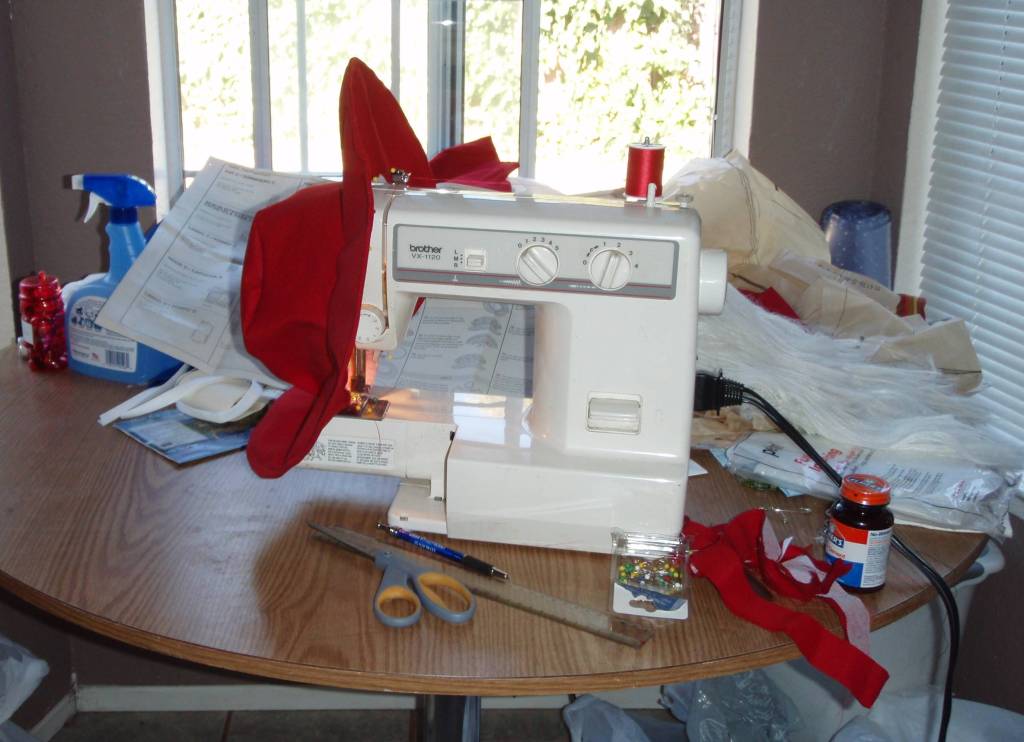
You don’t need to go buy a high-end machine or a multipurpose machine right away. My first machine was a Brother that cost about $40 on sale at Walmart. It wasn’t computerized and only did two stitches, straight and zigzag stitches. When getting started, those 2 stitches are all you need, and they’ll get you incredibly far.
Brother machines will tend to last you quite a while if you take care of the machine. Check for sales at Walmart and Costco and similar places for sales. If your budget is smaller, try to find one second-hand at yard sales, estate sales, or thrift stores. Also, check second-hand websites or apps. In some places, you can find workshops or industrial manufacturers selling off old machines when they buy new models. As long as it has all the parts and works, it’s enough to get you started.
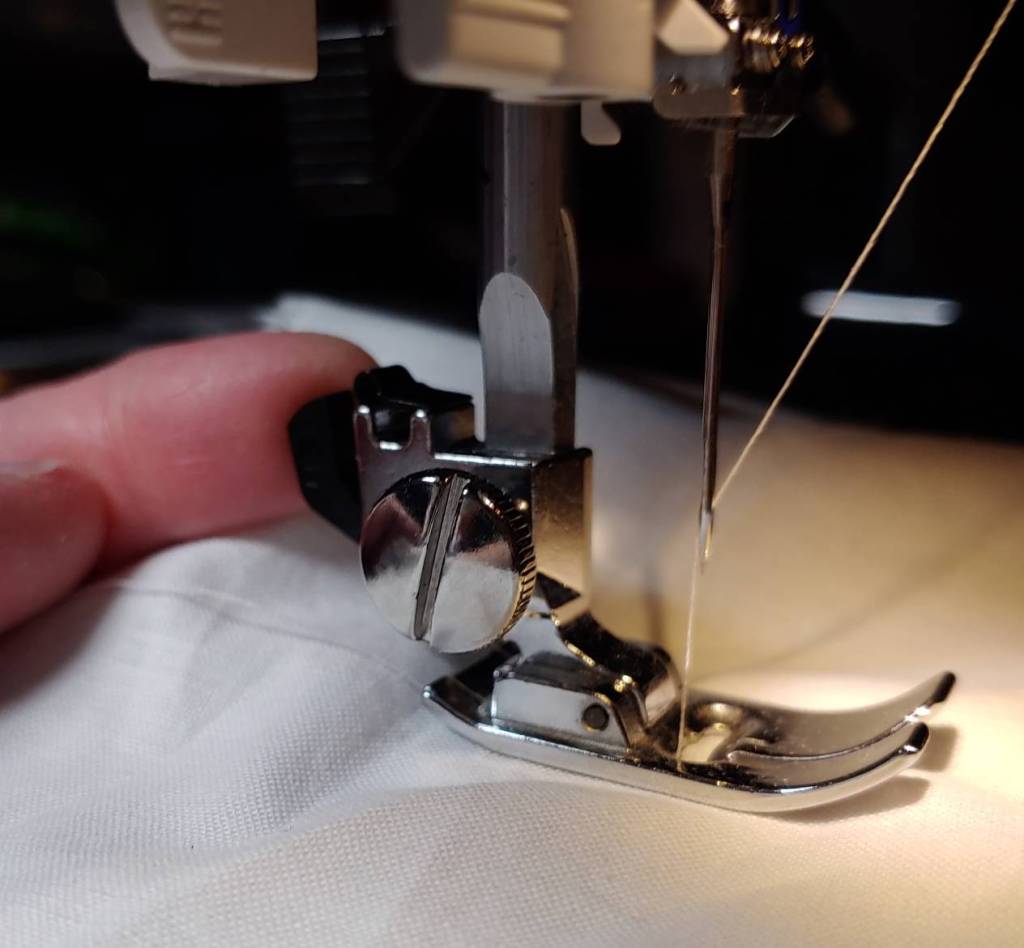
When looking for used machines, look for ones that have a snap foot. This is a type of foot that has a lever in the back and quickly releases the actual foot itself. All modern machines have this sort of foot, but industrial and older machines may not have this. Looking for this type of foot makes it easier to find replacement feet and change feet as needed.
If you cannot find a machine with a snap foot, make sure the machine has at least a standard foot attachment to get you started.
Needles
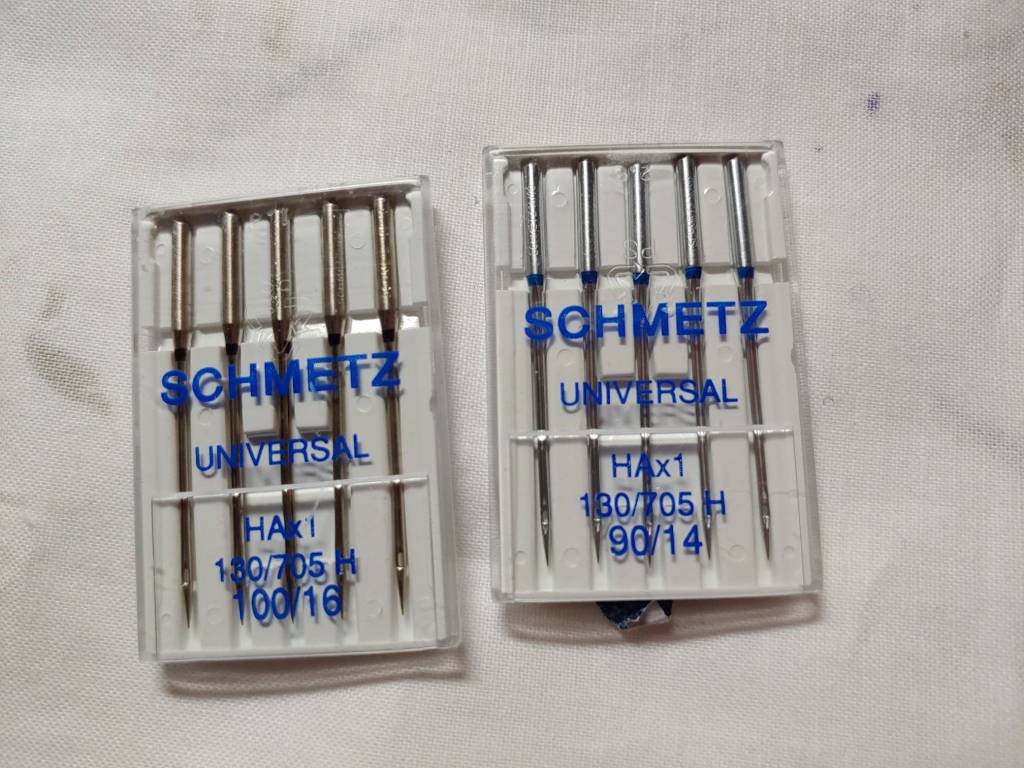
To sew, you need needles. Since your first projects would start with cotton or polyester, look for universal or general-purpose needles. Any brand should be fine. Sizes 90/14 or 100/16 should get you through most of your projects. Buy a pack so you can replace the needle when it begins to dull, about every few cosplays or so.
You can find machine needles nearly everywhere sewing supplies and notions are sold.
Feet
You won’t get very far without a foot on the machine. The foot presses down on the fabric and helps with feeding the fabric through the machine by providing pressure from the top. To start, you’ll want two feet: a standard foot and a zipper foot. A new machine will likely come with both feet, but a used machine may not have both.
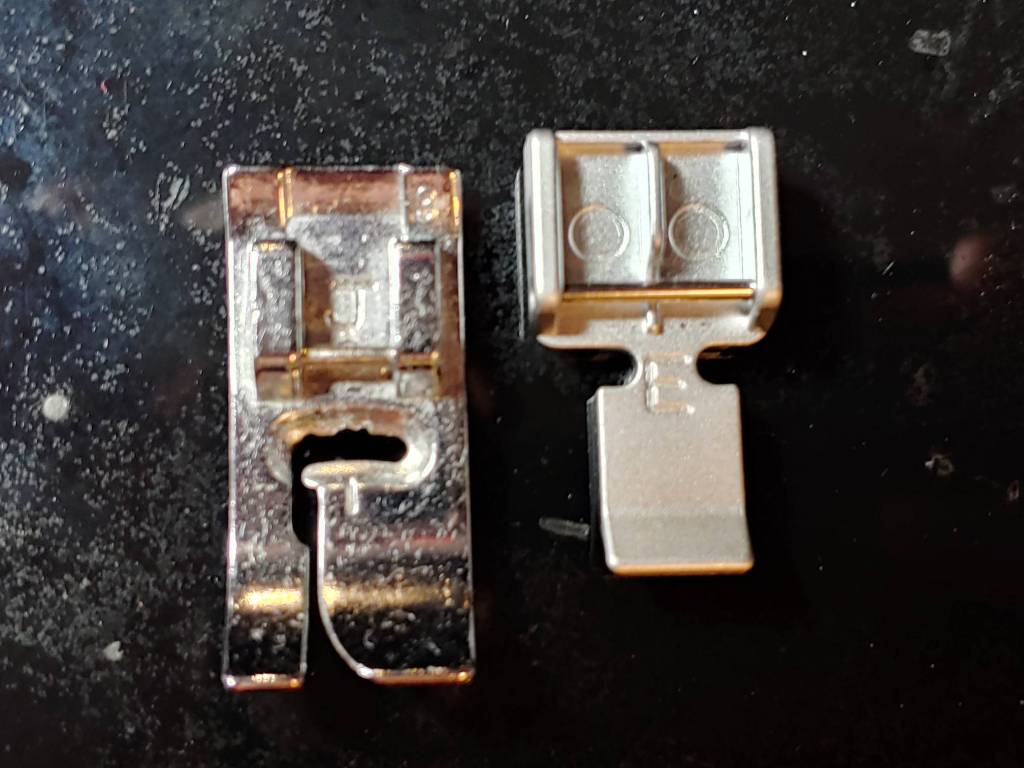
A standard foot is absolutely crucial. It is a metal foot with two prongs. This is the primary foot you’ll be using for your projects.
A zipper foot is a foot that has a single prong and looks more like a ski. When using a snap foot, a zipper foot has two attachment points so it can be moved to the left or the right of the needle. Other feet may simply have a singular attachment point and require you to move the needle position when sewing.
While it is not necessary to have a zipper foot when you start, adding a zipper to any outfit will be incredibly difficult as standard feet sometimes get caught on the zipper teeth. When you plan on adding zippers into your cosplay, make sure you have a zipper foot.
If you are missing feet, fabric stores often have replacement snap feet. If you are using a vintage or industrial machine or one that doesn’t use snap feet, you may have to go to a sewing machine and repair store to find them.
Bobbins
Bobbins are little spools that make the bottom thread of your stitches. Machines generally take one of two types of bobbins: plastic or metal. Before buying yourself a pack, check the bobbins that came with your machine to see which type fits. You’ll want a few bobbins so you can change the color of the thread to match the fabric you’re working with. When you buy bobbins, they will be empty. You can spin your own bobbins using the bobbin winder of your machine.
You can find bobbin packs at most places that sell sewing notions.
Maintenance supplies
To make sure your machine lasts a long time, you need a few supplies for maintenance. Your machine might come with some brushes, but I recommend finding an old fluffy paintbrush. You can pull dust out of your machine with it and keep the feeder dogs free of lint. When the machine gets linty, threads tend to get caught when passing around the bobbin basket.
The second supply you need is machine oil. If it moves, you’ll need to oil it. Your big oil point will be the bobbin basket. You can find oil by the bottle at a rather decent price at most places that sell sewing notions. If you find one with a spout or a straw, it’ll make maintenance easier. Any brand will do. You can find oil at nearly every place that sells sewing notions and supplies.
Thread
You cannot sew without thread. While you could sew for any old thread, to ensure your projects last, you’ll want to use good quality thread. Cheaper thread will tend to snap more easily, and you may find your seams popping in the middle of a con. It is the one thing I never skimp on.
Gutermann is a good quality thread that isn’t that expensive. You can buy a large spool at the fabric store. If you’re on a tight budget, look for thread sales to stock up and gather a number of common colors to add to your collection. Buy the larger spools because you can spin more bobbins and sew larger projects before you have to replace the spool.
You can find cheap budget thread at most places that sell sewing notions, but Gutermanns will only be at fabric stores.
Seam ripper
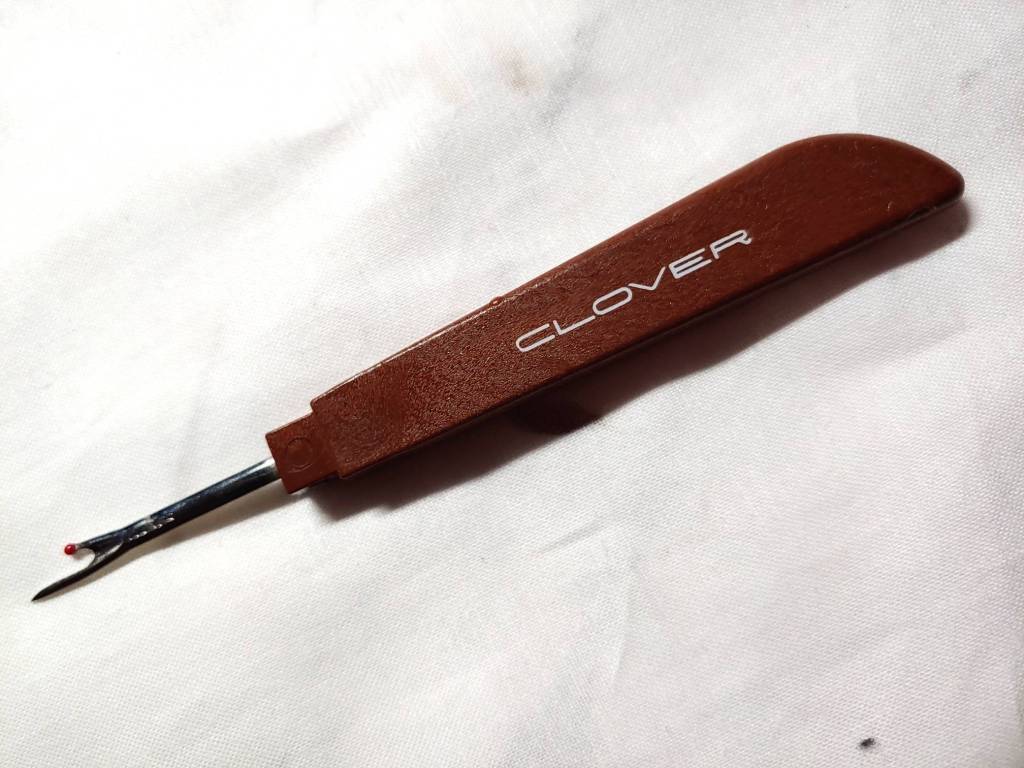
You’ve accidentally sewn over other parts of the costume, sewn a piece inside out, or sewn the wrong pieces together. It happens, and that’s when a seam ripper comes in. Whether you’re a beginner or an expert, you’ll eventually need to rip the threads of a seam. You could try to snip the threads with some thread scissors, but a seam ripper makes this process very simple.
A seam ripper is a thin, sharp, pointy tool that gets underneath the stitches or in between the fabric so you can rip the threads and pull the seam. You can find it at most places that sell sewing notions for a few dollars. Get one with a longer handle as it is more ergonomic and gentler on your hand.
Scissors
Scissors are very important in your projects and unlike the other supplies, will tend to be specialized. Changing between media or using your scissors for things like paper or opening boxes will dull them very fast. When you dull your scissors, they will chew on fabric or fail to properly cut threads.
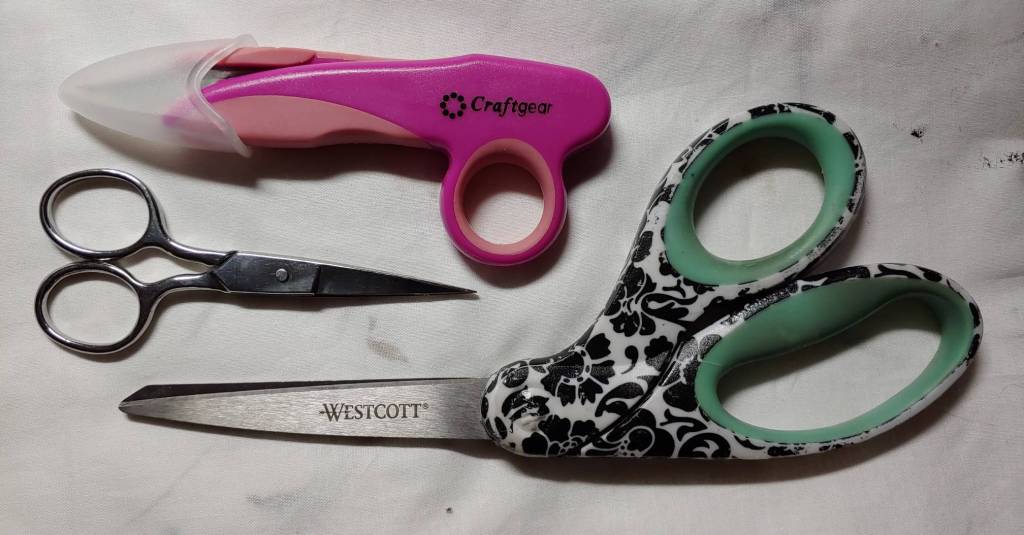
Fabric scissors will be full-sized scissors, flat on one side so you can cut the fabric flat against a table or a cutting board. These scissors are very sharp and should only be used for fabric. Dull fabric scissors can be retired to cutting pattern paper.
Thread scissors are smaller and can look like scaled-down scissors or snips you pinch. Personally, I’d recommend embroidery scissors as they are made to cut thread for a very long time without becoming dull.
Do not go for safety scissors or kitchen scissors. Look for fabric scissors in the fabric aisle. You can also look for sets that come with both fabric and thread scissors together.
You can find specialized scissors at most places that sell sewing supplies and notions. Wescott is a good budget-friendly brand to get you started, and often you’ll find fabric scissors in a set with some snips or thread scissors.
Pins
You’ll need pins to pin your pattern down to your fabric and pin the fabric together when sewing your seams and hems. Quilting pins are the best to start with. They are the longest type of pin and come with a ball on the dull end. The ball helps you find the pin in the fabric and makes it easier to pull out.

You’ll also want a place to store the pins. A tomato pin cushion or a magnetic pin saver will help keep the pins off your floor or getting lost underneath the sewing machine. You also want to make sure you don’t spear your fingers when trying to get pins from your pin cushion or saver.
You can get all sorts of pin cushion shapes, everything from a cactus to a couch to a shoe. Anything that holds your pins and keeps them safe will work for you. I personally use a giant shoe since it holds a lot of pins and it sits nicely on my desk.
You can find both pin cushions and magnetic pin savers at places that sell sewing notions.
Ironing supplies
No one likes to see fabric creases on a cosplay. You’ll want creases removed and your fabric crisp and smooth. You also want to iron your seams flat so they don’t curl in on themselves. And to do that, you need an iron.
The brand of iron itself doesn’t matter, but it will need to be a steam iron. It’s easiest to start with cotton and polyesters so having an iron where you can adjust the temperature by fabric type will ensure you don’t scorch your fabric when working with it. You’ll also want the option to turn off the steam when working with interfacing.
Next you’ll need a surface to iron on. A towel is the cheapest, given you have a hard flat surface to put it on. You can also get ironing pads you can place on a dryer or a table. These are heat resistant and work best with the high temperatures used to get those wrinkles out of cotton.
If you have the space, invest in a full-size folding ironing board. You can fold it up and store it behind a door or next to the washer. With a large ironing board, you can iron long cuts of fabric and large cosplays much more easily than on a towel or a pad.
You can find decent ironing supplies, boards, and even replacement pads at any place that sells laundry supplies.
Work surface
You’ll need a place to work, but it doesn’t need to be fancy. You don’t need to go out and buy fancy sewing desks or large cutting tables. You can start with relatively simple work surfaces.
My first work surface was the floor of my dorm room. If you have a desk to put your sewing machine on, your back will thank you. It just needs to be wide enough to support a sewing machine and not wobble too much as the shaking can cause your stitches to be crooked. You can also work on a dining room table, a card table, or any space where you can set up a machine.
You’ll need a space for fabric as well. A desk isn’t large enough when cutting out patterns, so you’ll need a bit more space. If you have enough space for it, you can use any sort of solid table. A plush table can get caught in pins, so avoid card tables and table cloths. Also, avoid any tables which can become scratched by sewing pins. Folding picnic tables work great if you need to break down your workspace after use.
If you don’t have room or the funds for a table, go budget. You can get folding cardboard pin boards at some fabric and crafting stores, but if you’re unable to find them or super scraped for funds, regular old cardboard will do. Moving boxes, furniture boxes, some shipping boxes you dug out of the recycle bin. Anything large enough to sit flat underneath the fabric. You can also use a flat hard floor. Avoid hardwood so you don’t scratch it with pins. Also, avoid carpet since you’ll likely end up pinning your fabric to the carpet.
Optional Equipment
Here are some optional supplies that might make your crafting easier.
Rotary cutter
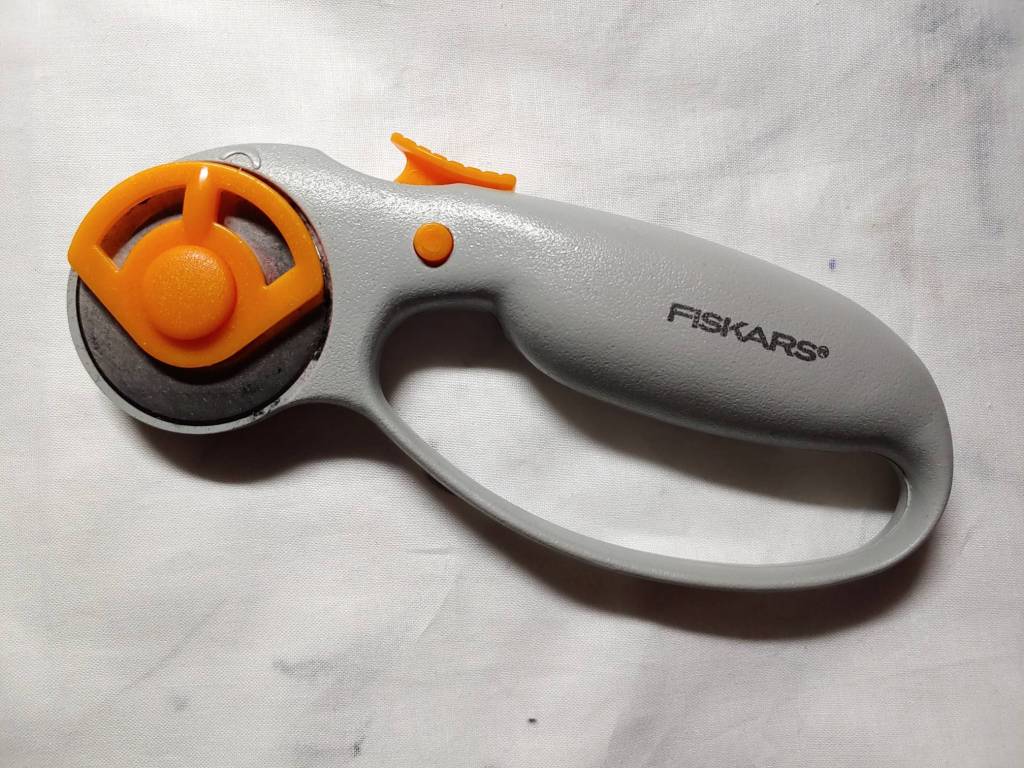
A rotary cutter is a cutting tool with a sharp wheel that looks like a pizza cutter. This particular tool is paired with a specialized plasticky cutting mat, usually one that self-heals from the rotary cutter blade. A rotary cutter blade is incredibly sharp and comes with a safety button to withdraw the blade so you don’t slice your fingers when you set it down.
This cutter is used to cut patterns out of fabric. Unlike scissors, it does not put any pressure on your hand or your wrist as there is no cutting or snipping motion involved. If you have any wrist problems or your hand gets tired from cutting out patterns, a rotary cutter may be a good investment for the long run. Make sure to get a good self-healing mat along with it.
Since rotary cutters feel different than scissors, make sure to practice on some scrap fabric before cutting your pattern pieces out in the good fabric.
Rotary cutters are relatively cheap and you can buy replacement blades in bulk. The mat will be the big cost of this set. Look for sales or coupons or gift sets if you’re on a budget.
Sleeve board
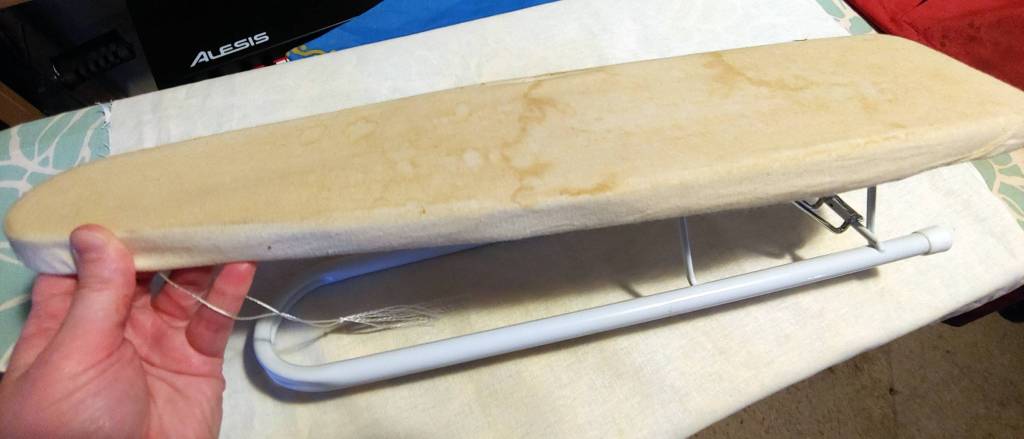
A sleeve board looks like an ironing board that got shrunk in the dryer. It is a small board that is used for exactly what it sounds like. Sleeves! This board is very useful for any small seams that you can’t fit around a normal ironing board. Sleeves, pant legs, and accessories like pouches and bags.
You can generally find a sleeve board at a fabric store.
Ham
Unlike the name, this is not dinner. This is a fat stuffed ironing roll that goes by a few names: tailor’s ham, pressing ham, even a potato. The ham is good for ironing curved seams such as collars and shoulder seams. Ironing curved seams on a flat ironing board will tend to iron creases into the seams. You want to get rid of creases, not add them into your cosplay. This is where a ham comes into play.
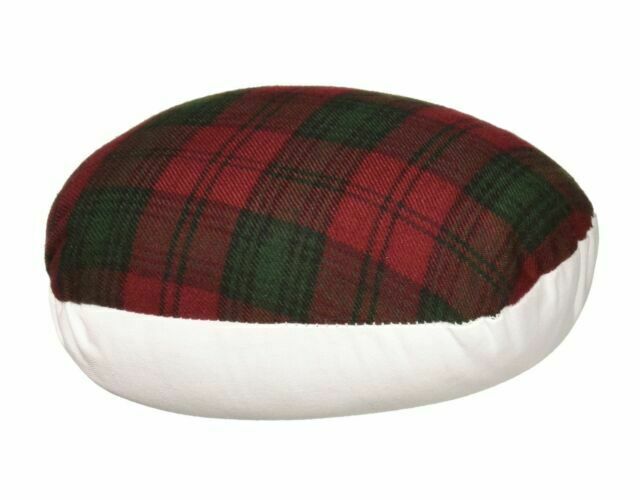
Because of a ham’s shape, you can turn the ham sideways, sit it tall, or lay it flat on its back to get the perfect form for your curve to keep it from creasing. It is heat resistant so you can iron it on the highest setting without damaging it.
You’ll likely need to go to a fabric or crafting store to find a ham. They’re pretty easy to store and very useful when you start getting into collars and curved seams. You can also use it to iron sleeves and pant legs as well.
Hemming ruler
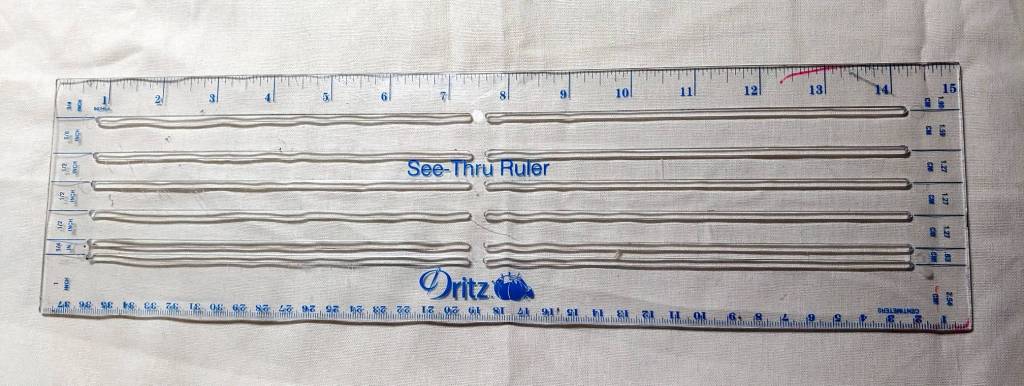
This type of ruler will become your best friend when you start altering patterns and making your own. It is a wide see-through ruler that has common widths marked as cutouts for you. This ruler is used to measure hems and seam allowances but also works as a sturdy ruler when working with any kind of markings or measurements.
Because of the cutouts, it takes the guesswork out of making an even hem. You could use a regular ruler, but I definitely find a hemming ruler to be much more accurate. You can find this type of ruler at a fabric store.
Point turner
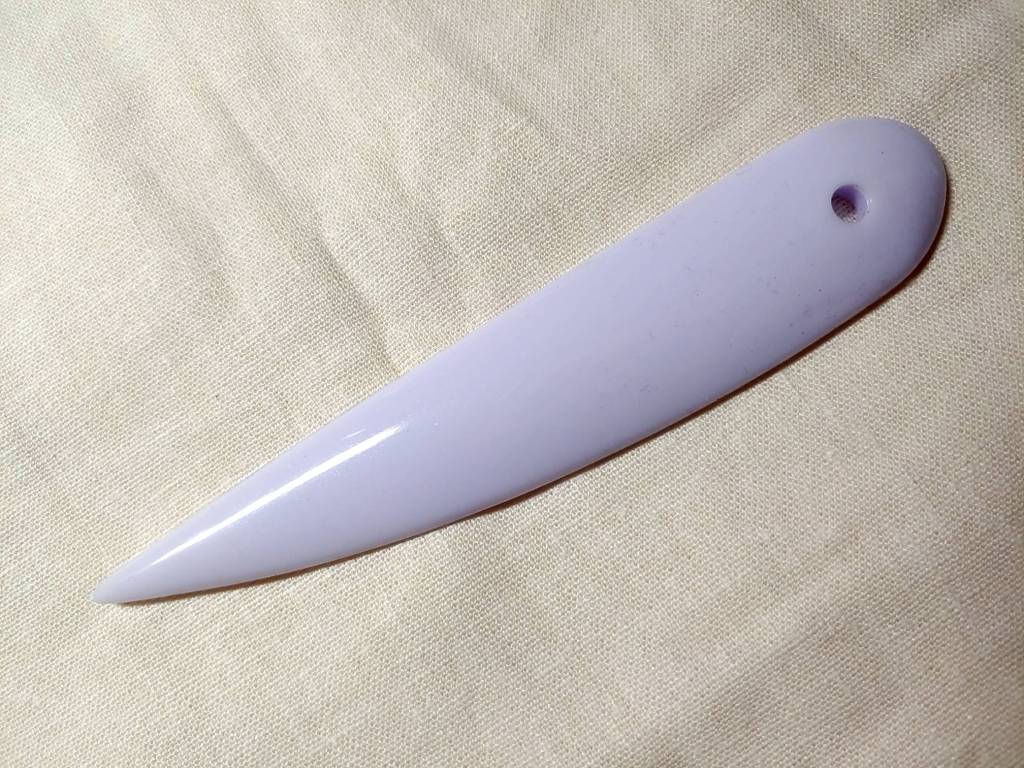
A point turner, sometimes called a creaser or a corner pusher, is a tear drop-shaped plastic tool. This tool helps you push seams and corners out and makes them crisp.
If you’re making collars or large bows or anything that has a corner in it when you turn it right-side out, a point turner will make pushing corners out much easier. You could push the corner out with your finger or a pen, but sometimes they don’t fit or a pen pokes through your seam and you have to push it back inside before trying again.
When you use a point turner, you slip the tool inside your collar, accessory, or any edge with a corner. Gently push the point turner into the corner and it will help push the fabric outward for a nice corner instead of a rounded, sometimes blunted point. You can also push the flat side of this tool against folded seams to push them completely outward before ironing flat.
You can find a point turner at most places that sell sewing notions.
I hope this little article helps you in starting your sewing journey. Let me know how your adventure goes and when you level up. @ me on social media and show me your work! I’d like to admire it.
