Sometimes you just need a pair of fake tatas. A lot of characters have plunging necklines and impossibly perky cleavage, defying the laws of physics of how their outfits are actually staying up. Or perhaps you just need an anime-sized bustline. Either way, it’s time to make some fake tatas that go under shirts and corsets.
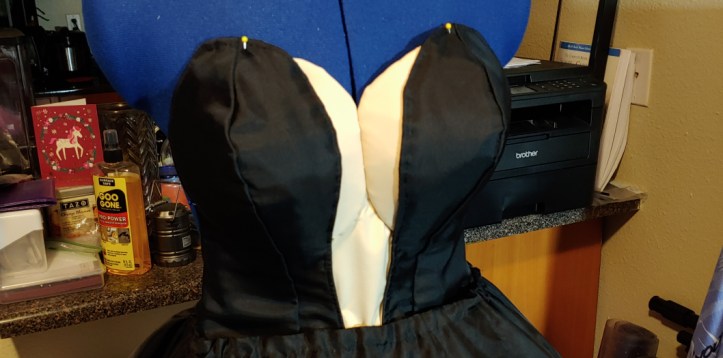
This particular method is adapted from some very old Japanese tutorials that you cannot find anymore (nor can you find the supplies referenced). It is good for tatas that hide under a corset or a shirt partially as there are seam lines. You can do this inside too! No contact cement or EVA foam required.
There is no neckline with these tatas as many tata designs have, but who cares when you get perfect anime cleavage?
Skill level: intermediate
Budget: moderate
Materials:
- ½ yd Pellon Flex-Foam (FF77). It’s used to make bra cups!
- ½ yd swimsuit lining, nude spandex, or power mesh that matches your skin tone kind of closely. It won’t be exact but power mesh has a lot of tones that may work for you.
- ½ yd or two squares of soft felt
Supplies
- Poster board, cardstock, or other heavy paper for patterning
- Pens
- Scotch tape
- High-temp hot glue gun and glue sticks
- Sewing clips or clothespins. The foam is too thick for pins.
- Long hand sewing needle
- Thread that matches close to the outer fabric
- Thimble (optional)
- Scissors for paper
- Scissors for fabric
Drafting the pattern
Before you cut into the good foam, you want a pattern made out of cheap stuff! Because Flex-Foam is so stiff, poster board is a good stand-in for patterning. I’ll be using a dress form in these photos but you can pattern on yourself or put a bra on your table too.
Start by cutting a piece of posterboard. It doesn’t have to be perfect, just marginally rectangular in some shape or form. Make sure it’s larger than the bust when pressed against the chest. It will need to reach from the outer side of your bust to about middle sternum to form proper cleavage at the center.

You want the tatas to be large enough that you fit snugly underneath without any pressure or pinching. Pinching your chest all day at a con can hurt pretty quick, so you want to be comfortable.
Once you’ve decided on a size, trim it down with some paper scissors and cut towards the center of the paper from the corners and edges. Once cut, start overlapping the cut paper to make a sort of hump shape.
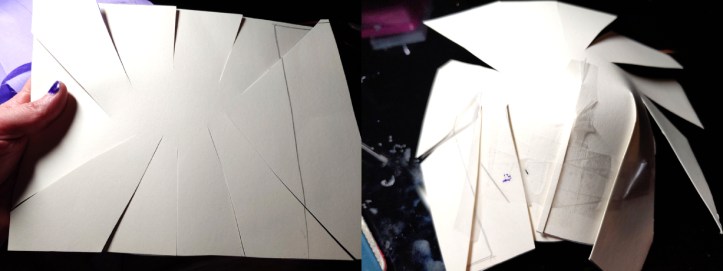
The hump will be steeper on one side to form the cleavage at the center and more gradual on the other to form a more natural transition from the tatas to your side or to tuck into a seam. As you tape the sides, test the size to make sure it is large enough, but not so large that it’s comical (unless that is the point, then go forth!).
Once you’re satisfied with the size, trim the jagged edges to make them sit flat against a surface like your desk. Your body is slightly round so close to flat is good enough!
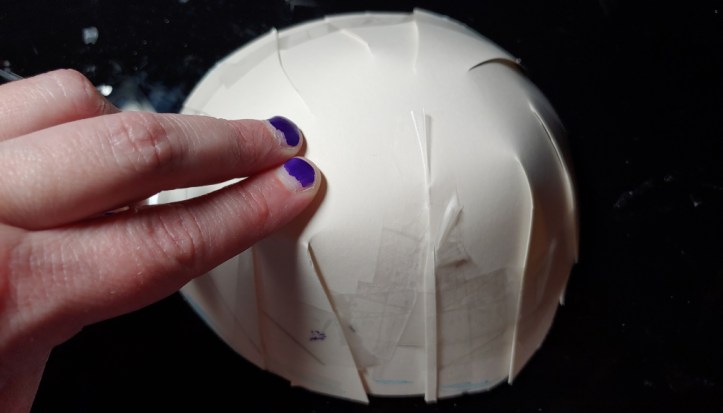
Now before you can use it, it’s time to cut up that nice new pattern. Cut a seam near the center from bottom to top then cut along the sides to form spokes. the pattern should sit flat on the table.

Assembling the foam base
Now it’s time to start assembling. First is to assemble the base out of Flex-Foam to form your solid foundation. Flex-Foam is about ¼” or so thick and is slightly ridged. There isn’t really a grain as this isn’t a woven material. You can cut it with regular fabric scissors. It’s not like EVA foam which will wear down your scissor blades.
Trace your pattern onto the foam. Make sure to trace two sets as you need two tatas. Trace one set with the pattern facing up and then one down, labeling each to make sure they are assembled in the proper direction. Make sure each piece is labeled with an arrow pointing upward.
Cut the pieces out, plug in the hot glue gun, and it’s time to assemble.
Start with one piece at a time, carefully add a thin line of glue along one of the edges of the darts, pressing the two sides together and giving the glue time to cool.
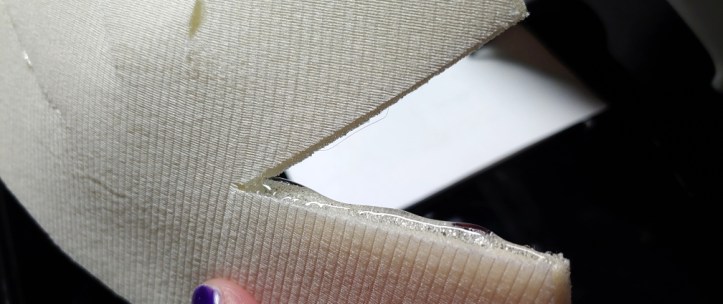
It takes a few seconds for the glue to start cooling. If you release it too early, the seam will come apart and you’ll notice glue strings as the two sides attempt to cling together. The foam is stiff so it wants to attempt to flatten itself, but we don’t want that. We want it to keep its shape. If it does come apart, pick the glue out of the seam (if possible. It may just try to stay there) then reglue the seam, holding it together once again.
If you notice glue trying to squeeze out of the top of the seam, don’t go and immediately wipe it away. That’s how you burn your finger. Wait a moment for the glue to cool but still be liquidy before wiping it away. You can also take a fine pair of scissors and cut excess glue off the top once it cools.
Once all the seams are done, squiggle glue along the seams on the inside of the foam to add more stability to them.
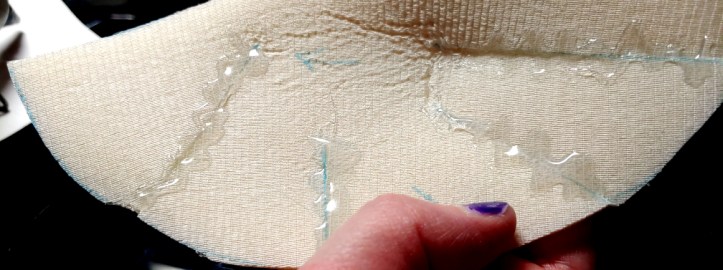
After gluing all the seams, it’s time to glue the two pieces together. Because this seam is long, it needs to be done in sections. Start with either top or bottom and glue to about the halfway point. Press the two pieces together and hold them there. You may need more fingers to hold this than with the side seams.

Once the glue has cooled, glue the remaining half of the center seam and hold it closed to finish it off.
Repeat for both and you have a nice pair of tatas.
Adding padding
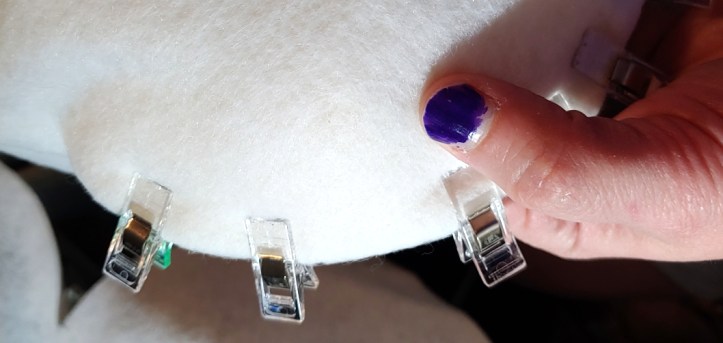
It seems silly. Adding padding to padding. But if you run your hands over the seams, there’s likely to be some roughness, and that will show through the outer spandex fabric. The tatas need to be padded up to hide the roughness, and felt is perfect for the job. The softer and thicker the felt, the smoother the tata will appear to be.
Press the felt down over the tata and trace around the shape, giving yourself at least 3″ around the edges for overlap. Cut it out as a square or a circle shape.
Now it’s time to add the felt to the foam. Since felt isn’t stretchy, there needs to be a seam or a dart at some point, and that dart is best along the center seam of the foam since it’ll be hidden inside a shirt or a corset.
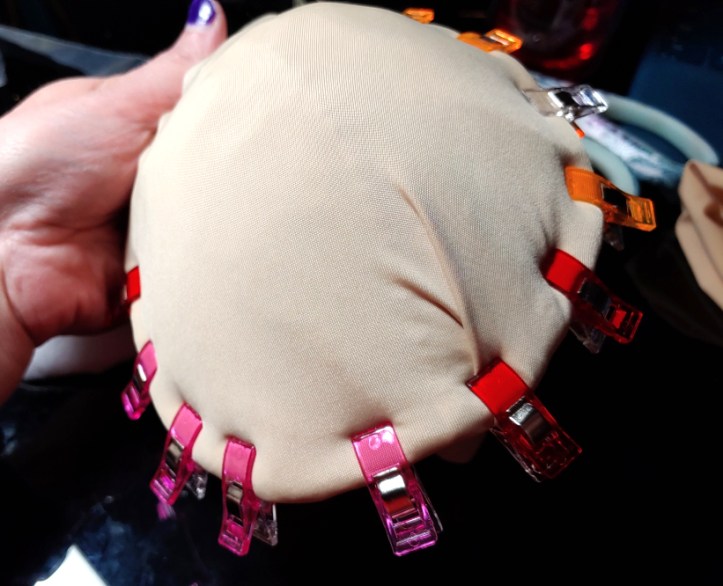
Start at one side of the center seam or the other. Place the felt on the outside of the tata, smoothing it out with your hand and tucking the fabric underneath the foam. Add sewing clips to keep the felt in place as you work around the side.
Once you reach the center seam on both sides, smooth the fabric down and clip the fabric on the opposite side, leaving the extra fabric loose at the center seam.
Once the fabric is smooth across both sides of the foam, take the excess fabric at the center seam and tuck it inside, leaving the opening of the seam facing towards the outside, non-center side of the foam. Once folded, clip it down.
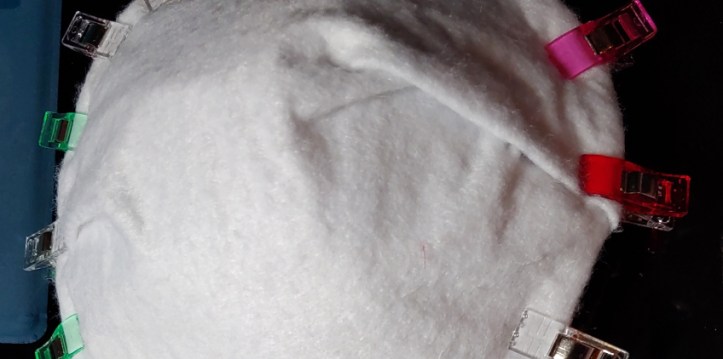
Your darts can be a little crooked as long as they lay flat and they are generally close to the center. This center seam will be hidden by the cosplay anyway.
Once everything is clipped, time to sew it all down. while you can sew all the way through the foam, you risk pulling the stitches tight. We’ll be using a whip stitch, but feasibly any sort of stitch that only goes halfway through the foam will work in this case.
Flip the inside of the foam up towards you. Knot your thread and draw it through the fabric, drawing the needle up through the felt towards you. Now insert the needle into the fabric, making sure to catch the foam underneath in part before pushing the needle back out by slightly bending the fabric away from you.
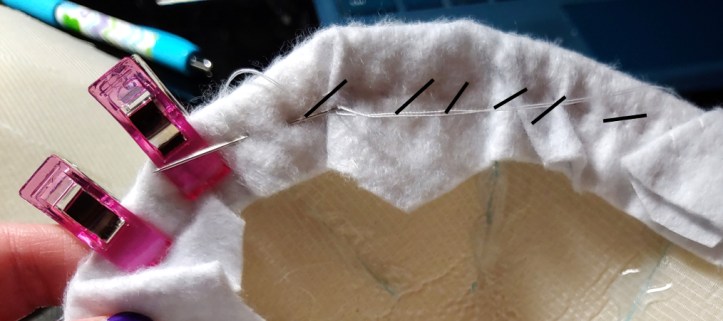
Whip stitches are usually sewn at an angle, which works great for securing any folds in the felt as well as ensuring that the fabric sits securely against the felt. They also get a little haphazard due to the round shape.
Feasibly you can use a slip or basting stitch to much the same result. The goal here is to secure the fabric and the folds and ensure this base felt layer is very secure.
Continue working along the felt, removing the clips as you go. When pushing through the foam, you’ll have to avoid the glue underneath as you can’t really push a sewing needle through solidified hot glue. Not without ruining your needle at least. In these sections, use a whip stitch to sew only the felt and continue working along the way.
Once you’ve sewn all the way around, it’s time to secure the folds. A whip stitch is perfect for the job. Using a very tight whip stitch, secure the exposed fold of the dart.

Do this for both tatas and for all edges until the felt is completely secure. Trim the excess felt inside.
Sewing the outside layer
Now that you have a smooth layer to hide the foam seams, it’s time to add the outer layer. The process will be much the same as it was for sewing the felt, though the outer layer is now stretchy.
When clipping the fabric around the edges of the foam-felt-form, pull only slightly to secure the fabric against the structure. Pulling too much can potentially cause the structure to pucker, and we want nice smooth tatas after all. When clipping and stretching, you may have to reposition your clips a few times before it finally settles on the form. Spandex can be touchy with stretching over shapes, but it will indeed settle down.
Despite the slight stretching of the outer fabric, there still will be extra fabric along the center seam. Tuck a small dart and clip it down. It’ll be much smaller than the felt dart.
After clipping the edges, it’s time to sew them down. You can use any straight or whip stitch you like to sew them down. For mine, I went for a haphazard slip stitch that was just enough to secure the fabric. You can secure the fabric to the felt or to the felt + foam.

After sewing the fabric down, trim the excess. You can optionally sew the fold down as well.
Making cleavage
A proper pair of cosplay tatas needs some good anime cleavage. You might want a thimble for this one to sew through all these layers.
Place the pair of sewn tatas together at the center seam and clip them together. Sew them together at the center at about ¼” from the edge.
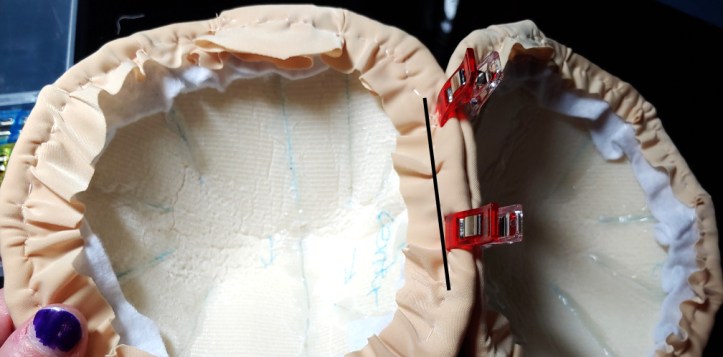
This is only a partial seam, enough along the center to mimic cleavage. Sewing the full center seam will look too squashed and too small a seam may cause them to shift unnaturally (we don’t want them crooked). It’s approximately half the center seam, though you may have to make adjustments depending on the shape of your pattern.
And now you have a pair of tatas to put into your cosplay!
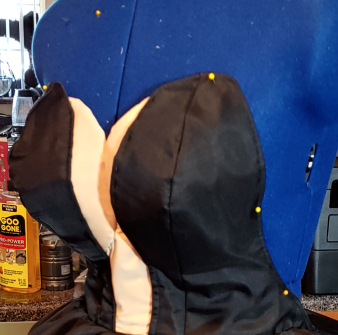
And now you have a pair of perky, perfect anime tatas to use underneath your cosplay! These definitely work best underneath something to hide the folds, but if you’re sticking them in a shirt or under a corset? You’re good to go.
This is one of the probably many ways to make your own fake chest, and the Flex-Foam used here is pretty sturdy underneath things. It’s pretty solid and you can even sew through it to secure cosplay pieces to them.
Let me know what you think! @ me on social media so I can admire your work! (Just make sure to be respectful of social media rules and tatas haha)
