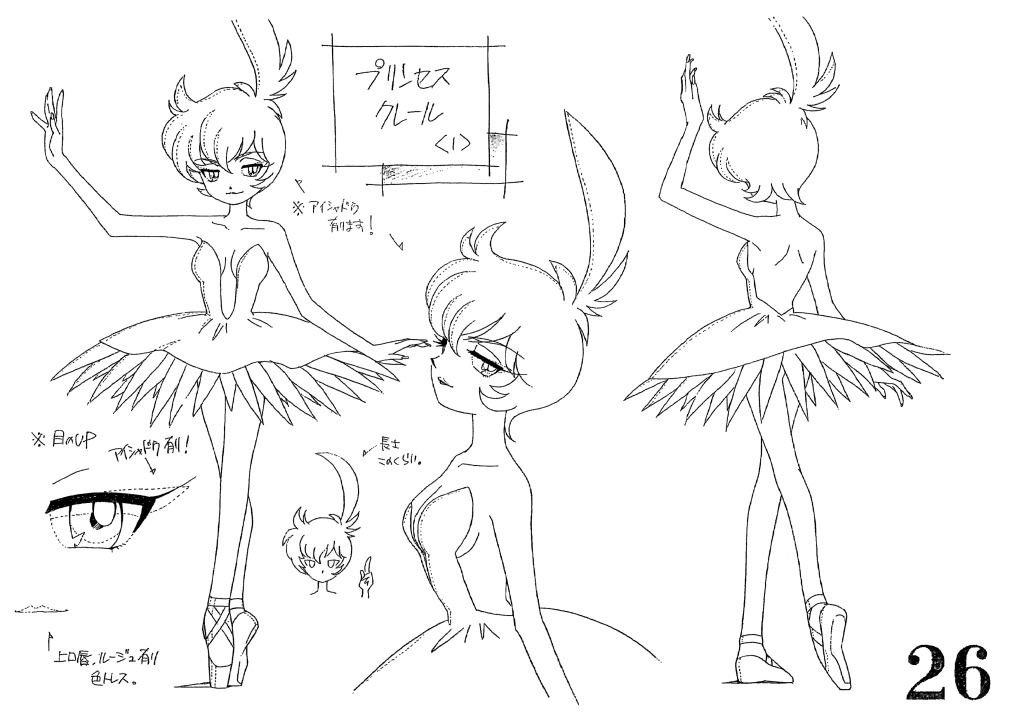
If there’s one thing about magical girl cosplays, it’s that they like to defy physics and how fabric works. Princess Tutu is honestly no exception to this. When my sister wanted to cosplay Kraehe, I knew I had to get creative with how that corset worked and how to get it to stay put. It has a plunging neckline and is backless, which left little for structure. Or so it seemed.
Cue the magic of invisible elastic, fake cleavage, and a ton of duck canvas. It makes for a pretty stable corset that can be attached to a skirt or sits separately. This method works for pretty much anyone who needs this style of plunging neckline and backline (though more Kraehe cosplay is never a bad thing).
This tutorial covers how to alter a corset to match the fake cleavage and the style plus how to reinforce and support it so it stays on you and doesn’t end up on the floor. You’ll need fake cleavage you can sew through for this tutorial. If you don’t have a pair and want to make some, try my previous tutorial: Lets make fake tatas!
Skill level: intermediate
Cost: Moderate
Materials:
- About ½yd outer fabric
- About ½yd duck canvas. Try to match your outer fabric in colors
- About 1yd muslin or scrap fabric for patterning
- A scrap of nude spandex or power mesh. If using power mesh, make sure to get a scrap of duck canvas closer to your skin tone than the outside fabric color
- Spool of plastic bra elastic (may simply be listed as clear elastic) If you have a heavier chest, consider ballet elastic matching your skin tone instead
- bra strap kit which includes plastic rings, slider buckles, and small hooks
- A fake bust
Supplies
- Straight pins
- Pens and pencils for marking
- A corset pattern
- Sewing machine with a universal needle
- Thread matching the outer layer
- Clear/invisible thread
- Hand sewing needle
- Thimble
- Fabric scissors
- Pinking shears (recommended)
- Ruler
- Tailor’s ruler (recommended)
- Iron and ironing board or fluffy towel
- Ironing ham
Creating a pattern
Before diving into the good fabric, you want to ensure the corset pattern fits. With fake tatas in the mix, there’s a good chance this pattern needs modification before it’ll sit properly on them and your own body. This process can be done with a body double or dress form (recommended) or on yourself (though you’ll want some help to properly see the seam lines).
Cut out the entire corset pattern, using measurements that match the bust measurements. The fake bust will make the measurements larger than your own. Sew it and leave the back open. If you are using a dress form, you can get away with cutting out just the front section of the corset and pinning it to the dress form. If you are wearing it, you want the whole corset so you can get accurate measurements.
Shaping the bustline
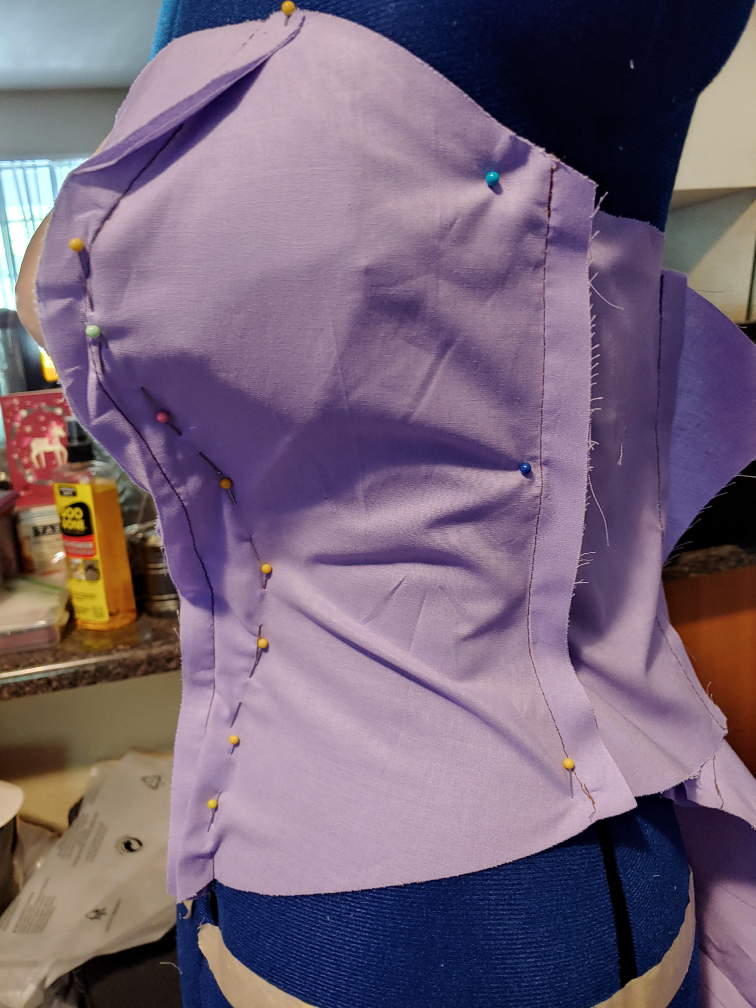
Flip the corset inside out so you can see the seams then pin the corset to the dress form or tightly to yourself, positioning the fake bust underneath the fabric. Once pinned, it’s time to tailor the shape to match the fake bust’s shape.
Take straight pins and pin along the contours of the bust and torso to create a temporary seam. Do this on both sides of the corset to ensure that the center seam still sits on the center of your body. Use a ruler to match one side’s pins to the other as needed.
Once you’re satisfied with where the fabric sits, remove the corset and set it on your desk. Using a pen, trace the lines the pins have made underneath the bust to create a sewing line.
Lay the corset on your desk, shifting the pins 90° to be perpendicular to the line without shifting either layer of the fabric. Sew the seam and remove the pins.
Shaping the sides

With the bustline finished, it’s time to make the plunge along the sides.
Take a pen and carefully trace along the top of the bust and along the sides, making sure to give yourself some leeway along the edges to hide the side of the fake bust. Plunge it down to meet the waistline.
As we’ll add the seam allowance later, you can get pretty close to the bust to check if it sits where you want it to.
If you notice any puckering along the sides, add a dart about halfway down the bust along the side. Sew the dart flat. You don’t need to mark it as when you disassemble the pattern, it should fit pretty flat on your final fabric.
Adding a plunge
You can’t have a plunging corset without a front plunge.
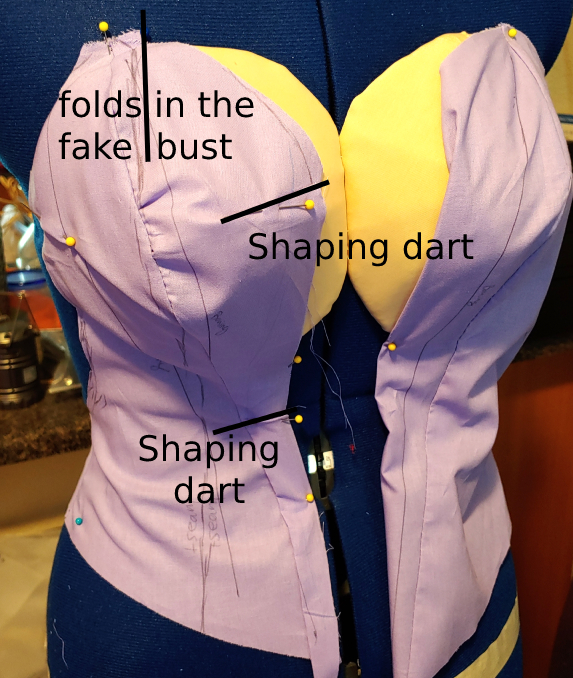
Much like with the sides, start marking out a rounded shape and drop the center down to the waistline. If you are using the fake tatas from my other tutorial, make sure that the shape you’ve drawn fully conceals any folds in the fake bust fabric.
Once cut out, you’ll likely notice puckering along the side of the bust and underneath it. Try as you might, a corset will not stick to a bust, so you need to make it do so.
Add a dart along the cleavage section of the fake bust and one just underneath it to ensure that the corset sits flat against the bust and the torso. Sew these darts down.
Sewing the corset
Now that the pattern is complete, cut the bust seam and lay the corset flat. As we’ve modified it so much, cutting the bust and adding the seam allowance on the fabric is easier than adding it to your pattern.
Fold your outer fabric in half and lay it flat. Pin the pattern down flat to the fabric leaving about 2″ between pieces. Taking a tailor’s ruler or a clear ruler, mark a seam allowance. If you are using a tailor’s ruler, stick to the standard 5/8″ but if you have a regular ruler, 1/2″ is much easier to see.
For curves, mark the seam allowance in short bursts then smooth out the curve with a pen or pencil. Mark seam allowances for the edges and for the bust seam.

Once you have all your seam allowances marked, cut along the allowance. Either cut the canvas at the same time or use your outer fabric as a template and cut your canvas from that. You should have two of each pattern piece in each fabric for a total of 8 pieces.
Sew the canvas and the outer fabrics separately at the bust line. Iron the bustline seam open and flat, clipping the seam allowance as needed to prevent bunching.
Sew the canvas to the outer fabric, wrong sides together and only at the side seams. Clip your seam allowances and flip the two pieces right side out, pulling the fabric out through the bottom edge of the corset. Iron the edges flat.
Stitch along the outside edges of the corset to stabilize the corset and hide future stitches.
Making a stability panel
With the plunging neckline, the corset needs a ton of stability to keep it from collapsing in on itself. The fake bust and a full stability panel (that also serves as a good privacy panel) along the midriff will provide what we need.
Cut a rectangle of nude spandex/power mesh and one of duck canvas. Make the rectangle wider than the front gap and taller than the height of the corset and the bust. Baste stitch the two layers together as the spandex will try to wiggle around as you work.
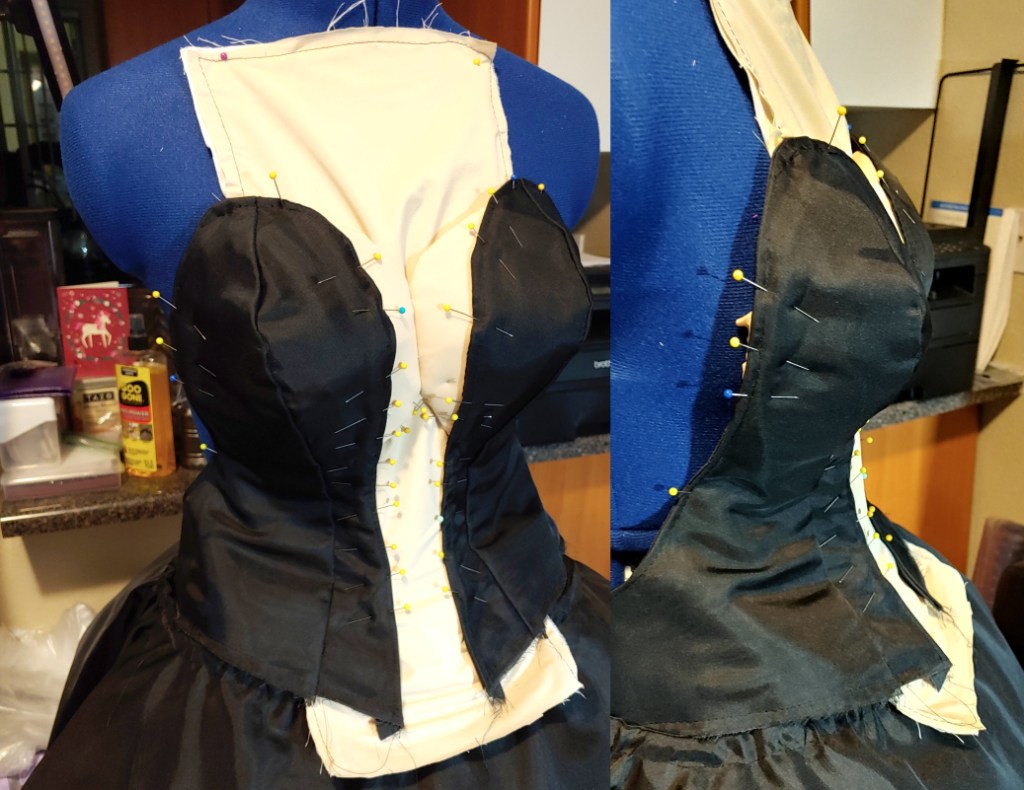
It’s time to pin. A lot. Pin the corset in place and slip the fake bust underneath it, pinning that down as needed. Slip the stability rectangle behind the corset and the fake bust, forming a panel.
Now pin. Pin the corset to the bust itself along the sides and top (the bottom will sit flush due to the contouring). Pin the corset along the stability panel on the midriff. Pin the bottom of the cleavage to the stability panel. Leave the top of the stability panel unpinned to the bust as we’ll trim this down to the bottom of the fake bust later.
Smooth out the stability panel as you work, making sure the corset sits flat. Reposition any pins to remove puckering.
Once you’re satisfied with how it sits, sew the midriff section down by machine. The rest will need to be done by hand.
Trimming the stability panel
Sew the underbust to the privacy panel by hand using a stitch of your choice. A blind stitch is pretty effective here, though you could use a very small whip stitch along the outside edge. Keep the stitches hidden to keep the illusion that it is a bust transitioning to a bare midriff.
Once the bust is secured, cut off the excess stability panel, leaving yourself some leeway away from the stitched edges. Pink the edges as needed to keep the canvas from fraying.

Stabilizing the bust
Before we can remove all the pins, it’s time to stabilize the bust. This will require the most hand sewing, but unlike the stability panel, the bustline has an easier way to hide the stitches. Right in the corset! Earlier you sewed a simple stitch around the outside border of the corset. You can hide hand-sewn straight stitches right in the machine stitch.

A simple straight stitch will do. You can plunge the needle right through all the layers of the corset and the bust, using a thimble as needed to push the needle through.
Avoid any glued section if you used my bustline tutorial. You cannot sew through solidified hot glue, so simply skip the section or sew through the outer fabric of the bust and continue sewing on the other side
Sew along the outside edge, the top, and the lines near the cleavage to secure the corset to the bustline.
Additionally, you can sew at the very bottom of the bustline to secure the corset to the stability panel, but only if this does not cause any bunching or wrinkles in the panel.

Adding straps
Unfortunately, we are not anime characters and cannot magically have this corset stay up. And after all the stabilization, the corset actually has a bit of weight to it. It’ll fall down pretty much right away, so we need a system of back straps to keep this thing from moving. The easiest way to mark the placement of the straps is with a picture.
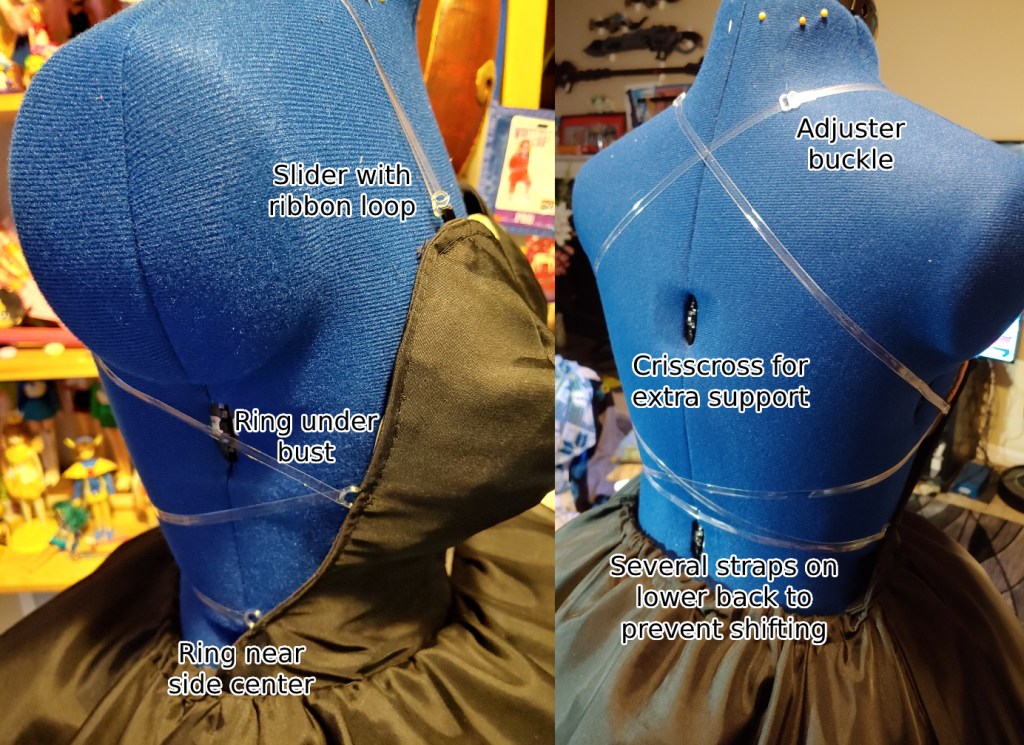
Here’s what you need to make this corset secure:
- The clear strap is one long solid piece with no breaks
- Crisscrosses twice for extra support and stability
- The slider sits at the top of the bust with a ribbon loop to secure it to the corset. Sliders are found in swimsuits and removable bra straps. The strap is looped through and not sewn at the slider. Having removable sliders makes dressing easier.
- Adjusters sit on both sides of the top crisscross. This makes adjusting and dressing easier. The only stitches are here at the adjuster buckles. Make sure your stitches are secure as a lot of stress will be put on them.
- Two rings sit on the side of the corset. One is located just under the fake bust. The second is at the side in the center near the waistline.
Each of these pieces will need to be hand sewn into the seams. The rings can be sewn directly in by stitching over the plastic. The ribbon for the slider needs a little extra ribbon underneath the stitch line. You can seal satin ribbon with a lighter but satin ribbon can fray still, so having that extra ribbon length will keep your straps nice and secure.
If you aren’t sure of placement, secure the rings and ribbon with safety pins then thread the elastic through it, pinning it with the buckles or leaving it hanging loose just to see where everything sits. Once you’re satisfied, mark the pin location lightly with a pen or pencil on the inside of the corset then sew the pieces down.
Once you’ve sewn all your straps down, you can finish the bottom hem or sew it into a skirt or other piece of your cosplay. And then you’re done! You’ve made a secure backless corset.
But how secure is it actually? Check out my strength test video and see for yourself!
I hope you enjoyed this tutorial! It was a fun engineering project to get everything stable and stationary and make sure there would be no incidents on the con floor or for a full performance.
Let me know what you make with this tutorial, whether it’s Kraehe or another character who defies the laws of physics! @ me on social media so I can admire your work.
