Sometimes a design has standing shoulders or shoulder decorations, but they don’t look like armor. Perhaps you need something lightweight or something easy to store. Fortunately, fabric shoulders can help make that standing shoulder illusion without the extra bulk, weight, or storage space.
These shoulders take only a few materials, and the fabric can be anything middle-weight with some body to it. Cotton, polycotton, and the like work great for this. If you want a shine, you can add a top layer of voile or chiffon to give it an extra pop.
The only structure inside is 2mm foam, which is flexible and easy to store, and buckram. These shoulders survived an entire day at the con, a contest performance, a flight to and from another state, and storage in my closet. They cannot support more than a pound or two of extra weight on them, but they did support a full set of Isis wings made of voile before I moved them to their own harness.
Skill level: intermediate
Cost: moderate
Materials:
- About 1-2yds of fabric, depending on the size of shoulders and design. This covers the design both inside and outside as the underside of the shoulders will be visible
- Buckram, fusible or sew-in. Enough to cover the shoulder design once
- A roll of 2mm EVA craft foam. You can get foam rolls at craft stores or online for around $10 or less. Look for the school supply aisle.
- Snaps (optional) to attach shoulders to your shirt
Supplies and tools:
- Poster board for patterning
- Pens or pencils for patterning and marking fabric
- Tape for patterning
- Tailor’s ruler or clear ruler for marking seams
- Sewing machine with universal needle
- Clear, variable zipper, or open toe snap foot for your machine (recommended)
- Matching thread
- Hand sewing needle
- Straight pins
- Fabric scissors
- Scissors for paper (not your fabric scissors, that’s how they get dull)
- Point turner (recommended)
- Steam iron with ironing board, mat, or fluffy towel
Planning
The most difficult part of patterning anime shoulders is getting them to work on an actual human body. Before sticking poster board to your dress form or yourself, you’ll want to do some planning.

One of the easiest ways is to drop a screenshot or concept art into Paint and start scribbling down ideas. What is the curvature of the shoulders? Do you need to worry about a range of movement? How does it connect to the top underneath? Does it wrap all the way around or only partially? Is this physically something that can exist in reality?
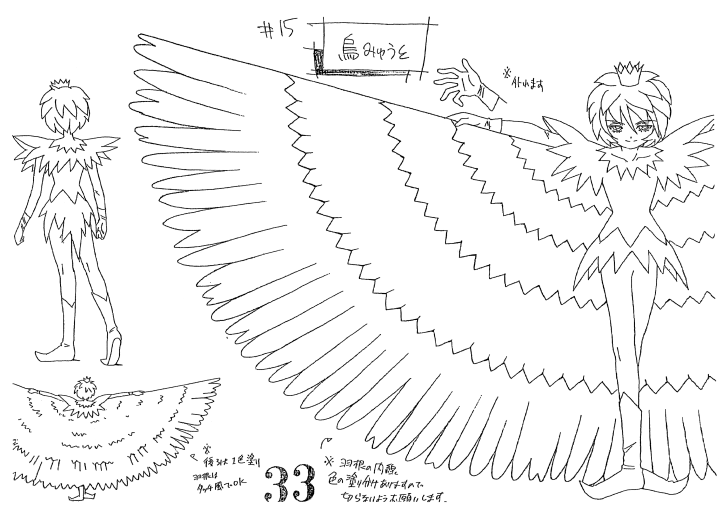
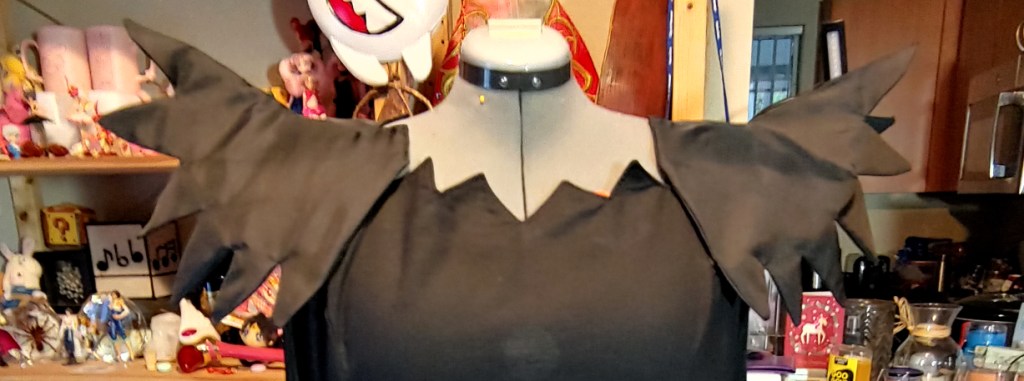
For Mytho, he has massive Isis wings attached to his back that he spreads out completely (if you want to see how I made them, check out Seamless tiered Isis wings with Mytho). These raised shoulders need to allow for that full range of motion but also sit on my shoulders when at rest. I gave them a curve at the shoulder to make it easier to move.
Mytho’s shoulders are attached at the front and center back with snaps since his shoulders wrap all the way around his back. This makes them removable and easy to store. For detached shoulders, you can use much the same method with snaps or magnets to make dressing and removal much easier.
That last question is the hardest one of all. Can this exist in reality? While characters can have wild shoulder pieces, you still must adhere to the laws of physics while anime characters may not. You may have to alter the top angle to make them sit on your shoulders or add supportive underlayers to make something seem to suspend in the air.
Patterning
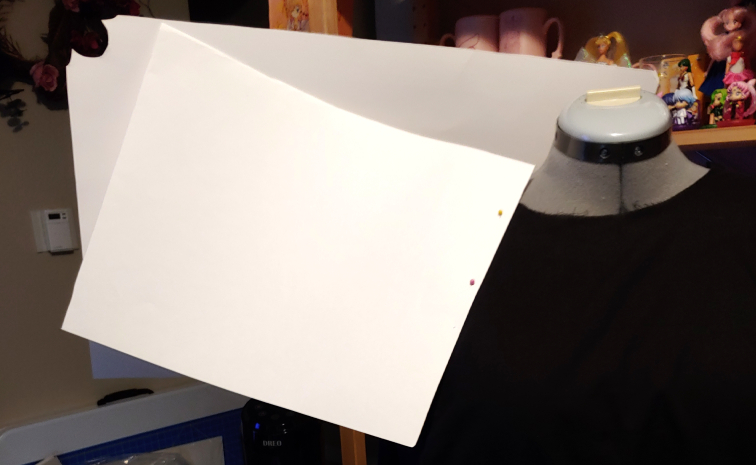
Now that the general shape of the shoulders is planned, it’s time to make those shoulders a reality. If you’re doing the patterning on yourself, you’ll probably want a second set of hands to assist. If you have a body double like a dress form, you can pin the pattern right to it while you work.
Start by roughly placing the front and back pieces of the shoulders. For Mytho, the front piece is partial but the back piece is solid. For solid backpieces, you can place the back piece at the center back to pattern both for symmetrical shoulders by patterning only one and mirroring it later.
The pieces should be much larger than your final shoulders. It’s easier to take away material than it is to add it.
Once in the correct position, take a pen or pencil and sketch the angle of the shoulder plus any curves desired at the top of the shoulder. This shoulder curve should sit on the top of your shoulders much like the seam of a shirt would. For Mytho’s shoulders, the shoulders curve up at the edge of the shoulder to give it a more flared appearance.

Once the curve is marked, cut off the excess paper and trace the shape onto the back piece of the poster board, connecting the two at the shoulder seam. Cut the excess off the back and tape the two together.

Once taped together, trace the outside edge of the wings plus the neckline. If you have a repeating shape, you can make a template out of scrap poster board or use objects like the edges of folders, cups, or anything to give you the shape you desire.
For Mytho’s shoulders, the neckline was made using a triangle from a school math to make the angles consistent. The feathers on the outer edge are freehand and redrawn a few times to make them consistent.
Once you’re satisfied, cut the pattern out and remove the tape.
Cutting and sewing
Now placing the paper pattern down on your fabric and tracing it directly will result in a smaller pair of shoulders than what you patterned. We’ll need to account for seam allowances since this is fabric and not something like foam or paper.
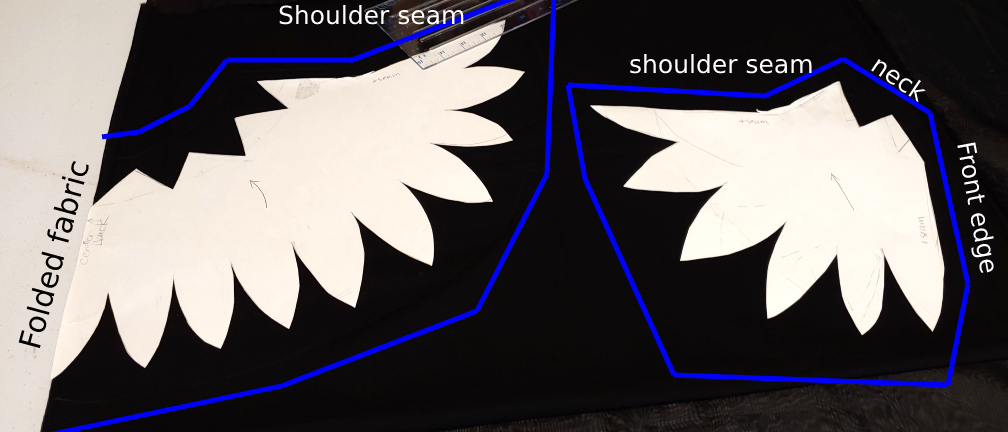
Fold your fabric in half, layering each type of fabric in a stack with the fold matched up. You will need two layers of outer fabric, one of buckram, and one of an outer shimmer layer if you have one. Place your pattern pieces on top, matching the edge of the back piece up to the fold if you have a solid back piece. If the pattern pieces skitter around, place a cup or a small weight on them to keep them from moving.
Using a ruler, add a seam allowance of 5/8″ (for a tailor’s ruler) or 1/2″ (for a regular ruler, it’s easier to see) to the shoulder seam and any side edges. Trace a larger area around the neckline and the bottom edge of the shoulders. It doesn’t have to be exact. We’ll adjust that later.
Mark the edges of your pattern along the shoulder seam and edges for easier placement later. Cut the fabric out and iron it as needed. If you are using fusible buckram, fuse it to one of our outer fabric layers. (if you fuse over your markings, make sure to transfer them to the buckram.)
To sew the top layer of the shoulders together, you’ll need to stack them in the appropriate order. From bottom to top
- Buckram for the back piece (if fused, place the buckram-side face down)
- Outer fabric for the back piece (right side up)
- Decorative shimmer layer for back piece (if included)
- Decorative shimmer layer for front piece (if included)
- Outer fabric for front piece (right side down)
- Buckram for back piece (if fused, place buckram-side face up)

If you have a decorative shimmer layer or non-fusible buckram, pin the neckline and bottom edges together so the pieces don’t shift while you’re working. You can also use a stay stitch on the edges if you don’t want to leave the pins in.
For all shoulders, pin the front and back pieces stacked together at the shoulder seam and sew a seam of 1/2″ or 5/8″, whichever you marked earlier when you cut the pattern out.
Clip any angles or corners and iron the seam open. Make sure to use a press cloth or a scrap of cotton to prevent burning the buckram.
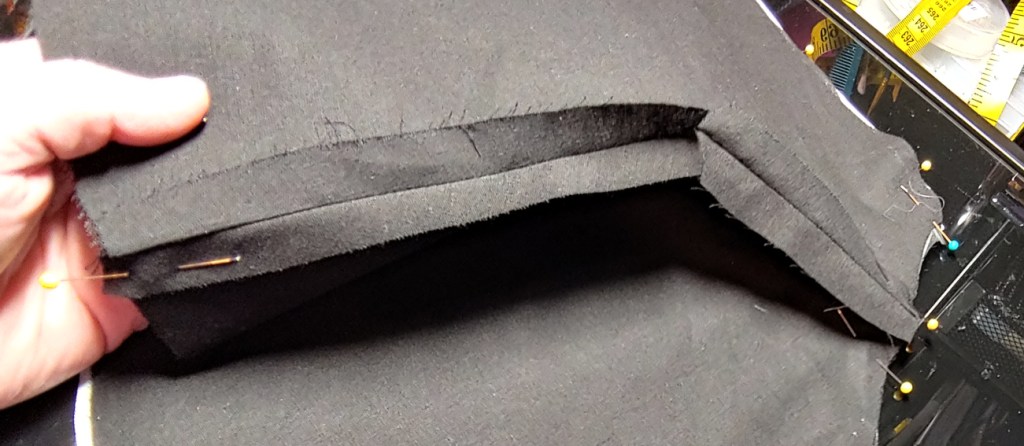
This creates a topside for your shoulders.
Repeat this process for the rest of your fabric. The pile order will be the back piece face up then the front piece face down. This stack will serve as the underside of your shoulders. You can add a shimmer layer here if desired, but it will mostly be underneath and in the shadows when worn.
Pin the topside and underside together, right sides together, aligning them at the shoulder seams. Lay the pinned pieces together on the table, placing the pattern on top of the fabric. Match the paper pattern up at the shoulders and any other registration lines you marked earlier. Trace the edges of the fabric with a pencil or pen to make your final shoulder shape and design.
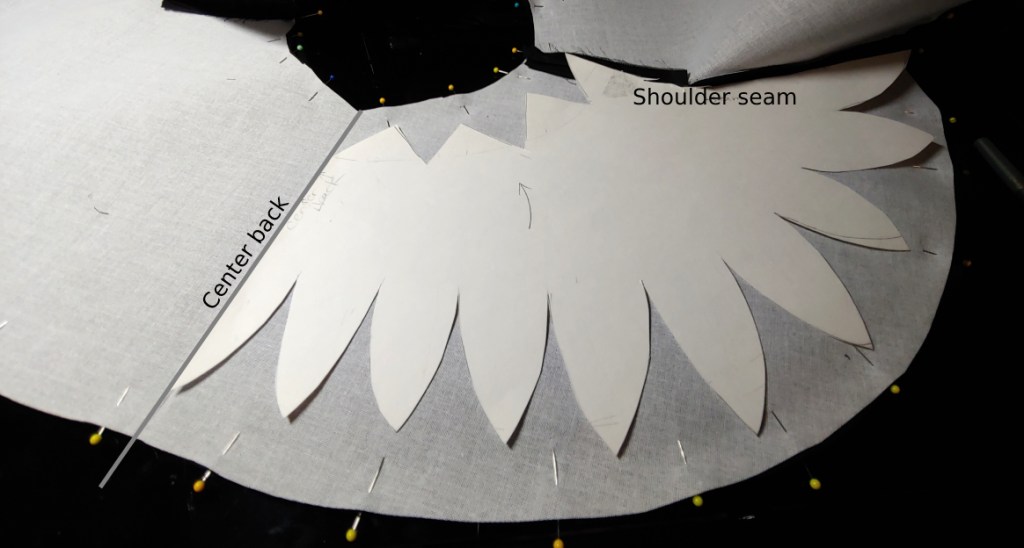
Trace all the pieces until both front and back patterns have been transferred to your fabric. Sew the pattern along the outer edge and the side seams, leaving the neckline open. Use the design you drew as a guide, sewing along those lines to finish the edge.
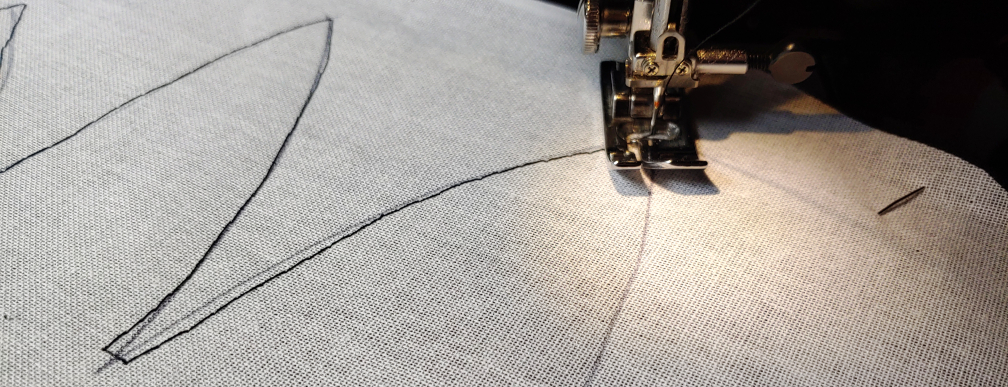
If you are sewing a scalloped or feathered edge, check out How to sew a scalloped hem to make the perfect, unbunched scallops or feathers every time.
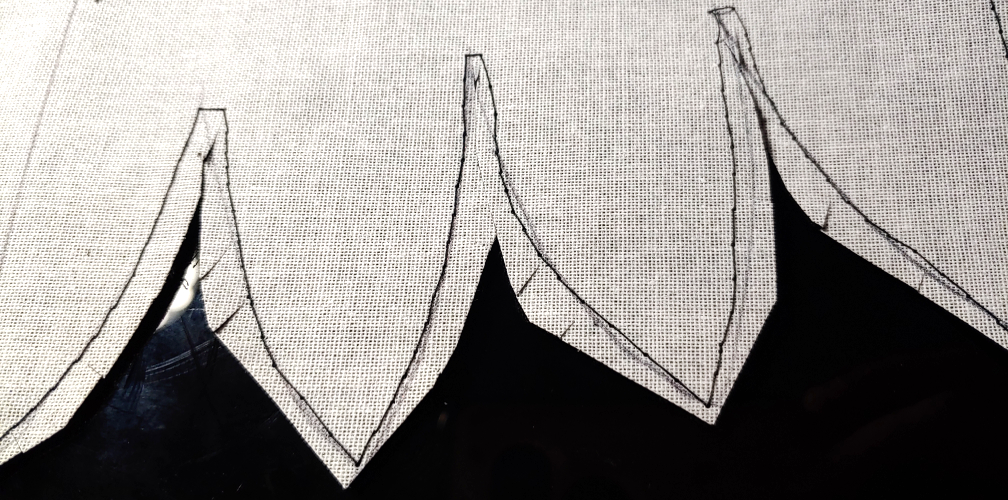
Once the edge is sewn, trim the excess fabric off. For a straight or curved hem, leave about 1/2″ or so away from the stitches to ensure the fabric doesn’t fray through them. If you’re sewing a decorative edge, you’ll want to trim closer to squeeze into small curves or zigzags.
Clip any curves, making small perpendicular cuts along them to ensure that the fabric doesn’t bunch up when flipped right-side out. Trim any angles as well, reducing the amount of fabric in corners by cutting at a diagonal.
Before flipping the shoulders right-side out, it’s time to trim that neckline. Don’t trim it down to the line you’ve drawn as, like with the rest of the shoulders, it’ll make the edges too small. Instead, add a seam allowance along the top edge. Add either 1/2″ (for a regular ruler) or 5/8″ standard allowance (for a tailor’s ruler). Trim off the extra fabric on both the inner and outer layers of the shoulders.

Now flip the shoulders right-side out, using your fingers to push out any corners or decorative edges. Use a point turner or an edge of a flat ruler to help smooth out any edges before pressing it flat with an iron. If you have a shimmer layer, use a press cloth or iron it from the shimmerless underside.
Adding support
With the current construction, the shoulders don’t really stand up all that well. They need a bit more structure to help them stay upright, and 2mm craft foam is perfect for the job.
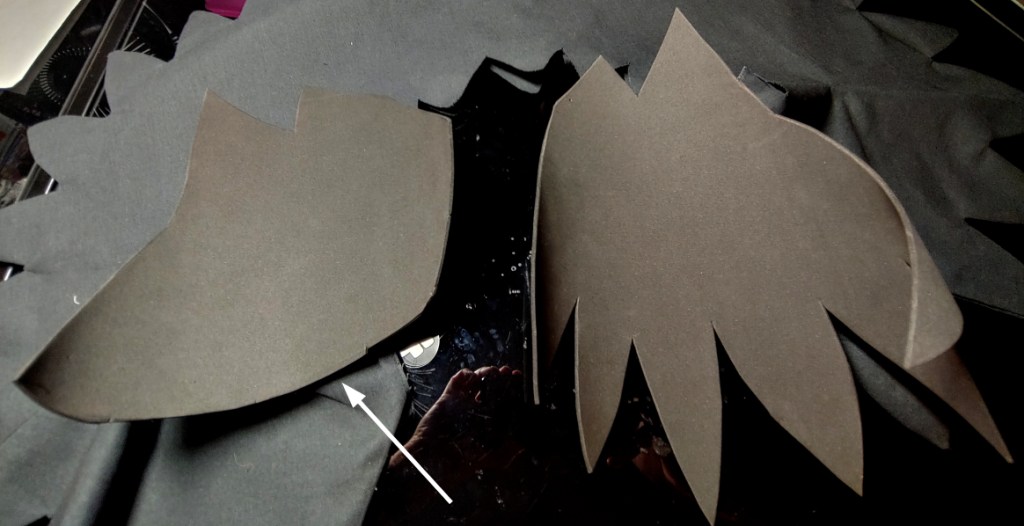
Unroll your craft foam, placing your paper template down wherever it fits best. If you have a full back like Mytho’s shoulders, make sure to mirror the back piece over the center line to make one solid foam piece. Trace the design using a pen or a sharpie.

Cut the foam designs out with a pair of non-sewing scissors. Foam will dull your scissors quickly, so don’t use the good ones. Now carefully push the foam inside the shoulders.
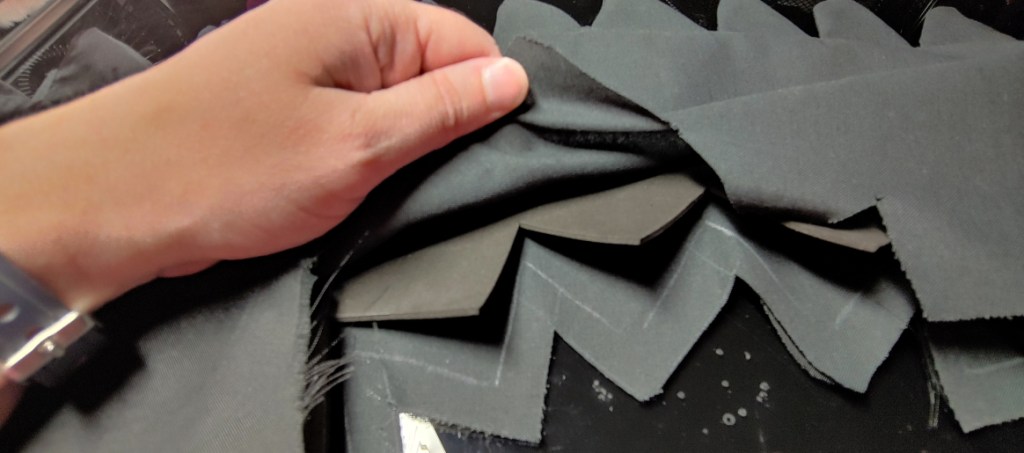
If you find that it won’t sit properly within decorative edges like the feathered edge, trim the edges down a bit so they fit into the pockets, or simply cut the decorative edges off. I ended up doing the latter.
Stuff the foam inside the shoulders and make sure it sits snugly inside. Trim the sides if necessary if the foam seems to buckle.
Finishing the neckline
Now that everything is properly stuffed, it’s time to finish that neckline. If left unfinished, the fabric will fray and the foam will likely slip right out. Fortunately, the foam is a good guideline of where the neckline should sit, and you can easily sew through 2mm foam with a standard universal needle.
Lay the shoulders on your desk, folding the outside layer over the foam and tucking it inside the fabric pocket. Tuck the edges of the inside layer into the pocket but don’t fold it over the foam. This forms a seam along the top edge of the foam.
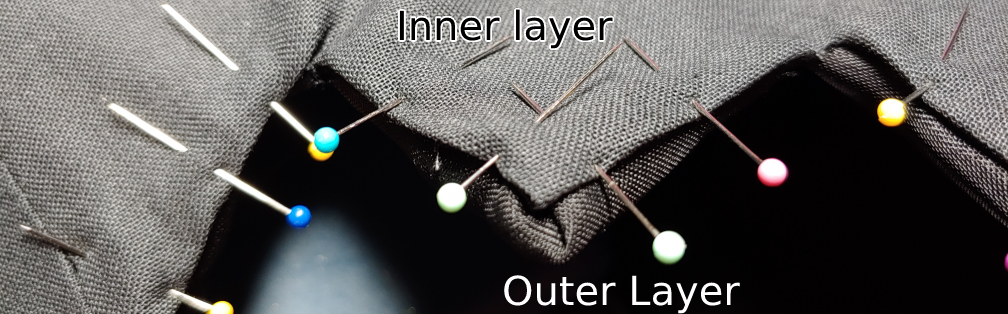
Foam doesn’t really take to pins well, so pin through the folds along the inside of the shoulders, avoiding pinning the foam, to keep your fabric from shifting. For zigzag edges, tuck the peaks of the zigzag and clip the valleys to get the fabric to sit flat as you fold the edges.
Once pinned, carefully stitch along the edge about a 1/8″ to 1/4″ allowance. Using a variable zipper foot, a clear foot, or an open-toe foot can help make sure your stitches are even.

Once the shoulders are sewn, you can optionally add some whip stitches to ensure the shoulders always keep their standing shape. Add whip stitches along the shoulder seam using a hand-sewing needle. Start at the shoulder (where your actual shoulder sits) and stitch all the way to the edge.
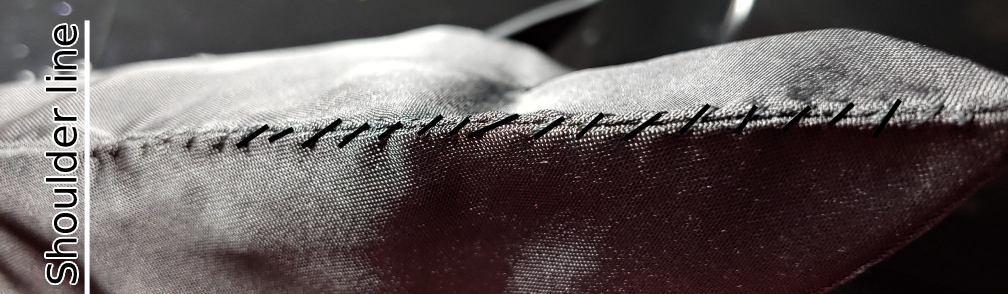
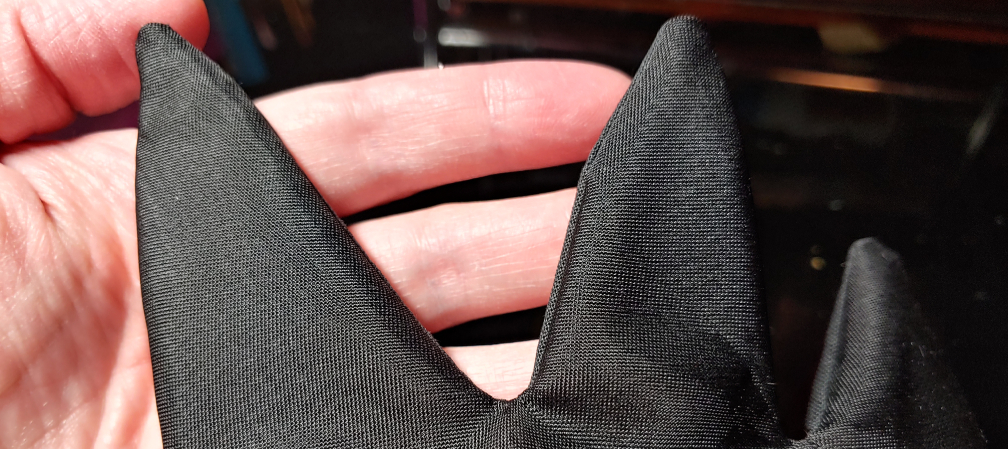
The whip stitches definitely help with wider standing shoulders like Mythos. No matter how much I bumped them, these shoulders kept their standing shape.
Attaching and securing
Unfortunately, shoulders don’t magically stick to your cosplay like they do in anime and games. So we’ll have to attach and secure them so they don’t move or fall off. You can attach them in a number of ways including with magnets, snaps, buckles, or a harness.
This section covers attaching snaps as that’s the method I used for my shoulders. Choosing your snap location is important, especially if you want the shoulders to appear like they’re floating. The best location is near the neckline (or the side-top of the shoulders) and a few inches below that.
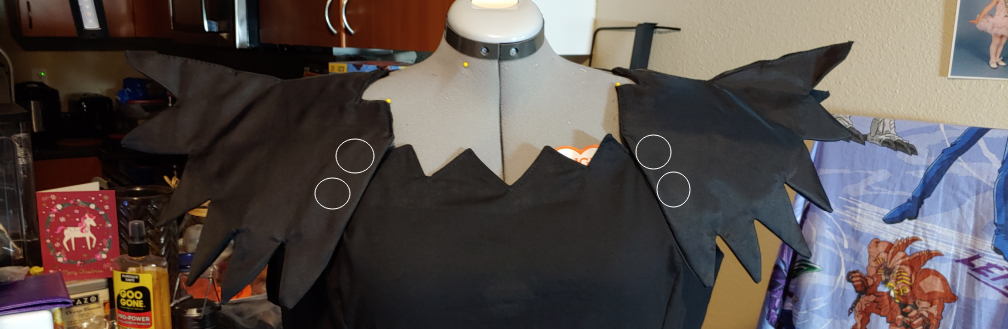
The top snap keeps the shoulders from separating from your shirt too far and the lower snap serves as a stabilizer to keep the shoulders from twisting.
If you have a separated back, then you can do the same method along the back side edge to secure the shoulders. If you have a solid back, you’ll want to place the back snaps near the spine in the center-back. I used 1″ snaps for the back so I could feel them better by myself, but smaller snaps can be used to attach these as well.
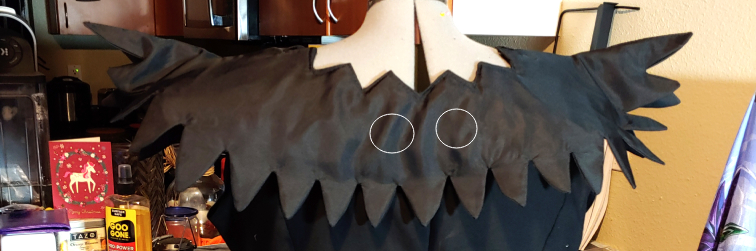
The two snaps in the back help to stabilize the shoulders, keeping them from shifting during general movement and especially when you lift your arms up. You want the shoulders to stay in place no matter how much you move, and with Isis wings for Mytho, stability was extra important. And cons are pretty rough on accessories, so stability will make sure they don’t move all day.
There you have it. Fabric shoulders for your cosplay!

I hope you enjoyed this tutorial! Fabric shoulders are a good way to create standing accents that don’t work for foam or require a softer look and appearance. Fabric shoulders are also easier to store and transport, so they’re good for smaller spaces or distant cons! Fabric shoulders are also a good alternative when you don’t have the space for foam work as well.
Let me know what standing shoulders you choose to make. @ me on social media so I can admire your work and creativity!
