You probably used paper mache in art class, maybe for hobbies or Scouts, but did you know that paper mache is a great medium for props and accessories with cosplay? It’s pretty cheap, uses a lot of supplies you can find in your house, and is surprisingly sturdy. It’s also pretty beginner-friendly.

I’m pretty big on upcycling and reducing the amount of waste in cosplay as well as using arts and crafts to create cosplay accessories and props. Foam and Worbla are fun and a good way to create props, but there are plenty of other fun methods to use. If you’ve seen my decoupage and fabric for props and accessories tutorial a few months ago, I talked about how to use leftover fabric and decoupage methods for cosplay. This time, let’s talk about paper mache methods and how you can make this medium work for you.
Skill level: beginner-friendly!
Cost: budget-friendly! Most supplies are recycled!
Tools of the trade
- Cereal, nugget, taco, and other boxes made of thin cardboard
- Shipping boxes like you get in the mail
- Aluminum foil
- Masking tape
- Heavy gauge wire for shaping
- Newsprint paper, non-coated
- Glue mixture or Mod Podge
Paper mache recipe
You’ve probably looked at the list of tools of the trade and thought back to arts and crafts class. Glue mixture? What about flour mixtures?
Flour mixtures are your pretty standard run-of-the-mill mixture for paper mache. They’re cheap and relatively easy to use at a 2:1 ratio of water to flour. Flour is pretty cheap at the grocery store and works when you’re in a pinch and raiding your kitchen a week before the con. Many of my first paper mache projects used a flour mixture, and they held up pretty well throughout the years.
However, flour mixtures have a problem. They’re food-based. If you get a food-based prop wet in the rain and the water soaks into the paper mache, you run the risk of your prop molding and having to throw it into the recycle bin. When you live somewhere like California where it’s generally sunny, this isn’t a problem, but now that I’m in the PNW? This is a huge issue for the longevity of my work.
So I recommend glue mixtures to avoid molding. I also find that I get a smoother result instead of potentially dealing with flour lumps. There are two kinds of glue mixtures you can work with:
- Mod podge right out of the jar
- School glue mixed 1:1 with water
You can buy white school glue by the gallon pretty cheaply if you plan on doing a lot of paper mache, but I honestly hate doing mixtures as my ratios are 9/10 times wrong. Mod Podge is already thinned, so you can use it straight out of the bottle without mixing. You don’t need the special paper mache kind either. You can use the basic matte or gloss mixtures and get a great result without the extra specialty cost. You can get Mod Podge at a decent price at craft stores, and an 8oz bottle will go a long way.
What’s in a box?
Paper mache cannot stand on its own. It needs a base to give it form and support, and what kind of boxes you use is important.
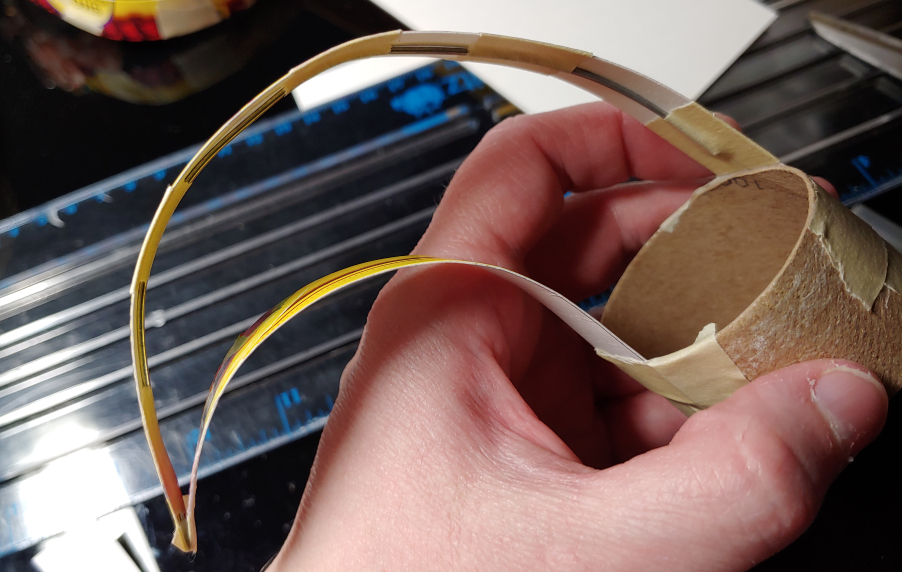
For many of your projects, the food box will be your main building material. Food boxes, tissue boxes, and even soda can boxes are made of thinner cardboard that doesn’t have air pockets or ridges inside. It’s a smooth type of cardboard with a bit of stability that can be manipulated into curves by curling it around your fingers.
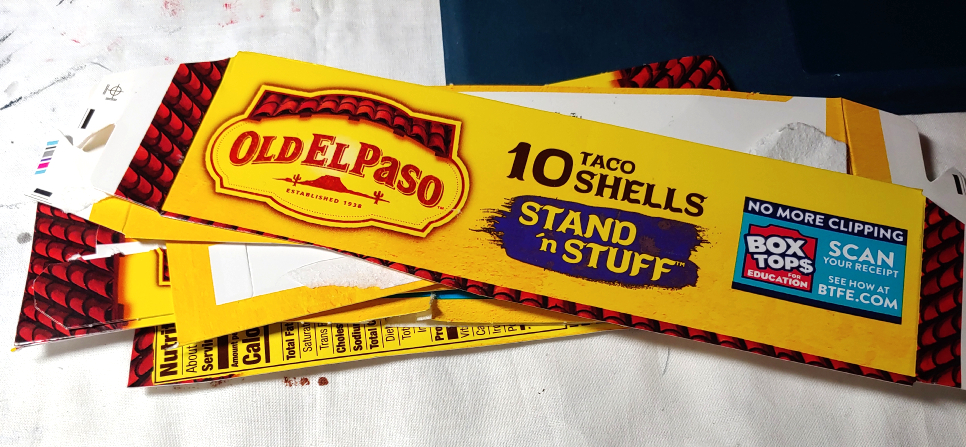
Taco boxes are my main building box (I eat a lot of tacos) but I’ve used everything from cocoa boxes to tissue boxes, chicken nugget boxes, and large soda can boxes. Anything that has that thinner food box cardboard to it. I keep a large bag of food boxes stored away just so I can make a base without buying any extra material.
Food boxes are also good for creating raised details and shapes. They can also be strengthened by taping heavy wire to the back and bent to hold a specific shape.

For larger pieces such as swords, axes, and the like, you want a big strong base, and the food box doesn’t quite handle these large builds. For this, you want a shipping box.
If you’re like me, you probably order a handful of things online. I tend to have a stack of Amazon boxes piling up near the recycle bin. These corrugated cardboard boxes are surprisingly strong and take well to paper mache. You can layer shipping boxes to create wider forms and even cut holes in them to make designs.
Shipping boxes don’t do well with small details, but you can cut some designs in them to make holes or large cutouts. You can layer on top of them with smaller food boxes to create details or “sharp” edges of an axe or a sword.
Shipping boxes need a box cutter or an Xacto knife to cut them without crushing the pockets in between the layers. To cut a shipping box, first score the box with your knife, cutting about halfway into the box. Retrace that cut again, pushing the knife through the bottom layer and freeing your design from the rest of the box.
Other bases
But your base isn’t limited to just food boxes and shipping boxes. Sometimes you need another shape or something larger to provide extra support to your prop.
For small round shapes, toilet paper rolls and paper towel rolls provide a nice stable round shape. They’re also thin cardboard which makes them easy to cut with a pair of scissors and manipulate to the size you need.
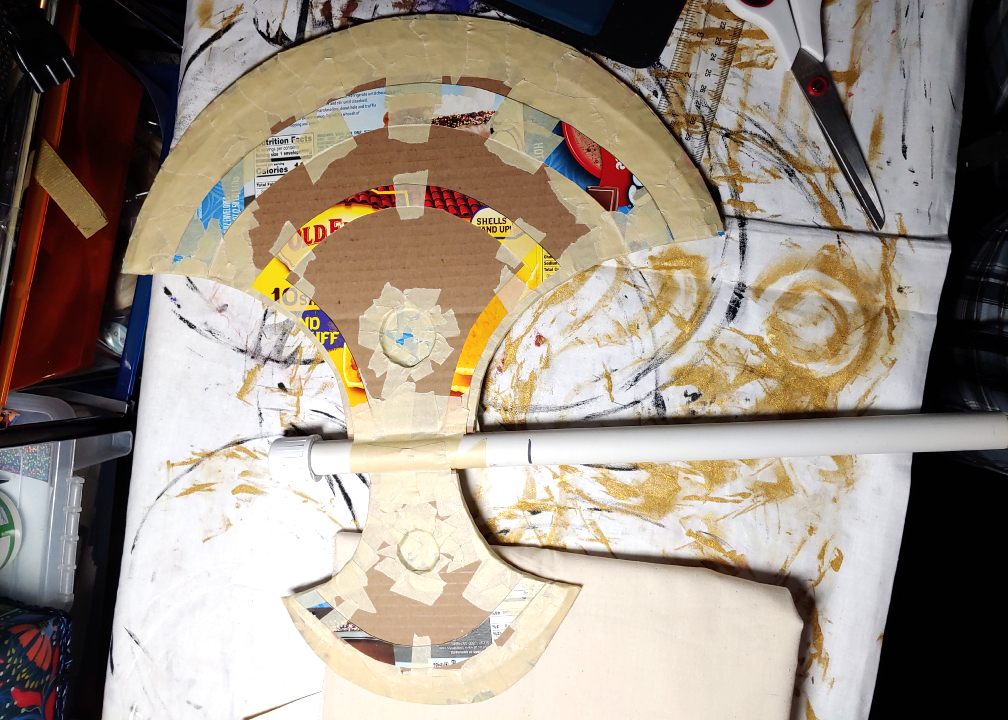
When you need something super strong or larger for a staff, an axe, or a large sword, PVC pipes provide great support. PVC pipes take well to paper mache and can easily be built on using boxes as the base. You can buy PVC pipes at a hardware store and use a pair of pipe cutters (get the ratcheting kind to make cutting easy!) to trim the PVC pipe down to the size you need.
You can also use more unusual bases for your props and accessories including plastic holiday ornaments and glass bottles. If glue can stick to it, you can paper mache it!
Contours and volume
Not all projects will be as flat as a sword or axe or smooth as a watch. You might want to add more organic shapes to your prop or accessory. The best way to get volume and contours is aluminum foil. Yep, that same stuff you use in your kitchen. You can buy it in bulk in a number of places, and if you’re planning on doing a project with a lot of voluminous details, you want a rather sizeable supply.

Densely packed aluminum foil works great as a base, and covered with tape, paper mache sticks to it no problem. Rolled foil can be used to create sharper edges while wadded-up foil can create larger shapes and more gentle slopes.
Taping it up
While you could just paper mache a singular piece of cardboard, you’ll likely want to layer pieces together or form more complex shapes. If you’re using foil layers, you’ll need to cover them up completely with tape else the paper mache won’t stick to them.
The best tape is masking tape. It’s cheap, easy to work with, and best of all, not waterproof. Glue will not stick to anything shiny or waterproof, and we need that glue for the paper mache. So get a nice big roll of masking tape at a hardware store since you’ll need a lot of this.
Paper choices
You can’t do the paper mache without the paper. Since it needs to work with glue, you need a specific type of paper – non-shiny and uncoated! That’s really about it. Newsprint works best, and you can use a newspaper from your front porch, a phone book, or even that weekly ad you get in your mailbox. When touching it, make sure that the paper does not feel slick.
For mine, I purchased a stack of uncoated newsprint online for pretty cheap. But if you want a budget option, use that weekly ad instead of recycling it!
Paper mache techniques
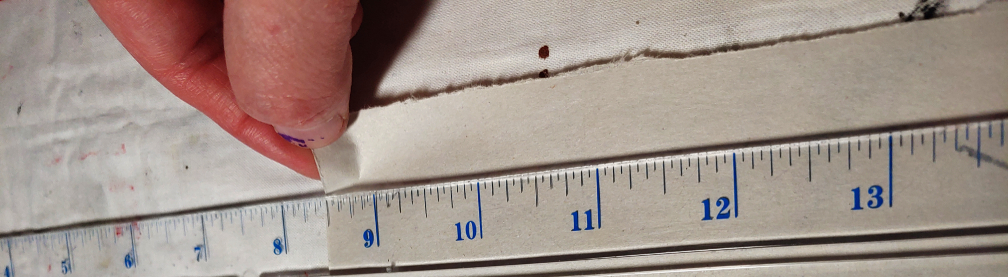
After building your base, it’s time to stick the paper down to the cardboard and tape. Before you do that, however, you need to make yourself some strips. The easiest way is to stick the paper underneath a ruler and use that to tear strips off. You can trim the strips down a bit more as needed once you are placing them, but to start, make yourself a pile of strips.
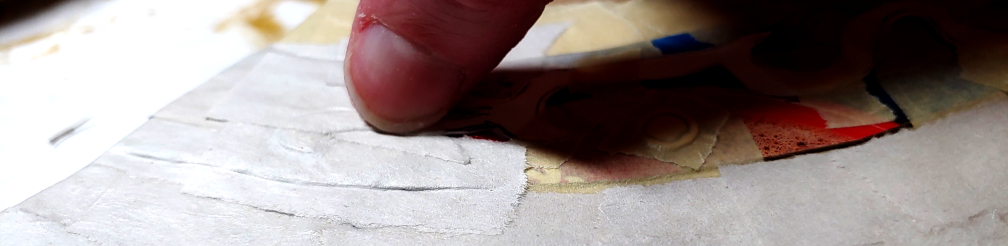
Once you have a pile of strips, grab a towel for your fingers. It’s time to get messy. Pour some of your mixture into a bowl and dip your fingers into it. Rub the glue onto the base where you want to stick the strip, then place the strip. Get some more glue then rub your fingers over the paper to create a glued bond, to press down the edges, and to help remove any wrinkles.
And that’s the basic technique, pasting strips down onto your base and gluing them down with your fingers. Your fingers will get sticky after a while, so make sure to wipe them off to keep the paper from sticking to you instead of your work.
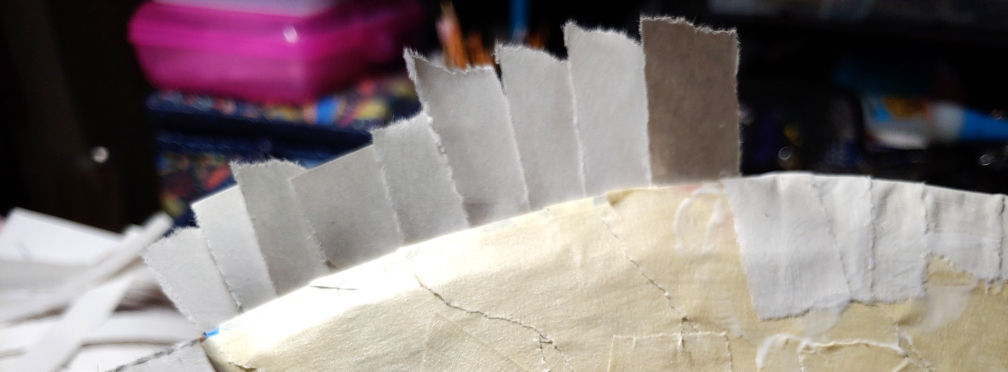
If you are working with curved surfaces, you can make notches in the paper, overlapping the paper at the cuts and creating a curve. For complex curves, cut the strips thinner or shorter so you have more control over how the paper sits.
After about 15 minutes, the paper mache is good to handle or add another coat, but you want at least 12 hours for the paper mache to fully dry and cure before painting, sanding, or adding details.
Wrapping over edges
A project may require you to glue over an edge. Whether this is the edge of a box or a curve of a blade, you want to wrap your strips over the edge to avoid any gaps in your work. You can work one of two ways with edges:
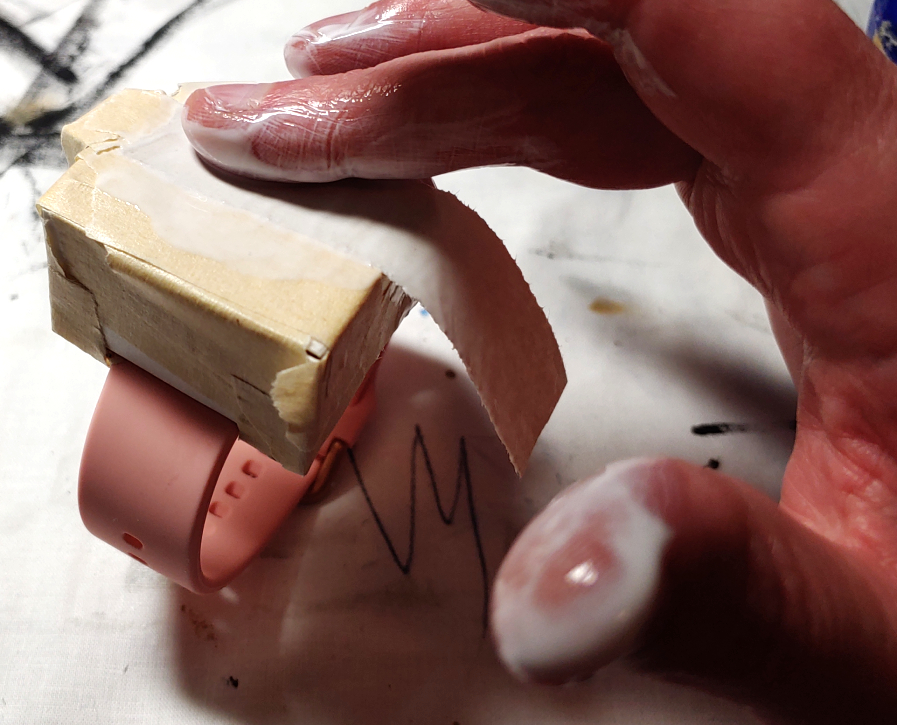
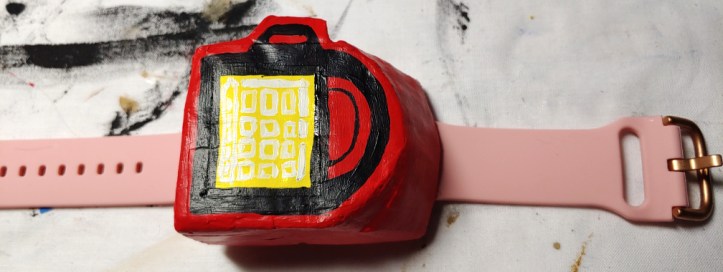
First method is to glue each strip in one go. Much like with the watch above, glue the strip to one surface first, applying glue to the paper on top and smoothing out the edges. Once that’s in place, rub the glue on the joined side and wrap the strip down snugly against the edge and rub the glue on the strip, securing it in place.
Second method works best if you find yourself attempting method one and having to flip your work over repeatedly. This includes things like sharp edges and thin objects like the edge of an axe or sword. For this method, glue only one side, leaving half the strip to hang over the edge. Once you’ve glued the entire side, flip your object over and wrap the paper to the other side, gluing the paper down and smoothing it out with your fingers.
Making details shapes
If you’ve added raised details or indentations, you want those to be visible and crisp when adding the paper mache. Fortunately, you are working with paper, so it has a certain flex to it when gluing it down. It can be manipulated with your finger alone.
If you have slightly raised or indented details, press your fingernail firmly against the cardboard details, pushing the paper into the small edge formed by the cardboard.
For deeper designs, the method is much the same. Use the back of your fingernail to push the paper into the designs and to make it lay flat against the surface.
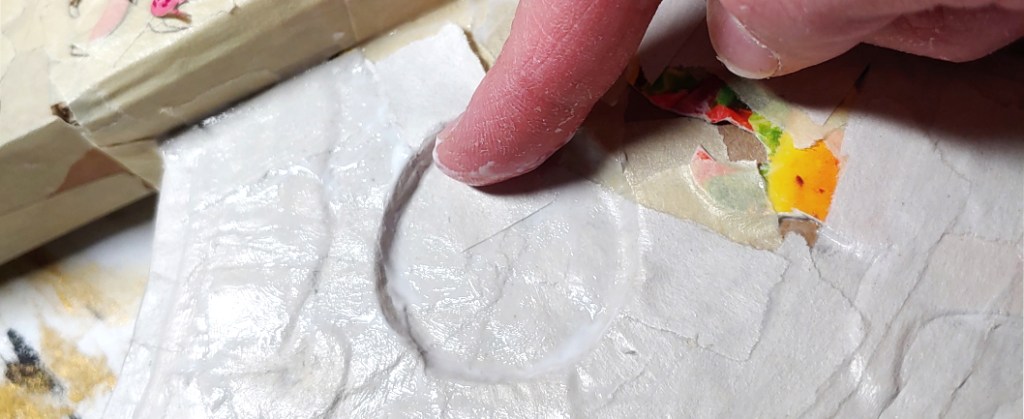
Your fingernail makes a hard surface for pressing paper into details without ripping the paper in the process. You will need to clean your fingernails off every so often as they will become coated in glue for this process.
Sanding it smooth
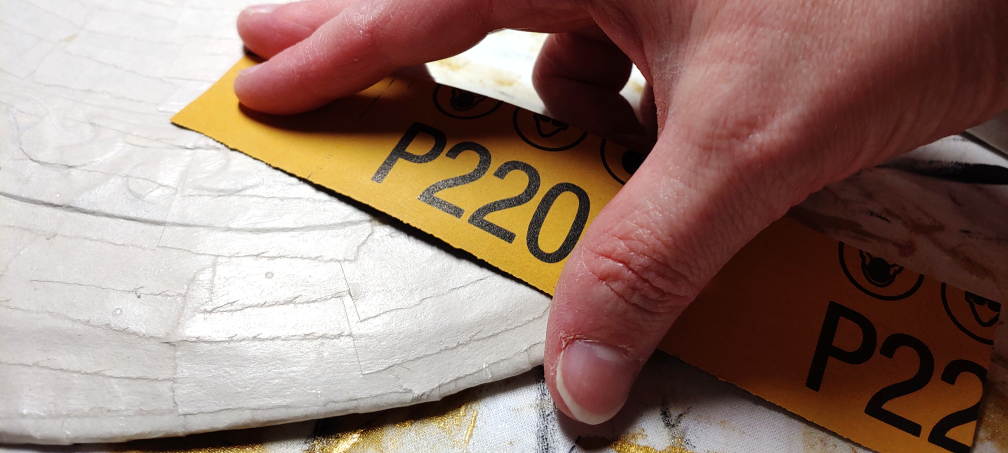
While you could jump right away to paint your creation, sanding it will make a smooth surface and reduce the noticeable edge of the strips. You cannot completely remove the edges without also removing the paper itself, but you can make them less noticeable.
The best paper for this is dry sandpaper, 220 grit. The super fine grit helps remove any bumps and edges in the paper while not chewing at it like a lower, rougher grit would. This process produces a lot of dust, so make sure to work in a safe space and over a place easy to clean. If you are sensitive, please wear a dust mask.
Cut a strip of sandpaper off the sheet and rub the sandpaper over the paper mache a few times. You won’t be able to see a difference. No matter how much you rub at this, it will always visually stay the same. But to know if you’ve smoothed the edges out, you can feel it. The roughness of the edges will start to diminish with a bit of rubbing. When you rub your fingers over the surface, it will feel relatively smooth.
Use smaller strips for more detailed sections or smaller props and larger strips to cover more area on larger props. You will go through sandpaper quite quickly. The easiest way to tell that you need a new piece or to move further down on the strip is by flipping it over and checking the color. If it starts to look like it’s completely coated in paper dust, then move to the next section.
Continue working throughout your entire prop. If you have a large prop or accessory, this may take some time, but the effort will be worth it.
Extra details
Sometimes you want to add extra details to your prop or accessory that cannot be made with paper mache. Like teeth!
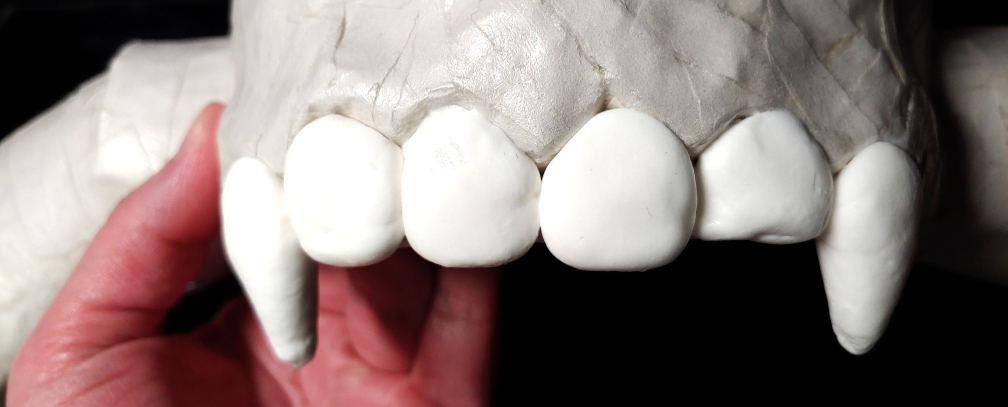
Generally, anything that will stick to paper will stick to paper mache. This includes things like clay, foamies, fabric, glitter, and a whole swath of other arts and crafts goodies. You can use these before or after painting depending on how you want to finish off your work.
Because this is paper mache, you can also decoupage materials to this. Fabric, other paper, and even string work as great decoupage materials for extra details to make your prop truly shine.
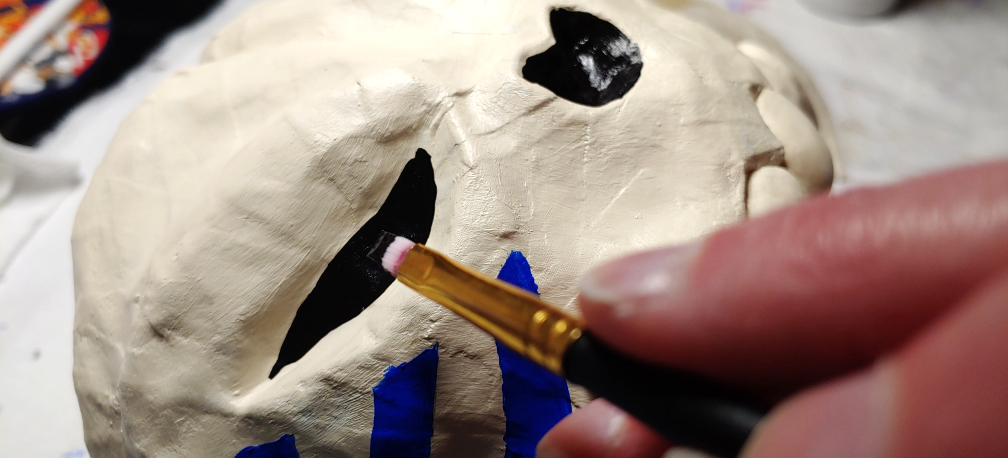
Painting
Because you’re using Mod Podge or glue, you don’t need to lay down a filler or base coat like you would with foam or plastic. Glue serves as a base in itself, sealing the porous lower layers and giving you a nice paintable surface.
If you’ve sanded a lot, you can brush a layer of glue or Mod Podge onto the surface to ensure there are no gaps.
But for the most part, you can start your painting right on the surface. You can use any method you like. I personally like to paint everything by hand using a brush or a sponge, but airbrushing and spray paint are good too! Whatever gets the paint on the surface works!
Once done, make sure to seal your work using a sealant (or Mod Podge!). This will protect your work from the bumps and scrapes of a con, and cons will always find a way to attempt to scuff up your hard work.
And after that, sit back and admire your work. You’ve made arts and crafts into cosplay.
I hope you enjoyed this rundown of how to work with paper mache. It’s a great medium, super cheap, easy to work with, and lightweight. I’ve made a number of props and accessories with paper mache, and they survive flights and conventions just fine. I also hang them on my wall like decorations or add them to my display shelf.
I’ll have detailed tutorials up soon as I make things so you can put these techniques to good use.
Let me know what you start making! @ me on social media so I can admire your hard work.

Loved reading this info! I am trying to make a cobra snake that is about 6’ long. I am wondering if I can attach the hood of the snake after I have paper mache’d the snake body. I would then paper mache the hood after I attach it to the snake body. Is this something I can do?
LikeLike
I think it would be possible, given that you had some method of attaching the hood. Wire, tape, something that can be secured when you work. You can paper mache the joint between the hood and the body to make it strong. That’s the way I’d approach it.
LikeLike
Thanks so much! It worked!Sent from my iPhone
LikeLike