I’ve wanted a Poketch since Pokemon Diamond & Pearl first came out for my Dawn cosplay. I made several attempts with it, but honestly why overcomplicate things? Sometimes the simplest materials work the best! So I turned to one of my favorite arts and crafts methods: paper mache.

Paper mache is a great method to make props lightweight and con safe, and most of the materials I already had around the house or from other projects. And best of all, paper mache is budget-friendly!
I strongly recommend using a glue mixture for your paper mache, as it is resistant to water damage. The glue also seals the paper and primes it for painting. Flour mixtures are susceptible to water and heat and may come apart after some time.
If you want to know more about the basics of paper mache, check out Paper mache for props and accessories.
Cost: budget-friendly
Skill level: beginner-friendly
Materials:

- Watch band. Any type will do as long as it fits your wrist.
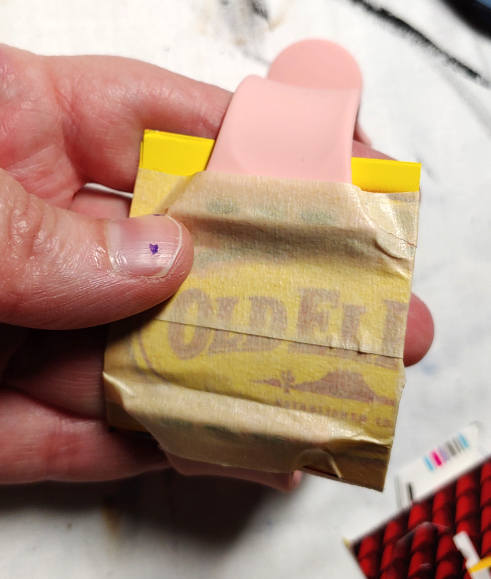
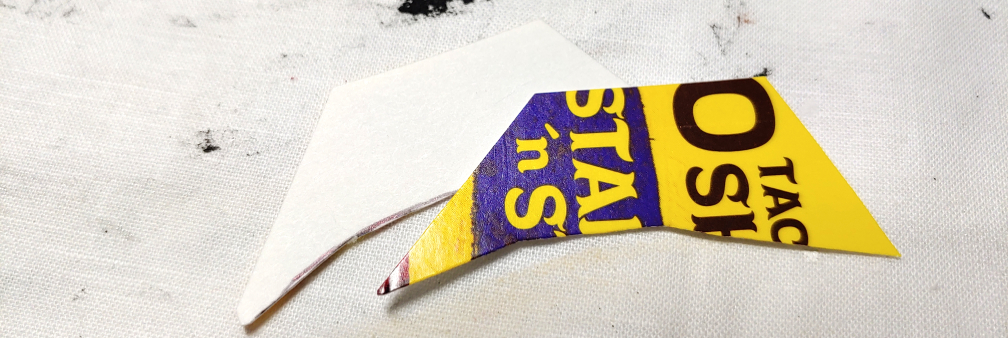
- Food box, empty and clean. I used a taco box.
- Newsprint. You can buy newsprint or use the weekly junk ad. Make sure it is not shiny else the glue mixture won’t stick
- Glue mixture. One of the following:
- Mod podge, gloss or matte, not mixed with water
- White school glue and water, mixed 2:1
- Acrylic paint in Poketch colors (they come in multiple colors, so take your pick)
- Gloss varnish. Can be Mod Podge or other varnishes. My favorite is DecoArt Gloss.
- Masking tape
Supplies
- Small bowl or dish for glue mixture
- Paper towels (you will get messy)
- Dry sandpaper, 220 grit (recommended)
- Protective covering for your table. Tablecloth, plastic, or scrap fabric
- Scissors for cutting the box. Don’t use the good fabric scissors
- Paintbrushes. Smaller paintbrushes are needed for details
Food box base
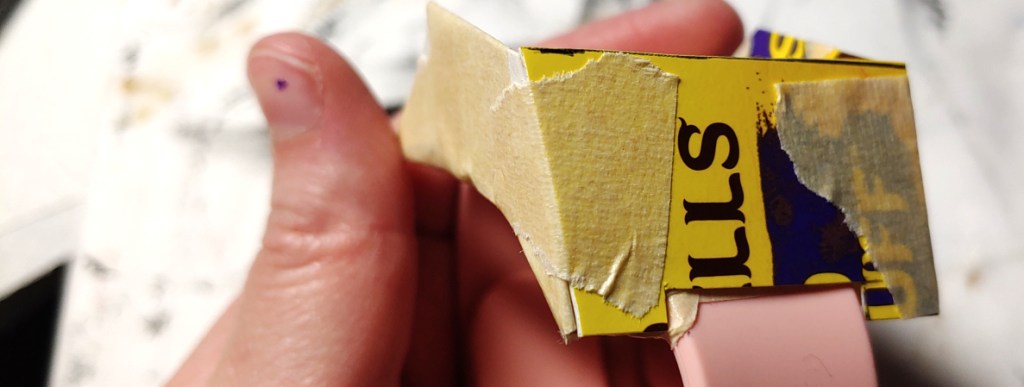
The strength of the Poketch comes from the materials used as the base. Cardboard is a great base, and a food box has the strength and flexibility needed to make the Poketch shape and hold it together. Food boxes are also a bit more moisture tolerant so when we’re slapping wet paper onto it, the whole thing doesn’t just cave in.
Creating a stable base
The stable base connects the two sides of the watchband and serves as the foundation for the entire Poketch. This can be one of the trickiest points, as you may have to do this one-handed. If you have helping hands, they can help you tape this part.
Buckle the watch band and wrap it comfortably around your wrist. The open ends won’t meet up, and we’ll need to add food box to complete the circle. Take a brief measurement of the distance with a finger or ruler and release the watch band. Cut out a square slightly longer than that distance and slightly wider than the watch band. Wrap the band back around your wrist and tape the band down to the box. It may take a few pieces of tape to get it to stay.
Once you have the base taped, remove it from your wrist and unbuckle it. Wrap the base and band a few more times with tape until the watch band no longer slips. We’ll reinforce it when creating the body of the Poketch but the band must be a stable starting point.
Building the body
The body will depend upon the shape of your wrist and how large your base is, but the general idea remains largely the same. It’s a large bulky watch with a curve along the underside to sit flat against your wrist. The bottom of the watch face is more curved while the top is more squarish.
Let’s start with the sides and build up from there. To get the shape that curves around your wrist, you can’t really stick food box on your arm and trace a shape. It’s too stiff. Instead, we can use the watch band itself to get a general idea of what the shape needs to be.
Buckle the watch band and set it down on your food box. The band will start curving a bit and give you a good idea of how the band sits on a wrist. Trace this shape then start tracing out the shape of the body.
The overall shape is a trapezoid, about 1-2″ tall. One side will be a more gentle slope than the other, and this side will serve as the curved section of the body. The back of the watch band is more straight up and down or with a slight slant.
Once you’ve traced out a shape, cut two identical pieces out. With the watch band still buckled, secure the side pieces to the base. The gentle slope should be attached on the side of the base that will be pointing towards your thumb. Make sure both sides are pointing in the same direction.

Once the sides are secure, place a piece of food box across the side that has a sharp angle. Mark with a pen where the box will sit and then cut the piece out. It should be close enough, but the tape can fill in any gaps you may miss.

Now you may notice the watch band in the way. If you have a wider watch band like I do, mark the width of the band and cut a small notched center out of the bottom of the box piece to make room for the band itself.
Tape the piece securely down to the rest of the watch body.
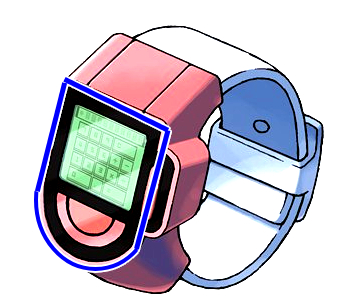
Next is the top. This will determine what kind of curve you want the bottom side of the Poketch to look like. The back of the Poketch is square while the front has a rounded shape. You can freehand this shape or use a round object like a lid or the bottom of a paint bottle to create the round shape for you.
Cut this shape out of a food box, taping it down to the back and side of the Poketch body you’ve created so far.
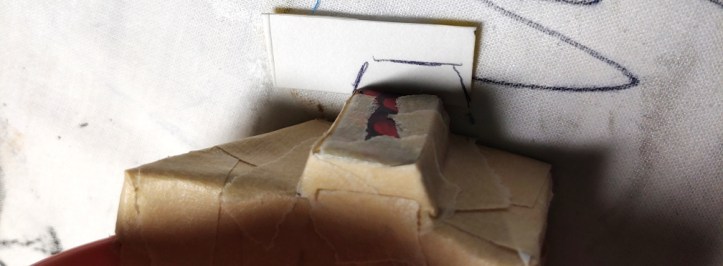
Next, we’ll create the rounded edge.

The bottom side of the Poketch is curved, according to all the designs. If you try to pattern that curved side with the box as is, the box might feel a bit stiff to you. But food boxes have a unique quality to their cardboard which makes them ideal for paper mache bases. You can curve the box in your hand and still have the box retain a lot of its strength. If you did this with a regular cardboard box, it would collapse the core and your cardboard would dent.
To curl a food box, take it in your hand and start curling it between your palm and your fingers. You may need two hands to get it to start curling. You don’t need to curl it too much to give the food box the right curved shape. Just lightly curve it in your hand.
Once curved, cut a few strips from the box. Place one of the strips near the top of your curved edge. The top of the strip will hang over the face of the watch. Mark where the top of the face meets the strip and cut off the excess.
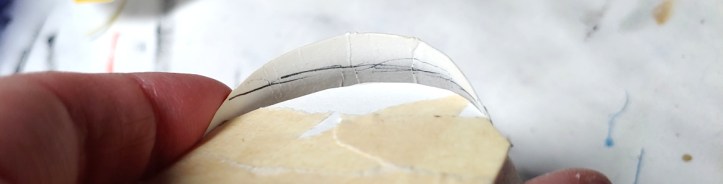
Trim the edges and tape the strip down along the sides of the base.
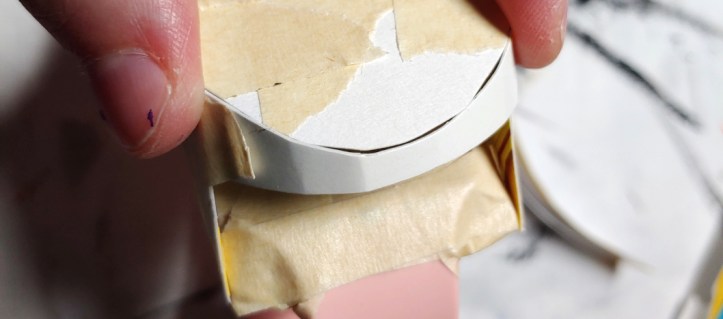
Tape the top of the strip to the watch face, filling in any gaps that may have been left behind from the difference between the strip’s angle and the watch face’s.
Continue filling in the front face with curved strips.
Leave a slight gap over the watch band to allow for shifting and movement while you wear the Poketch. Once the front face has been filled, tape the face with masking tape and fill any gaps near the bottom or the top of the strips.

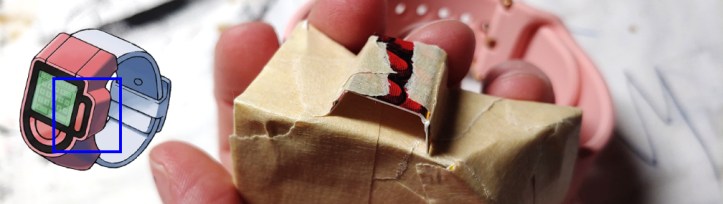
Making adjustments
While working on the Poketch, I found myself a bit unsatisfied with the more squarish side of the Poketch. I didn’t have enough real estate on the face for painting the Poketch designs. If you may find yourself in a similar such spot, you can modify the shape after building it. Modifying the curved edges may take some work, but modifying the back is going to be the easiest.

When making adjustments, the key is to pay attention to the angles. Since the watch face is the most visible part, it should stay relatively level and even, with no noticeable gaps or dents in it. The sides should have the same care to make them even as you patch pieces of box over the gaps, but any dents in the sides will be less noticeable than the face.
Once you’ve decided on the shape and built your form, use masking tape to stabilize the edges and joints.
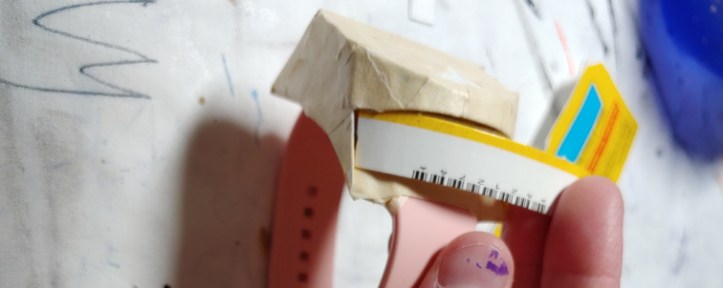
Adding the side buttons
The Poketch has some side button controls that stick out along the outside edge. Start by making a boxy shape along the side and taping it down. You can do this by creasing the box and folding it into shape or cutting separate pieces and taping them together.
The side button scales the entire side of the Poketch. This’ll help when making the caps. The bottom of the side button won’t be reachable, but you can lay the Poketch face-down on a food box to trace the shape of the side button. The top and bottom of the side button casing should be relatively the same, so cut this shape out twice.
Once traced, cut the piece out and tape it firmly down to the rest of the Poketch.
Paper mache
Finally, after building the base, it’s time to get dirty. Grab your paper, bowl, and glue mixture, and let’s paper mache this thing.

Many of the basic techniques are listed here in Paper mache for props and accessories, and the methods of applying the paper mache will be much the same. You want to cover the entire watch with paper mache, making it a solid watch. Avoid adding paper mache to the band itself as that can hinder the band’s movement. If you’re worried about accidentally getting any glue on the watch band, wrap the band with masking or painters tape to protect it
When working with the side buttons or smaller creases, use smaller strips. Push your fingers into the creases of the cardboard to push the paper inside the corner. This will give you a nice crisp edge.
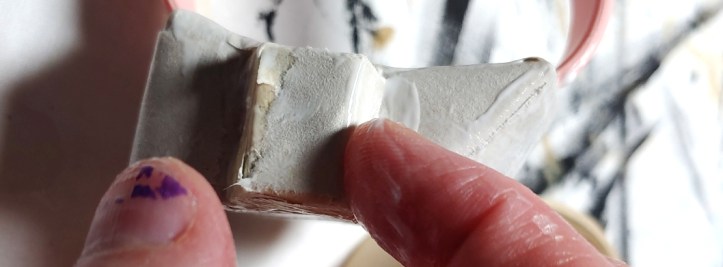
Once the entire Poketch is covered, let it dry overnight. You really only need one layer of paper mache, though you can optionally add another if desired.
Now a watch is smooth, not strips of paper, so sanding will help reduce the visibility of the paper edges. Cut a piece of 220 grit dry sandpaper and rub it along all the faces of the watch. You won’t see a difference visually, but if you run a finger along the edges, they should feel relatively smooth.

This process will produce paper dust, so make sure to work in a safe space, away from pets or kids or anything that can potentially breathe this dust. If you are sensitive to dust, please wear a dust mask!
If you notice any spots that feel more like paper after sanding, brush on some Mod Podge or glue mixture to cover them and protect them from the paint we’ll add next.
Painting
There are nearly a dozen different types of Poketch faces you can make and reflect the screen details from the game. For Dawn’s, I went with the concept art design with a yellow face instead of green to balance the colors with the red body.
As paper mache uses glue and Mod Podge to stick the paper down, you’ve already created a paintable surface. Glue acts as a sealant for the paper underneath, so we can get to painting right on top of it.
Start with painting a base coat. White is going to be the best color to start with since the screen and body tend to be lighter colors. Paint the entire body in one single color.

After the base coat has dried, use masking tape to section off the screen in the middle of the face. Cut pieces of masking tape into square shapes and place them about the middle of the square half of the Poketch.
Paint the body, painting right up to the edge of the masking tape. You can paint slightly over the tape as well. The tape will keep the face from getting painted.

Once dry, pick the masking tape off with a fingernail, carefully pulling it back so you don’t rip the paint. Since acrylics are plasticky, pulling the tape can rip the paint like thin plastic.
Paint the screen the color of your choice. The screen is generally lighter than the body color, so a little overlap into the body is fine. It’ll be covered by the border in a bit.

Next, draw the designs on the face. The border is a square around the screen and side buttons with some rounded details reaching down the rounded section of the watch face. They look almost like a Pokeball design. I honestly free-handed this entire design, but you can cut a template out of paper or use rulers to get the exact design you want.
If you want to shrink the size of your screen (I felt like mine was too big), now’s your chance. Draw the border inside the screen section to shrink it.
The border itself is a bold black. Use a smaller brush to get into the details, carefully painting up to the lines but not overlapping them.

Using a fine brush, you can optionally paint the screen details. The screens often show up as colored with white details on them. Using bright colors for the background makes it look like the screen is glowing.
If drawing your design, draw very lightly. Heavy marks will show through the white paint and are visible on the light-colored screen if you mismark somewhere. Use a pencil or lightly draw with a pen to make your guidelines.
For the concept art screen, I drew lines across the screen as guides then freehanded the rest of the squares. If you’re drawing a Pokemon or other shapes, lightly draw your guide before painting the design (unless you’re really good at freehanding, then go ham!).
Once the paint is dry, cover the entire Poketch with at least 2 coats of gloss varnish (or glossy Mod Podge) to seal and protect your paint. The Poketch is on your wrist, so expect to bump it multiple times at a con. The varnish protects your paint from scuffs and also makes it super shiny like a Poketch should be, even if you use matte paints for your colors.
Now enjoy your Poketch!

I hope you enjoyed this Poketch tutorial! Paper mache is a great medium for making a durable watch that lasts the entire con. Mine survived two days and a contest performance without so much as a dent or a scratch (and I bump into everything at cons).
Once you make your Poketch, you can also display it on a shelf or a jewelry hanger so you can show off your work and safely store it when not in use.
Let me see your Poketches! @ me on social media so I can admire your work.
