When I set out to make Noir’s axe, I knew I wanted to have a wrapped handle effect. It shows up in her artwork and is visible under her hand in game. The handle would need to also be grippable and not collapse while I’m holding the axe. So I turned to paper mache to make a solid base for me.

This axe has a little bit of weight to it, mostly because the actual handle is at the bottom and the axe head is clear on the other side. It’s imbalanced. It needed to be able to withstand a tight grip on it and not collapse, and foam handles have not cut it for me in the past. I’ve also had some trouble holding foam with gloves.
This axe survived a con and two flights to another state plus being hung on my wall, so I think it passes the durability test (and believe me, I am not gentle with my props).
Plus paper mache is a cheap, budget-friendly, indoor-friendly way to make props with stuff you already have in your recycle bin!
This tutorial not only covers the wrap but also how to make a cool angled end cap! The full tutorial for the axe will be up at a later date.
If you’ve never used paper mache before, I recommend checking out my starter tutorial: Paper mache for props and accessories
Skill level: beginner-friendly
Cost: budget-friendly!
Materials:
- long food boxes such as soda can, cereal, or tissue boxes. The longer your food box, the better
- PVC pipe, 1/2″ diameter, cut to length
- PVC pipe connector (optional if working with a segmented pipe). Works great for making sure the wraps are even
- Newsprint. You can use the weekly ad in your mailbox or a discarded newspaper. It simply must be non-shiny paper.
- Mod Podge (glossy or matte) or white school glue
Supplies:
- Scissors. Ones to use with paper. Don’t use the good fabric scissors.
- Ruler
- Pens
- Masking tape
- Bowl for paper mache glue mixture
- Something to protect your work surface
- Towel for gluey paper mache fingers
- Paints and paintbrushes
- 220 grit dry sandpaper
Making a fancy angled end cap

Completely optional, but it looks really cool. Noir’s axe has a fancy end cap on the bottom of the wrapped handle that curves at an angle. And if we’re going for a fancy wrap, we need a fancy cap!
Start by cutting a rectangle out of a food box, bending it slightly in your hands to make it more round but not crease the box material. The rectangle should reach the shortest point on the fancy end cap and wrap about halfway to 3/4 way around the pipe. Tape it down to the pipe.

Next, cut another rectangle of food box, This should reach the longest point of the end cap. Taking your scissors, cut a rounded section out of the bottom of the food box so you can tape the rectangle onto the pipe and the previous piece at an angle.
Don’t worry about the bump. The handle wrap will cover this. Just make sure it’s stable.
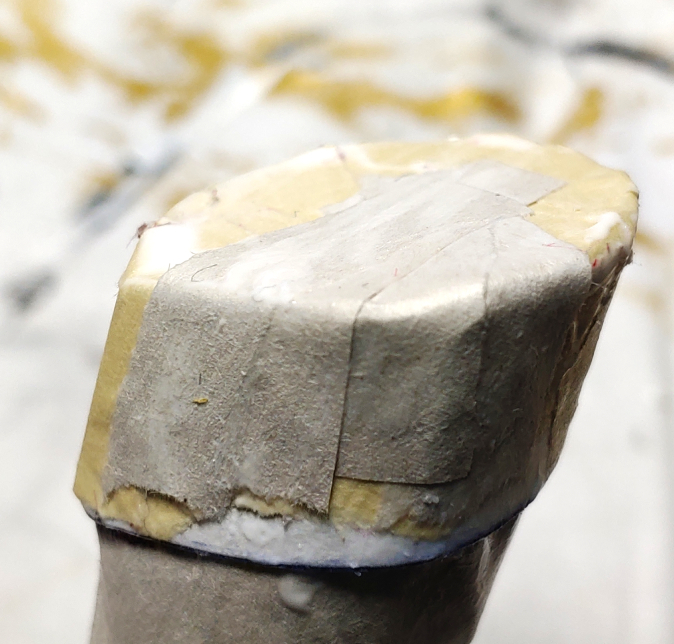
Now take your scissors and just cut the end at an angle, rounding the top off a bit. When you cut off the edge, it’ll make a point, and we want it to appear round.


Once you’ve created the angle of choice, cut a strip of food box around 1/4-1/2″ in width. Use your fingers to curl it before wrapping it around the open end of the cap. Cut off excess and tape the strip down to the rest of the food box. You’ll probably end up with a bump, and to make it less noticeable, tape the bump at the lowest point of the angle.
With the edge taped down, turn the cap open-side down and trace the shape onto the food box. Cut the shape out and tape it to the top of the cap to finish it off.
Creating the wrapped handle
Now let’s get to wrapping!
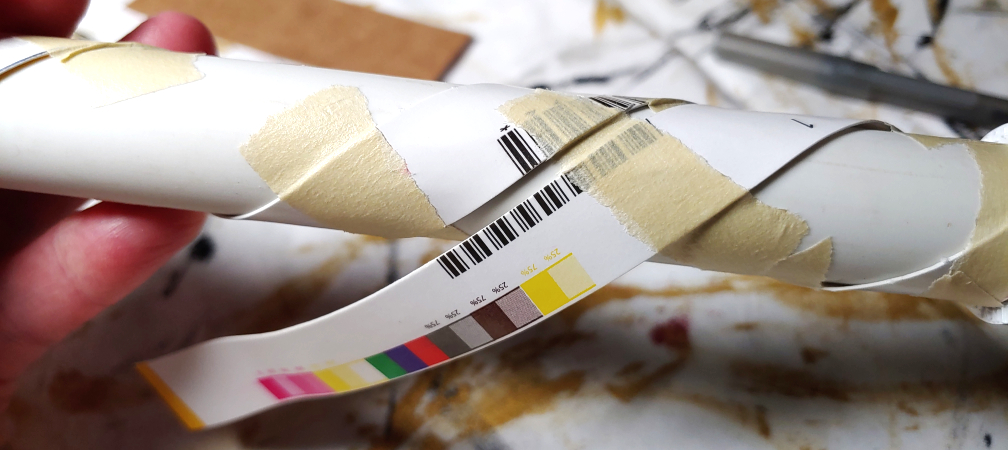
Cut several strips from your long boxes about 1/2″ wide. You’ll want 3 strips wrapped at the same time, but as you’re winding them around a pole, you’ll probably need at least 2 sets to finish the wrap. For each strip, pull them around your finger like curling a ribbon for gift wrap. This causes the box to slightly curl and makes it easier to wrap them around the pole.
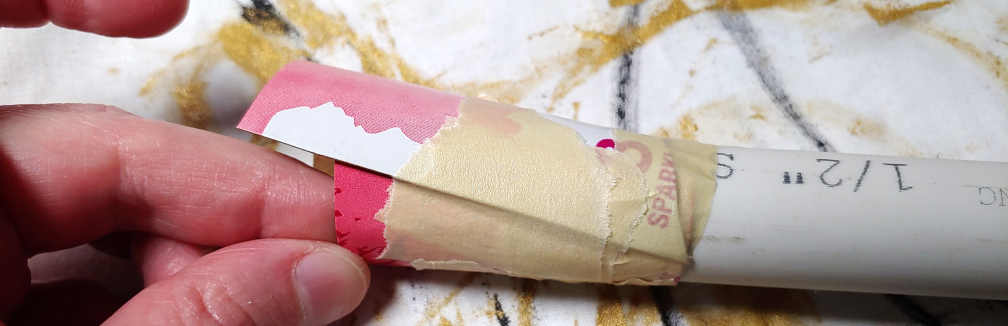
For the first 3 strips, cut about a 45° angle to sit flush with the Pipe connector. Tape each of the strips a bit apart to create a noticeable gap between the strips. This gap makes it look like you’ve wrapped the handle with fabric and creates a noticeable groove.
To get even strips and gaps, it’s best to wrap all three strips at the same time to make sure you don’t start wrapping closer and closer and run out of room. I did that the first time I tried to wrap my handle and halfway up, there was no longer room for the third strip. It’s much more reliable to wrap three at once.

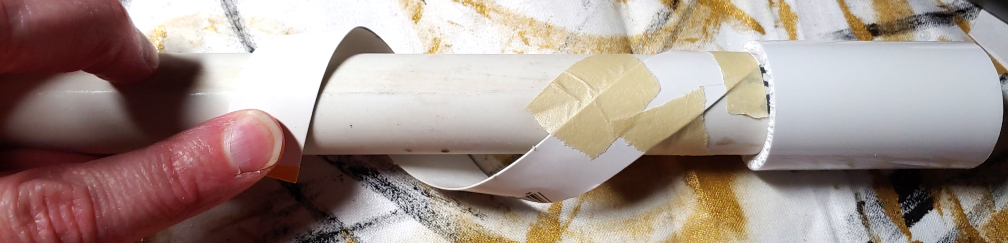
While wrapping the strips, work a small section at a time, taping the strips down one by one. Dig your fingernail into the tape along the side of the strip to ensure the tape isn’t noticeable when applying paper mache.
When working by sections, work on the side that’s visible to you first, taping down all 3 strips then rotating the pipe to move to the next section. If you run out of strip, tape the strip down then place the next one end to end with the previous. Make sure the two strips are sitting flush against each other and tape over the gap.
Once you reach the end of your handle, it’s time to finish off the strips. If you have a regular end cap or another PVC connector, simply repeat the process you started with. Wrap the strip to the cap and cut the excess at an angle before taping the strip down flush against the cap.
If you have an angled cap created in the previous section, wrap the strips around the handle, creating a slightly larger gap between the strips as you read the end cap. Tuck the end of the strip underneath the cap, cutting off the excess to make it fit then tape the strip down securely.

Once you tape the strips by the end cap, your handle wrap is now ready for paper mache.
Paper mache!
If you’re not familiar with paper mache or a recipe, I recommend my primer article, Paper mache for props and accessories. This will go over the basics like paper mache recipes and techniques to get you started. This project requires a few that aren’t covered here, so let’s talk about those!
Covering the end cap
When covering the end cap, because it is thin and round, you’ll want to use very thin strips to avoid creating pointed corners along the rounded edge. Short strips are going to be the easiest to control on such a small surface. I went with super short strips for the most control, the length of about the center of the cap to part ways down the side.
Paste each strip one at a time, working around in a circle. The direction doesn’t matter, but working around the circle instead of haphazardly means you cover the most surface with the least amount of work. Fully cover the top of the cap, pulling the strips over the side and pasting them down.

Once the strips fully cover the top, using some thin long strips, wrap them around the side of the cap to hide the edges of the strips and secure them.
You may need to layer the strips to get full coverage of the cap and cut thinner ones to fill in the gaps. These strips should fully cover the food box and the tape, giving you a strong, paintable surface for the cap. Overlap some of the strips to the handle wrap below, securing the cap down to the twisted wrap along the PVC pipe.
Covering the wrap
The handle wrap fortunately uses most of the techniques from the primer article. Long, wider strips work best for covering the wrap because you can work in larger sections at a time for a longer handle.
When covering the wrap, cover one food box strip at a time, gluing the paper strip down to it then using your fingernail to push the paper up against the edge of the food box. Continue gluing the strip down and pushing the paper into the gaps to create the wrapped pattern.
I found that working vertically from end cap to end cap was the easiest. You can feasibly follow the wrapped angles, but sometimes getting into those gaps can be difficult when the paper and designs match the same direction.
Drying and sanding
Paper mache takes about 12 hours to fully set and dry before you want to finish it. Best way to not get antsy about drying times is to leave it drying overnight. Prop it up onto something like a display rack or cups or something so that air can fully flow to all sides of your handle. You can set it down on things after about 15-20 minutes, but it’s best to dry it fully with that airflow. If you cannot prop it up onto anything, rotate the prop every so often to allow the glue to fully dry.
Now the trick to making the paper mache look like something else is to give it a proper sand. 220-grit sandpaper is going to give you the best result and smooth out the paper edges without chewing up the paper and removing it.
Check out the primer article for the best sanding techniques and practices! Paper mache for props and accessories Make sure to work in a safe space as sanding does produce dust!
Painting
After you’ve sanded and primed your surface, it’s time to get to painting. Glue and Mod Podge actually work as a great sealant for the paper underneath, so you don’t need to do any extra prep work before painting. The sealant protects the paper and prevents the paint from seeping into the porous layers below.
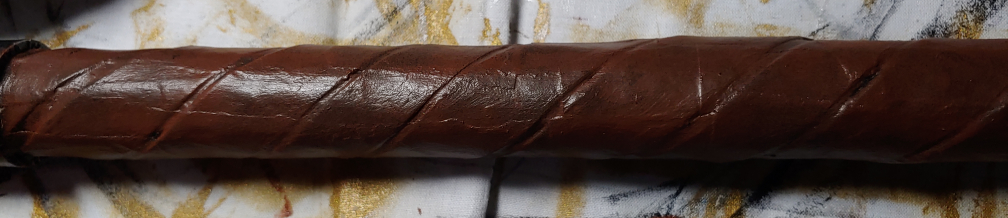
You can use whatever painting technique you want to get the paint onto your handle. For Noir’s axe handle, I wanted to make it look more like worn leather as if she’d used it repeatedly while exploring Mementos. I also like the more weathered look instead of plasticky look in general. For this technique, I used my favorite sponge technique, Painting weathered metal with a makeup wedge. The base color is black, painted with a paintbrush, then the top layer is a chocolate brown with a little black mixed in, applied with a makeup wedge. The result: worn leather.
Once you’ve painted your axe handle, you’ll want to seal it. Cons are notorious for dinging up your paint job, and you’ll be handling this handle a lot during the con. So protecting the paint is super important. Use a matte varnish to keep the handle looking more like fabric than metal. Matte Mod Podge works great if you need a cheap varnish (that you probably already have for making paper mache!)
Brush or sponge the varnish on to protect your work. If you used the weathered technique with the makeup wedge, you’ll want to sponge the varnish on. Otherwise, a brush should be fine. You can additionally use spray varnish if that suits your project. Use about 2-3 layers to fully protect your work.
And that’s it! You now have a wrapped handle!

I hope you enjoyed this tutorial on wrapping your handle and making a fun custom end cap to go with it! This is a nice cheap alternative to wrapping foam or other materials and is really easy to grip as well. I had no problem gripping the handle with slick satin gloves for an entire con.
Let me know what sort of wrapped handles you make for your cosplays! Show me your work, I want to see it! @ me on social media so I can admire your work and your paper mache adventures.
