When I started making props and accessories, I needed a way to make metal actually look like metal even though it actually was plastic, EVA foam, or unusual materials to fake metallic pieces.
My first paint jobs looked like fake plastic with a bad metallic paint job. There were issues covering the base coat (when I actually used one), and the process took a bajillion layers of metallic paint. I needed something new. So I relied on old arts and crafts techniques.

There are a few things you could use, but I find that makeup sponges, those wedges you find in the makeup department, give you the best results. They’re apartment-friendly, budget-friendly, and easy to work with. You don’t need any special equipment, ventilation, or space requirements. And this technique works with metallic paints, matte paints, and even gloss sealant.
Let’s fool people into believing that your foam and plastics are metal.
Skill level: beginner-friendly
Cost: budget-friendly. You can start for around $20USD
Materials

- Something to paint
- Primer of your choice. If your painted object needs to bend, you’ll want something flexible like Flexbond or Plastidip (make sure you have an outside area for this one). If it doesn’t, you could go with Mod Podge, wood glue, or various other easy-to-find primers.
- Black acrylic paint
- Top coat color acrylic paint + any contrast colors you need
- Gloss finisher. My favorite brand is DecoArt. Get a big bottle from JoAnn with a coupon.
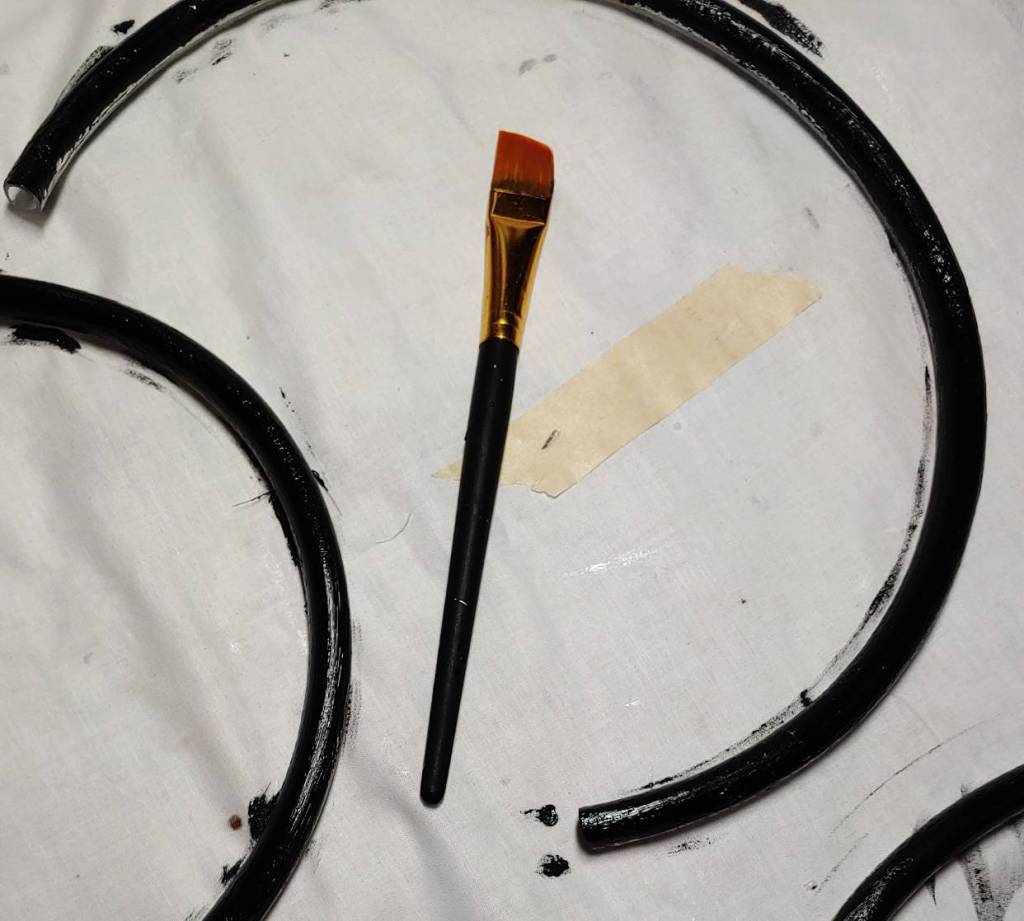
- Wide paintbrush
- A package of makeup wedges
- Paint bowl
- Masking or painter’s tape (optional)
This technique works for anything hard or that has a solid surface. This includes plastics and EVA foam. It won’t work for soft things like fabric. You can use this technique for accents, accessories, weaponry, props, and everything in between. Anything that needs to look weathered.
Base coat
The key to proper weathering is the color of your base coat. Having a dark base will make the metallic topcoat look weathered or worn like the prop or accessories have been used and aren’t new and made of cheap plastic. Black paint seems to work best.
After you’ve primed your object with the primer of your choice, you’ll want to coat your entire object with black. Brush it on with the paintbrush. It generally takes one or two coats to fully cover the object and this hides different color foam or materials and any markings left on the surface from the construction process. Registration marks, piece labeling, glue stains. The base coat hides this and makes everything one solid color.
Masking
Painting with a sponge is a messy process. If your object has multiple top colors with distinct lines, masking lets you work on one section while protecting the others and not getting the paint all mixed up. This isn’t necessary for all projects, but for things with multiple non-overlapping colors, masking saves you a bit of a headache.
To mask, you need masking or painter’s tape. This type of tape is gentle on your unfinished paint. You still want to be gentle when removing it, but it tends to leave your paint job alone while working.
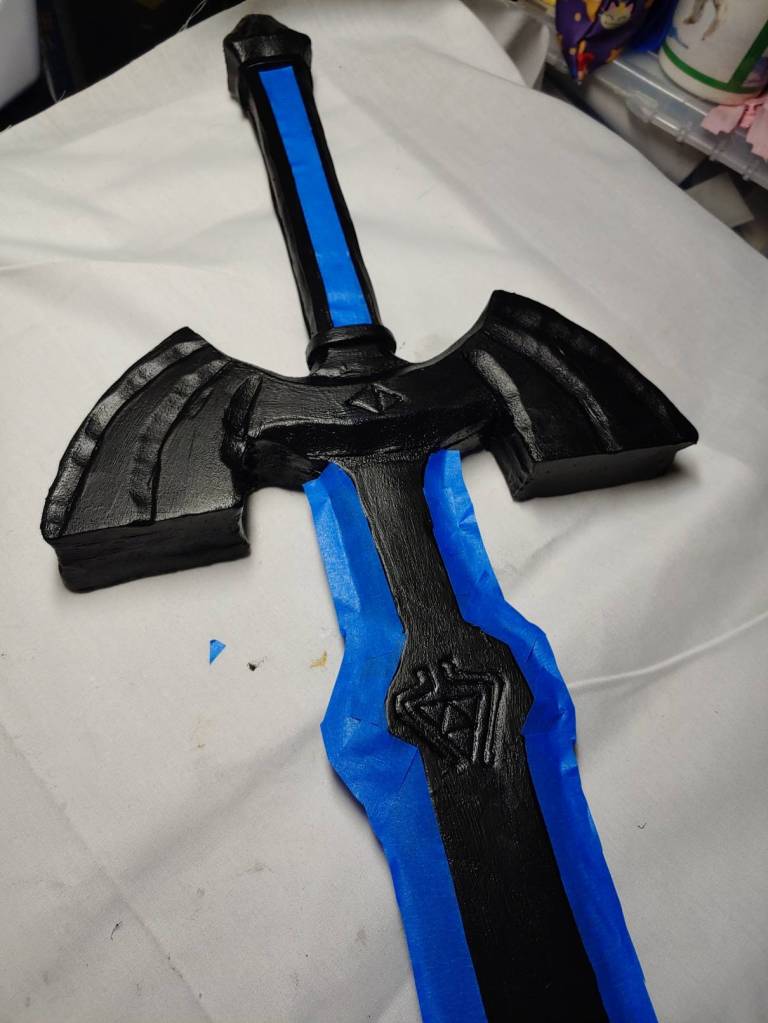
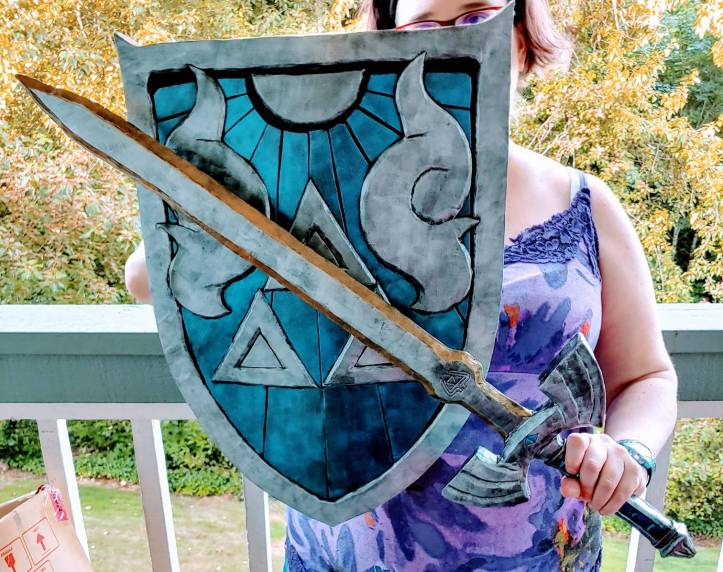
When masking, straight lines are the easiest, but straight lines are pretty rare. Even my swords tend to have nonstraight patterns, like my Master Sword and the geometric design on the blade. This means you’ll need to get a bit creative when you’re masking designs. The easiest way to do this is to use smaller strips, cutting them with scissors until they fit the shapes and curves properly. The smaller the design, the more you’ll need to cut the strips to properly protect your project
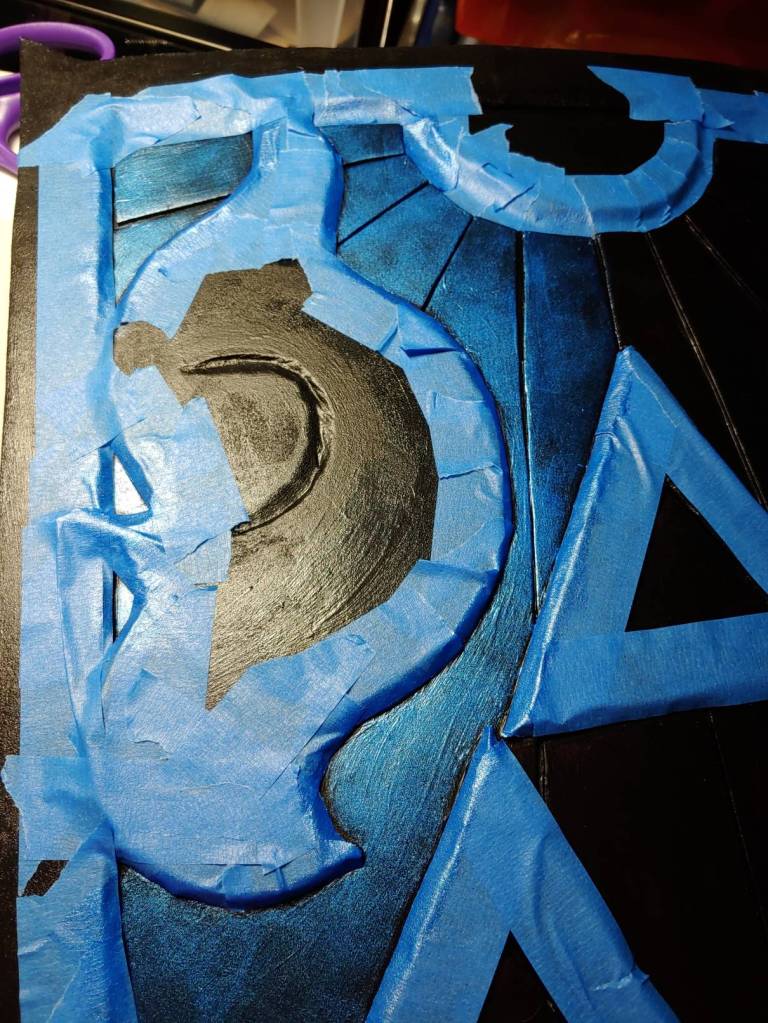
When covering spaces to protect them, you may not need to cover the protected space completely. If it’s a very large space, then you only need to cover the edges wide enough that you won’t paint over it with the sponge. The width of the tape is generally wide enough.
With smaller designs such as with daggers or accessories, you’ll likely be covering the entire protected space to ensure you don’t paint in the wrong location.
If your protected space is raised, you may want to wrap the tape down the side of the raised section as well. This ensures that the side of the raised section is the proper color when you’re doing with all your painting.
Dabbing the top layer

If you’ve never painted with a sponge before, it’s a bit different than using a paintbrush. You don’t slather the paint on the sponge and drag it across the surface. That creates odd streaks, and with the texture of the sponge, dimples. Instead, it’s best to dab.
Since you want a very light dimple effect to make that weathered look, you want only a bit of paint on the sponge, just enough to coat the bottom. The square bottom on the wedge is the best surface you have to work with. Dip the sponge into your paint and make sure there’s enough to work with. Then wipe the sponge on the side of the bowl so only a thin layer on the surface remains.
If you go at this method with a sponge doused in paint, it’s going to leave some sections more covered than others. It becomes visually jarring as one section is brighter and more vibrant instead of being weathered and worn. Keeping the amount of the paint on the sponge consistent will help make that weathered look believable.

Now it’s time to dab. Dab like you’ve never dabbed before. You don’t have to be gentle with it but you also don’t want to smash the sponge onto the surface. Smashing creates weird brighter sections when you drop too much paint on the surface. So dab reasonably lightly.
You’ll notice your first dabs aren’t even. some sections are thinner and others show the line of the sponge edge. The first pass is never dabby enough. In general, you’ll want to repeat this dabbing 2-3 times to get a full even coverage of the surface and remove all the odd lines that indicate you used a sponge instead of actually beating something up over time. 2-3 times is enough as that gives you the best coverage and at this point, you’ll need to put more paint on the sponge and move to the next section.
That’s it. You don’t need 11908764357 layers. Just 2-3 passes with the sponge are enough to paint the metallic paint and make it look weathered but shiny. This works even with cheap $1 paints which when using a paintbrush literally do take 1089735896 layers to actually get a proper shine to them.
The dabbing method leaves a pretty thin layer of paint on the surface, so you’ll want to do the entire section of a prop or object to prevent one section from drying too fast. If you start overlapping dry sections with fresh wet sections, those weird brighter sections will show up. Like in the gif, I did the entire strip in one go before I considered setting down the sponge to leave the table or to let it dry.
Speaking of drying, if you need to paint more than one side, dab one side at a time. The paint is very thin so if you turn over a prop before it dries, then it dries against your protective surface, it will rip that paint right off, often taking your base coat right with it. Avoid headaches and let everything completely dry before rotating the object to paint other sides.
If you’ve painted using masking, make sure to remove the tape after the surface has completely dried. Make sure not to leave the tape too long because it has a tendency to pick up base coats, even if it says it never will.
Repeat the mask and dab for as many colors as you need to do.
Sealing
Never do a paint job without the proper sealant and topcoat to protect your lovely work. Cons are notoriously rough on anything painted, and one little bump can ruin your entire paint job. This method is especially susceptible to scuffed and removed paint because of how thin the metallic layers actually are.
Gloss sealant works great to not only protect your work but also to make the paint look shiny and more metallic. Even weathered weaponry or accessories have a certain shine to them since they’re metal. If they’re super weathered or tarnished, you may want to use a matte sealant instead, but that tends to work best for more natural-looking materials like wood.
Regardless of which sealant you use, the sealing method is the same. You cannot use a paintbrush for this process as the dabbed paint is too thin. A paintbrush will take the paint clean off your object. Instead, we’ll need a clean sponge to apply the sealant.
Much like you did with the paint, pour some sealant into your paint bowl. Dab the square side of the sponge into the sealant. However, instead of wiping off the excess, only wipe off a little bit. You want your sponge to be wet for this.
Stabilizing your prop, rub the sponge over the paint. Don’t rub too hard as you’ll lift the paint off, but just enough that the sealant is applied. Some of the paint will inevitably come off and be absorbed by the sponge, but it won’t be enough to ruin your paint job.
If you have raised accents, you may notice sealant pooling around them. While the sealant dries clear, you’ll want to address those spots. After you’ve rubbed the sponge over the section and gotten most of the sealant onto your work, dab the sponge over the raised sections to absorb the excess and remove it.
Repeat the sealing process 2-3 times. This ensures you haven’t missed any spots and that your work is doubly protected.
And there you have it! My method of weathering using a makeup sponge and only thin layers of paint. I use this for pretty much all my props and accessories to give them a more used look and even to accentuate details or damage I add to my prop.
I also use this to imitate non-metallic objects such as bamboo hats or weathered wood. It’s also good for getting non-metallic colors onto a surface where painting would take far too many coats. It has a lot of possibilities and I hope it can help you with painting too!
If you paint something using this method, @ me on social media. I’d love to see what you make!
