When thinking of paper mache, a 4′ axe isn’t what most people think about first. Neither did I, honestly, but I wanted to make an axe for my Persona 5 Noir cosplay, and it’s way too cold for working with foam in the middle of winter. I needed something lightweight, that could be broken into segments for a flight, and was indoor-friendly to make. So I turned to my favorite medium, paper mache.

This project costs very little, totaling about $15 for the whole thing, and even less if you have all the supplies already. The advantage of paper mache is that you can use a lot of materials you already have. I pulled boxes out of my recycle bin to work on the project, only purchasing materials for the pipe. It’s a very accessible option that requires very few tools to make, great for budget-friendly cosplay!
I had all the materials I needed from the recycle bin and leftover from previous projects, so this project actually cost me a nice fat $0 to make.
Noir’s axe has a lot of details and accents. This tutorial covers not only how to make the base designs but also design details, segmenting the pipe, and other accents. This tutorial links to several other pages as well to keep the tutorial from getting longer than an RPG. Your project may not require all of these, but hey, why not make it fancy? Just because it’s paper and cardboard doesn’t mean it needs to be boring.
This is a bit of a long tutorial, so buckle up. It’s time to prepare for Mementos.
Skill level: beginner-friendly
Cost: budget-friendly
Materials:
- 1 PVC pipe, 1/2″ diameter. Get this at the hardware store for a cheap budget option
- 2+ straight PVC pipe connectors (optional to segment the handle)
- 1 PVC end cap
- 1 medium shipping box like an Amazon box for a solid axe head base
- 2 long boxes, like a soda box or a tissue box, for the square accents beneath the axe head and the handle wraps
- 2 large food boxes such as cereal boxes for the axe blade
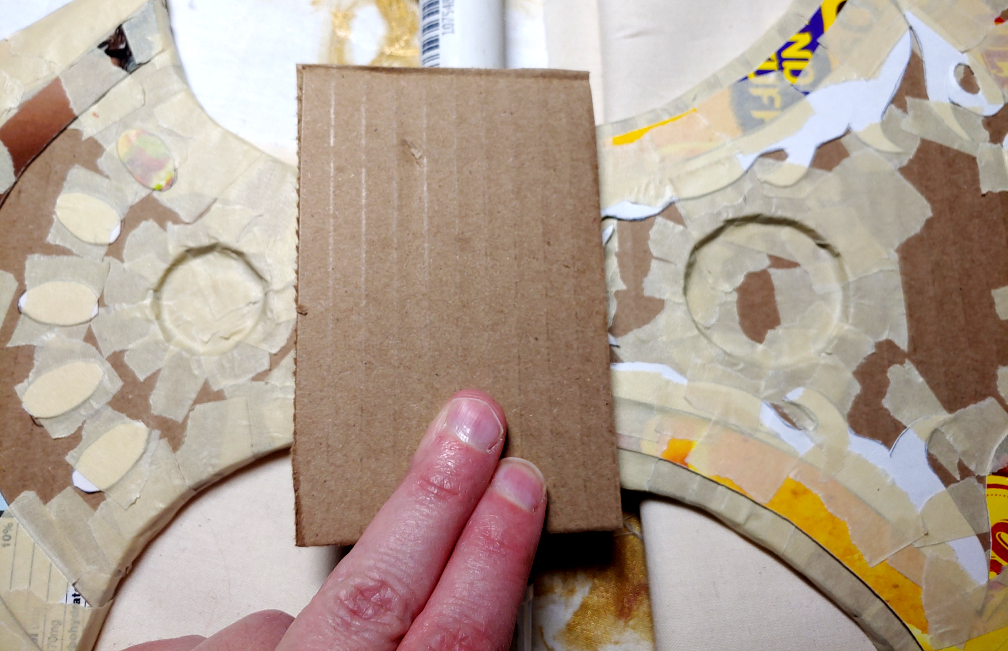
- 4 small food boxes for detailing
- Several sheets of newsprint paper. You can use the paper ad in your mailbox or an old newspaper from your front step or buy newsprint. Make sure it’s non-shiny paper!
Tools and supplies
- Poster board and pens/pencils for drawing templates
- Scissors for paper (don’t use sewing scissors please!)
- Box cutter
- Cutting mat or cutting board
- Masking tape
- Ratcheting PVC pipe cutters to cut the pipe and optionally segment it. Get them at the hardware store. I highly recommend having one of these in your toolkit.
- 220 grit dry sandpaper
- Mod Podge or white glue:water paper mache glue recipe
- Small bowl for paper mache glue
- Towels (you’ll need them for your fingers with paper mache)
- Acrylic paints and paintbrushes
- Ruler
If you’ve never worked with paper mache before, I recommend reading my primer first: Paper mache for props and accessories
Preparing the pipe
For Noir’s axe, I used a 44″ length of PVC pipe. For segmenting, two segments are about 14″ long each, with one segment taking up the remaining length since 44 does not divide evenly by 3. Keeping the segments shorter means it fits into a suitcase much more easily and the segments worked with her axe’s design. Segmenting also makes it much easier to work with the axe on your desk.
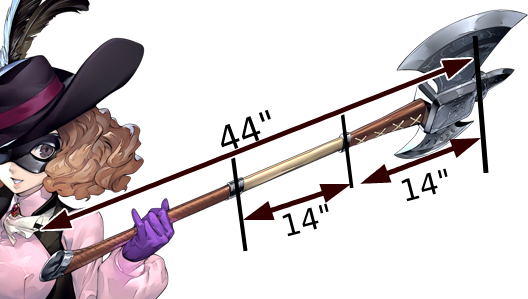
The best way to guestimate the lengths of pipe you need for your axe is to take a look at the reference art and compare it to the character’s height. I knew I wanted the axe to be around 4′ long to make it come up to around my chest when resting on the ground. I’m 5’6, much taller than Noir, so I adjusted the axe length to my height.
To test out the length, mark the PVC pipe with a sharpie and hold it, looking at it compared to you in a mirror or using a camera. Don’t worry about marking the pipe up several times if you need to since we’ll be covering it with paint and paper mache anyway. Once you’ve decided on a length, it’s time to cut the pipe.
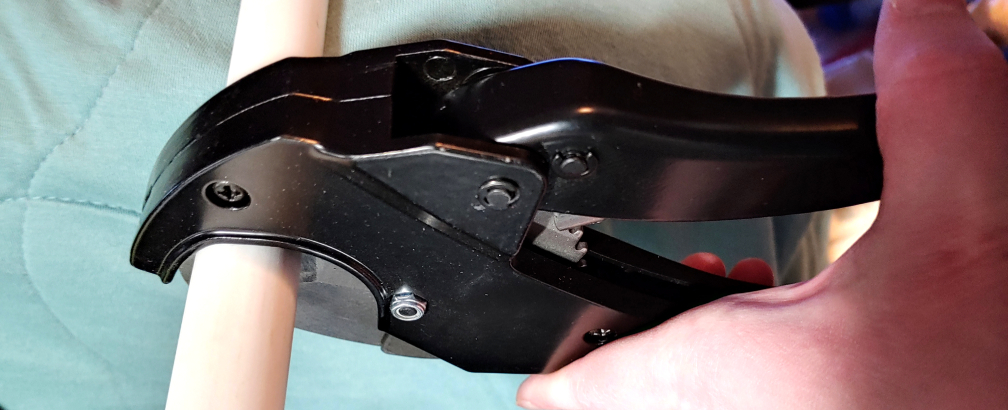
Ratcheting pipe cutters will make your cosplay life 1000% easier. They are easy on the hands as the ratchet does all the work for you. You also don’t have to worry about a saw or plastic dust either. They’re perfectly safe to use indoors. Just don’t ratchet your hand inside the blade, please.
Cut your pipe apart, and let’s get started on the axe head!
Creating the axe head
Since an axe needs an axe head, it’s good to start on this section first and add all the optional details later. A poleaxe typically has a double axe head, one larger and one smaller, though the size ratios may vary depending on the design of your axe.
Patterning
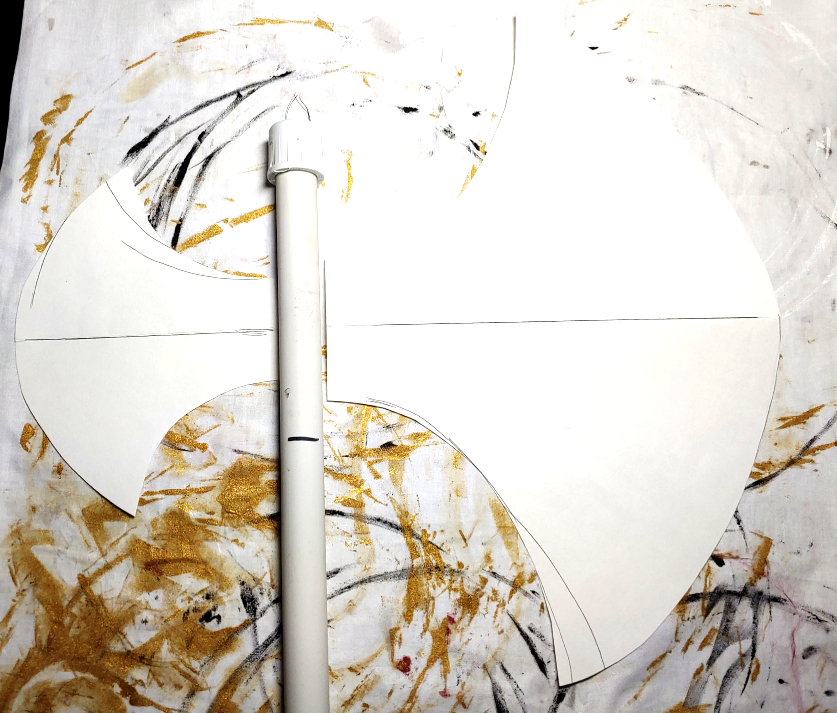
While the materials for the axe head are pretty cheap, you can avoid a lot of frustrations by patterning it first. Patterning doesn’t have to be anything fancy, so posterboard works amazingly for this.
To make a mirrored pattern, fold the posterboard in half and cut only half the pattern.
By patterning, you can get a good sense of the size of the axe heads. And if you tape the poster board down to your PVC pipe, you can compare the size to yourself as well.
When patterning, note that this is just how wide the axe head is. The blade will extend a bit out from the edge.
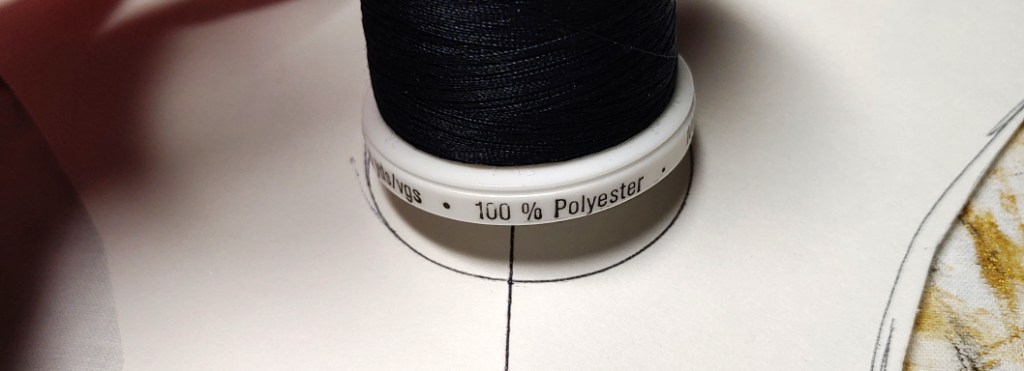
If your axe head has a round indentation like Noir’s does, draw a pattern onto your axe head. Noir’s axe has round indentations, so I used a thread spool to make the proper shape. Note that the more indentations you have, the more you compromise the stability of the cardboard, so stick to 1-2 if you can.
This is only for indented features on the axe head. Anything raised we’ll add later. For indentation features, you’ll want them to be a bit larger as corrugated cardboard does not do well with cutting out small details.
Cut out your pattern piece and any indentation markings like the circle traced around the thread spool. This will be our guide for creating the axe heads.
Cutting the axe heads
The axe heads are made out of your shipping box, and corrugated cardboard is a bit of a pain to cut out. While you could use scissors, you’ll crush the little pockets inside the cardboard, and the side of your axe head might look a little squished. We want a nice solid-looking axe head after all.
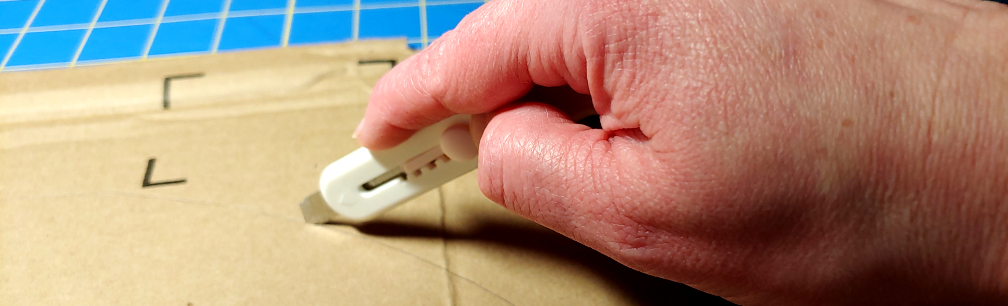
The trick to cutting corrugated cardboard is to use a box cutter or X-Acto knife. On a cutting mat, score the cardboard once, cutting about halfway into the material. Don’t push hard. Let the knife do the work. Then follow your cut again, this time cutting all the way through the cardboard while following the scoring lines exactly. The result is non-crushed cardboard every time.
Trace your pattern onto the box using a pen or pencil then cut the axe heads out. You’ll want two pieces of cardboard for each head to make it sturdy and stable.
If you have an indentation in your axe head like Noir’s axe does, trace the indentation marks onto the cardboard. Using the same scoring techniques as cutting out the head, scoring once then cutting second. Once cut, simply push the cutout right out of the axe head. If it does not push out easily, return the axe head to the cutting mat and score the cardboard once more.
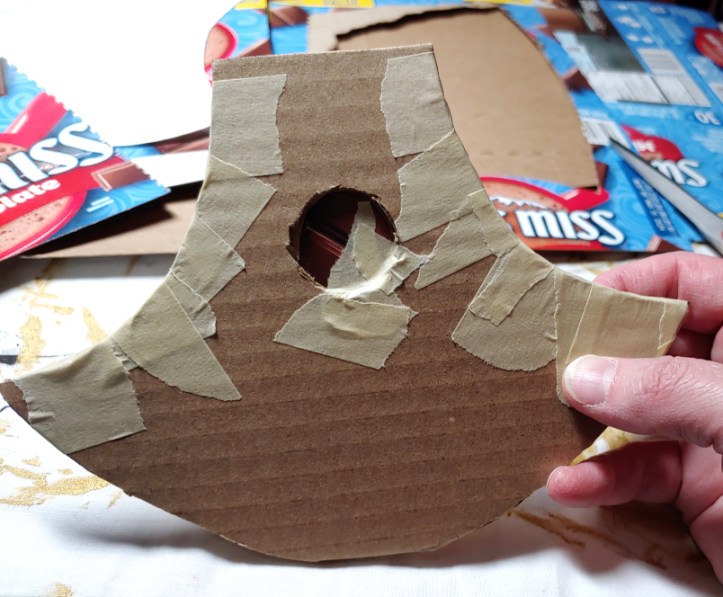
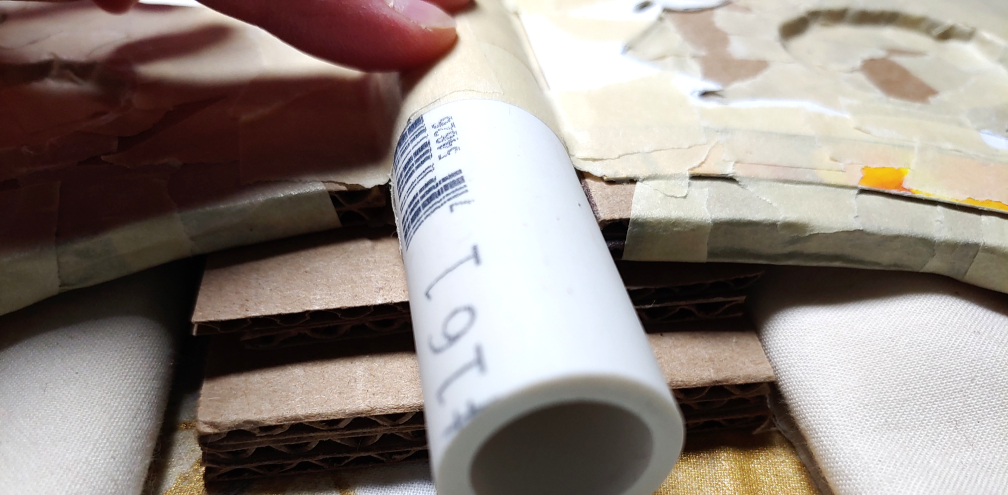
Once all your indentations are cut, place the two sides of the axe head together, slipping a small piece of a food box in between to stabilize any cutouts.
Using masking tape, firmly tape the two sides together and secure the food box in the center of the cutouts. Make sure the boxes do not move but do not pull the tape so tightly that it crushes the air pockets along the side.
You only need to tape the sides as the blade edge will be added next.
Repeat this for both axe heads.
Creating a blade
Corrugated cardboard doesn’t make for very good axe blades, and there’s not exactly a good way to make it look like a sharpened edge. So it’s time to turn to our friend, the food box. For this section, you want the big food box. Cereal boxes, large pasta boxes, Costco-sized boxes of cocoa. Whatever you have on hand, if it’s big without any creases, it’ll work. For smaller blades, you can get away with smaller food boxes.
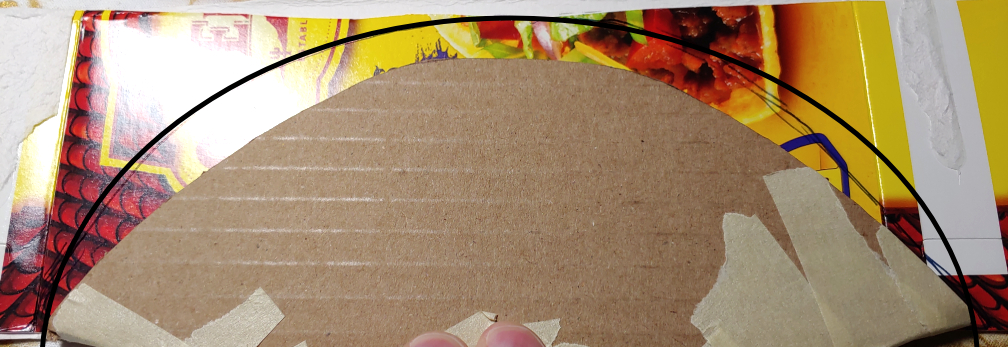
Place the axe blade on top of the food box, tracing the shape with a pen. Then roughly trace the shape of the blade. It should be smaller at the edges and longer towards the center. It doesn’t need to be exact, as long as it’s close enough.
Cut two of each axe blade out of your food box.
For each blade, tape the bottom edge of the food box blade to the cardboard, lining the food box up to the top of the cardboard so there’s no step or bump between them. Try to line it up as closely as possible. If gaps form, place a few pieces of tape over them to close the gap without tugging on the food box.
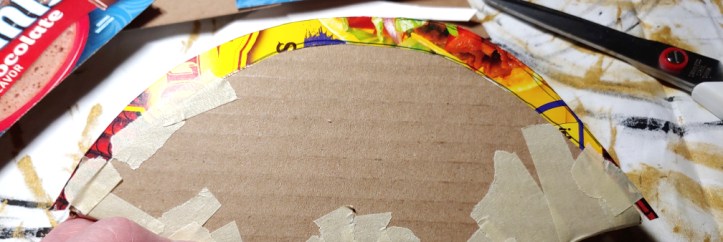
Once you’ve taped both sides of the blade to the cardboard, pinch the outer edge of the food boxes together to form a pointed blade. Tape them together.
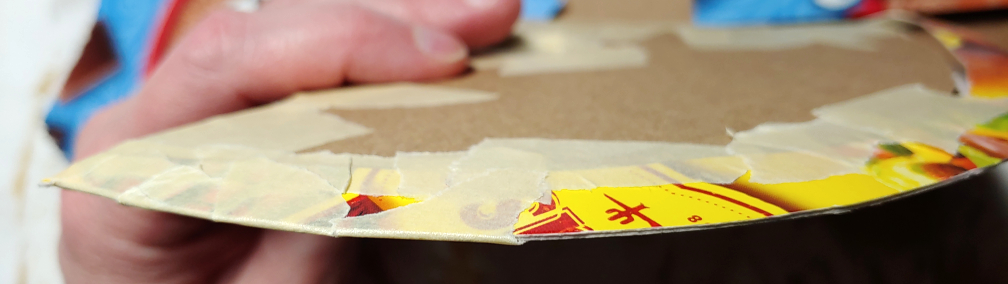
After taping the blade, carefully tape the outer edges of the blade, filling in the triangular gap created between the two food box pieces.
Repeat for both blades.
Adding optional blade details
If you have raised details on the axe blade, now’s the best time to add them. This is mostly for designs and details. If you have gems or shiny things, those can be added after finishing the paint.
Check out adding raised details here Making raised details with paper mache. Skip the paper mache and painting sections as we have more axe work to do and it’s easiest to do that before finishing.
Attaching and stabilizing the axe heads
You can’t do much with a poleaxe without the axe heads attached, so let’s attach those blades. These points need to be extremely stable. The most stability will come from making a stabilizing box, but you might be able to get away with just taping the axe blade and reinforcing it with a lot of extra paper mache. Though I strongly recommend the box.
Start with taping the blades on either side of your PVC pipe, and I mean really tape it down. You want to plaster this down so it doesn’t move. Use a piece of cloth or a notebook underneath each blade to place it in the center of the pipe and support it as you work.

While you can leave this as is, you may notice that the axe blades are a little flappy. If you pick up the axe now, you can wiggle the heads pretty easily. Some of that does go away with the paper mache step, but to avoid the paper mache cracking, a stabilization box is going to provide a ton of support.
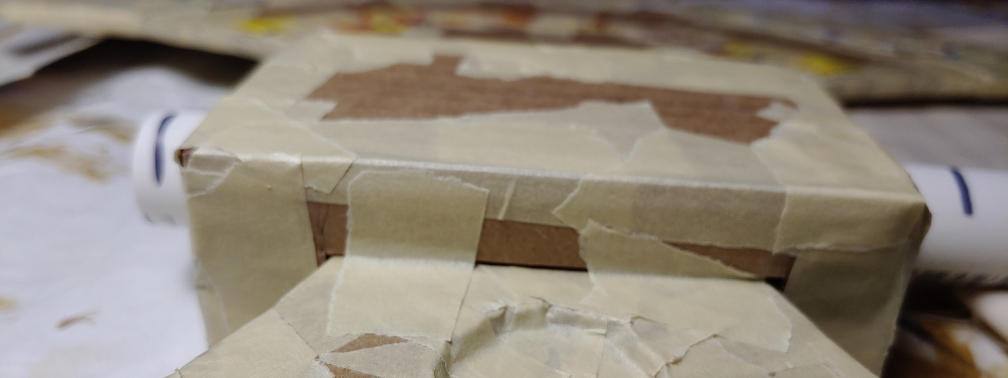
Start by cutting a rectangular shape that overlaps the pipe and some of the axe head. Noir’s is particularly large, but yours might be a little closer to the pipe. A larger one is going to provide the most stability while a smaller one provides some, but it should be enough. Cut two of these, one for each side of the pipe.
Now it’s time to stabilize. Start from the bottom up, as you’ll be able to see what you’re doing. The main strength of this box comes from the layers of cardboard shoved inside. Cut out several pieces and start shoving them underneath the axe blade and against the main shape sitting underneath the pipe. The stabilization pieces don’t need to stretch the whole length of the box, just enough to cover the edge of the axe head and cushion it.
Tape these pieces together then continue along the top side of the axe heads, adding pieces of cardboard until you reach the top of the pipe. Tape these together really well so they do not move.

Now that the axe heads are stabilized, it’s time to finish the box. Cut a large square, larger than the top side of the box. Using a spare PVC pipe, trace the shape of the pipe approximately in the center of this square and cut it out using a box cutter. Cut it slightly larger than the pipe.
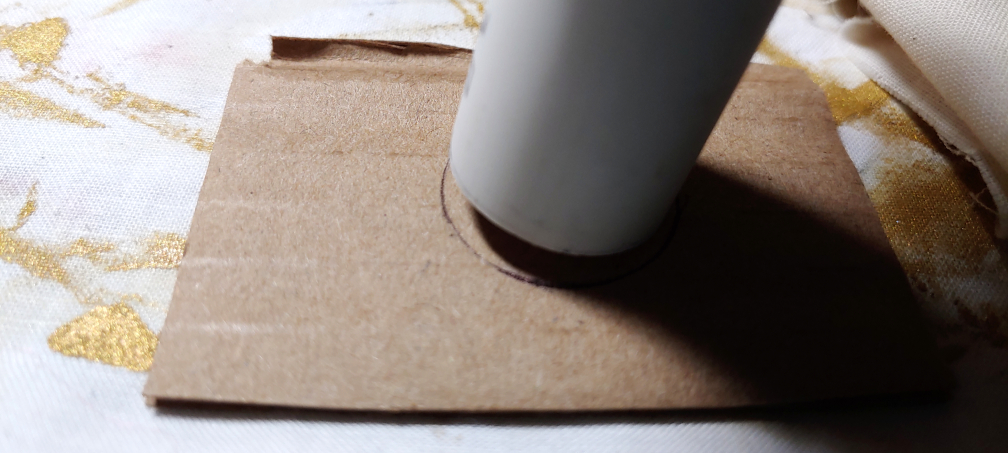
Slip the square over the pipe and flush against the stabilization box edges. Trace the sides, moving the box and edges as little as possible, with a pen. Slip the square off and cut off any excess box. Return the square to the stabilization box, taping it down to the sides. Repeat for both the top and bottom faces.
The sides of the box need to be created in a similar manner. Cut out a long rectangle, splitting it in the center and cutting out a skinny notch to fit the width of the axe head in the center.

Place the pieces along the side of the stabilization box, tracing the edges of the box and any adjustments to the notches with a pen. Cut off the excess, then tape each piece down to finish off your box.
Tape across the side gap several times to secure it. Tape the axe head to the stabilization box to add extra stability.
Making a square pole segment
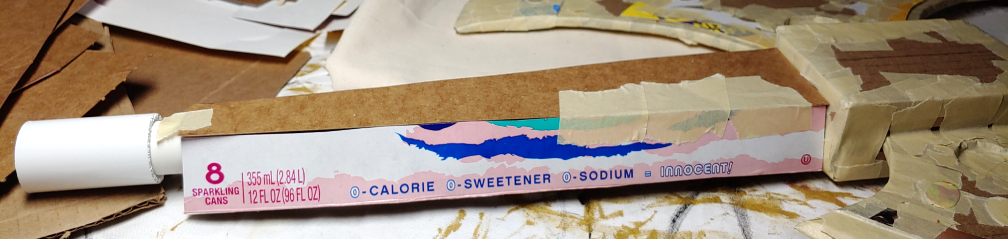
Noir’s axe has a square segment on the pole right underneath the axe head. Fortunately, we can use the stabilization box to ensure the box segment sits properly on a round PVC pipe. You’ll want long boxes like soda can boxes for this segment.
Cut the soda can box along the creases, separating the sides of the box. Take one of the sides and place it underneath your axe, tracing a segment wider than your PVC pipe but not wider than the stabilization box. Noir’s square pipe is a bit larger on the top than it is at the bottom, so you’ll need to draw hers at an angle. The segment should sit flush against the stabilization box but should fall short of the PVC connector piece. Cut two of these.

Using a loop of tape on the back of the soda box, tape the segment to the pipe then secure it to the stabilization box and the pipe at the bottom. Next, take another piece of soda can box, place it along the side, and trace the edges. Use a ruler to straighten out the edge, and cut two pieces out like this.
Tape the two pieces along the edge completely, finishing off your square pipe.
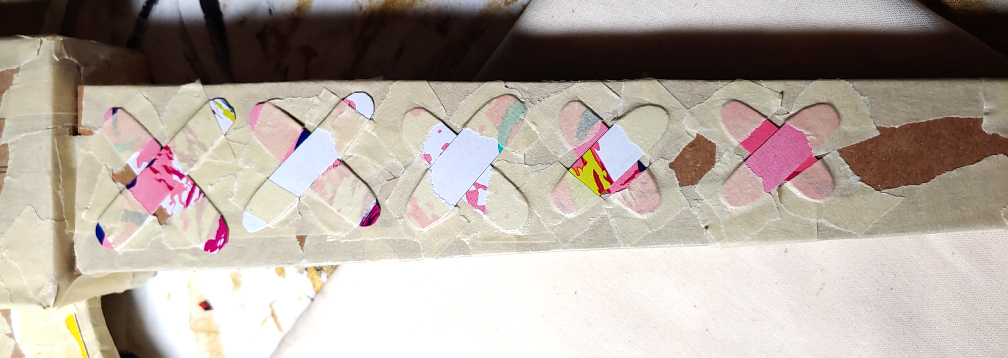
Optionally, you can add details to this box as well. Noir has laces up the front and back sides. These laces were created with the same technique as the axe head details. Each lace is rectangles with rounded edges which gradually get smaller with each pair to match the shape of the square pipe. You can use the techniques listed here to create the laces: Making raised details with paper mache
Creating a wrapped handle
The axe has a wrapped handle at the bottom. And unlike the square pole, this part of the handle needs to be holdable. So when I hold it, it doesn’t crush the designs. Fortunately, it’s round, so we don’t need to worry about stabilizing the shape first to avoid crushing it.
Check out the tutorial on creating a wrapped handle and custom end cap here: Creating a wrapped handle effect with paper mache and a PVC pipe
Paper mache time
Now that you’ve taped and built an entire axe, it’s time to solidify it with paper mache. And it really only takes one layer to make this work as the strength comes from the cardboard base underneath.
You’ll want to review the following articles for basics and even some specifics for your axe:
- Basic techniques – Paper mache for props and accessories
- Working with raised details – Making raised details with paper mache
- Covering the wrapped handle – Creating a wrapped handle effect
In addition to those, here are some tips and tricks that will make your axe stable and con-ready.
Covering the blade
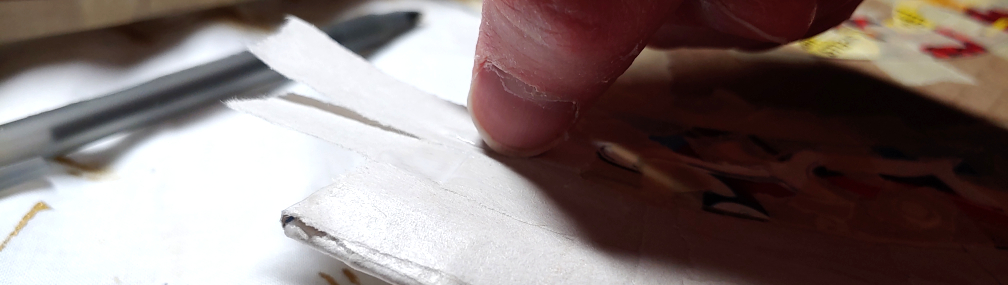
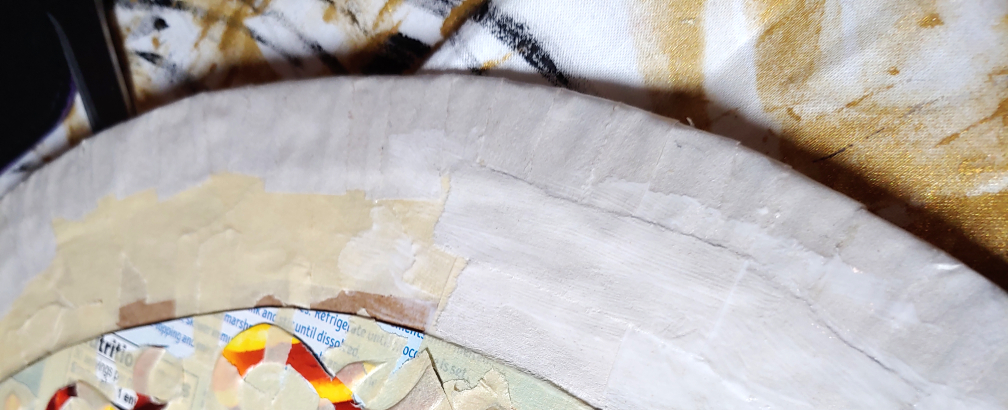
No one wants a bumpy blade. Instead, it should be nice and smooth and trick people into believing it’s not made of cardboard and paper. To do this, wrap thin strips from one side of the blade to the other. But going one strip by one strip is a tedious pain, so let’s do this an easier way.
First glue half the strip to the blade, leaving the other half dry and hanging over the edge. Do this for the entire length of the blade, smoothing out each strip as you paste it down. Depending on the size of the blade, the strips may be starting to dry by the time you reach the end.
Now flip the axe head over. Start with the strip where you can see the entire strip. As the strips do overlap when gluing them on the other side, the overlap should be easy enough to see. You can also feel it by folding the strip (unglued) over the blade and seeing if the other strips fold over with it or not. If they don’t, you’ve found the starting point.
Starting with the starting point and working your way to the other side, glue the strips folded over the blade and smoothed down. The strips may glue at a slight angle due to the curve of the blade, and that’s fine. What’s important is not creating a bump at the edge of the strip. A little one can be sanded down later, but the fewer bumps, the better.
Once the blade strips have been secured, glue some along the side of the blade section. Like with the blade, the strips should be half glued to one side with the extra hanging over the other side. Flip the axe over and pull the strips down over the sides, securing them with glue.
Continue along the shape of the axe blade with strips running perpendicular to the blade itself to finish off the blade and secure the blade edge strips.
Securing the stabilization box
These strips are key to making sure your axe is as stable as possible. And for this process, we’ll need two layers instead of just one.
Start by gluing strips from the stabilization box, over the gap where the two meet, then to the axe head itself. Use your fingernail to push the strip into the corner as needed.
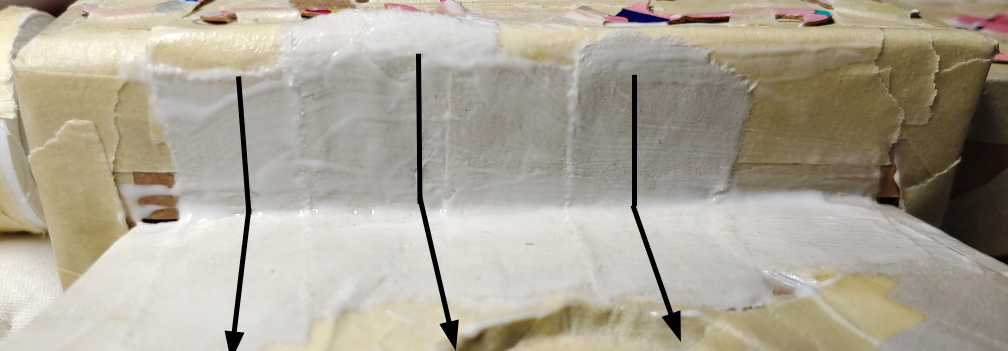
Once you’ve covered the entire gap, lay strips perpendicular to the previous strips on both the stabilization box and the axe head.
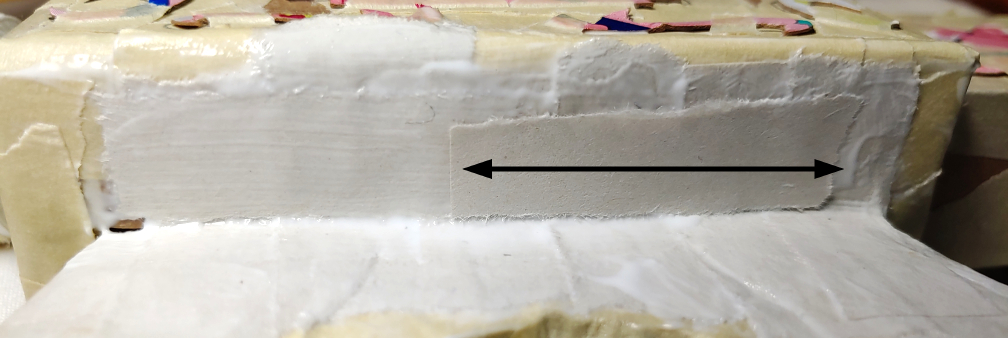
One layer of each direction of strips should be enough to stabilize your axe. Do this for all sections where the axe head meets the stabilization box.
Working with large indents
Your axe may have an indent or a cutout like Noir’s does. Use smaller strips like with the blade to prevent any bumps around rounded or complex curves. When placing the strips, use the back of your finger to push the strips into the deep grooves.

Sanding
After letting the axe dry for about 12 hours, it’s time to sand. While sanding something this large can be time-consuming, sanding reduces any notches along the edges and reduces the visibility of the individual strips. To make it less daunting, sand section by section, taking breaks as needed. Sanding does produce dust, so make sure to work in a place easy to clean and that won’t bother pets or people with the dust.
Sanding basics are covered in my primer here: Paper mache for props and accessories.
In general, when sanding, you can work with larger pieces of sandpaper first to cover larger sections like the poles, axe blade, and big details.

By using a larger strip, you save your fingers a bit of work by covering more area at once. This isn’t recommended for smaller details, and for that, you can check out Making raised details with paper mache for tips and tricks for tiny little details.
For crevices like the spaces between the stabilization box and the blade, use smaller strips to get close to wedge yourself in between. Any place where your fingers cannot reach, you don’t need to sand. No one’s going to see inside that crevice honestly.
When sanding, the strips won’t visually look any different. However, if you brush your fingers across the strips, it should feel somewhat smooth.
Make sure to also sand exposed PVC pipe! The paint won’t stick to it otherwise! You can use the same 220-grit sandpaper here too.
Painting
Mod Podge and glue are great primers, and since we used that for the paper mache, your prop is already primed! No need to add any extra layers, though you can brush on an extra layer of glue if desired.
You can add paint however you desire to make it metallic. Using a paintbrush, a sponge, a spray paint can, or even an airbrush. As I work inside primarily, I used my favorite technique, Painting weathered metal with a makeup wedge, to make the axe look like it’s been in Mementos more than once.
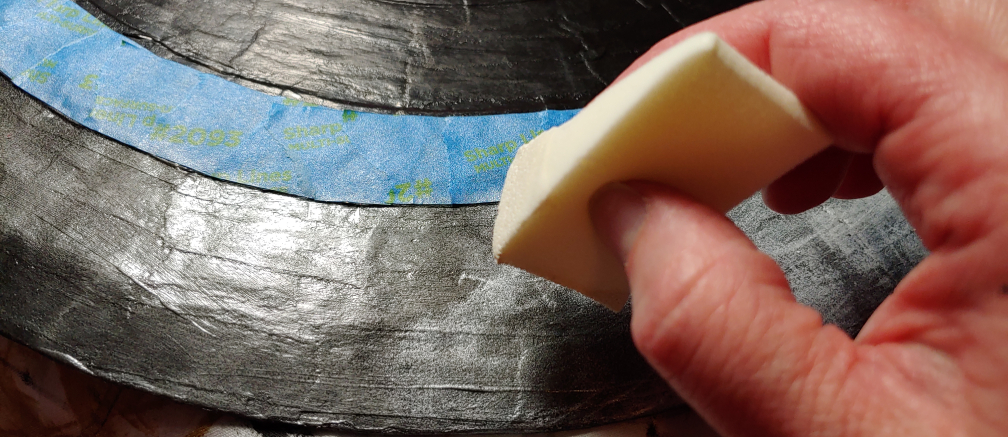
As Noir’s axe uses a lot of different colors, I used painter’s tape to section off parts I didn’t want to paint at the time. This prevents having to go over a section and repaint it multiple times to keep the colors from overlapping. The makeup wedge technique is quite messy, so the tape protected the other sections while I worked.
This also worked great to keep the silvers and browns from blending at the borders.

When painting a segmented axe, make sure to not paint where the pipe is inserted into the pipe connectors. If you do this, the pipe will get stuck inside and you won’t be able to pull the sections apart.
Once painted, it’s time to add varnish. Cons are notoriously harsh on props, and you want to protect your hard work. Glossy varnish will, as the name suggests, make things glossy and shiny. This is good for metallic sections of your prop like metal caps or the axe head. Matte works great for more leathery or fabric sections where the axe doesn’t appear shiny. I used this on the brown sections of the axe.
Add 2-3 coats of varnish to your prop, allowing each layer to dry before adding another or flipping the prop.
Let everything dry and admire your work.

I hope you enjoyed this tutorial! I sure had a lot of fun making Noir’s axe, and perhaps this will help you create your next axe project out of cheap materials pulled from the recycle bin. Paper mache is a great budget-friendly way to make even larger props like this. And it stands up to the convention test too. I beat the heck out of this axe, transporting it three states over on a plane and toted it around the con the entire day. Still looks the same like the day I made it.
Let me know what axes you make with this tutorial! @ me on social media so I can admire your work!
