There’s a good chance you’ve never heard of a sleeve head roll before. It’s a structural piece of fluff that sits along the top of a sleeve – or a sleeve head, thus the name – that gives the top of the sleeve body and sometimes smoothness. And when I needed structured shoulders and sleeves for a JoJo gakuran (a Japanese school uniform for boys), I had to dig deep in my knowledge of structure to get everything to sit properly on my shoulders.
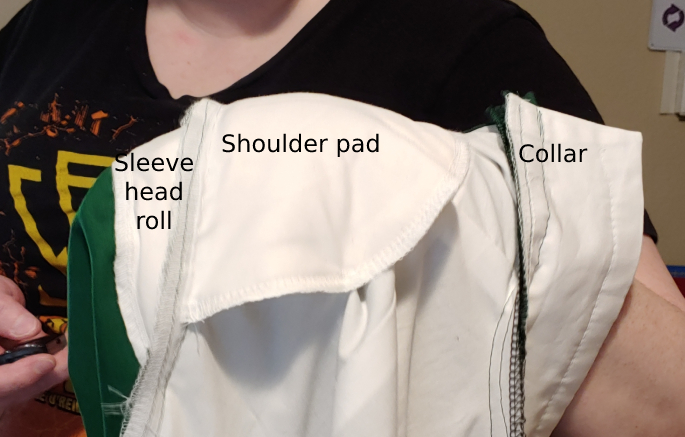
Sleeve head rolls are more common on things like suit blazers and coats, but they work great for a cosplay that needs structured sleeves like for JoJo or gakuran. The sleeve head rolls prevent the head of the sleeve from collapsing down and give them a more rounded look. Depending on your sleeve, it can also make the sleeve head look smoother. My sleeves have gathers at the top, so it gives it more body than smoothness.
To make your sleeve head roll, you need something stable. Cotton quilt batting works great, and if you get batting for a twin spread, you’ll have enough to make dozens of sleeve head rolls and shoulder pads. If you’re looking for something more budget-friendly, fleece or thick wool felt works great too.
If you’re using a heavier material like wool or suiting fabric, you’ll want to stick to quilt batting, but middleweight fabrics like cotton and polyester work great with any of the materials. If you make a cover for your sleeve head roll, they’re now washable (given your outer fabric isn’t dry clean only, of course).
Alright, let’s make some sleeve rolls!
Skill level: intermediate
Cost: moderate
Materials:
- About 1/4yd quilt batting, fleece, or thick felt
- About 1/4yd of cover fabric (optional, but recommended especially if you’re using quilt batting). Can use lining fabric, felt, fleece, or flannel
- A sleeve to add the sleeve head roll to. The garment should be sewn and any lining should already be added.
- Sleeve pattern piece
Supplies:
- Paper, pens, and pencils for patterning
- Ruler
- Scissors for fabric
- Scissors for paper (don’t use your fabric scissors on paper!)
- Straight pins
- Sewing machine with standard universal needle and polyester thread
- Serger or overlock stitch for finishing the cover edges (optional but recommended if you’re using lining fabric for the case). If you do not have a serger or overlocker, I recommend using Fray Check to keep the edges from fraying all over the place.
Creating the pattern
Since each sleeve pattern is slightly different depending on your size and garment style, you’ll need to draft a custom sleeve head pattern to properly fit and support your specific sleeve.
But first, let’s talk about the part of a sleeve. And this will vary depending on if you have a segmented sleeve or a single pattern sleeve.
For a sleeve made of one pattern piece, when looking at a pattern, notice that the shoulder seam marking (usually a circle on American patterns) isn’t in the top center of the sleeve head. It’s slightly to the side. The longer portion of the sleeve curve is the front of the sleeve while the shorter is in the back.
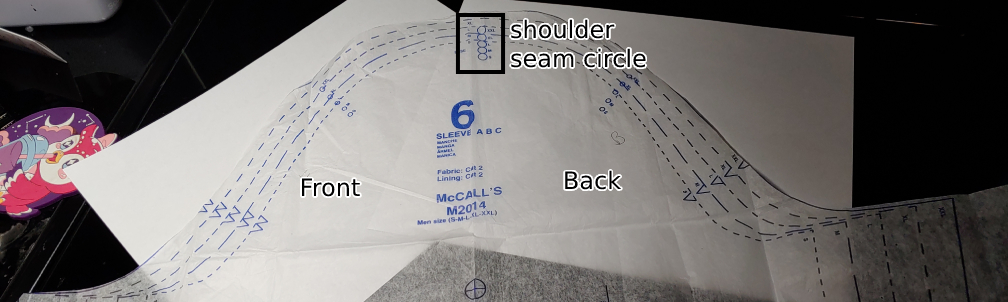
For a sleeve made of two pattern pieces, the curve pictured above will appear to be cut short on one side. That cut side is the back of the sleeve while the front has the entire curve.
Understanding the front and back of the sleeve is important as the sleeve head roll is longer in the front than in the back. This is also important to understand for placement when sewing the roll into your garment.
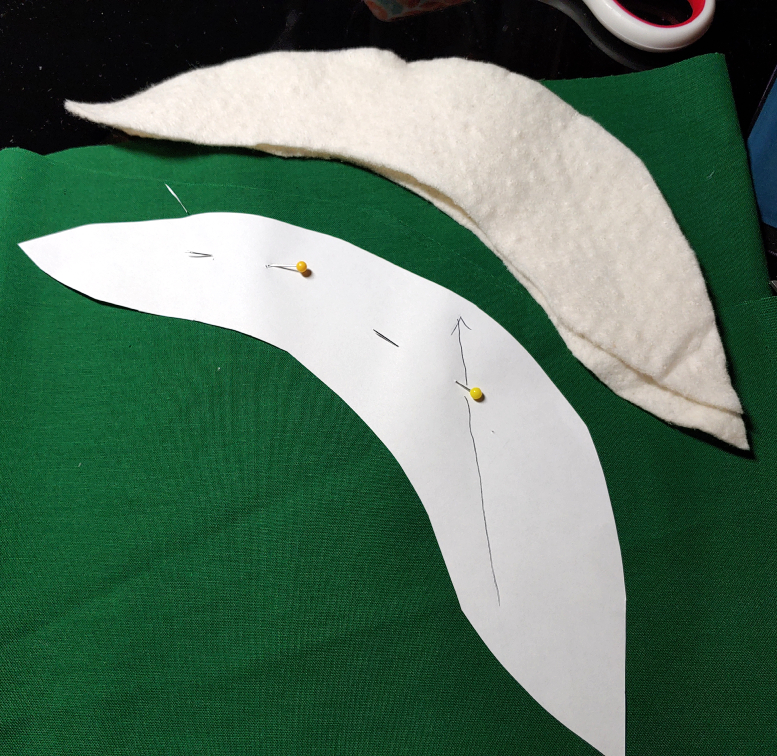
Now that you’ve identified the markings on the pattern, it’s time to make the sleeve head roll pattern. Take a sheet of paper (letter paper from your printer works nicely) and lay the pattern down on it. The shoulder seam markings should sit off-center so you have more room to make the front of the sleeve head without taping two sheets together.
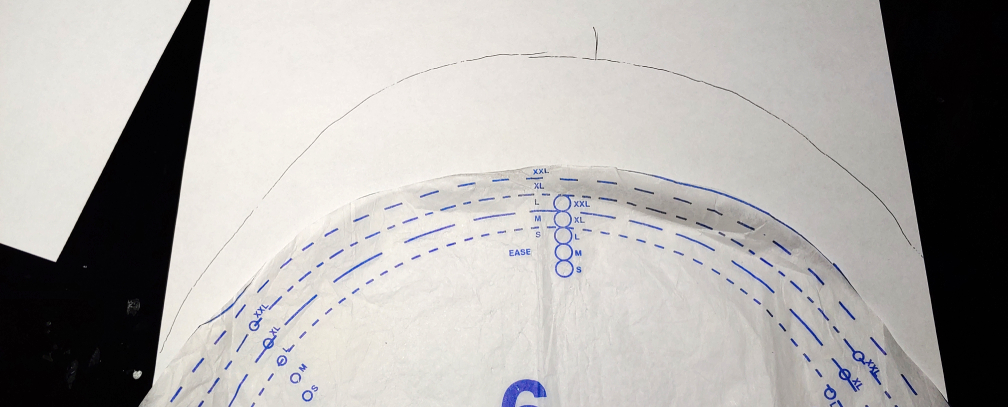
Make sure that the pattern you trace matches the size you’ve made your garment. Mine was XL so I traced that line instead of the larger XXL on the outside of the pattern.
Using your ruler, draw a line straight down from the shoulder seam marking to give yourself a central point. Label the front and back of your pattern. Now it’s time to draw a really weird jelly bean. The jelly bean will be longer on the front side than the back. The inner curve of the jellybean should follow the shape of the sleeve head itself.

To ensure the sleeve head roll moves and bends with you, it’s actually cut along the bias and not the grain line. The bias is cut at a 45° angle, and if you’re like me and don’t have a drafting set or a triangle, finding an accurate bias can be challenging. Fortunately, I found a trick in one of my old tailoring books.
Extend a line out from your shoulder seam line at a 90° angle. Now in the larger section of the front of the jellybean, create a 2″x2″ square directly off this extended line. Draw a line from the bottom left corner to the top right of the square and you now have an accurately drawn grainline.

Cut the jellybean out with some paper scissors and it’s time to make some sleeve head rolls!
Cutting the pattern out
While we want to cut the pattern out along the bias, you don’t need to guestimate now much the pattern needs to rotate to cut along a 45° angle. We’ve already done the work when drawing that line through the boxes in the previous step.
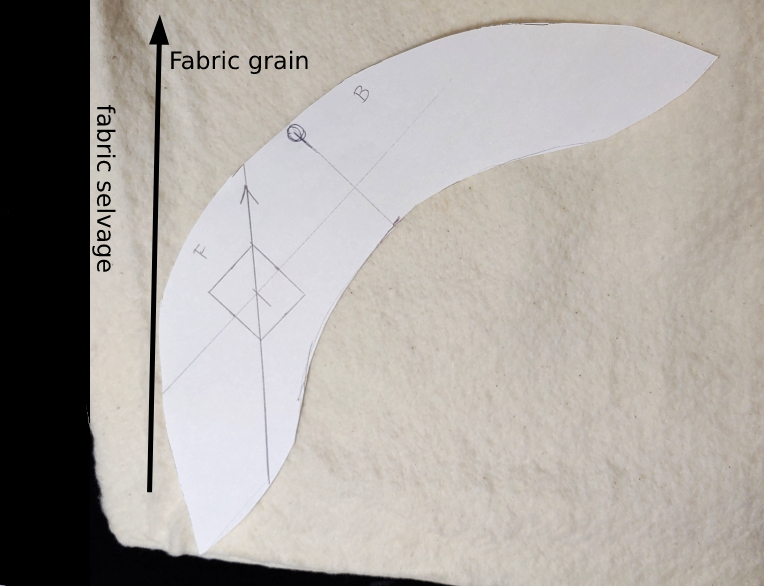
If you aren’t familiar with pattern reading, the line you drew is a grainline. This means this line should match the grain of the fabric, which is parallel to the selvages and your fold.
When you place the jellybean on the fabric, matching the arrow up with the grainline of your fabric, it’ll look like a slanted jellybean. This bean is now at a 45° angle, cut along the bias when you finally cut it out.
Match the grainline marking with the selvage or the fold of your fabric. Pin it and cut out two of these jellybeans. You only need one layer of jellybean for each sleeve to make an effective sleeve roll. If you have particularly stiff or heavy fabric, you can double the jellybeans for each sleeve for extra strength.
Optionally you can add a casing. If you’re using quilt batting, I highly recommend a casing as batting is literally just fluff. It could come apart with wear or washing. With a casing, you protect the structure and keep it from fraying. If you do not have sleeve lining or are installing them after adding the lining, this is crucial since the sleeve rolls will be resting against your shoulder while you wear the garment.
Like with the first jellybean, you want to cut the casing fabric in the same way. Match the grainline arrow up with the selvage or fold of the fabric, matching grainline to grainline.
The lining fabric should be about the same size as the jellybeans you’ve already cut out with a little bit of edge on it to account for the thickness of the inner fabric.
Cut four pieces of lining fabric, one for each side per sleeve jellybean. Transfer your markings for the shoulder seam line and which is front and back to the casing pieces for placement later. If you don’t have a serger or an overlocker and are using fraying fabric like lining, slather the edges with Fray Check and let it dry.
Sewing the sleeve head roll
It’s time to sew up some jellybeans.
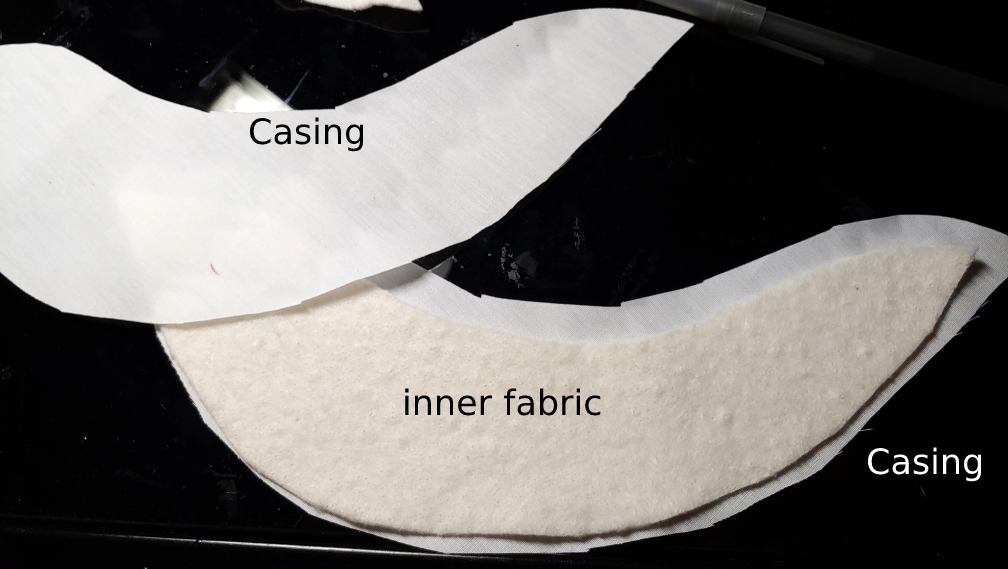
Place your two casing fabric pieces, wrong side together, then slip the inner fabric in between them. Since the shape is longer on the front side, make sure all the pieces line up in the same shape, matching the shoulder seam markings to align the layers.
Pin the layers together and sew a straight stitch near the edge of the fabric, about 1/4″ or so, to secure the layers together. If you have a serger or an overlock stitch, finish the edges to prevent any fraying.
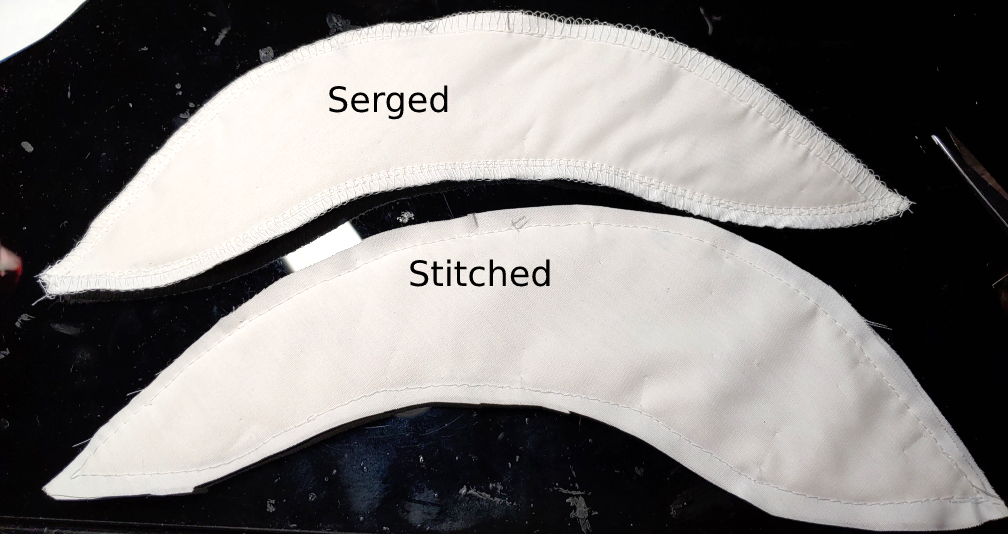
Repeat for both sleeve head rolls.
Attaching the sleeve head rolls
Now that you’ve sewn some rolls, it’s time to stick them into your sleeves. Sleeve head rolls are a permanent attachment to your garment, so make sure your sleeves are attached before installing your rolls. The lining does not need to be attached, though mine is in the photos.
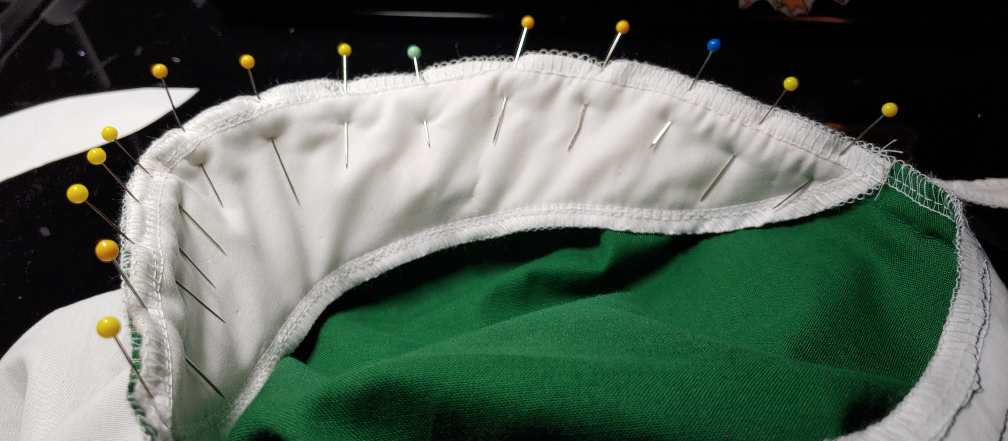
Start by lining the sleeve head roll up with the armhole, matching the marking on your roll with the seam that goes along the top of your shoulder. The longer side of the roll should be facing the front of the garment.

Pin the roll to the shoulder seam, working from that center marking outward until you reach either end of the roll. Do not pleat, fold, or gather the sleeve head roll, else it won’t sit properly when worn.
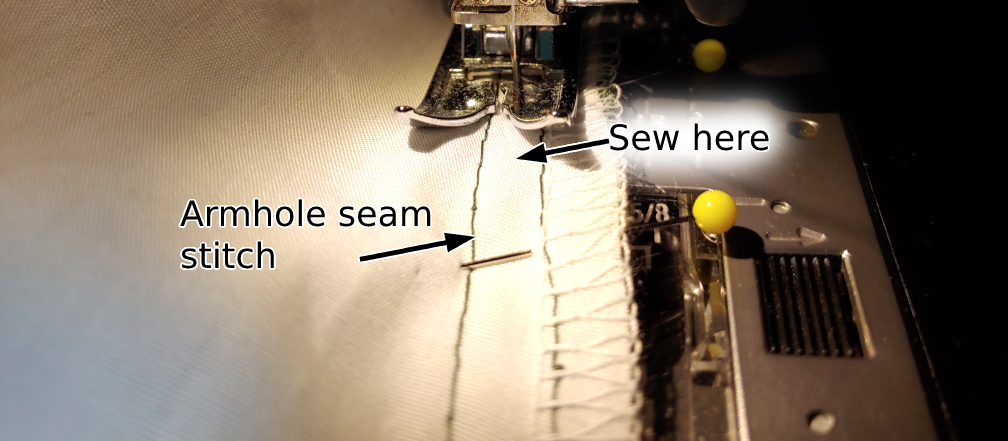
When sewing the sleeve head roll to the armhole, you want to sew in between the armhole seam stitches and the edge of the fabric. Sew closer to the seam stitch than the edge of the fabric to give the sleeves the best support.
Repeat for both sleeves and now you have structured sleeve support!
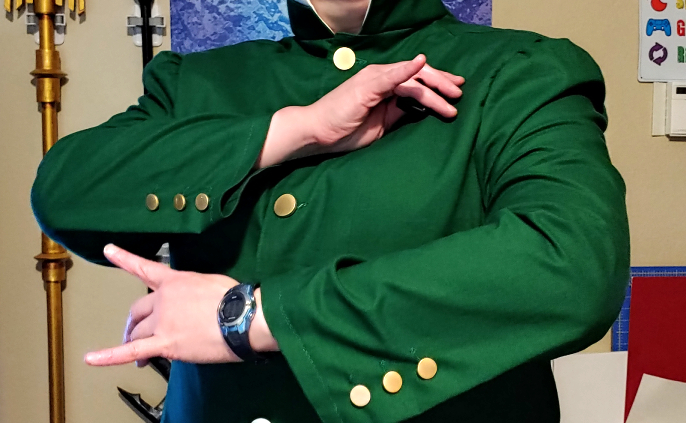
I hope you enjoyed this little tutorial on structure! It’s so important for proper fit of tailored jackets and tunics. The roll specifically keeps the sleeves from collapsing in on themselves and makes for great structured JoJo sleeves.
You can cross your arms like Kakyoin or do any number of poses, and the sleeves will stay supported and look nice every time.
Let me know what cosplays and even regular clothing you support with your sleeve rolls. @ me on social media so I can admire your work.
