Decoupage is a fun craft technique to do, but it can also be used in cosplay for creating props and accessories. Like paper mache, it involves pasting a thin medium onto another object and sticking it there permanently. It is as strong as the medium you use. Paper will provide a good deal of strength, but fabric is truly strong and can endure a beating at cons in your props. I like to call decoupage fabric “fabric mache” since that’s pretty much what it is.

I did decoupage a lot as a kid and pasted cutouts of anime characters from TV Guide onto wooden jewelry boxes as a hobby. I hadn’t thought of it as a medium for cosplay until recently. It’s not the smoothest method as you cannot sand it, but it’s incredibly cheap and is good for getting rid of that extra fabric stash on the shelf.
I came across the technique while searching for paper mache recipes on the Mod Podge website. It gave some ideas, but it really didn’t go into detail about how powerful this medium really is and how to make it work for you in cosplay. So here are all the tips, tricks, and advice I have for your next decoupage project.
Skill level: beginner-friendly!
Cost: budget-friendly!
Common materials:
- A project to decoupage (I’ll have some tutorials up soon that could give you ideas!)
- Scrap fabric. Cotton works best
- Mod Podge or a glue mixture using white school glue
- Foam brush
- Fabric scissors
- Paper towels or a washcloth you don’t mind using (your fingers get super messy)
- Plastic tablecloth or trash bag to cover your workspace
Optional construction materials
- Plastic wrap
- Glasses and bowls
- Aluminum foil
- Masking tape
- Cardboard
Why decoupage?
Like paper mache, decoupage is an arts and crafts technique. It’s non-toxic, pretty cheap, and works great indoors. You can actually decoupage with both paper and fabric, but fabric will give you the greatest strength between the two media. And after you seal the decoupage, it literally does not move. It is stuck there and does not peel.
Another benefit to decoupage is the glue it uses. It’s actual glue. The typical flour paper mache mixture has a few problems. After years of use, it can start to peel, and if it’s exposed to water or moisture, it can potentially mold. It’s flour, after all, and flour is food. You don’t want to get it wet. If you seal it, you should be fine, but I like to avoid the hassle in the first place.
The major downside to decoupage is that you can see the strips in your final work.

This is mostly due to the fabric itself not being completely flat. It’s also not sandable like paper mache is. You can partially cover it with paint or decorations, but it is still there. For the most part, it doesn’t always show up in photos, and if you don’t mind the lines, this is a good technique to play with.
Decoupage construction
You can make a wide variety of projects with decoupage. But you’ll need to know a few things about construction before you sit down and make your first prop or accessory. I’ll have a few projects up on my Tutorials Index soon enough, but until then (or if you want to create something I haven’t thought of yet!) here’s what you need to know to get started with your decoupage project.
Using a temporary base
Fabric decoupage in itself is quite strong. Finish it off with Mod Podge Hard Coat (or use Mod Podge Stiffy), and the fabric will hold its shape just fine.

But that’s after it dries. You will need a base while the fabric is still wet and while it’s drying. Fortunately, decoupage does not stick to anything that is covered in plastic wrap!
This means you can use just about any shape for an actual base. For a small crown, I used a glass turned upside down. You can also use bowls, jars, boxes, or really any oddity that you can find.
When picking out a base, you need to make sure you can slip your decoupage off the object cleanly and in one piece. If you’re making a box, for example, consider making the base and lid separately, decoupaging them together once everything is dry.
If you need an odd shape, consider using a permanent base instead.
Permanent base
A permanent base is anything encased partially or wholly by decoupage. It is meant to provide stability and ensure that your work never moves. This is good for irregular shapes, something which could take a beating like a watch or a headpiece, or a larger object such as a staff or a sword. Anything you have to hold will also want a base for stability.
Decoupage is a little finicky, however. It won’t stick to everything and needs something that the glue will adhere to. Mod Podge will stick to most surfaces honestly and will give you the best results while white glue mixtures tend to be a bit more touchy about what surfaces you use. Here are some good base structures that will work:
- Cardboard or foam core board
- PVC pipe
- Masking tape
- Most plastics (if the decoupage has trouble sticking, sand it with 240 grit sandpaper by hand to give it a fine tooth for the glue to stick to)
- Wood and metal (like with broom handles!)

Speaking of masking tape, this can be used to cover more finicky surfaces that don’t take to glue. This includes making thicker shapes out of things like aluminum foil or other materials that tend to be nonstick. If it says nonstick, it means nonstick. You can wrap surfaces with masking tape before using decoupage to get the fabric to stick like glue (literally!)
Decorating and detailing
Because you’re using glued fabric for decoupage, you can use a lot of common things to decorate and finish your prop
- Acrylic paint (sticks right to it as glue is a sealant)
- Clay (various. Foam clay works, though I want to try a few others)
- EVA foam. You can glue it right down
- Super glue and hot glue
As this is fabric, you can also cut the decoupage if you’ve made it without a base using a pair of fabric scissors. This makes it easy to make generic shapes then cut them down later, such as making a crown on a glass!
Decoupage techniques
The big part of decoupage is of course the fabric. You’ll want quite a bit of it too. Time to get rid of that old scrap stash that’s been sitting on the shelf for a few years.
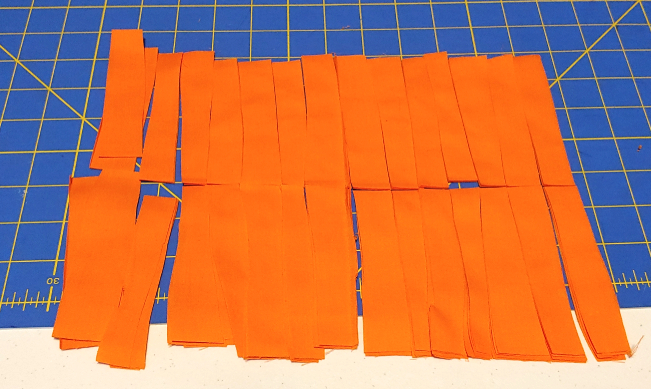
Cut a lot of strips of fabric. I cut some long and some shorter, no more than maybe 12″ in length. Any longer and they become difficult to handle.
Cut some strips to use (you can always cut more later if you need), cover your workspace, and prepare to get messy.
Basics
If you haven’t done decoupage before, it’s pretty simple and fun, if not thoroughly messy. Keep paper towels on hand as you need to keep your hands from getting too sticky.
Pick a strip of fabric to place. Take a foam brush and dip it into the Mod Podge bottle, wiping off the excess so only a layer of glue remains on the surface. Brush the foam brush along your surface then place the fabric down on the glue.
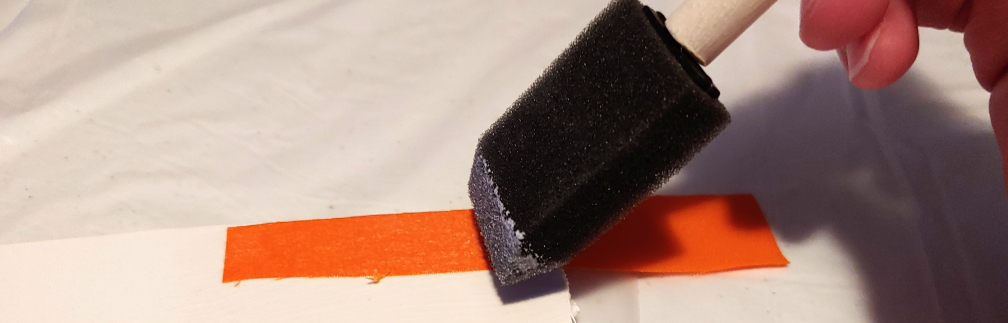
Now brush the foam brush across the fabric’s surface to make it stick in place. This will leave it a bit wet and sticky while it’s drying, but you can layer on top of this while it’s wet still or leave it to dry as is.
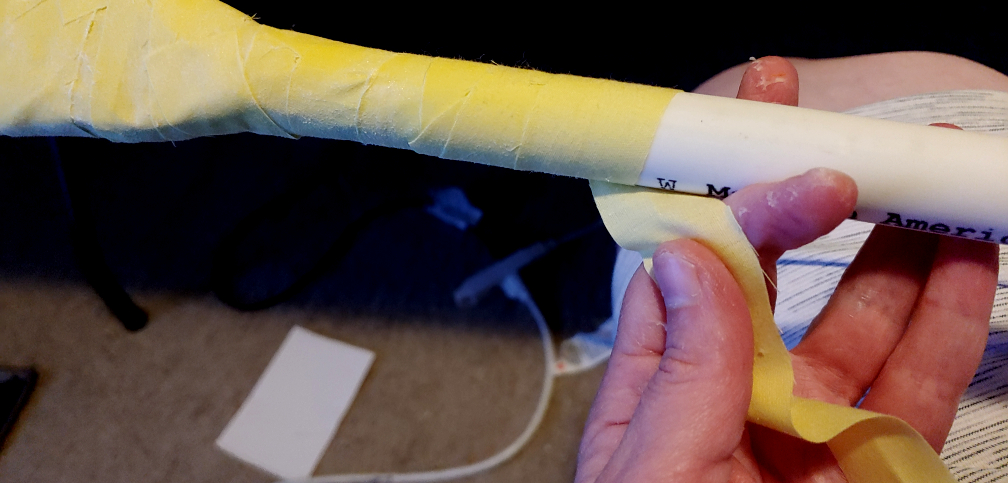
When you’re working with larger strips or more complicated forms, you’ll want to decoupage in sections. Brush only a small section of glue onto your surface then stick the fabric down on top of it. This technique is also useful if you’re wrapping sword handles or need to flip an object over repeatedly and don’t have enough hands (or knees) to hold it.
Wrapping points and corners
To cover a point and still have it look like a point, you’ll need to layer your fabric strips a few times to get the right shape.
Start with a small strip of fabric and wrap it around the point. Start gluing at the point, pasting the center of your strip to it.
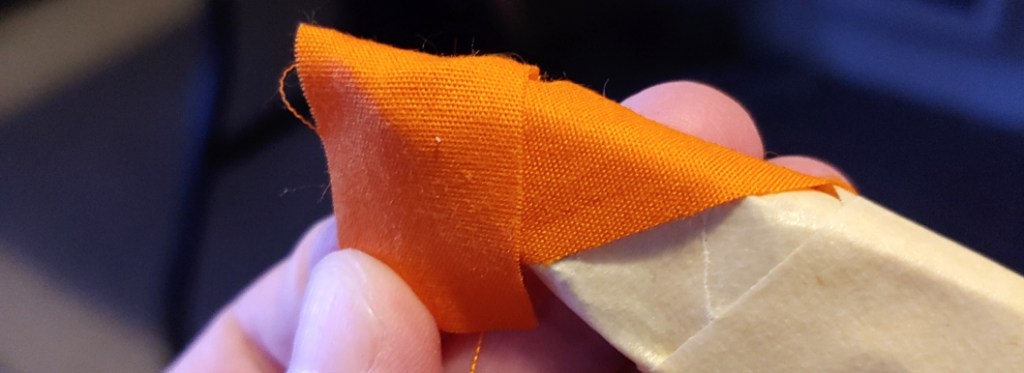
One tail at a time, carefully wrap the tail around the pointed shape, gluing it in place. Now take the second tail and wrap it in the opposite direction, gluing it down with your foam brush as well.
Take some shorter strips and start wrapping them around the form as well. Much like with the point, glue the center of the fabric down first, wrapping the tails around one by one and gluing them down.

While wrapping these strips, making the wrapping look consistent instead of haphazard will give you a better result. So for your first strip, start on side A and wrap the tails around to the back. For the second strip, start on side B and wrap towards A. This will give you a more consistent look on both sides of your object instead of having one side wrapped horizontally and the other diagonally.
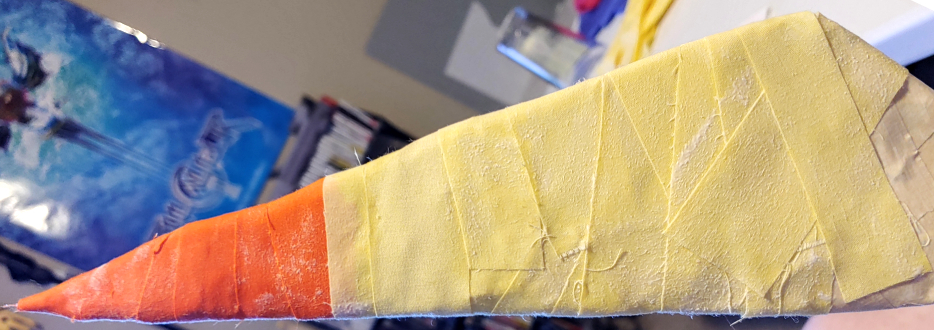
When it comes to forms with multiple angles, it may not be possible to get a completely consistent look and some may just come out a bit more angled or haphazard. Simply keep wrapping and covering your entire form in the best way it fits.
Wrapping organic forms
Organic shapes are tricky because they can be literally any shape. Organic shapes will vary from project to project and may take a combination of wrapping corners and edges to make them work.
The best approach with organic forms is to start with smaller strips, build a base up to cover the shape then wrap longer strips around the form as needed.
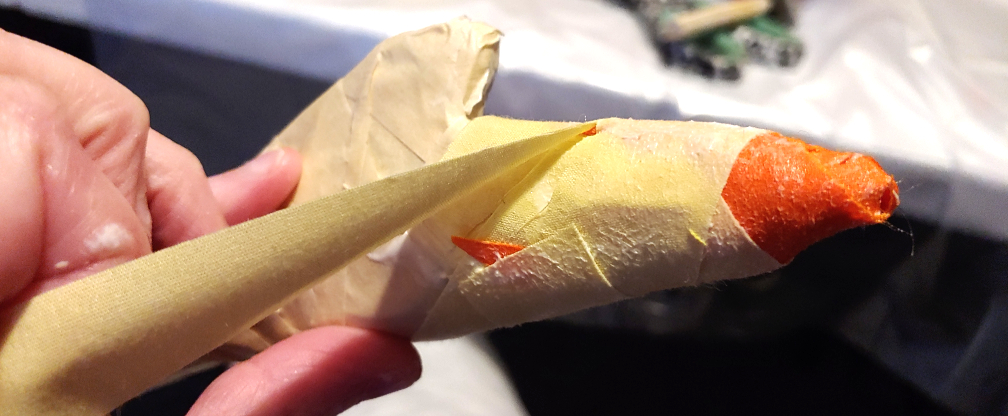
The longer strips can hide the edges of the fabric, but the strip will need to sit flat against the organic form to make everything look smoother. If the strips do not sit smooth, you can take your scissors to snip the fabric then push the fabric down to overlap it or spread it apart and make it sit flat.
Clean your scissors off almost immediately so the blades don’t get glued shut. Mod Podge isn’t the strongest glue for your scissors, but it’s still annoying to try to pull the blades apart when this happens.
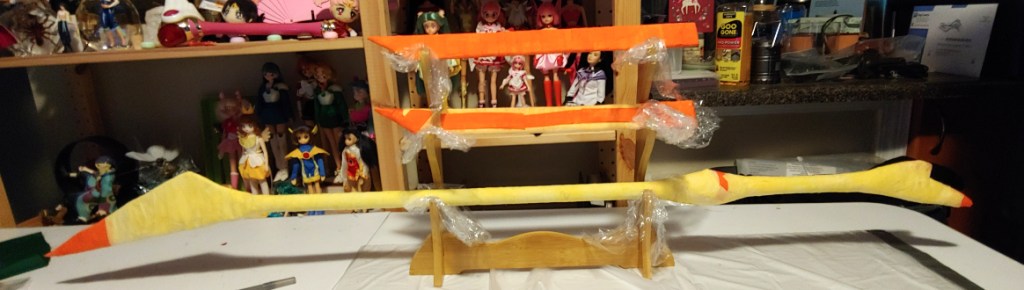
Directional wrapping
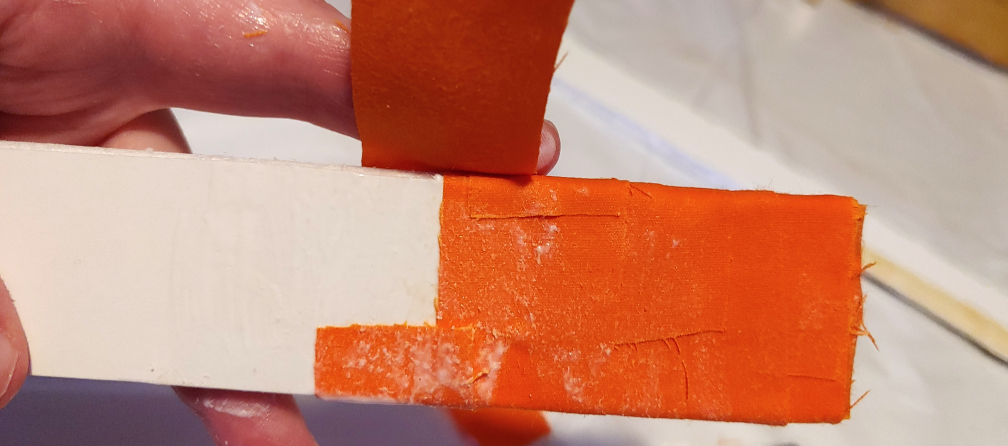
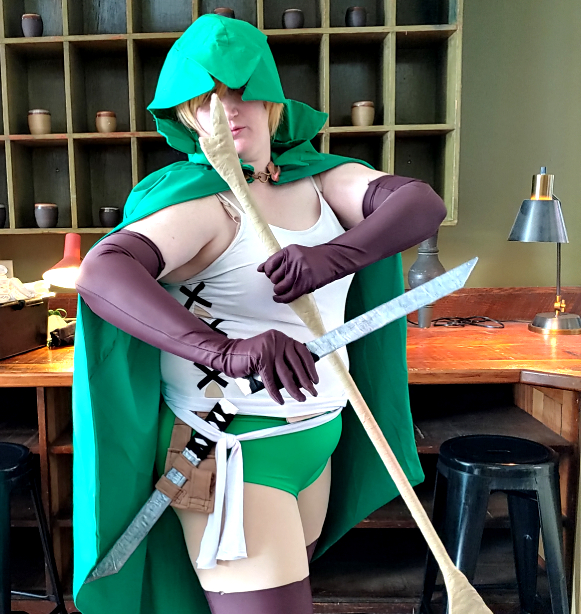
Directional wrapping is laying the strips out in a specific direction to reduce how visible the individual strips of fabric are in the final version. This may involve laying long strips across something like the blade of a sword like this short blade here:

You could also use directional wrapping to make a particular piece look consistent like when wrapping corners and edges. By wrapping directionally, you avoid having one side wrapped at an angle and one side wrapped horizontally. With layering, you can make both sides look pretty close.
Drying times
Drying times are pretty confusing when you look at a bottle of glue. It can say up to 4 weeks, and technically that’s both true and also not true at the same time.
When working with decoupage, you can generally handle something about 30 minutes after you finish your work given that the Mod Podge was applied thinly and wasn’t slathered. You can set this on a drying rack or prop it up on bowls covered in plastic to dry all the way around, rotating it every so often to ensure everything fully dries, but don’t hang it up.
Before you paint, allow your project to dry for about 12 hours. It should feel completely dry to the touch, with no wet spots at all. If you’re in a particularly humid area, it may take up to 24 hours.
Before hanging a prop up, wait at least 24 hours. Allow it to sit on a table until then.
If you are finishing your prop with any type of Mod Podge, it will take up to 4 weeks to fully cure. You can handle it and even take it to a con before then, but if you’re using Hard Coat or even the dishwasher-safe glaze, wait that 4 weeks for it to fully cure.
Clean up
You’ve probably seen how sticky my fingers look in some of the photos. When working with decoupage and glue, inevitably your fingers are going to get tacky.
Mod Podge cleans up easily with soap and water, and if anything sticks behind, you can simply pull it off your fingers. It does not hurt to pull it, and it releases its grip on your fingers pretty easily.
When cleaning off your brushes, clean off right after you’re done, running the sponge brushes under cool water before squeezing them out and setting them aside to dry.
I hope this article on decoupage gets the brain juices flowing. Decoupage and paper mache are fun ways to make props and not have to worry about outdoor space, cost, or PPE gear. You can do so much with simple materials laying around the house, and if you aren’t sure which project to start with, I’ll have some projects I’ve made up on the Tutorials Index soon enough!
Let me know what you make with your next decoupage project, whether it’s props or accessories or even decoupaging your favorite anime character to a jewelry box. @ me on social media so I can admire your work!
