When you go to a con, you need a place to put your phone. Alas, pockets aren’t always possible in all costumes, so if you have a belt, why not create a simple belt pouch to keep your phone in? You can also stash other small items like eyedrops or some cash in there as well.
When I worked on my Link cosplay, I realized I didn’t have any place to put my phone or even pockets. I like to have my phone in a pocket or easily accessible all the time, so a pouch was the best solution for holding my phone and some eye drops. Link also had pouches in his concept art, so it worked out pretty well.
This little pouch works great for ren faires and cosplay and can be made to fit nearly any belt. I wear pouches when I go to ren faire as well, and this little pouch is coming with me next summer to hold my things.
So let’s make a little pouch to hold our things!
Skill level: intermediate
Cost: moderate (on the low side)
Materials:
- About 1/4 yard outer fabric. Good outer fabrics include soft vinyl or faux leather, faux suede, and canvas
- About 1/4 yard of duck canvas for stabilizing
- 1 large snap or magnetic clasp
Supplies
- Sewing machine with a heavy-duty needle (leather or just heavy gauge depending on fabric choice) with matching polyester thread
- Walking foot (for all outer fabrics except canvas)
- Hand sewing needle. A regular sharp will do.
- Thimble (as needed)
- Fabric scissors
- Pens and pencils for drafting
- Clear ruler (tailor’s ruler recommended)
- A belt for strap measurements
Drafting the pouch pattern
The pouch is a simple pattern. It has a back and a front, with the back longer for the flap that closes over the front. I recommend using your phone to get accurate measurements for how big the pouch should be. If you draft it too small, your phone won’t fit!
I’ll be using my phone for all the measurements, but if you plan on putting something else inside, use that for your measurements instead!
Lay the canvas down on a flat surface, folded in half with the selvages together, and place your phone about 1″ from the bottom edge. Trace a line up the side of the phone about 1 – 1½” away from the edge of your phone. Extend the line higher up than the phone for the front flap.

Draw a line across the top of your phone then draw a second one approximately 4″ above that.

These two lines mark where the front and back pieces of the pouch end. The longer piece is the back and the shorter is the front. But since we can’t leave the front edge raw, add a 5/8″ seam allowance to the top of the front piece, the line that sat right above the top of the phone.

Cut out two pieces of canvas at full size. Once you have both canvas pieces cut out, cut the marked piece of fabric along the 5/8″ seam allowance line you drew above. This will make two pieces for you at different lengths. Label the bigger one back and the shorter one front.
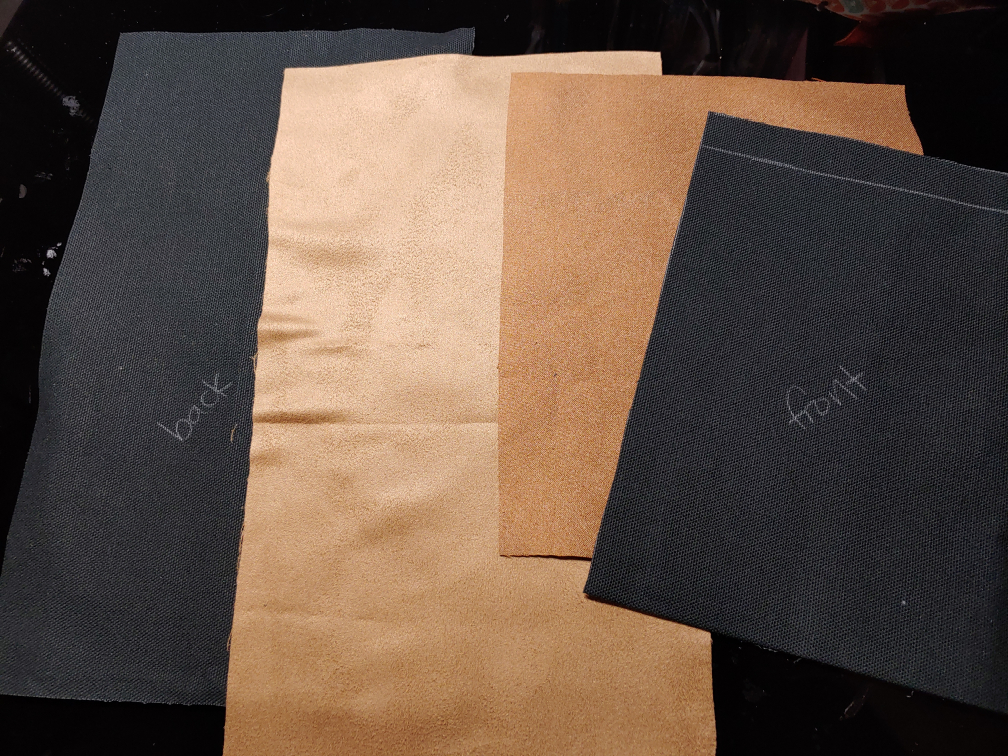
With your two canvas pieces, lay them down on your outer fabric, in my case on the faux suede. You need only one back and one front piece for each pouch. Cut the pieces so the longest side runs along the fabric’s grainline.
Set your scraps aside for making belt loops.
Iron your canvas if needed or desired. Don’t iron faux suede, faux leather, or vinyl.
Adding loops
Before sewing the front and back together, it’s easiest to create and sew the belt loops down first. Using your scrap fabric, mark a loop about 6″ long and 2″ wide. Mark the center of this loop at 1″ as well. This will cover the majority of belt sizes and you can trim it down once the belt is fitted. You will need two loops, so make two of these.

Cut the loop out along the outer lines. Fold the loop in once so that the edges meet at the center line.

Then fold the belt loop again so that the edges are sandwiched in the fold.
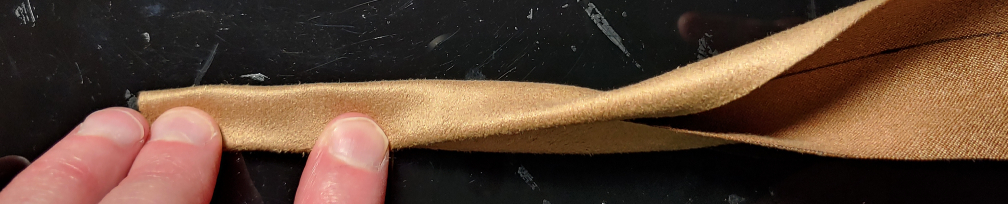
The fabric likely won’t stay put, so as you work, pin the loop down after folding it twice. Once pinned, attach your walking foot to your sewing machine. Sew the belt loop along the open edge with a straight stitch to secure it.

Set the loops aside for a moment. Place the canvas back piece on the wrong side of the outer fabric back piece. Stay stitch or pin the two together. Now place the canvas for the front piece on top of the back piece’s canvas, matching the bottom edges together. Lightly mark where the front canvas ends on the back canvas then set the front canvas off to the side.
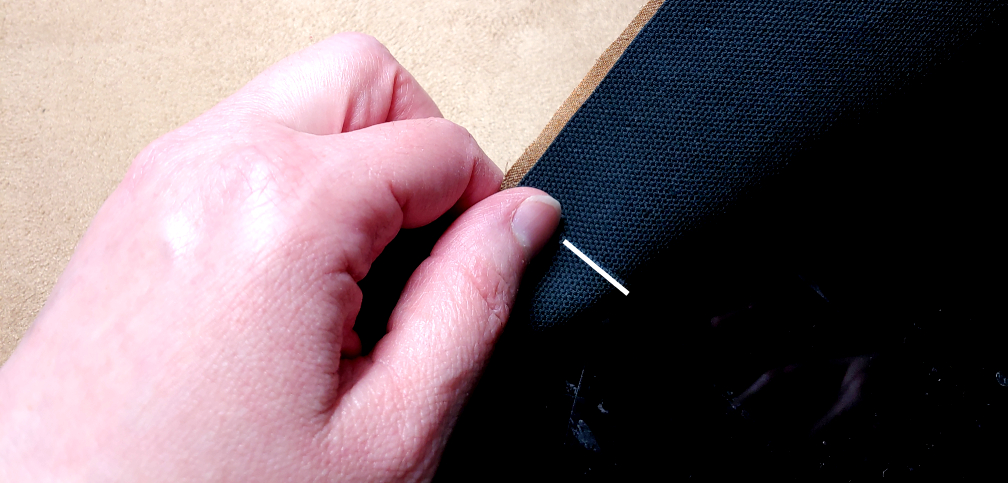
Transfer a small tick to the right side of the outer fabric in the seam allowance.
Lay the back piece right-side up on your desk, placing the belt perpendicular to the fabric about 1/2″ below your markings. Now it’s time to place the belt loops. These loops should be near the center of the pouch, at least 1″ apart. For larger pouches, they’ll need to be a bit further apart. Make sure not to pin them to the seam allowance. Give yourself some space.
Start at the top or the bottom of the loop, it doesn’t matter which. Tuck the loop underneath the belt, pinning it down at the top of the loop but not to the belt. Pin the tail underneath the loop and not the top of the loop itself as you’ll be using this pin for a marking in a bit.
On the other side of the loop, tuck the edge of the loop underneath the belt and give yourself a little leeway wiggle room, about 1/8 – 1/4″. You can guestimate. You want the belt to easily thread through the loops and not get stuck.
Once satisfied, slip a pin into the loop but not the belt and pin the other half of the loop.

Pull the belt out of the loops. Using a pen, mark the belt loop where it folds close to where you pinned the loop fabric. You’ll need this mark when sewing the belt loop down. Do this for both ends of the belt loop.
Pick a side, either top or bottom, and turn the pins to match the direction of the belt loop. Make sure to keep a good hold of the belt loop when removing and turning the pins so the loop stays in the same location.
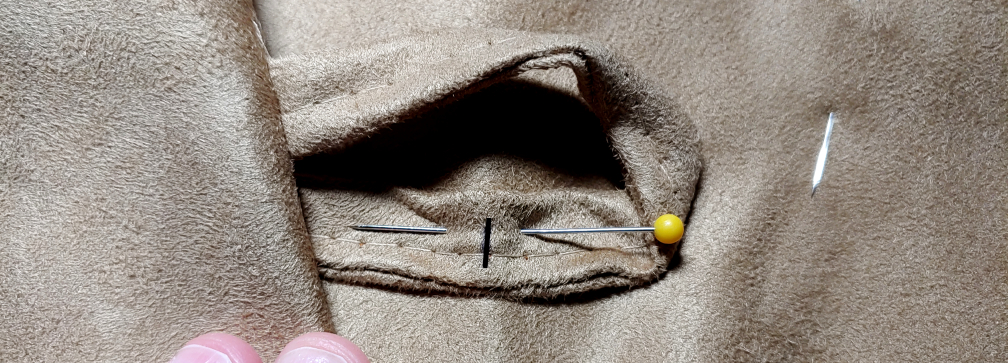
Once the pins are turned, sew a straight stitch back and forth over the mark on the loop several times. You will need to hold the loop with your fingers to keep from sewing over it. You may also need to bunch the fabric along the side to give yourself enough room to sew.

If you have a lot of loop fabric left beneath your stitch, trim the loop down to about 1/4″ to remove excess fabric.
Repeat this process for the other half of the loop until you’ve stitched both loops top and bottom.
Sewing the body
Now that the loops are on, it’s time to sew the body of the pouch. With only two pieces to the bag, it’s important to get the right order to make sure your innards aren’t showing.
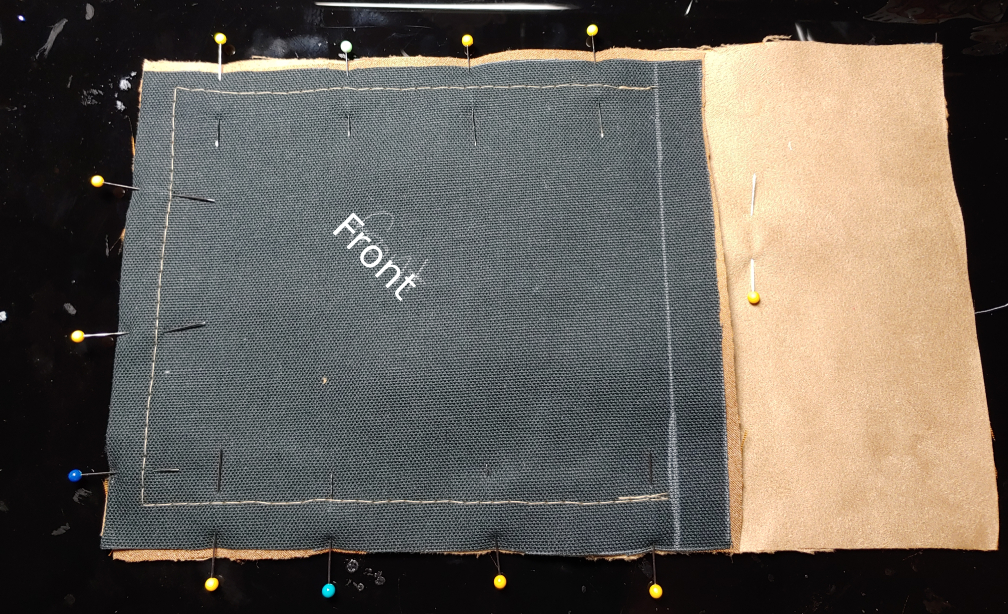
Place the back right-side up with the loops facing upward. Make sure that the back piece has the flap upward. The loops should be on the lower half of the back piece right now.
Place the front piece right-side down with the canvas on top of it, matching the front piece up to the back piece along the bottom and side edges. the canvas should be markings-side up so you can use them as a guideline when sewing. The front piece should meet up with the lines marked on the back piece earlier for the loop placement. The loops should be completely sandwiched between the layers and not visible.
Once the sandwich is complete, pin all the layers together and sew a straight stitch along the edges, stopping at the lower line you drew along the top of your phone before adding seam allowance.
Remove the pins and clip the corners.

With the bag still inside out, fold the top edge of the front piece down twice, creating a double-folded edge to prevent fraying. The fold should use the full seam allowance, folding down until it reaches the stitches along the outside edge of the pouch. Pin this fold with pins, making sure to pin only the front piece.
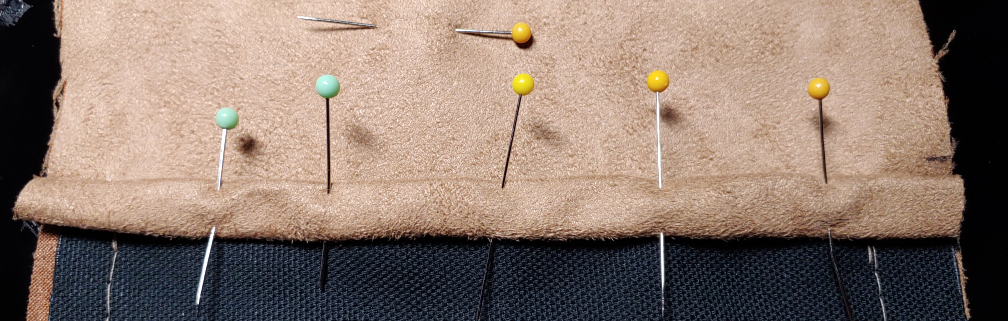
Stitch the fold down with a straight stitch, making sure not to sew the front to the back. You may need to shift the bag while sewing much like with the belt loops to keep the layers out of the way.
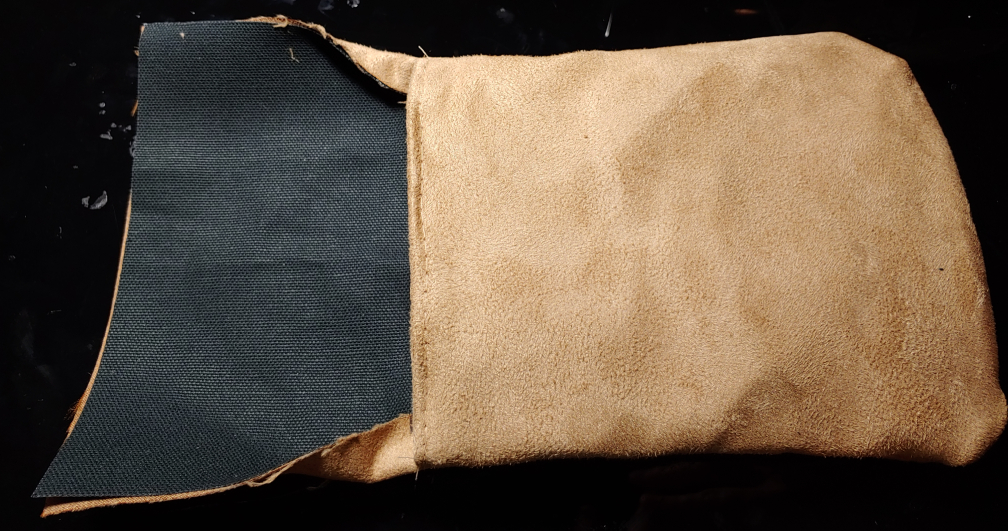
Remove the pins, flip the pouch right-side out, and push the corners out with your finger.
The flap needs to be finished much like the front edge with a double-folded hem. Fold the sides first, pinning them down, before folding the top edge. If the corners get too bulky, clip the corners as needed then fold the edges down again.
Sew these folds with a straight stitch. You may need to back up the stitch along the top fold to the outside edge of the fabric to fully secure the top fold and keep it from wiggling.

Adding a snap
As much as we could try to simply fold the pouch down and let it sit, it’s not going to stay. You need a snap to hold it in place. The best snap for this is going to be the large kind, about 3/4″ – 1″ in diameter. You can find them online or at a craft store where notions and snaps are sold.
Start by adding the snap to the top center of the flap. It doesn’t matter which snap piece you use here. If you don’t want the thread to show on the outside, you can move to the next snap hole over the snap instead of along the back of the fabric. Make sure to do at least two loops of thread in each hole to secure it.
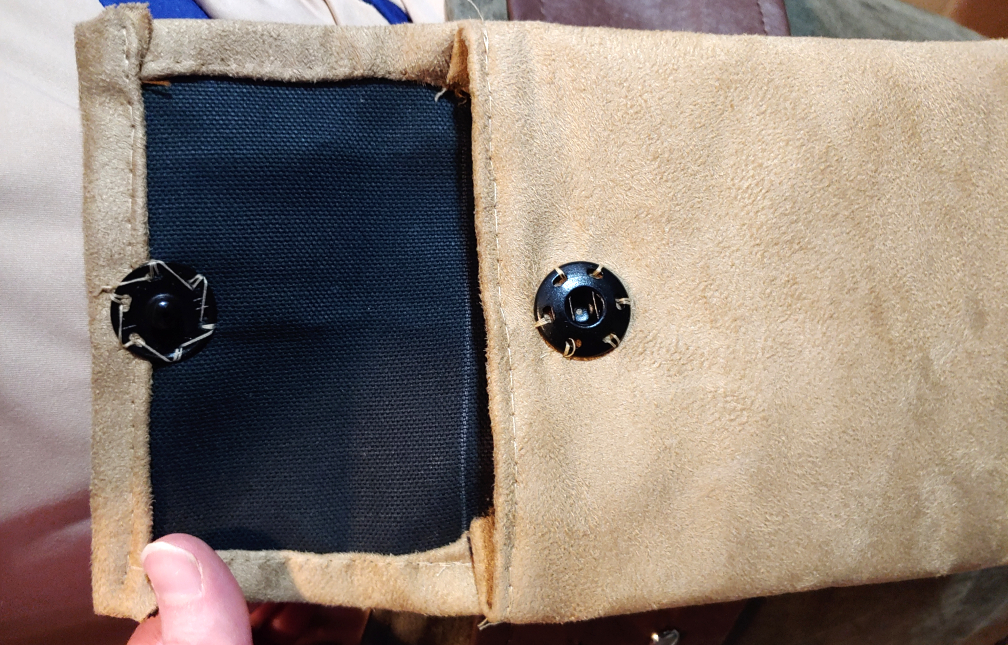
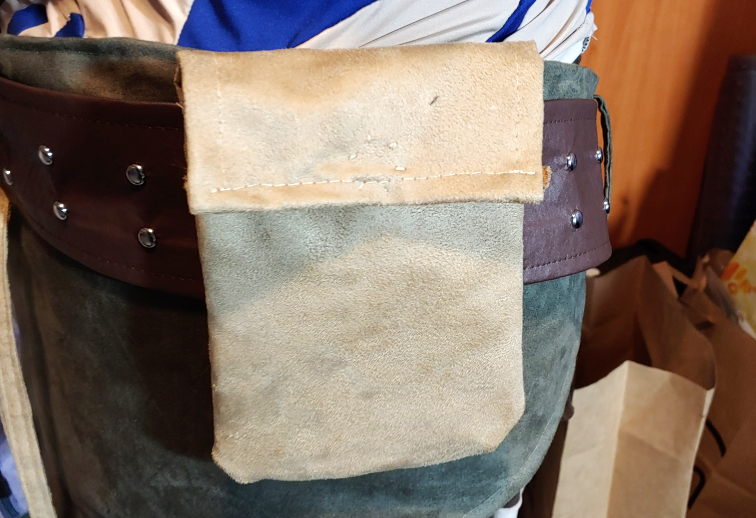
After adding the snap, slip your items inside the pouch. My phone is relatively thick, so when I folded the flap down, the snap met the fabric pretty high up on the front piece. It may be different for yours.
Fold the flap down and use a pen to lightly mark where the snap meets the fabric. Take the other snap and sew it securely down to the front piece, making sure to only sew it to the front and not the back.
Once sewn, clip your threads and snap your snap. You now have a belt pouch.

I hope you enjoyed this tutorial on drafting, sewing, and creating your own belt pouch! It’s convenient for cosplay, ren fairs, and anywhere where you don’t have pockets but do have a belt. You can make them in a variety of heavier fabrics to match your cosplay needs.
Let me know what kind of pouches you make with this tutorial! @ me on social media so I can admire your work.
