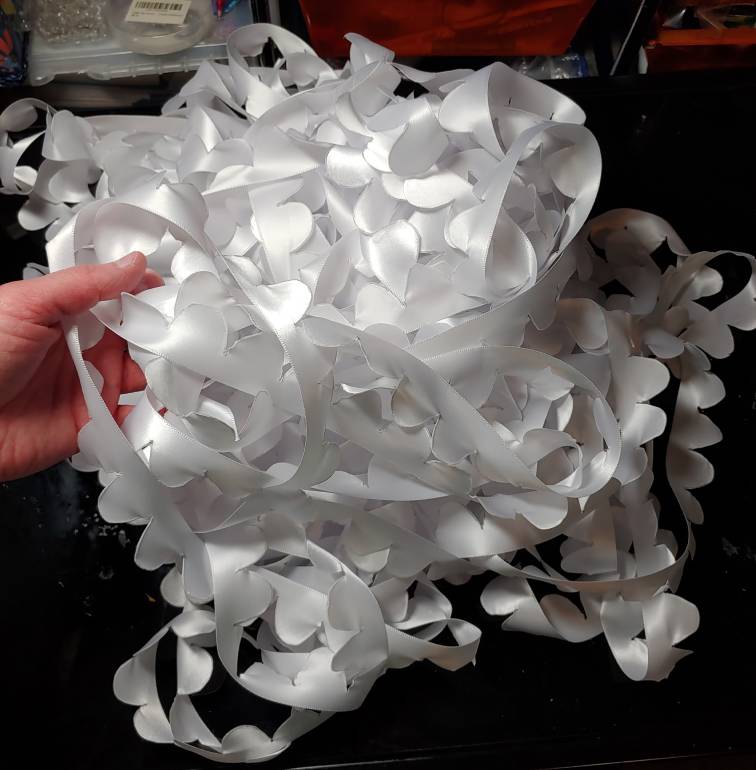
Sometimes you need scalloped trim. A lot of it. And large amounts of trim get super expensive. My petticoat project required around 50 yards of scalloped trim. Even the budget trim would cost me at least $250 and it wasn’t even the right style! That’s really expensive for a petticoat, so why not make your own in the exact style you need?
This process can be a little time-consuming, but it is beginner-friendly and relatively budget-friendly, making it a good alternative to dropping over $200 on some lace that doesn’t really match.
Some safety notes before we get started! This method involves working with high temps. Please make sure to follow all safety precautions and not burn yourself.
This process can also be quite rough on your hands when making long stretches of scallops. Make sure to take breaks and stretch if you start feeling any pain or fatigue in your hands or wrists!
Skill level: beginner-friendly
Cost level: generally budget-friendly
Materials:
- Double-faced satin ribbon wider than your scallops. Find them in large spools from wholesalers on Amazon and eBay to keep the cost down
- A soldering iron, hot knife, or wood-burning kit
- A smooth heat-resistant surface like a glass cutting board or cookie tray that you don’t plan on using for food.
- A damp sponge you’re not using in your kitchen ever
- A pen or pencil to mark your cut lines
- Something to make stencils with. Mylar, cardboard, poster board, cardstock. Anything that’s stiff enough to keep its shape
Safety notes:
- Make sure to work in a safe space where you won’t burn anything or yourself. Ensure that you won’t trip on the cord or knock the soldering iron off your table.
- Heated up synthetic fabric can emit fumes. Make sure to work in a ventilated area or near a fan or window!
Working with a soldering iron

If you’ve seen my other tutorials, I never use my soldering iron for actual soldering. It’s always for weird craft things, and this is one of those weird things.
Satin ribbon is a synthetic fabric, which means it’s essentially plastic fabric. And when you apply heat to plastic fabric, it heats and seals the edges, preventing them from fraying without leaving nasty burn marks behind. You can do this with most non-stretch synthetic fabrics. This will generally work on any kind of synthetic ribbon, though satin ribbon is the easiest to work with and has the prettiest results.
So let’s talk about working with heat. I am using a soldering iron kit I got off Amazon. Comes with a stand and the iron with a heat dial, and that’s pretty much all you need. You don’t need anything fancy. A hot knife or a woodburning kit will also do much the same, and those are pretty easy to find cheap.
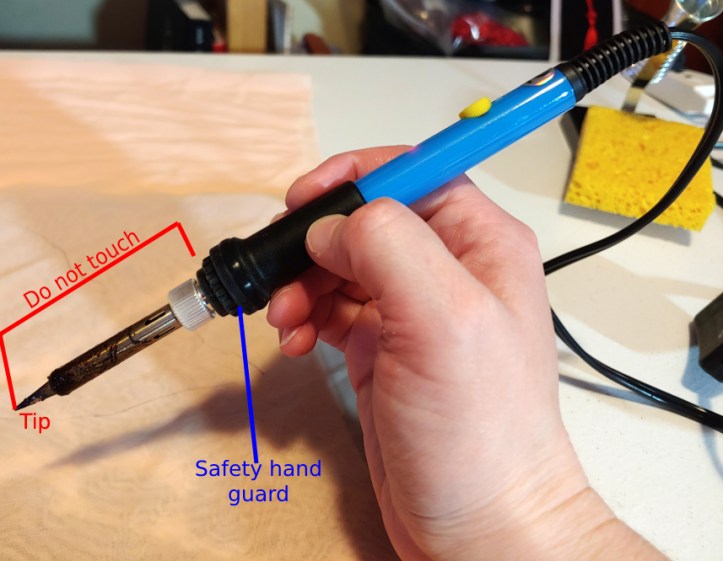
When cutting satin ribbon, the soldering iron will need to be around 350-450C. Celcius. That’s really hot, so you have to make sure you don’t accidentally touch yourself with the tip as it will burn you. Heat tools all have a safety grip and you should always hold above this grip to prevent any damage to your hand when you work. At 450C, you will likely feel the heat radiate off your workspace but as long as you don’t touch the tip, you’ll be fine.
When you work with any hot tip, you want to keep it clean. The plastic fibers will attempt to stick to your tip and gunk it up, and the more gunk on the tip, the worse it will cut. After making your cuts and before you return the iron to the stand, roll the tip over a damp sponge to remove all the gunk and keep your tip nice and clean. Steam will come off the sponge but you’re touching a very hot thing to a wet sponge. It’s normal and expected.
Making a scallop template
Unless you want crooked lace, you’ll need a template to make sure all your scallops are consistent and nearly the same size (within reasonable human error. we aren’t cyborgs. yet). The basic design of the template will have one side flat to press against the top of the ribbon with the other side scalloped. This tutorial shows basic scalloped lace but details like eyelets and little designs can be added to the template as well.

The basic shape of a scallop is repeating ovals or circles. You can use a compass or something oval-shaped like an egg or digital tools to create the repeating pattern. A repeating template a few inches will do as you’ll be moving the template along the ribbon as you go. Make sure to leave yourself a bit of room between the bottom of the scallop and the bottom of the ribbon, as cutting too close to the edge can cause the ribbon to start snagging and dragging, which creates misshapen scallops.
The best materials for a template are something stiff that you can push your pencil or pen up against and not have it bend out of shape. Mylar works great if you have a vinyl cutter or a shop knife to cut the shapes. If you need something hand-drawn or printed, cardboard, poster board, or even card stock will work as well. Something like ordinary printer paper or fabric will start to bend and your scallops will start looking lopsided. We want nice even scallops.
Setting up your workspace
One of the biggest challenges of cutting your own scallops is workspace limitations. If you’re cutting a small amount of ribbon, you can probably skip this section, but if you need to cut 50 yards of scallops as I did, you’ll need something to handle that many scallops.
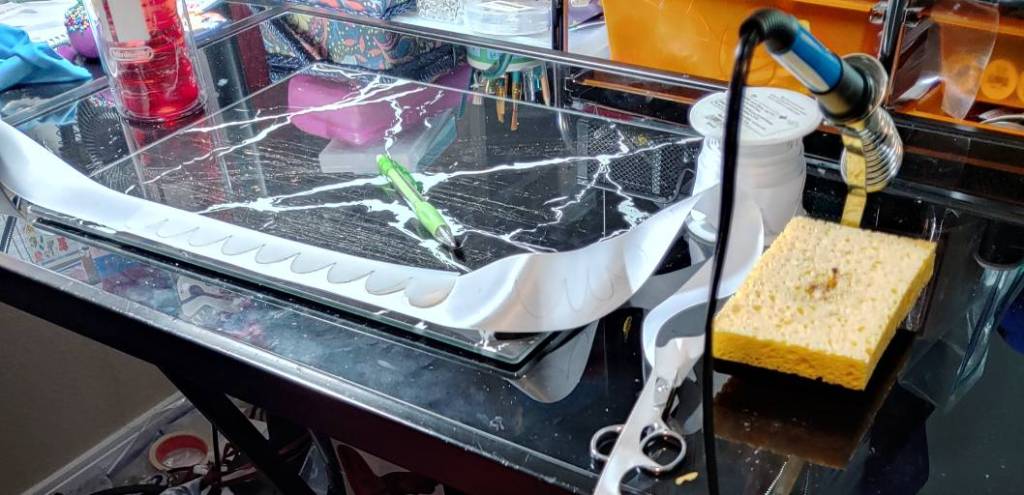
The bulk of your workspace will be a safe place to cut the ribbon without burning either yourself or your work. Make sure that your soldering iron or hot tool has a place to sit on the side without falling off the table and onto the carpet and is out of reach of your arm, your pets, or other small gremlins. You’ll also want to make sure the power cord doesn’t get stuck on anything and you end up dropping it. Make sure you also have space for the cleaning sponge. When working, you’ll need to pile the ribbon on one side and the finished work on the other, dropping the scraps on the floor or into a bucket as needed.
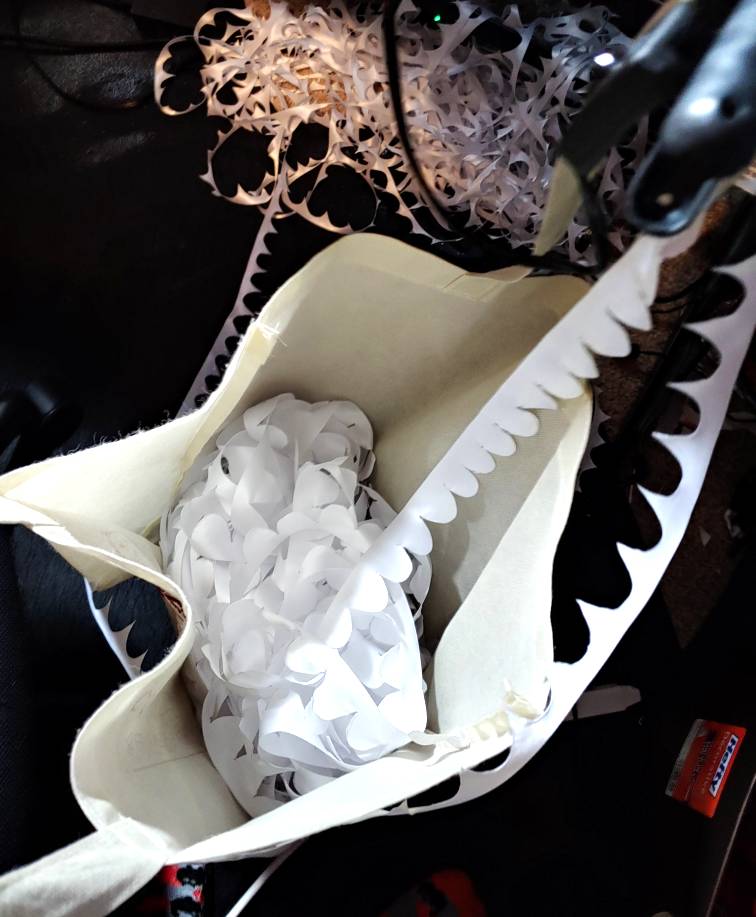
When I started this project, I think I underestimated how much 50y of ribbon actually was and how literally impossible it was to rewind the ribbon onto a spool. To keep from flooding your desk with scallops and having it go everywhere, you’ll need what I’m dubbing a ribbon-catcher.
A ribbon-catcher can honestly be anything. For mine, I clamped a canvas tote to my desk and fed the finished ribbon into it while dropping the scraps onto the floor. You could also use a shipping box, a bucket, a pot, or whatever you like to catch the ribbon so it doesn’t scoot all over the place.
Cutting the scallops
Phew, all the prep work is finally done! Let’s get down to business.
To start, lay your template down on the scallops a little bit away from the edge starting edge (which is usually already fraying from removing the tape). This makes sure any fraying fibers don’t get stuck to your iron and cause you issues when cutting. this also seals the starting edge. Press the flat edge up against the top of the ribbon and start tracing.
If you’re working with lighter materials, stick to a pencil to trace your scallops. A pen works for darker colors. If you have super dark ribbon, a white colored pencil shows up nicely. Don’t use a marker as it will bleed all across your ribbon. Don’t use chalk as chalk dust is flammable.

Once you have your marks traced, you can move the stencil and trace some more, using the last scallop as the next first, or you can move right into cutting. Your preference. I mapped out about a yard or two at a time, then cut, giving my hand a break in between sections.
The best way to use a soldering iron is to draw like you would a really large hot pen. Trace the lines you’ve drawn slowly and you’ll start to notice the edges separating and have a bit of a lip on them. This is the heat burning the plastic fabric and sealing it. It’s going to give off some steam while you do this, so I wouldn’t recommend leaning over your work.
As you continue working along the scallops, leave at least one uncut scallop at the end. When you move the ribbon over, use that one uncut scallop as a guide to where to start the next set of scallops. Place the first scallop of the template over the uncut scallop then trace the rest along the line. This ensures your final scallop is always even and matches the rest.

Each time you reach the end of your drawings, always clean off the tip of your iron and place it back in its holder or in a safe place. After it’s safely tucked away, shift the ribbon across your desk, dropping the finished scallops into the ribbon-catcher if you have one.
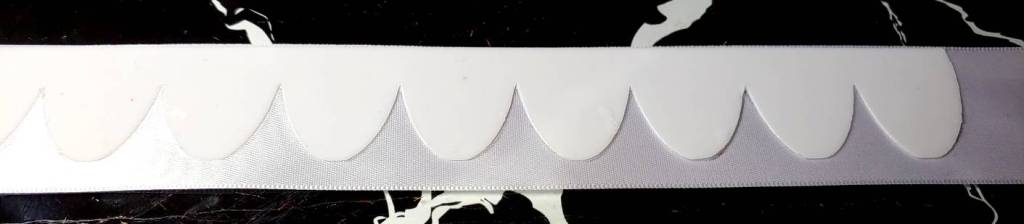
Keep going until you get to the end of the spool or to whatever length you need and draw one final scallop. When you cut this scallop, take the cut all the way to the top of the ribbon to seal off the edge and prevent your precious scallops from fraying.
If you need to trim your scalloped ribbon down, you can cut them by drawing a line with the soldering iron or cut them with scissors, take a lighter, and lightly burn the raw edge.
And there you have it! Your own scalloped ribbon at a fraction of the cost. You can use basic scallops or cut patterns into them. You could use this for all sorts of shapes including triangles or feathers or even moons and stars. As long as the designs don’t overlap, you can cut them out of ribbon. Have fun with it and make lots of cool shapes!
Let me know what you make with this tutorial. @ me on social media so I can admire your work!
