My sister hates wigs, and it’s not exactly an uncommon sentiment. They can pinch, feel itchy, slip, or just not fit over larger hair. I’ve gotten used to them over the years, but my sister still has problems with them. So why force her to wear a wig she’ll want to rip off in 5 minutes when alternatives are much more comfortable?

Felt is a great option to make a wig alternative. It’s soft, lightweight, easy to find, and incredibly cheap. It can be layered to look like anime hair and comes in many colors. It’s not styleable but you can fix the pieces in different ways to mimic hairlines and hide your stitches.
This tutorial covers short hairstyles, though you could mimic shoulder-length hair this way as well. The character used for this tutorial has no noticeable part in the bangs or in the hair. You’ll need to modify it to match your character’s design, but the techniques should work for any style that is flat and not spiked.
Skill level: late beginnner
Cost: relatively budget-friendly
Materials:
- Beanie or head wrap is permanently tied with some stretch
- Felt in the hair color of your choice. This short hairstyle took about ¼ yd. You can also use several felt squares if you cannot get felt in yard increments. Felt can be acrylic or wool.
Supplies
- Styrofoam or fabric wig head close to your head size
- Stand (tripod or desk clamp) or some surface (like a pvc pipe glued to a base) to hold the head and keep it from scooting around while you work
- Small straight pins
- Sewing machine with a standard/universal needle
- Matching polyester thread
- Fabric scissors
- Several sheets of paper for patterning
- A pen or pencil
- Paper scissors (don’t use your fabric scissors on paper please)
What caps work best?
The best type of cap has some stretch but is not too snug on the top of the head. It should have a snug band to make sure it stays securely on the head when worn but the rest can be loose for max comfort.

I used cotton sleep wraps with elastic in the back for this. The cap is slouchy so she can pull her thick hair up comfortably underneath. The cap also has ridges on it which made for easy measurement and placement of the hair.
Slouchy caps will also help mimic the hairline as you can sew felt pieces next to each other and even overlap them around the crown to create a more natural-looking hairline.
If possible, find a cap matching your skin tone or hair color. I chose a black one so that if the cap shifted, the gaps between the hair pieces would not be noticeable against the black felt.
Patterning
Patterning will help you get a feel of how the final felt wig will look as well as how stretchy the cap will be once you’re done. Paper is a bit stiffer than felt and tends not to sit flat against the head, but it is close enough to work for patterning. It also has no give, which is good for estimating how stretchy the cap will be once everything is sewn on.
The biggest trick for retaining stretch in this cap is spacing the pieces out around the band and the head. These gaps allow for the cap to stretch naturally when the cap is worn or pulled on (it needs to stretch the most at this point). The gaps will be larger around the band and gradually get smaller as you go up.
The gaps are covered by layering pieces on top of each other, about 1-2″ inches apart up the head. I’m using a cap with ridges to determine distance, but if you do not have any, you can lightly draw lines on the cap using a colored pencil to get positioning right.
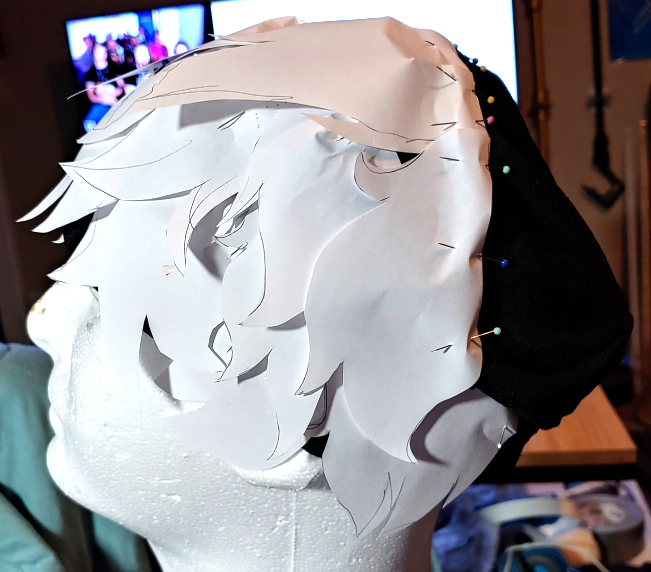
The front of the felt wig has the most layering while the back may or may not have a lot. If you’re working with a slouchy cap, you’ll have less in the back, but a tighter cap will require more layering to mimic the hair.
Patterning the front
The front half of the cap requires the most layering and stretch out of the cap, especially if working with a slouchy cap. You’ll want to layer all the way back to the crown of the head, creating smaller and smaller gaps as you work to create fuller felt hair.
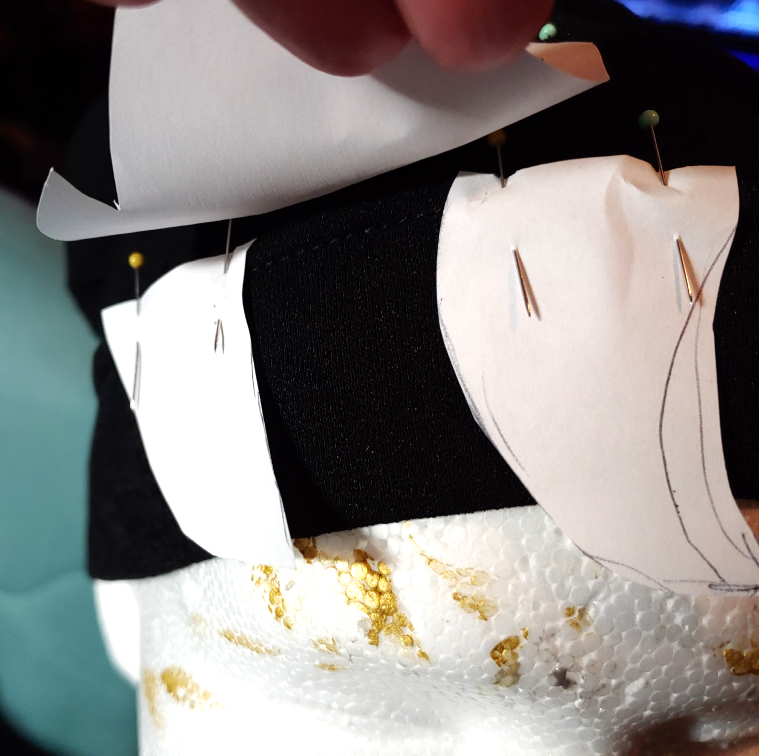
When deciding on the size for each hair piece, hold the paper up to the wig head and cap and lightly sketch the approximate shape and size you want. When you cut it out and are happy with it, pin it to the cap with some straight pins.
Work only to the section above or slightly behind the ear as the rest will be covered by the back pieces.

Your first row, closest to the band, will have the fewest pieces. You’ll want to cut smaller curls of hair to help fill out the base of the hairline. For this felt wig, I had only 3 small felt hair pieces in the front, and a single one over each ear to cover the sideburns.
Your next row will be slightly larger. Create wider pieces, adding multiple curls or jagged lines to mimic the hairline. These will also need to be spaced out to ensure there’s enough stretch along the head to prevent headaches or discomfort when worn. the pieces should be long enough to cover the gaps created by the first row.

The third row will also contain larger pieces. These pieces need to be long enough to cover the gaps as well as the top of the first row pieces. These may be more sparsely placed on the cap, only reaching towards the line upwards from the back of the ear across the crown.
Generally, you’ll only have about 3 main rows before creating the crown line. You may only have two if you wear the cap back further or have a smaller head. My sister likes to wear the cap further down on her forehead, so I needed more rows of felt hair to make the crown sit in the proper position when the cap is worn.
Now that you have all your rows in, it’s time to make the center hairline. This is the part that will serve as the crown and hide the gaps between the front and the back sections.
The crown hairline has the longest and widest pieces. These pieces should extend forward toward the front pretty far and cover any remaining gaps.
These pieces need to overlap or sit right next to each other to cover any gaps at the top as well. The back hair will be facing in the opposite direction and will not cover gaps here.
Additionally, add another piece of hair underneath this crown line near the bottom to curve the hair backward towards the back of the head. It should sit at an angle towards the back and above the ear. This will cover any gaps between the back and front pieces to make a more seamless transition between the two.
Patterning the back
Patterning the back is perhaps trickier than the front as you have to worry about elastic. You cannot pin hair to the elastic since that has stretch and felt does not. It’ll cause pinching on the back of the head. If you’re working with a slouchy cap, you’ll also need to work around the slouched shape and any hair you may be shoving underneath it.
You’ll want about 3-4 rows of hair to hide the shape of the cap, one on the very bottom above the elastic and 2-3 near the top of the head.
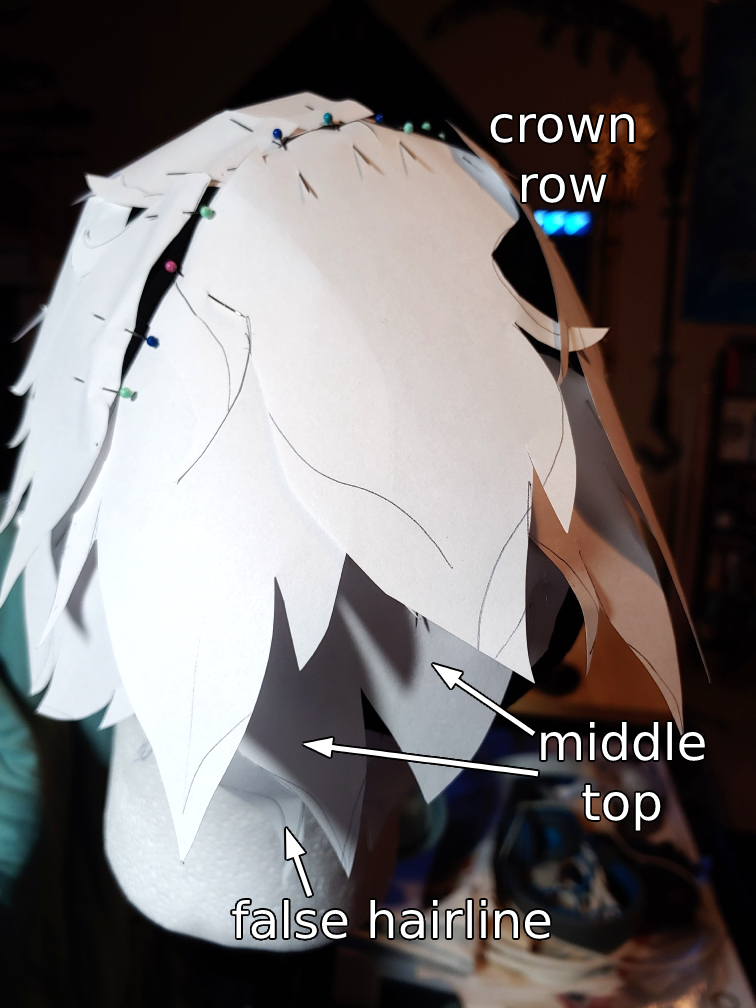
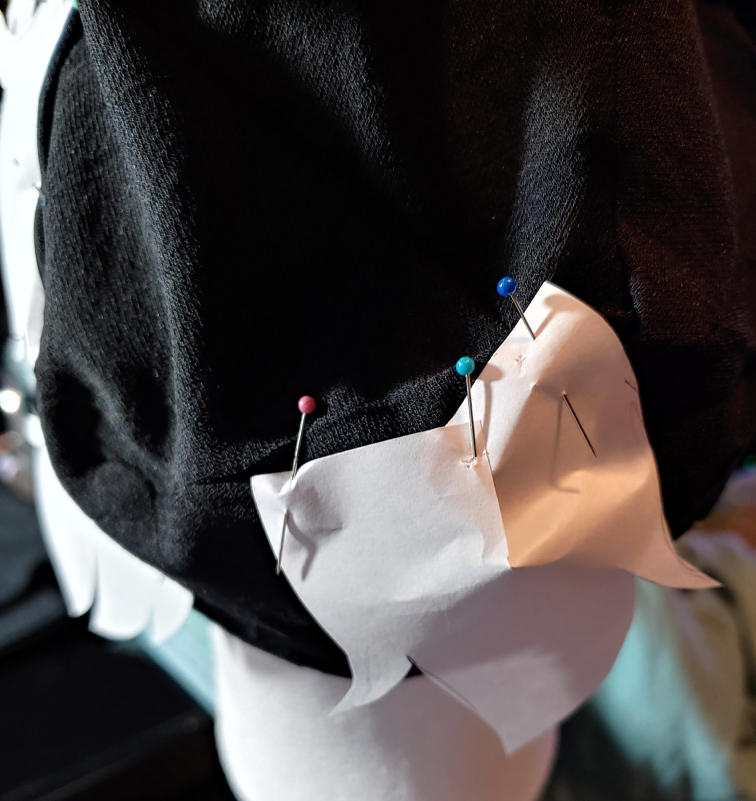
Start with a false hairline at the neck. This is a long singular piece that stretches across the entire back of the head. Place this about 1″ above the elastic, pulling the cap outward from the wig head with your fingers when pinning as needed to ensure the stretch.
The crown row is the longest section on the back. This row meets the front at about the crown on the head and covers much of the back of the cap. These pieces will need to droop down over the slouchy cap and cover any gaps. Paper does not droop but felt droops nicely over the cap once sewn in.
For this felt wig, there is a slight gap in the center back for Kraehe’s hair feather, but if you don’t need to attach anything, you can make these pieces overlap.
Now the last 1-2 rows. These are a bit subjective depending on how slouchy your cap is and how much hair you plan on putting underneath it. This section is easiest to add last as you can ensure all the gaps are properly filled in for your particular wig’s needs.
If you have a slouchy cap, the best place to pin these rows is at the top seam of the cap. Unless it’s a solid knitted cap, most caps will have this seam. Since the cap slouches, this portion will sit further down on the head and you’ll only need to cover this seam and above with pieces to fake the hairline.
If you are not using a slouchy cap, you’ll likely be pinning these rows below this seam, repeating the process used for the front pattern but with longer pieces.
Finalizing the pattern

Now that you have the pattern pinned, it’s time to make any adjustments before making this out of felt. Felt is notoriously difficult to seam rip, so make any changes now before adding the felt.
The paper won’t sit flat, particularly along the back of the head, but it should give you a pretty decent idea of how it will look and cover the head when made of felt.
Take this moment to adjust the placement of the paper, to add or remove pieces, and then once you’re satisfied, let’s get to sewing!
Cutting and sewing
Unlike most patterns, removing all the pieces then sewing them onto the cap isn’t going to work as well as sewing a shirt, for example. The patterning process has placed the pieces in very specific placements and distances to ensure the cap is as comfortable as possible, and by removing all the pieces, we instantly lose all that hard work.
Instead, we’ll do it piece by piece. Each time you remove a piece, mark one of the edges with a small straight pin so you can place the felt piece in exactly the same location.
Sewing the back
Start with the back first, working from the bottom to the top. Cut out the long false hairline at the bottom, pinning it about 1″ above the elastic using straight pins. Pull the cap out with your fingers away from the wig head to stretch out the elastic while pinning the felt down. This ensures that the wig keeps its elasticity despite felt having none.

Next cut and pin the section that sits behind the ear, crossing between the front and back sections. It’s easiest to sew this one with the back section, mostly due to how the crown hairline sits.
Continue upward until you reach the crown row, pinning each one down to the hat.
Now it’s time to sew these pieces down. Pull the tool tray off your sewing machine and slip the cap over it. Push the other felt pieces out of the way with your hand or pin them aside as you sew, sewing a simple straight stitch along the top of the felt hair. Make sure to secure your stitches with a back stitch to ensure the stretching doesn’t rip your threads.

Sew only the pieces, but do not sew across the gap as that will compromise the stretch of the cap. Continue sewing until you’ve sewn all the back pieces down.
Sewing the front
Unlike the back, you’ll want to work crown-down to the forehead. You have a lot more layers to work with and it’s easier to pin back felt pieces than it is to fold paper pattern pieces.
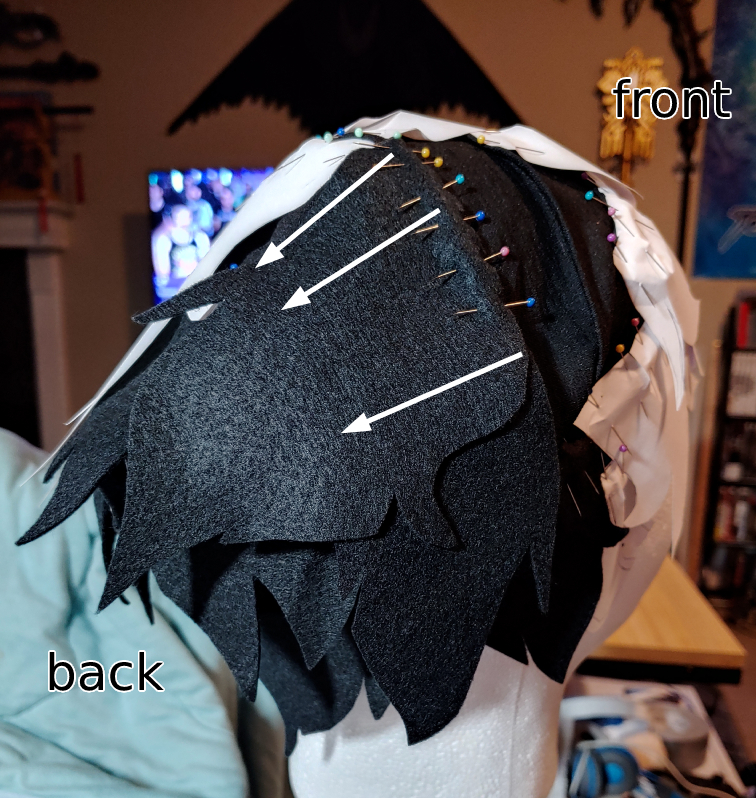
For the crown row and the crown row only, pin the felt pieces facing backward instead of forward. This will form a false crown on the head and cover the stitches, making the felt look more like layered hair than pieces of felt sewn to a cap. These will be flipped back down later.
You can optionally sew them down now or later.
Once the crown pieces have been placed, start working on the next row down, cutting and pinning the felt pieces in place.
As you move further downward, you can drop a stick pin into the felt, pushing it down into the wig head to keep it from shifting or getting stuck while you work. These pieces should be pinned facing toward the front of the cap, in the same direction that you pinned the pieces of pattern paper. Only the crown pieces should be backward.
Now it’s time to sew. Repeat the same method as sewing the back of the cap. The pieces will be closer together, so make sure to pin any felt pieces out of the way while you work. If you have two pieces close together that aren’t on the crown line, do not stitch over the gap. Instead, stitch only the felt, clip the thread, then start a new stitch on the next piece.
Tacking down the crown
If you put the wig on as-is, you’ll probably notice that crown piece flipping towards the back and not staying. You can brush it forward, but eventually, it’ll flip right back to where it wants to sit. Fortunately, a little bit of hand sewing will make this sit properly each time you wear it.

The tacking needs to be in a few key places to make it stay flat on your head. The primary locations are where the felt pieces overlap or meet.
For this wig, I had 3 meeting points. The main one was at the top of the head with one on either side for the individual layered pieces.
Pin these meeting points together and wiggle the wig head a bit on the stand. If the felt stays put, then you’ve found a good location to keep the felt in place.
Use just a few stitches at each point to tack the felt down. You can optionally tack the felt down to the cap itself, though make sure to only do a few stitches to avoid making the cap too rigid.
Once everything is sewn, try it on! You now have a felt wig alternative!

I hope you enjoyed this little tutorial! Felt wigs are a great way to make a wig alternative that might be more comfortable on your head, work better for your hair, or just make your head happier. Felt works great to mimic anime hair layering, and this method works great for shorter hairstyles.
Let me know what kind of felt wigs you make and how you like them! I hope they make your head feel happy. @ me on social media so I can admire your work!
