Shinies. Who doesn’t love shinies? Rhinestones can really make a cosplay shine, but you could be like me and have a love-hate relationship with glue. Thankfully there are other options, and it’s called hotfixing.
Hotfixing is like it sounds. You’re fixing gems to fabric using high heat. While you could hotfix with an iron or a heat press, that doesn’t work with scattered rhinestones, smaller workspaces, and even smaller budgets. Instead, you can use a small hotfix tool that fits in your hand to melt the glue on the back of the rhinestone.
A lot of tools come with confusing or partial instructions, so let’s go over what tools you need and how to use them to bling up your cosplay or craft project!
Skill level: beginner friendly!
Cost: relatively budget-friendly if you buy gems in bulk. The tool itself is pretty cost-friendly.
Hotfix rhinestones
Hotfix rhinestones aren’t the same as glue-on rhinestones you’ll find in scattered packs at the craft store. Those have a simple flat back whereas hotfix ones have an additional element to them. There is solidified glue on the back. The good kind of glue will look kind of like a waffle and feel rough when you touch it. It isn’t sticky and won’t stick to anything until you hotfix it.
You can get hotfix rhinestones in pretty much any color rhinestones come in. They are usually faceted to fit properly in the tool bit though some do come flat. To keep budget-friendly, you can find large packs for around $5-10 bucks online, and then store the leftover in a small cubby container for later. Usually, you get a lot in these packs so they’ll last you a few projects.
When shopping for rhinestones, look specifically for ones that say hotfix. If they do not mention this, there’s no glue on the bottom and they won’t work with the hotfix tool!
I highly recommend a small jewelry storage box for keeping your rhinestones in. Make sure it has tight latches so if you drop the box, you won’t have rhinestones stuck in the carpet fibers for the next several years.
Hotfix tool
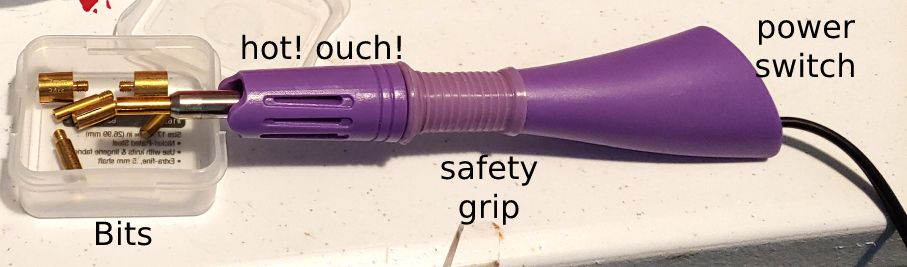
The trick behind all the rhinestone magic is a hotfix tool. This thing looks like a giant pen and comes with a box full of interchangeable bits. It has a switch usually on the top of the tool, a power cord that plugs into a standard socket, and a safety grip to keep your hands from getting burnt. Often the kit will also come with a metal stand (not pictured)
When the tool is cool, you can simply screw the bits on and off with your fingers. If for some reason you need to change the bits while the tool is hot, use a pair of needle nose pliers to unscrew the bits and change them. Set the bit on a small towel until it’s cool enough to touch.
When you switch on the tool, it takes about 2-3 minutes to fully heat up. The tool has only one temperature setting, and this works with any hotfix gem.
After switching it off, allow time to cool off before putting the tool away. I usually left it for about half an hour before putting it away.
This tool will probably cost around $15-20 for a full kit. A kit often comes with a tool tray, tweezers, and a handful of gems. Some will come with a gem storage box or a tool storage case as well.
How to pick a bit
One thing that a lot of instructions skip is how to properly pick the right bit for the job. Many of the bits are labeled, but the numbers are hard to read or might not even be accurate. Or you might’ve forgotten the size of your rhinestones and can’t for the life of you find the listing where you bought it to check the size. But there’s an easy way to find the right bit pretty quickly.
Take a singular rhinestone and set it on a flat surface. Take one of the bits and place it over the rhinestone. Only a small part of the base should be showing below the bit and the rest should be fully covered.
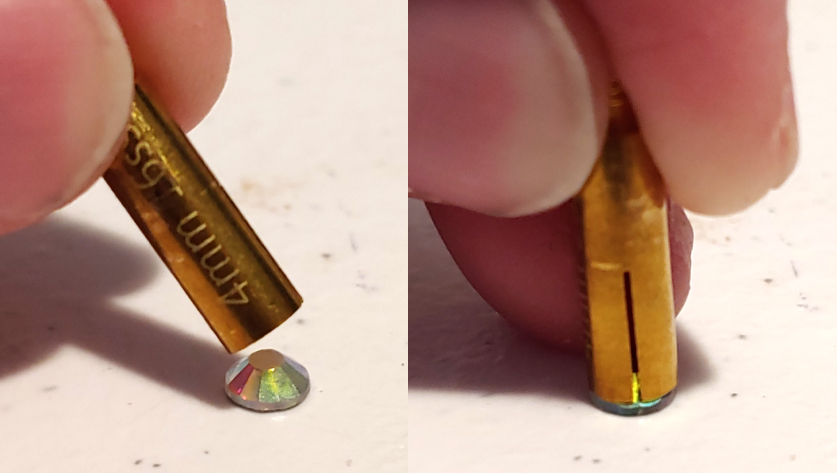
If the bit is too large, it will reach the table and you can feel the rhinestone wiggle around. You can also hear the bit tap against the table itself. If it’s too small, more of the rhinestone will be showing, perhaps all of it. It also will feel a little wobbly as it attempts to balance on top of the rhinestone. The bit should be goldilocks and fit just right.
How to hotfix
Now that you’ve gotten all your supplies and chosen a bit, it’s time to hotfix. Make sure you have a hard surface to work on and ample room to work. Screw the appropriate bit on your tool. Plug in your tool and turn it on, making sure to rest the hot bit on the stand so you don’t burn your workspace.
How you choose to place the rhinestones is up to your project. You can scatter them irregularly, make a line with them, or make shapes or designs. Whichever your project requires, it’s best to work in small sections at a time so you don’t knock everything over with your arm as you move. Make sure your surface is flat and your rhinestones won’t skitter about as you work.
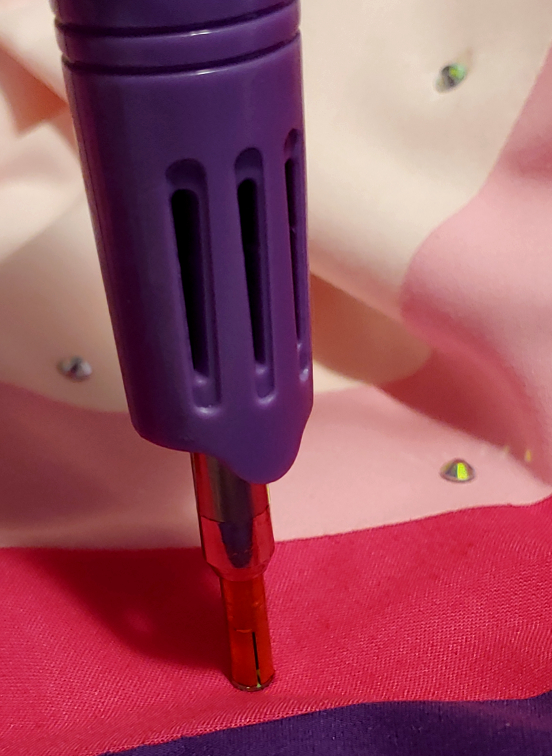
Place some rhinestones out on your fabric. Take the tool by the grip and place the bit over the top of the rhinestone and hold it there for about 10s. Try not to wiggle it as that’ll cause the glue to smear over your fabric. Hold the tool vertically or close to vertical.
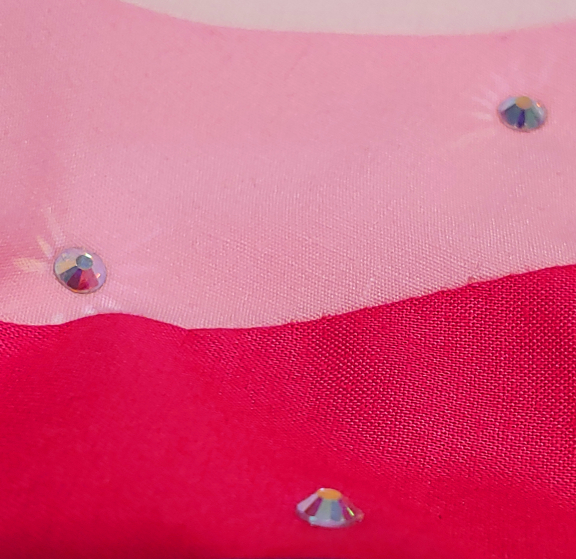
While you work, you may notice that the area around the gem looks a little shiny. This is the glue, and once it cools, it won’t be as shiny anymore.
After you remove the tool, try to avoid touching the rhinestone for about a minute or so. The rhinestones are pretty hot at this point. I haven’t burnt myself on them, but it certainly isn’t pleasant.
And that’s it. That’s how you hotfix!
If you find your gems aren’t sticking well (some glue is troublesome), after removing the tool, use something hard and flat (and heat tolerant so no fingers!) to press down on the top of the rhinestone for a few seconds. That should make them stick just fine!
I hope this little post about hotfixing helps you out! Rhinestones really are a great way to make a cosplay shiny and really catch the light on stages or in photos. They also work great to recreate the sparkle effects some characters have on their outfits. (Or perhaps you just really like shiny things like me and want more shiny).
Either way, I hope you have fun making things sparkle! @ me on social media and let me see what you sparkle. Let me see the shiny!
