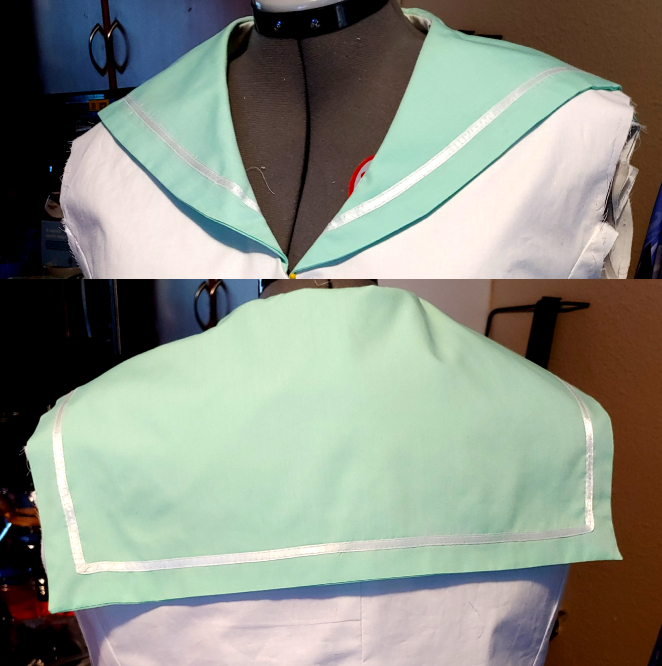
Sailor collars show up in all sorts of cosplay from Sailor Moon to school uniforms and everything in between. Lined sailor collars have a nice solid color on the bottom with the stripes showing only on the top. But how the heck do you get the stripes even? When do you add them?
The best time to add stripes is after you cut the fabric out but before you even begin to sew the collar fabric together or to the shirt. You can add as many or as few stripes as you want, even if your pattern doesn’t show you where to add them or how to do it.
This tutorial works for nearly any sailor collar pattern you have. It covers how to add the stripes, get that perfect right angle at the back, and finish off the lining. It’s an extension of another tutorial, so if you want to learn more about adding stripes with ribbon, check out Adding stripes and details with satin ribbon!
Skill level: late beginner for sewing corners and steady lines
Cost: budget-friendly!
Materials:
- A sailor collar pattern. I am using Simplicity 8481 as my base. Commercial patterns and home patterns have a pretty big selection. Most will work!
- 1/4″ satin ribbon in the stripe color
- Enough fabric to cut two pieces of sailor collar, usually around 1y
Supplies and tools:
- Sewing machine with standard universal needle
- Zipper foot or clear foot attachment
- Matching thread
- A lot of very small straight pins
- Sewing gauge (highly recommended) or a ruler
- Point turner (recommended)
- Fabric scissors
- Steam iron and ironing board or thick towel
Choosing and cutting a pattern

Before you get started, you need to pick a pattern. My go-to is Simplicity 8481, though most commercial patterns have a cosplay or general costume pattern that is sailor-collared school uniforms.
You want to pick a pattern with a flat neckline in the front and a wider collar to look more like a proper uniform. Some patterns use thinner collars, and those can be more difficult to work with when pinning your stripes, mostly due to a sharp curve in the neckline.
You can generally tell if a pattern is good for this method by “does it look like it would in an anime?” Yes? Choose that one.
Once you’ve picked out your pattern, cut two collar pieces, but don’t sew them together just yet. To keep the stripe stitches from showing on the underside of the collar, we’ll need to add the stripes first.
Pinning the stripes
Making the stripes even across the entire collar will require precise measurements, especially if there’s more than one stripe. So to make measurements easier, I recommend a simple tool called a sewing gauge.
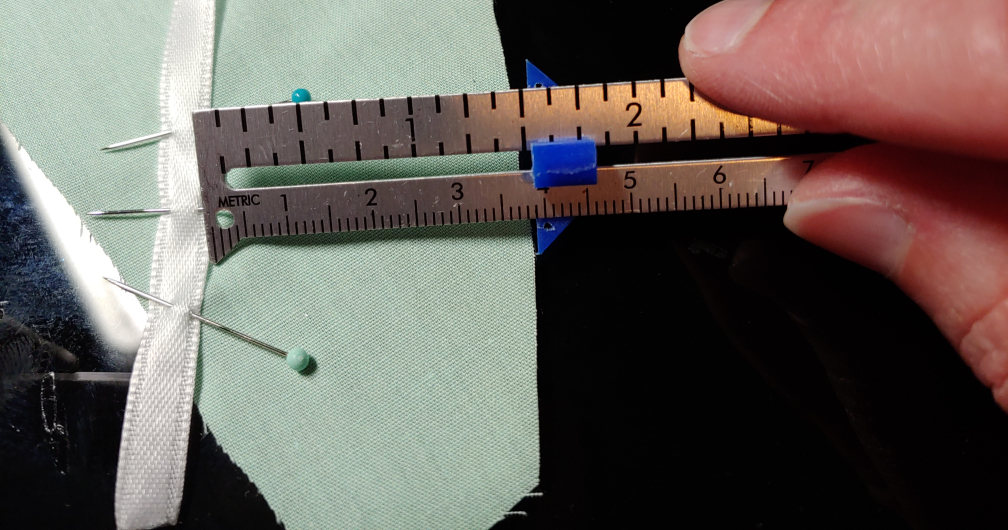
These tools are fairly cheap and usually come in metal with a little plastic slider. You can set the slider to whatever measurement you want and get the same measurement every time when you use the little notches on the gauge.
Main stripes
For your lowest stripe, 1½” away from the raw edge is a pretty good width to work with. Unroll some of your ribbon, leaving a bit of a tail hanging over the neckline of the collar. Using the gauge or a ruler, measure 1½” between the outer edge of the collar and the bottom of the ribbon. Measure a bit of the ribbon then pin the ribbon down using small straight pins. Once the ribbon is pinned, measure a little more and then pin that. Continue measuring and pinning this way across the whole collar.
The outside edge of the collar does have a very slight curve to it. When pinning curves, measure the same as you would a straight edge but pin more closely together on the curves. You essentially make very short straight lines, which visually look like a curve once you’ve finished it.
If you have any trouble pinning your stripes, this article goes into detail about this method: Adding stripes and details with satin ribbon.
Corners
Corners can seem intimidating at first, especially with thinner ribbon, and you can certainly flip the ribbon, bending it around the corner and continuing on your way. However, if you want your ribbon to turn a corner with no visible twists, you can do it in 4 steps:
1. Stop near the corner and then turn the ribbon at a 90° angle, making sure not to twist or flip the ribbon. Measure 1½” on the turned side and drop a pin.
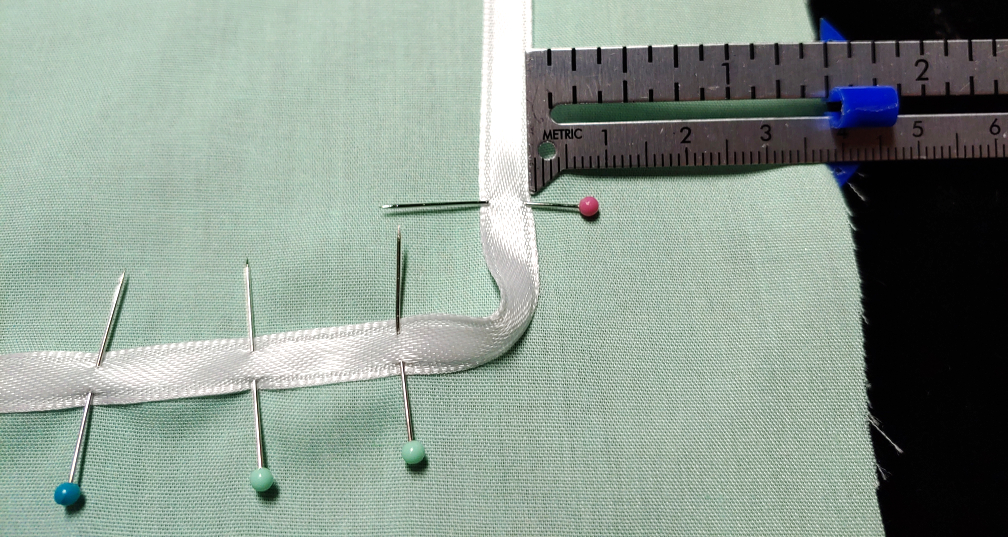
2. Next, pick one side of the ribbon or the other, doesn’t matter, Push that side flat in the bend in the ribbon. By pushing it flat and flush against the underside of the ribbon, it forms a triangle underneath the ribbon where the top of the ribbon has folded down.

3. Push the triangle down flat on the fabric. This will form a 45° angle in the corner.

4. Optionally iron the folded corner flat then drop a pin in it so it doesn’t move.

Now continue pinning along the rest of the ribbon!
Once you’ve finished pinning, you probably have a spiky porcupine like this!
Sewing the stripe
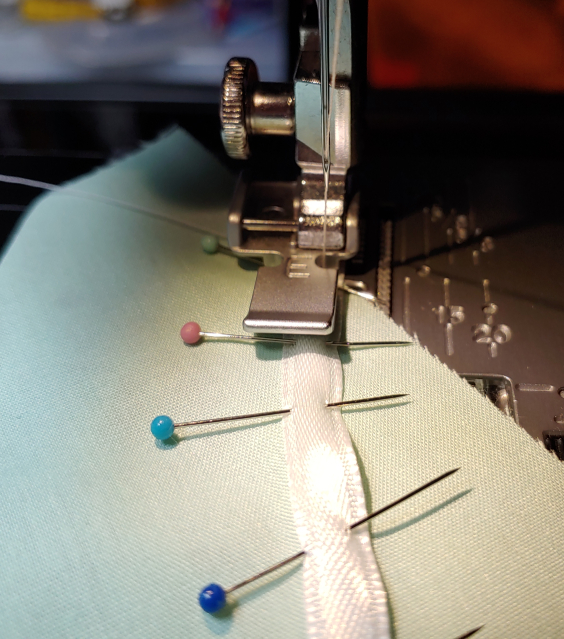
You can’t go to a con with a bunch of spiky pins in your collar. Ouch! So it’s time to sew this spiky porcupine in place. The trick to a nice flat ribbon is to sew right near the edge on both sides of the ribbon. A standard foot will block your view with its large metal foot, so you need something that gives you more visibility.
My go-to feet are a variable zipper foot (looks like a ski!) or a clear foot. You can line up the side of a zipper foot with the edge of the ribbon, and you can snap it on either side of the needle to align your stitches on both sides of the ribbon. A clear foot gives you a full view of your work underneath. While it seems like a tempting option, avoid an open-toe foot, as the foot tends to get stuck on the pins and pulls them, causing crooked stitches.

Whichever foot you choose, it’s time to start sewing the ribbon down.
Start by lining the needle up with one side of the ribbon. It does not matter which side you start with, but my personal preference is to always start with the right. Using a straight stitch, follow the edge closely and sew near the edge of the ribbon. If you notice any of the pins tugging, drop the needle to the lowest point by turning the hand wheel, lift the foot, and pull the pin before lowering the foot and continuing on your way.
To sew the corners, sew up close to the corner using your foot pedal. Stop near the corner, using the hand wheel to lower the needle to the lowest position as close to the corner as possible. Lift the foot and turn the fabric. Lower the fabric back down and continue sewing normally.
If you have any trouble sewing these fine lines, check out these two tutorials:
- Adding stripes and details with satin ribbon
- Start sewing with the straight stitch (there’s a section just on corners!)
Once you have the entire ribbon sewn, pull the pins and iron the ribbon flat with a steam iron. This final step ensures that your curves and corners lay flat and look as smooth as possible.
Adding more stripes
It’s hardly uncommon to have two or even three stripes on a sailor collar! So after you’ve sewn your first one, adding the second one involves much the same method but at a much shorter distance.
A good distance between stripes is about ¼-½”. You could go larger or smaller, but this is an easy measurement to work with, and when making sure something is equidistant, easy is good.

Lay your second (and third!) stripe much the same way as you did the first, paying attention to the distance between stripes. You want this distance to be exact as wavering is very noticeable with stripes this close to each other. A sewing gauge will really help you out here! If you don’t have one, use a clear ruler to make it much easier to see the distance.
Fold your corners in the second and third stripes as you folded the first stripe so it matches. If you turned your corners on the first stripe, make sure to turn in the same way for the others.
Pin then sew one stripe at a time. Having multiple stripes pinned is actually very difficult to sew. You spear your fingers and risk the foot getting caught on pins from the next stripe over. It also takes a ton of pins. I have two boxes of small pins, and I’m not sure I could pin two stripes completely.
Once you’ve pinned your stripe, sew it down on both sides like the first stripe and iron it flat to smooth out any wrinkles or curves.
Assembling the collar
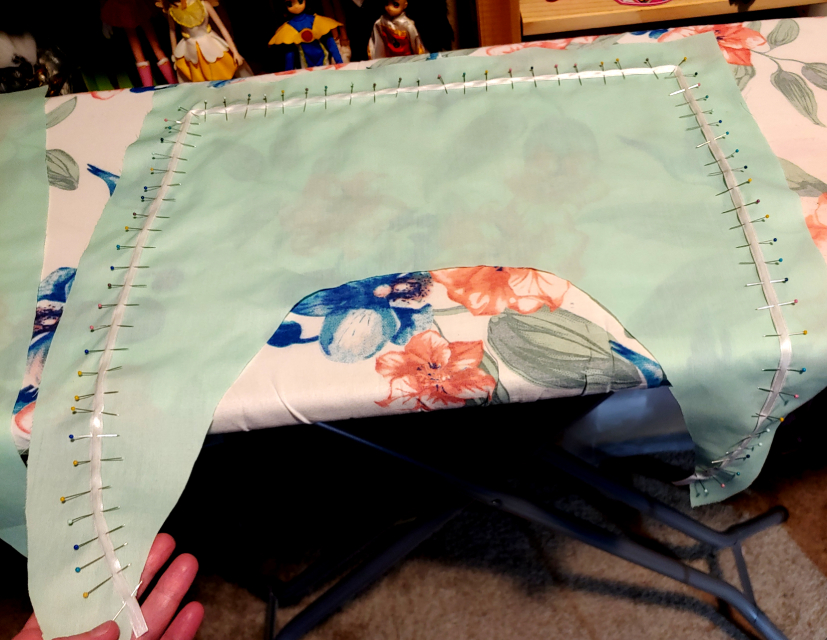
With all the stripes sewn, it’s time to put the collar together! Start by pinning the two collar layers together, right-side together, along the outside edge. The stripe should be on the inside of this collar sandwich.

Sew a standard 5/8″ seam and remove the pins.
Before you flip the collar right-side out, you want to clip the corners. Clipping reduces the fabric in a corner or reduces the strain on the fabric on a curve. As a sailor collar has both corners and curves, you’ll need to clip the fabric before turning it to avoid bunches and pulling.
Start by clipping the corners. To reduce the amount of fabric in a corner, clip the fabric at an angle towards the corner stitch without cutting the actual stitch itself. If you accidentally clip the stitch, simply sew over the cut stitch with a sewing machine to reinforce it.

Next, clip the curve. Unlike the corner, make small cuts with your scissors inward toward the curved stitches. This allows the fabric to overlap or spread apart without bunching. The curve is pretty gentle so you don’t need that many to make the fabric sit flat.

Now turn the fabric right-side out. Push any stubborn fabric out with a finger. Before ironing, use a point turner or some stiff cardboard to push the corners out and make them more corner-like instead of rounded. Don’t use a pen as it’ll push the fabric out right through the stitches. You can use the point turner or cardboard to smooth out the curves as well.
Once everything is smooth, give it a good iron and there you go! Your collar now has stripes and is ready to be added to your cosplay following your pattern’s instructions.
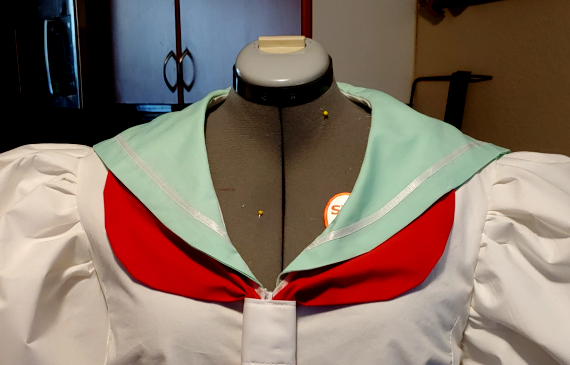
I hope this helps you add stripes to any collar, even if the pattern doesn’t tell you where to place it. It’s a useful little technique for all your sailor seifuku stripe needs.
Let me know what sailor collars you choose to stripe-ify with this tutorial. @ me on social media so I can admire your hard work.
