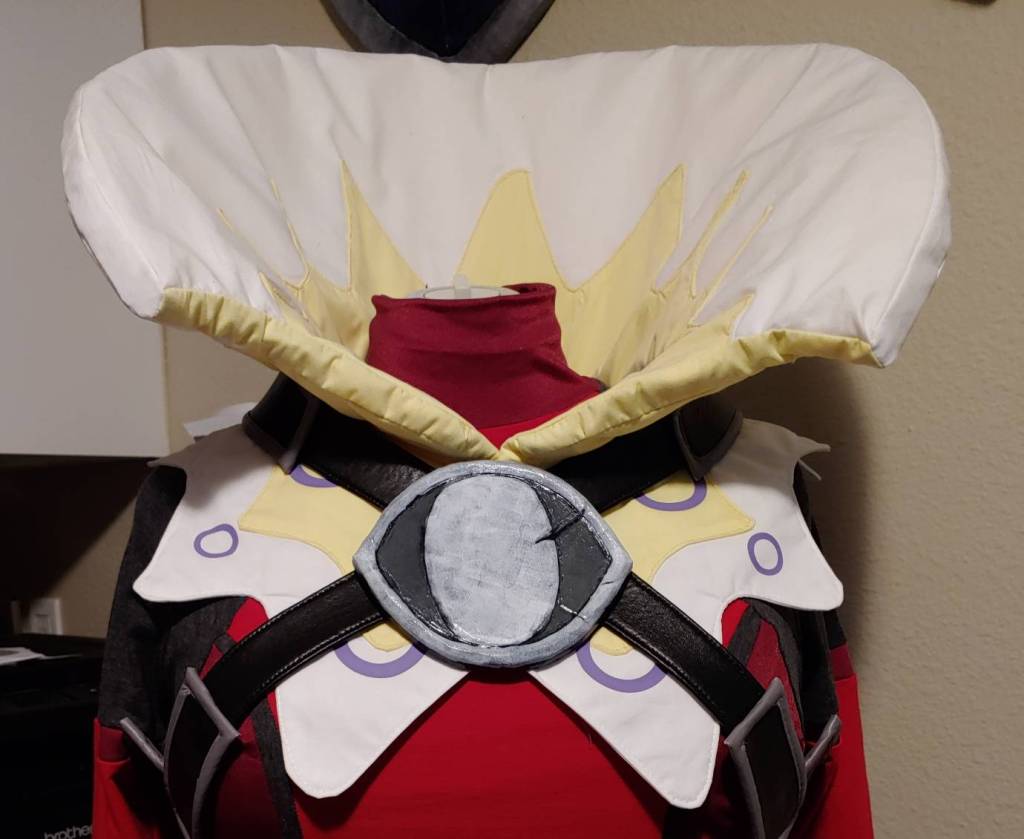
When I first saw Master Kohga in Breath of the Wild and later in Age of Calamity, I knew I had to cosplay him. His outfit presented a number of challenges, one of them included the giant puffy collar. There are dozens of tutorials out there on how to make ruffs and stand-up collars, but none of them were puffy and most of them involved crazy wiring and supports. Good for future cosplays, but not quite for Kohga.
I puzzled over this for a while until I ran across the perfect supplies while rummaging through my craft shelf: light furniture foam and horsehair braid. Both are easy to get and aren’t too expensive. So if you need a puffy collar too, here’s one way to make an ultra-puffy, easy-to-transport stand-up collar that doesn’t require a lot of crazy or expensive materials.
Skill level: Intermediate for pattern-making and sewing puffy things on a sewing machine
Cost: moderate. Depends on what accents you use for a project. HTV can get costly.
Materials needed
- poster board for patterning
- muslin fabric or scrap cotton for patterning, about 2y or so
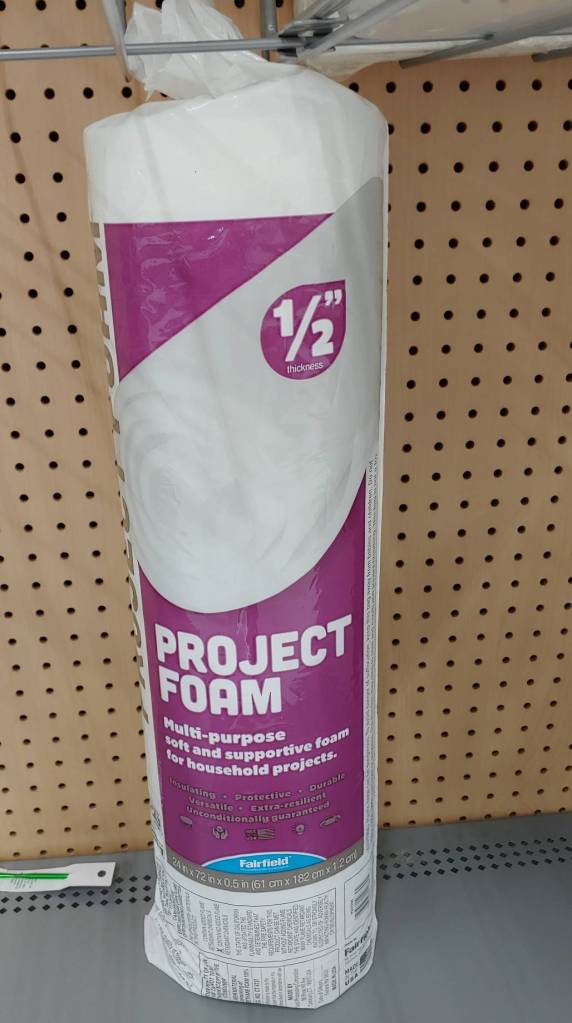
- about 1y 1/2″ project or furniture foam. The rolled kind, since that is more flexible
- about 2y wide horsehair braid
- about 2y cotton or polycotton fabric in the main collar color
- accent fabric width may vary
- about 1-2y of medium-weight interfacing for stabilization and protecting from horsehair scratchiness
- accents in foamies or heat-transfer vinyl as needed
- patterning supplies such as a hem ruler, pens, scissors, etc
- hand sewing needle
More fabric and supplies may be needed for a larger collar. It is recommended to have a dress form or body double to make the initial pattern since I don’t recommend stabbing pins into your shoulders when working with the poster board.
Creating a pattern

Stand-up collars are weird. You could feasibly go and draw the pattern flat on poster board and cut out your foam and fabric using that template, but it won’t sit properly on your shoulders and probably will bop you in the face. You’ll need to mold it around your neck and shoulders then make a curved pattern based on this.
First, start by marking the collar on your dress form or body double. You can tape it, pin some ribbon, whatever you need to get started.
Next, start cutting strips. It’s going to look like a mess of strips for a bit, but keep cutting large strips, then pinning them to the dress form (this is why I didn’t recommend using your own shoulders. ouch!) Tape the pieces together at the angle you want the collar and keep going around until you reach center-back. Fill in the gaps with rectangles until you make a full, strange-looking collar.

Once you’ve taped the pattern together solidly, remove it from the dress form and trace the shape of the outer edge. Because it’s pretty big, you may have to freehand the curve or use a pencil attached to a string to get a proper circle.
For Kohga, he has a curve to the front end of the collar. If you need a curve or detail on the front end, make sure to add this too.
Once you’ve shaped the pattern, hold it up to yourself in a mirror and check the size. My initial pattern ended up being ridiculously huge, so I trimmed about 4″ off the top and reshaped it.
Cutting the foam
When working with rolled craft foam, it’s never going to sit flat. It’s rolled, and will probably stay that way as long as you allowed it to be. There’s not really a good way to flatten it either. And we can use that to our advantage.
It doesn’t matter which way you cut the foam. There is no right or wrong side of the fabric. However, you’ll want to cut it longways with the top edge and the neckline parallel to the edge of the foam. This will give the collar a bit of a natural curl when you wrap it around the neckline, making it curve outward and not smack you in the face when you wear it.
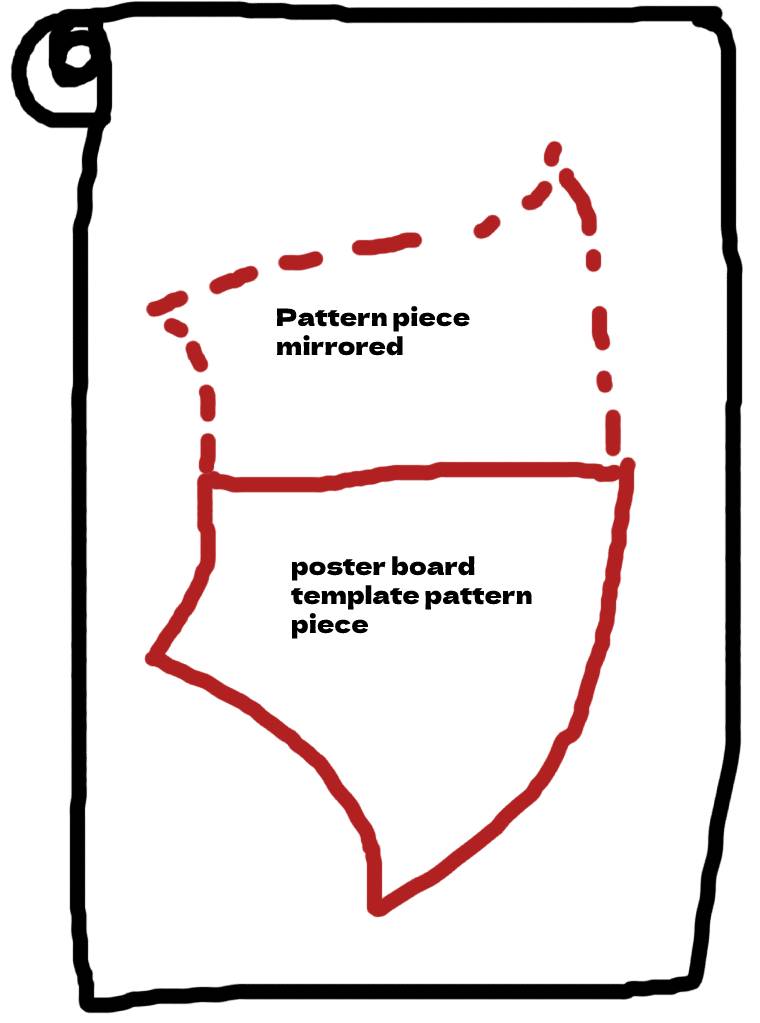
Since you’ve made only half a collar, you’ll need to mirror the pattern piece to make the full collar. Make sure not to cut down the centerline else you’ll have only half a collar.
Keep your poster board pattern. You’ll need it later.
Horsehair support
While the foam can stand pretty well on its own, it’s best to give it a good support system so it doesn’t flop around at the con. Horsehair braid is the easiest to work with, though feasibly you could use polyester boning.
The horsehair braid is a rough polyester woven strip that’s often used in hems to give them structure. Though in cosplay, horsehair braid is immensely useful for different kinds of support, much like the collar here. I used 2″ wide horsehair for Kohga, but feasibly any wide horsehair should do.
Because horsehair is woven, you’ll have to be careful when cutting it. It tends to try to stab you because they are plastic threads after all. They get annoying and scratchy. You can use clear tape to secure the ends, much like you would do to prevent a braided trim from fraying. Since the horsehair braid is hidden, you don’t have to worry about the tape being visible. I honestly didn’t tape my horsehair and ended up scratching myself a few times. Don’t be like me. Tape up your scratchy braid.

Since the foam is thick, you’ll need to hand sew the horsehair braid onto the foam collar. You’ll need about 5 pieces to fully support the collar, 4 vertical and 1 horizontal shown in red on the diagram. This spread-out structure ensures that the collar doesn’t sag unevenly but still has room to flop over on the top to give it that curled look standup collars often have.
It doesn’t really matter what order you sew the strips down onto the foam, but it’s important not to sew through the foam. If you do then pull the thread tight, that dip will show up in the final collar. We don’t want that. So use a simple hand stitch, puncturing only the top layer of the foam, just enough to secure the horsehair to it. I used a straight stitch down both sides of the horsehair, but any securing stitch will do.
Making the fabric pattern

The biggest challenge in making a pattern for this collar is remembering that the collar is not flat. It’s 1/2″ thick and the pattern will need to be designed around this. You can’t make a simple sleeve and be done with it. It needs a side channel to not crush the foam you just worked on making and give the collar that 3D shape. Why else make a puffy collar if you’re going to crush the puff?
Start by making the front and back of the collar. Use your poster board template to make the base much like you did with the foam, but don’t cut it out yet. You’ll want to add 1/2″ – 5/8″ seam allowance to your fabric on all sides, including the neckline. You need that so when you sew the fabric together, it’s not too small for the foam. You add extra to the neckline to either close the collar or attach it to something else like a capelet or a shirt.
Once you have the front and back pieces, you’ll need the channels. If you’ve used 1/2″ foam like I did, you’ll need 1/2″ strips + seam allowance on both sides. Measure the length of the outer edge of the collar then add a few inches. You think you’ll have enough just by calculations, but it never seems to be enough, so add those extra inches just to be safe. Do this also for the front-facing side seam as well, though make sure to cut two of these out as there are two side seams.
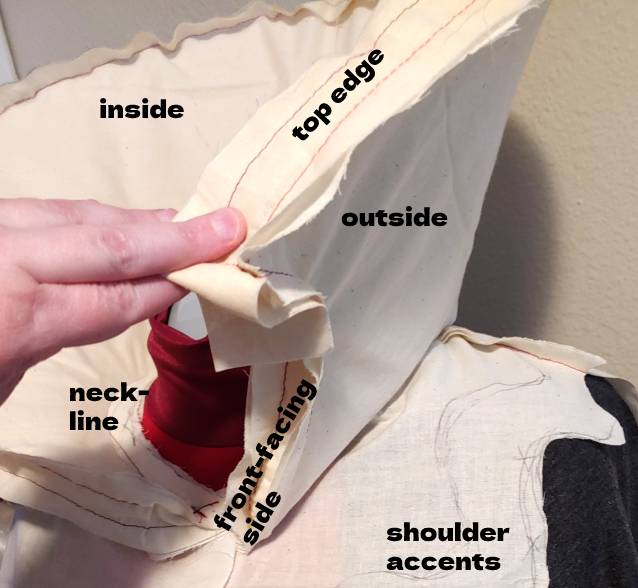
Now it’s time to sew all the pieces together to make sure your pattern looks right. Start by joining the inside to the outside with the top edge strip. If the strip you cut for the top edge is too long, no worries. We’ll trim it down in a bit.
Next, sew the front-facing side. This one is a little tricky since it’s a box shape on a curve. I recommend starting with sewing the front-facing side to both the inside and the outside of the collar before sewing the joining seam between the top edge and front-facing side. You’ll probably have extra much like I did, and that’s okay. We’ll trim it down.
Now slip the cover onto the foam. If you’ve left your horsehair edges untaped, make sure not to scratch yourself or the fabric in the process. The horsehair braid should be facing the outside so the curves of the collar are correct. If the foam fits to your liking, you’ve got a good cover! Trim the corner where the top edge and the front-facing side meet down to a 1/2″ or 5/8″ seam allowance so you know exactly how much fabric you need in the final version.
During this process, you can sketch any accents or details you’ll want to include in your design. And since you have the collar stuffed and sewn (temporarily), create any shoulder accents you want as well. Do the whole thing all at once to save yourself some headache of trying to do it while the collar is constructed.
Construction
Now it’s time to build your final collar! You’ve done most of the work already in the planning phases, so this is probably one of the easier parts. So rip apart your muslin pattern, and let’s get to construction.
When cutting out the fabric, it doesn’t particularly matter if you’ve cut it out along the grain or the crossgrain. This particular style of collar doesn’t require any stretch or drape nor does it need a particular strength one way or another, so you can cut it either way. I cut mine out along the crossgrain much like I cut the foam.
You’ll want to also cut out interfacing for the inside and outside pieces. This will add extra strength to the collar and also smooth out any puckers created by the horsehair or during the sewing process. If you’ve left the horsehair untaped, this also prevents the fibers from trying to poke through the fabric. Before construction, fuse the interfacing to the front and back panels according to the interfacing’s instructions.
Sewing is pretty much the same as it was when sewing the muslin pattern together. You can follow the same order and guide to put the collar together. However, before you sew the pieces together, add any accents. For Kohga, it was all the gold accents. It was much easier to sew these accents on the pieces before construction, though given their shape, I could’ve sewn them after as well.
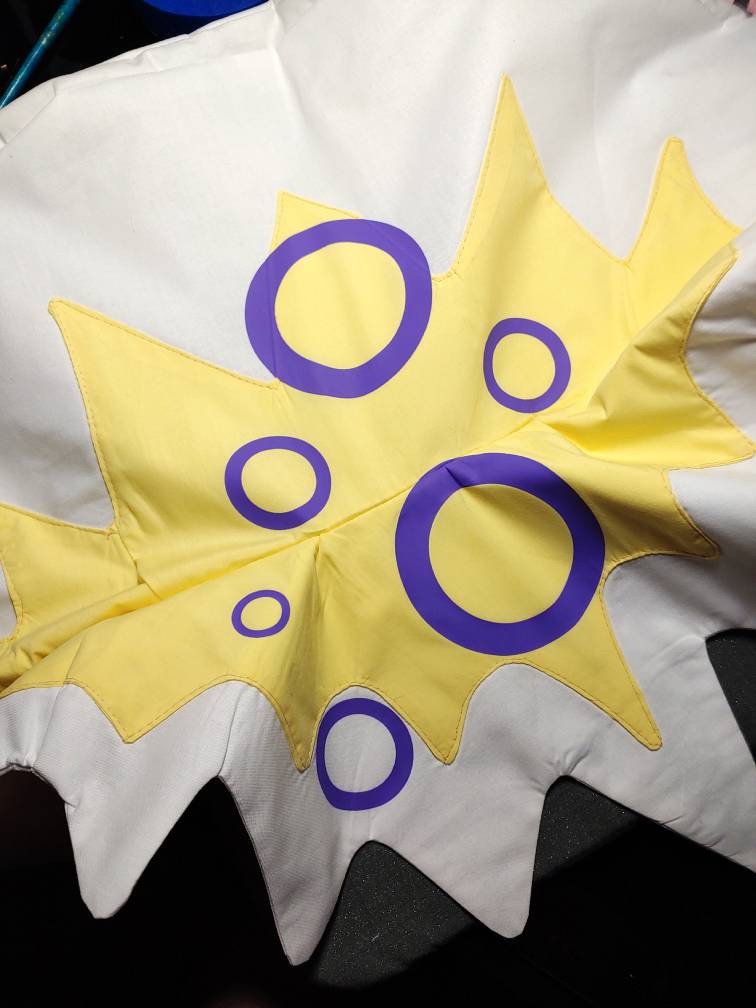
After you’ve sewn your pieces together but before you insert the foam, add any accents that require heat or to bend the fabric. Kohga has a lot of purple spots on his collar, and I used heat-transfer vinyl, HTV, for this. Furniture foam does not take well to heat (nor am I certain it’s safe to heat the foam up to 200F+). I also couldn’t get my hot pad in the right location if the foam was already inserted.
If you have HTV accents, add them here. If you have beads or lace or trim of any kind, now’s your chance. It’s easier to manipulate the fabric and add details while you can bend and curve the fabric as needed and not worry about how to maneuver a giant foam collar across your work desk.
During this point, make sure to add any collar accents as well, unless you plan on hand sewing them later.
Once you’ve completed all the details, it’s time to stuff the collar. Orient the horsehair braid to the outside of the collar and carefully insert the foam into the collar, flattening it out as necessary to prevent foam bunches and warping.
Once you’ve stuffed the collar, it’s time to sew the neckline. You can sew it by hand, tucking the raw seams inside the collar and sewing it shut. You can also sew it with a straight stitch then use a serger or pinking shears to prevent fraying. Whichever’s easiest for you.
Once you’ve sewn it all together, it’s time to admire your work and show it off!
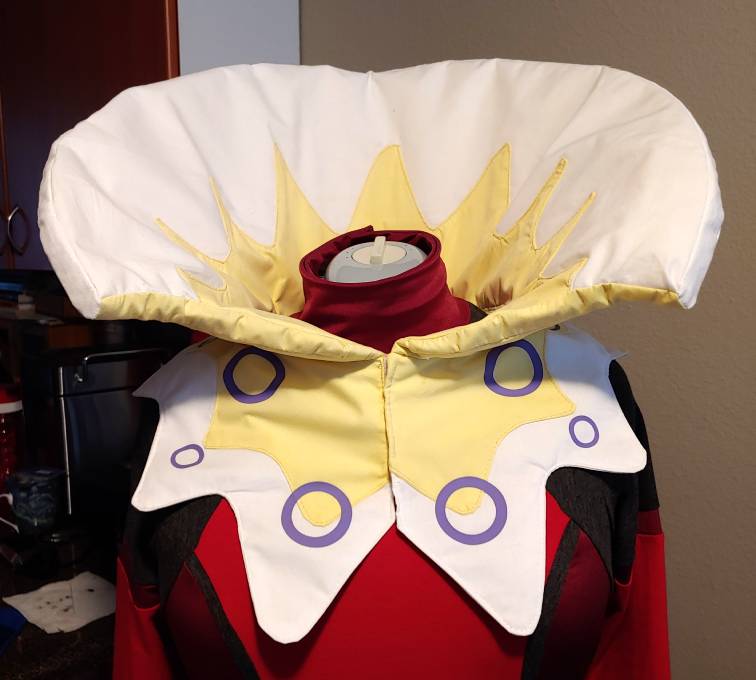
I hope you found this tutorial helpful if you ever come across a character with a super plush collar/ruff and have no idea how to make it. I was puzzled myself for a while until I tripped over the roll of craft foam. You could use this tutorial for all sorts of plush collars, not just ruffs, and see where it takes you.
If you use this tutorial, I’d love to see what you make! @ me on social media so I can see your work!

[…] https://leafnincosplay.com/2022/02/09/making-the-puffiest-of-stand-up-collars-with-master-kohga/ […]
LikeLike