Sometimes you must ponder the orb. And then you color the orb.
But coloring plastic orbs aka plastic holiday ornaments can be a bit of a chore. The plastic is rather delicate and when trying to dye with synthetic dye, while it has a pretty result, you run the risk of collapsing said orb in heat needed to set the dye. I collapsed about 3 orbs before turning to a different solution.
I found a food coloring technique for temporarily dyeing plant vases and thought, why not use it for orb? Turns out, this is a good way to dye your orbs or other-shaped ornaments for use in cosplay. As the dye is all on the inside of the ornament, you don’t have to worry about the food coloring rubbing off or scratching. It’s completely safe inside.

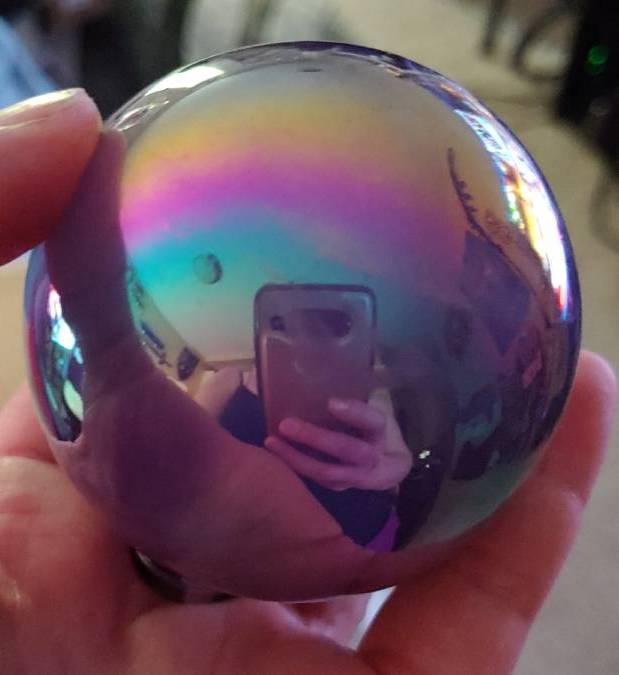
The resulting ornament is semi-transparent and will pick up any iridescent sheens or accents on the ornament itself, creating cool effects. You can shove lights inside or include the ornaments in props or accessories.

This method is space and budget-friendly. You only need a few basic supplies and a sink to work in. And better yet, all these supplies are nontoxic so you can do it right in your kitchen. I wouldn’t recommend reusing the funnel for food though. Glue funnel. Gross.
Skill level: Beginner-friendly
Cost: budget-friendly
Materials:
- Clear plastic ornament of some kind. Orb is optimal spherical shape. Iridescent ornaments and ones with speckles or stripes can add interesting effects
- Small funnel you don’t plan on using for food. Make sure the funnel fits into the neck of the ornament
- A large bottle of white school glue (unless you want glitter, then get glitter glue)
- Food coloring. Any brand will do.
- Plastic cup and a spoon (or the back of a paintbrush)
- Dish drying rack and paper towels or a second cup. I recommend the dish rack as the cup can sometimes leave blotches behind.
- Plastic to protect your counter (optional)
- Fairy lights (optional)
Preparing the dye

Before even mixing the dye, you’ll want to think of the end result. This might take some experimentation to get the color right so you’ll want to have a few test ornaments on hand.
I’ve found that brighter colors tend to work best when going for colorful orbs (they also shine best when you shove lights inside). Dark and mysterious orbs could use black, but you can also mix in darker purples or blues for just a slight pop of color.
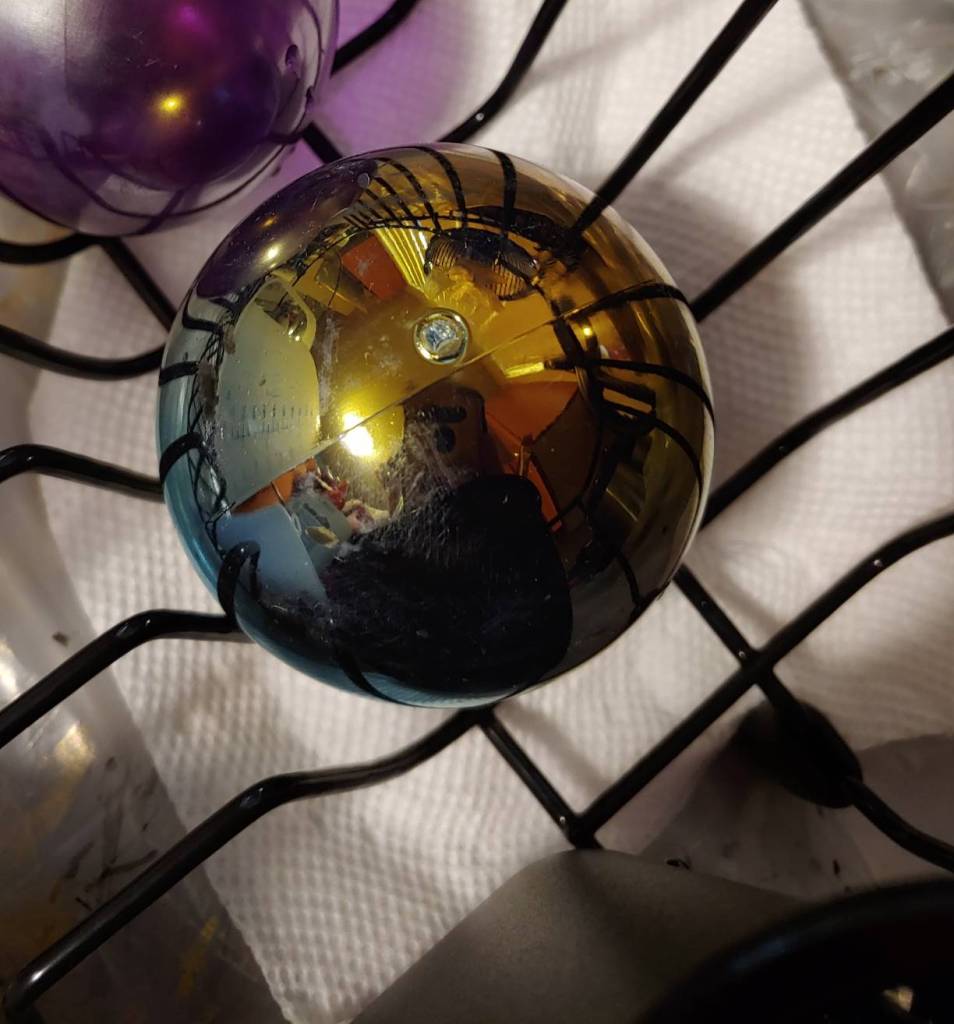
For my purple orb, when I had mixed red and blue, the final result was nearly black as shown in the picture above. I ended up going with a lighter, more vibrant purple food coloring instead of mixing two colors to get a satisfying purple that worked well with the fairy lights I was using.

Whichever color combination you go for, it’s time to make the dye mixture. This is more of an art form than a science, and really there are no exact ounces or measurements to tell you how much to use. You won’t be using the entire cup but you’ll want enough dye in your cup to coat the plastic ornament. The glue is what sticks the dye to the ornament, and it dries clear. How much food coloring you stick into your cup will determine how vibrant and opaque-ish your colors are. Opaque-ish as this is still glue and food coloring. There is still some amount of translucency in the end.
To start your dye mixture, squeeze the school glue into the bottom of the plastic cup. You’ll need a fair amount to coat the inside of the ornament. The larger the ornament, the more you need. It’s better to have too much than too little. The amount of glue I used was about 1/2″ up the side of the cup.
Now add the food coloring. To make the orb vibrant and mostly opaque, squeeze a hearty helping of food coloring into it then stir it around with a spoon or the handle of a paintbrush. If you notice more white than color, squeeze some more in and stir it around. If you’re mixing two colors, make sure to mix them thoroughly.
Dyeing the ornament
Now it’s time to add the dye. You’ll probably want to do this over a sink.

Stick the funnel into the neck of the ornament and make sure it’s far enough in that you can hold both the ornament and the funnel with one hand (or borrow someone to hold it for you).
With your other hand, pour some of the dye mixture into the funnel and let it slide into the orb. Carefully swirl the mixture around with your orb hand, tilting the orb as necessary to start coating the sides. Careful not to tip so far that the mixture comes out of the funnel.
Once you’ve coated the inside of the orb, pour some more dye mixture into the funnel and do a second coat. This ensures you haven’t missed any spots and end up with some random clear spots once the orb dries.
You may not use all the dye mixture. You can just wash it out in the sink, along with your funnel, to reuse later. The dye unfortunately doesn’t keep well enough to save it for more than an hour or two due to how fast school glue dries.
Drying time
Now it’s time to dry the dye. If you leave the ornament right side up while drying, you’re going to get a pool of dye mixture sitting at the bottom, which is very obvious when you shine a light inside. If the dye is lighter, you can see these pools even without a light.
The optimal way to dry an ornament is completely upside down so that any excess dye drains out the bottom and doesn’t pool anywhere. You want it completely vertical else you can get pooling around the neck as well.
The optimal drying spot is a dish drying rack, particularly the smaller side that is probably made for drying cups. This section has high sides that are good for balancing an orb upside down.
Lay paper towels and plastic underneath the drying rack before turning the orb completely upside down. Lean it against the walls as needed to make sure it doesn’t move and let it drain and dry overnight.
If you don’t have a drying rack, you can use a plastic cup. Turn the orb upside down and drop it inside the cup. Make sure that the ornament does not shift when you do this else you’ll get pooling at the neck. Let the ornament dry overnight.
Lights
Who doesn’t like lights? Once your orb is dry, you can add lights to make a glowing orb. Since the orb has been dyed with food coloring, it has a semi-translucent appearance to it. Depending on where you shine the light will make the orb cast light or simply glow. Both of these effects were done simply with white battery-powered LED fairy lights and the photos were taken with the lights on in my living room:
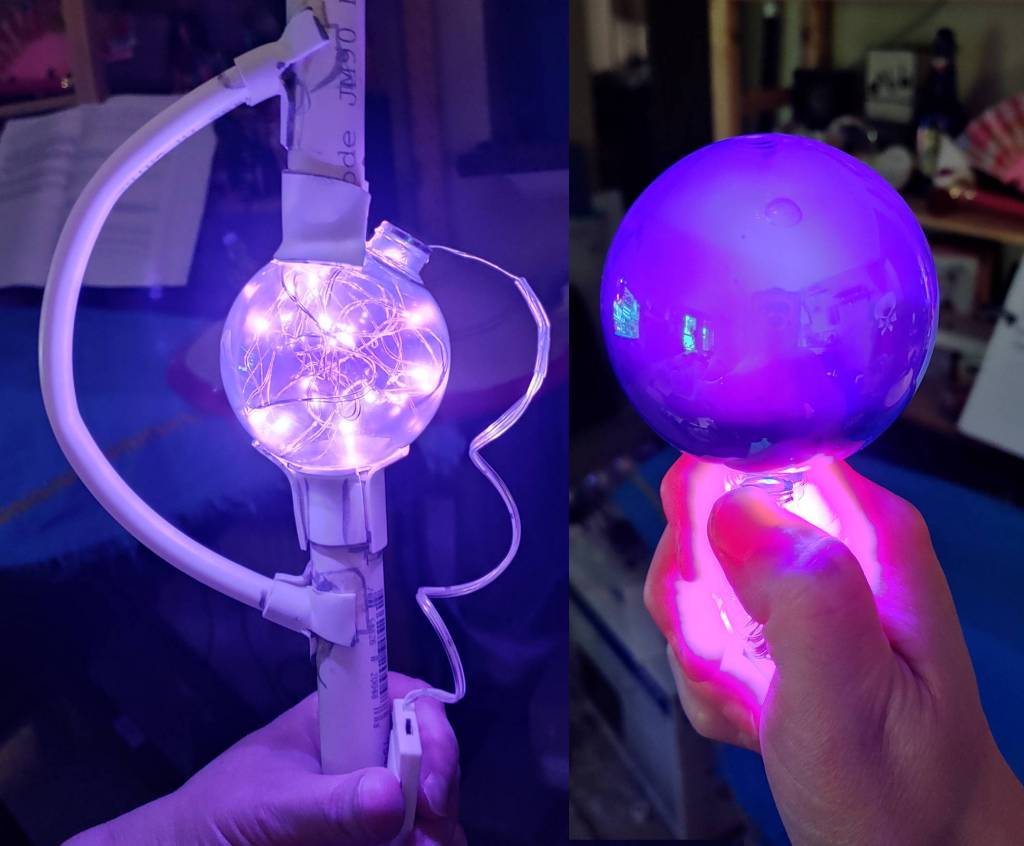
Both of these are the same orb but the position of the lights makes a difference.
Shoving the fairy lights inside creates a more ethereal effect and also causes everything around it to be bathed in purple light.
Shining a light inside the orb through the neck creates a more opaque effect. It causes the orb to subtly glow but it doesn’t cast much light on its surroundings.
I’d imagine you could do even more effects depending on the light you used, but these two options can get you started and are budget and beginner-friendly. No need to know how to solder your own LEDs. I ended up going with shoving the lights inside due to space requirements on the staff, but try it out yourself and see what you like!
I hope this tutorial helps to create your own orb which you can ponder. This technique can be used for other shapes, of course, but why not create many orbs for your props and cosplays? Orbs are such a spherical joy to create. They’re lightweight and budget-friendly, requiring only a few simple supplies and your kitchen. And they can cast a cool glow when you put lights inside.
What might you use with this method? Let me know. @ me on social media and let me see your dyed orb creation so I may admire and ponder the orb.

Hi and thank you for your tutorial! I always decorate my den with a Harry Potter theme. This year I’m giving the tree a Slytherin theme. I plan on using this technique to color a few ornaments in an Emerald green.
I have some mica that I will try in the glue mixture. Thanks again!
LikeLiked by 1 person