When I wanted to make a giant raven prop, I knew I needed something large, durable, and foldable. This thing had to travel but also be large enough to be seen on stage during a performance. Stage props are often made out of cardboard or disposable materials, but I also wanted something I could use offstage. So why not use kites?
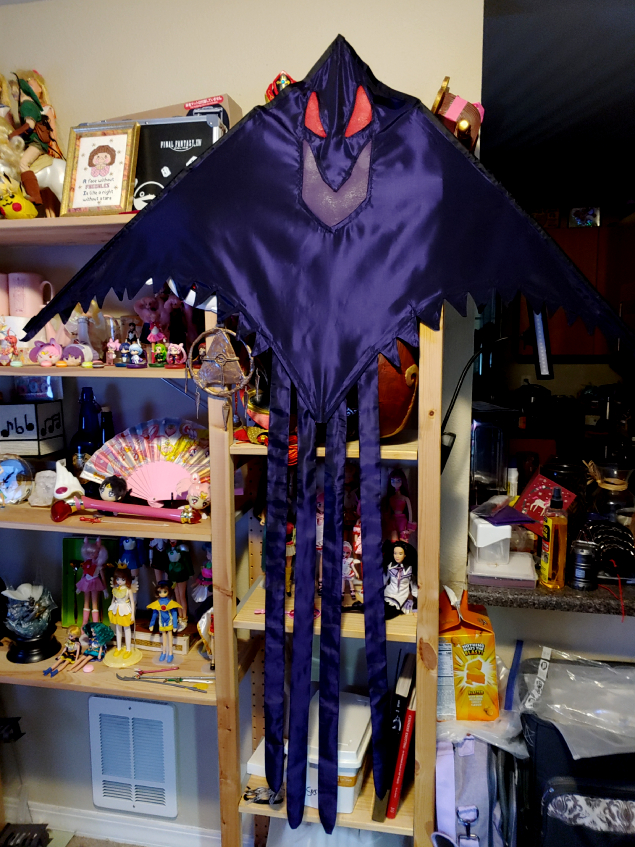
The result is a Raven kite with a 5′ wingspan, light-up eyes, and 3′ long tails. It’s made of a delta triangle kite with a removable framework to make it easy to transport. You can use any kite shape you want for your prop as long as the aluminum poles can be removed in some way.
I could technically fly this, as you can fly most things that have enough surface area to catch the wind. Ripstop nylon is your typical kite material, but most synthetics will work for this. I used thick iridescent taffeta, though any thicker fabric will do as long as you can sew it and it doesn’t have a lot of give.
This tutorial covers how to make a kite in one color and optionally add cutouts and fairy lights.
Skill level: intermediate
Cost: Moderate
Kite materials:
- 1-2 yds of kite material in your color of choice. The length depends on the size of your kite
- A kite with a removable framework. The edges do not need to be removable but the crossbars should be easy to remove
Light-up cutout materials:
- Chiffon or tulle, scrap in the color of your choice
- LED foam (the thin styrofoam roll used when packing packages) or a frosted translucent folder for light diffusion
- Battery-powered LED fairy lights, 1 strand for smaller cutouts, 2+ for larger. Get the kind powered by coin batteries
- A bright-colored hard surface such as a table or a folder
Supplies and tools:
- Posterboard for patterning
- Pens/pencils
- Scissors for paper (don’t use your fabric scissors on paper. It dulls them)
- Tape (if the posterboard isn’t big enough for the kite)
- A large flat workspace such as a table or floor. If you have a carpeted floor, lay down some cardboard so you don’t damage the carpet.
- Sewing machine with universal needle and matching thread
- Fabric scissors
- Clear ruler or tailor’s ruler
- Iron (with polyester setting) and an ironing board, mat, or thick towel
For a custom or zigzag edge:
- Clear foot or open-toed foot for your sewing machine
- Point turner/corner pusher (recommended)
Kite anatomy
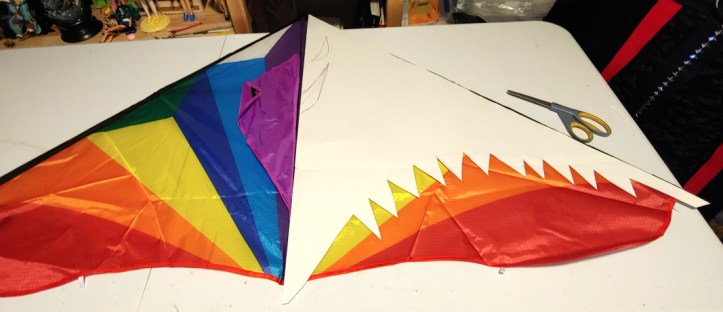
Before you cut into your kite, you’ll want to familiarize yourself with how the kite is put together and what is and isn’t sewn in. For my kite, I used a pretty standard delta kite that was of course rainbow colored.

Usually, the spine and cross-spar are removable. They come segmented into two pieces and are made of aluminum rods that tuck into pockets or sockets to make the kite sturdy. The spar along the frame may actually be sewn into a pocket or have segments that break apart to make the kite collapse into a small pouch.
To keep the proper kite shape, we need to work around the spars and the spine and all the pockets or connectors used to give the kite its proper shape. If you have a border like my kite’s black border, it’s best to leave this intact as it makes sewing the kite so much easier.
Creating a pattern
Now that you’ve had a chance to play with the kite and maybe even fly it, it’s time to make a pattern before we disassemble the whole thing. If your prop is symmetrical, you only need to pattern one-half of the kite.
Delta kites often have a seam underneath the spine with a keel attached. The keel is a flap of fabric with an eyelet on it where you attach the kite string to fly it. As this is in the exact center, you can use that as a guide for where to place the paper for patterning.
With the spine and cross-spar in the kite, place your kite on a hard surface. Place an uncut edge of the poster board against the center seam. Trace the outside edge of the kite along the spar edge with your pen. You want that extra width for rolling the seams down later when sewing the kite into the spar casing.
Once you have that edge traced, it’s time to do detailing. If you’re creating a curved edge, use a gentle curve, making sure to keep enough room at the bottom of the spine and spar for the aluminum rod pockets. Keep the curve below the cross-spar to keep it from showing and to prevent the kite from trying to fold in on itself.
If you are doing a zigzag pattern and want tails, make sure to leave a few inches of space near the spine for the tails. Tails in general can be attached anywhere you want at the bottom of the kite, but if you want it bird-like as my Raven kite is, the tails should be attached on either side of the spine.
Cutting the fabric out
Since you’ve only traced half the kite for the pattern, cut the fabric out on the fold, placing the edge of the pattern flush against the fold.

If you have a zigzag or custom pattern on the edges, lightly trace a simple curved or straight line a few inches away from the design to give yourself plenty of space to sew. Trace the edge that will meet up with the spars. Cut the whole pattern out then trace any cutouts onto the back of the fabric. Make sure to trace the pattern onto both halves of the kite.

Finishing the bottom edge
The first thought would be to sew the kite to the frame, but finishing the bottom edge makes attaching the spine pocket much easier. It can also help with attaching the side spars and their pockets, especially if you have a custom edge.
If you have a simple straight or curved edge, you’ll want a double-rolled hem to finish off the edge and prevent any fraying. Take your iron and roll up the edge once at about ¼”, pressing it down as you work. Now roll the edge up again at the same width, using the first roll as a guide, to tuck the raw edge into the fold and safely underneath the rolled hem. Once pressed, sew the edge down with a simple straight stitch.
Making a fancy bottom edge
We’re making kites here, so you might want a fancy edge. If you’re sewing scallops, I have a tutorial here on making the perfect scallop: How to sew a scalloped hem.
If you’re sewing zigzags, let’s make some zigs and zags!
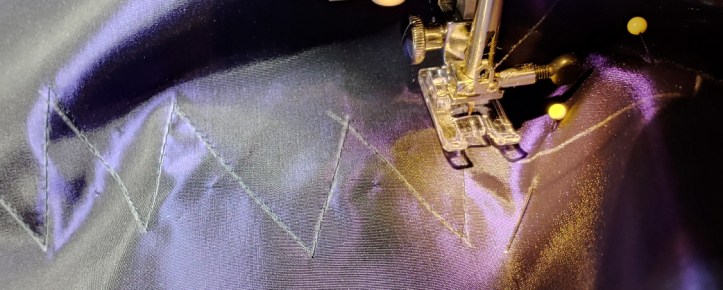
Cut a piece of fabric that matches the bottom edge of your fabric and extends a few inches above the highest zigzag in your pattern. Pin the two, right sides together, along the zigzag pattern you’ve drawn on your fabric. It does not need to be every zig and zag, just enough to keep the fabric from slipping.

Once pinned, sew along the zigzag line using the line you’ve drawn as a guide. Use a straight stitch, dropping the needle and making a turn at every zig and zag.
Once the entire zigzag is sewn, remove the pins and trim the excess fabric down along the bottom edge of the zigzag to about ¼”. Clip the fabric by the peaks, tapering them in towards the point. Clip the fabric at the valleys as a simple line towards the stitch. Avoid cutting the stitches themselves, but if you do, simply sew over them with a new straight stitch.

Flip the zigzags rightside out. Turn the fabric and use your finger to push the zigzags out. Using a point turner, smooth the edges of the zigzags before ironing.
Trim the top raw edge above the zigzags down to no more than an inch above. You can optionally serge or pink the edges, but the best method is to double-roll your hem once again, trapping the raw edge in the roll of the fabric.

Roll the fabric so that the second roll is sitting against the top of the zigzags. then iron it flat. This will create a bit of a pocket on the back of your kite. Since you can’t sew this edge down easily on a machine, we’ll trap it in the zigzag stitch instead. Sew along the edge of the zigzag at about ¼” from the edge of the fabric.

This will secure the top edge and keep the zigzags nice and flat. It also hides the tail stitches, if you add some.
Attaching to the frame
Now that the bottom edge is finished, it’s time to mount the kite to the frame.
Optionally serge the raw edges to keep them from fraying.
With the cross-spar and spine on the kite, lay the kite on the floor or a table spine down. Place the kite face-up on top of the existing kite, matching the edge of the kite with the edge of the spar casing. Pin the new kite to the old one about an inch or two away from the edge along the side spars.

You have two options, depending on if the outer edge is serged or not. If it is, fold the edge down once, exposing the spar casing and overlapping the fold slightly over the edge of the casing. Feel for the spar in the casing and make sure you have enough room to stitch next to it and secure the kite to the frame.
If you do not have a serged edge (or want to finish your edge this way anyway), double roll the edge, matching it up with the frame and pinning it down. You may need a very tight double roll depending on how much leeway your fabric and frame have. As you can’t iron a spar, simply fold the rolls over and pin them down. Do not tug, as your fabric will start stretching irregularly.

Remove the cross-spar and spine. Flip the kite over and sew along the edge of the spar casing, being mindful of the spar still left inside. If you have a cross-spar connector attached, flip it to the outside of the kite to keep it from being stuck in the machine. Optionally you can use a variable zipper foot or an edging foot to line up your foot with the edge of the spar inside the casing.
Once sewn, return the cross-spar and spine to their position. For a lot of budget commercial kites, the spine has a small pocket of some kind to hold it into place. this will need to be sewn down to ensure the spine doesn’t move on your kite.

Pin the pockets on the top and bottom into place before removing the spine and the cross-spar. Using a straight stitch, sew up both sides of the pocket, but not across it.
If your kite also has cross-spar pockets, repeat the process and stitch them in place.
Now it’s time for destruction. I couldn’t find a way to make the kite removable, but it’s time to cut that old kite away so that only the new kite remains. You can keep the fabric for other projects or toss it into the textile recycle bin.
With small sharp scissors, carefully cut the old kite material off where it meets with the spar casing. Cut around the sewn pockets, trimming as much of the original kite away as possible.

Do this for all sides until the original kite is fully removed. If your spine pocket had a casing sewn up the center of the kite, trim the casing so that only the pocket remains. As the pocket placement was determined with the full frame installed, the tension of the spine itself will keep the kite upright.
Adding tails
Tails are a lot of fun. They have great movement and are just generally cool. So if your design demands tails, let’s make some. Start by figuring out how many tails you want and how wide they should be. You’ll want to keep the width at least 1½” so they’re easier to turn right-side out. Anything smaller will give you difficulty.
Once you decide on a size and length, sketch the size out on the fabric or a piece of paper to make your pattern. Add a seam allowance to each side except for the top which will be connected to the kite itself. ½” is a pretty easy seam allowance to see on a ruler.
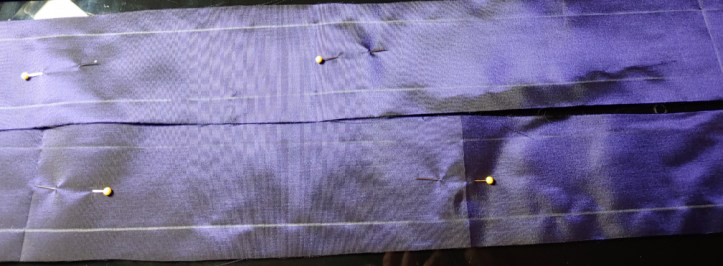
Fold your fabric in half, right sides together, pinning them together inside the tails so that the fabric doesn’t shift. Cut out all your tails. Sew each tail along the edges, leaving the top open. Turn the tails right side out. You can push your fingers into the tails and coax them along, shaking the fabric to straighten it out.

Once turned, use a flat yardstick to gently push out any corners or edges before ironing the tails flat.
Simply push the raw edge inside the tail and iron flat to finish the top edge. If your tails are attaching at an angle, you can clip the edge to match the kite’s angle before flipping the fabric inside and ironing it flat.
With the cross-spar and spine installed, hang the kite on a bookshelf or the side of a table or a hook somewhere. Pin the tails in place on the backside of the kite to hide the extra edges from the front face. Overlap the top edge of the tails over the stitches along the bottom.
Sew the tails down and remove the pins.
Adding light-up cutouts
Cutouts are fun. So are lights. So why not add both? This works great for a more sinister or magical kite to show effects or just evil foreboding eyes. The chiffon on the outside will determine the primary color with the lights tucked inside to accentuate it. You can optionally add a pocket for the battery case on the pocket or tuck the battery pack inside the light case.
creating the cutout

If you haven’t done so, trace your cutout designs onto the wrong side of the kite fabric. Add ¼” hem allowance on all sides of the cutout. If you want the cutout to be exactly the size you drew, ad the hem allowance on the inside of the shape. If you want it slightly larger or the exact size doesn’t matter, draw the hem allowance on the outside.
Cut out the smallest shape completely, clipping any corners. Iron the edges to the wrong side of the fabric, creating a cutout shape.
Adding color
Once the shape is ironed, lay your kite on a flat surface without the cross-spar or spine installed, placing a bright backing behind it. Here’s where you’ll want that bright folder or table in a different color than your fabric.
Place the chiffon fabric over the cutout. Trace a shape about ½” – 1″ larger than the cutout. You don’t have to be exact, just make sure it is larger than the cutout and the ironed edges. Cut this piece out.
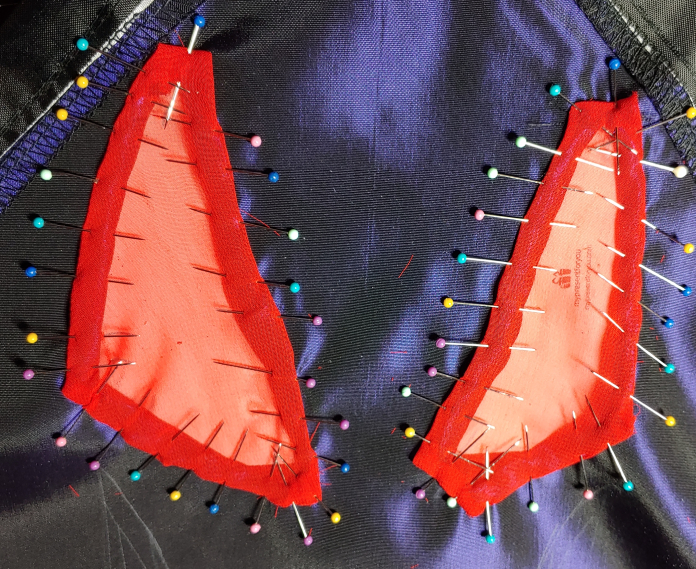
Lay the kite as flat as possible on the surface, putting something heavy like a book or a water bottle on the edges so it doesn’t move. Center the chiffon over the cutout. Roll the edges of the chiffon underneath the ironed edges and pin it down. This encases the raw kite fabric edges in chiffon and tucks the chiffon edges underneath so they don’t fray either.
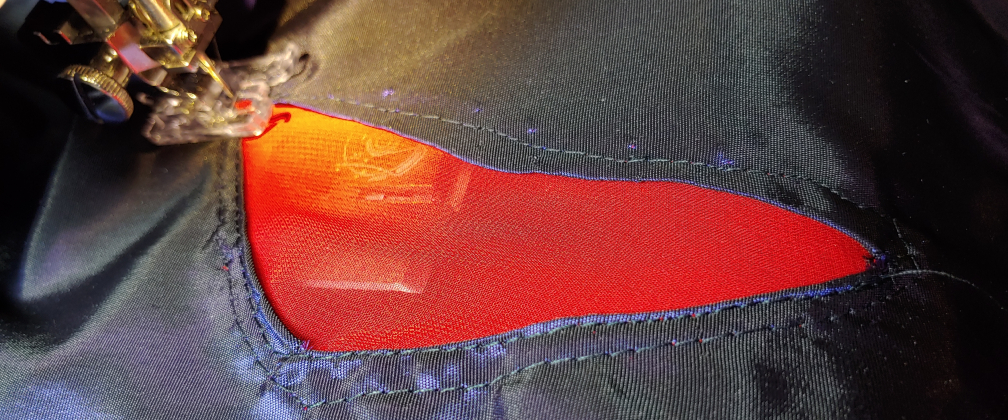
With the pins face-up, sew around the edge of the chiffon. Remove the pins. Flip the kite over and sew near the edge of the cutout. This secures the two sides together and reinforces the edge so that nothing moves.
Cutting the back panel
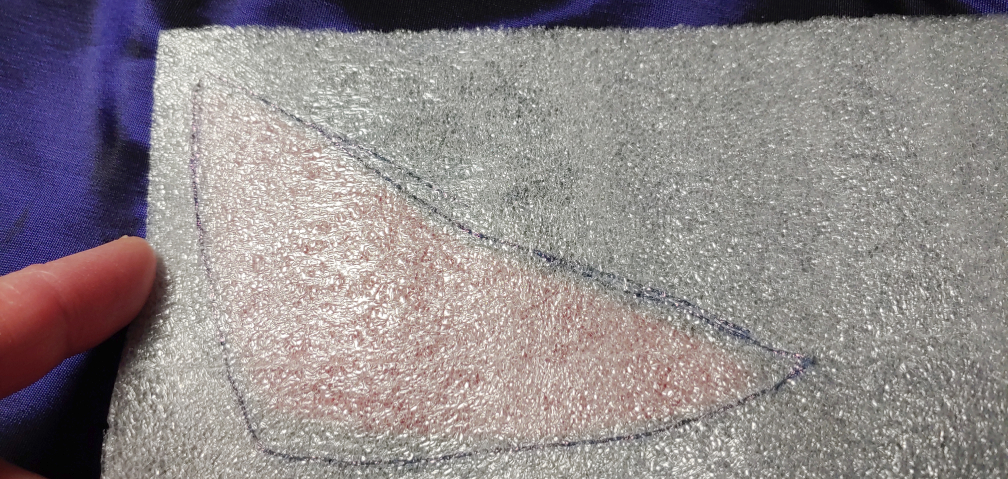
You’ll need a place to nest your lights and diffusion materials so it’s time to make a back panel. cutting out the back panel is a bit of a challenge as you can’t really see what you’re doing. You’ll have to do it by touch.
Lay your kite fabric on top of your kite. Use a pen or pencil to lightly mark the shape of the cutout underneath, feeling for the layers and stitches beneath the fabric. Trace a line about 1-2″ larger than the cutout to make your back panel. We need extra space for the lights, so it needs to be larger than the previous fabric pieces.
Pick one of the sides of the back panel. This side will need to be shorter but also have enough space to shove the lights and your diffusion material inside. This will largely depend on the size and shape of your cutout for which side you choose.
Fold the side down about ½”, iron it flat, and sew the edge with a straight stitch.
Adding an optional pocket
On the back panel, you can optionally add a pocket for the battery pack. The pack must be smaller than the panel and light. This will generally only work for coin cell packs as full-size batteries will be too heavy.
Cut about ½” larger rectangle than the size and shape of your battery pack. Fold one side down and sew a hem to form the top edge. This side should match the side where your cord sits.
The placement for the battery pack is the outside-facing side of the back panel with the opening towards the top of the kite. If you aren’t sure which side that is, place the kite on your table face-down and place the back panel on top, matching the shape and direction of the cutout. The side that is facing you is the outside-facing side of the panel.

Remove the kite from your desk and place the battery pack and the pocket on the back panel. The pack should sit about the center of the panel for smaller panels and might sit closer towards one side for larger ones that require more than one string of lights to light up.
Wrap the pocket around the battery pack, tucking the raw edges underneath, and pin the edges down on the back panel. You may need to fold the corners at the bottom of the pocket to get the fabric to sit flat.
Remove the battery pack and sew the sides and bottom of the pocket, leaving the top open for the pack. Now you have a pocket!

Attaching the back panel
Iron the raw edges over at about a ¼” seam. Place the kite on a flat surface with the back panel over the cutout. Pin each side, matching the edges up and leaving extra fabric at the corners.
For each corner, pleat the fabric until the corner lays flat. The pleats in each corner should be facing toward the corner so that when you shove the lights inside, it opens up like a large pouch to give the lights enough space to sit flat. Leave the sewn seam unpinned.

Sew the pinned sides down and remove the pins.
Flip the kite face-up and place your diffusion material over the cutout. Trace the cutout shape just slightly larger than the cutout and cut the shape out of the material.
Slip the diffusion material into the pocket through the opening.
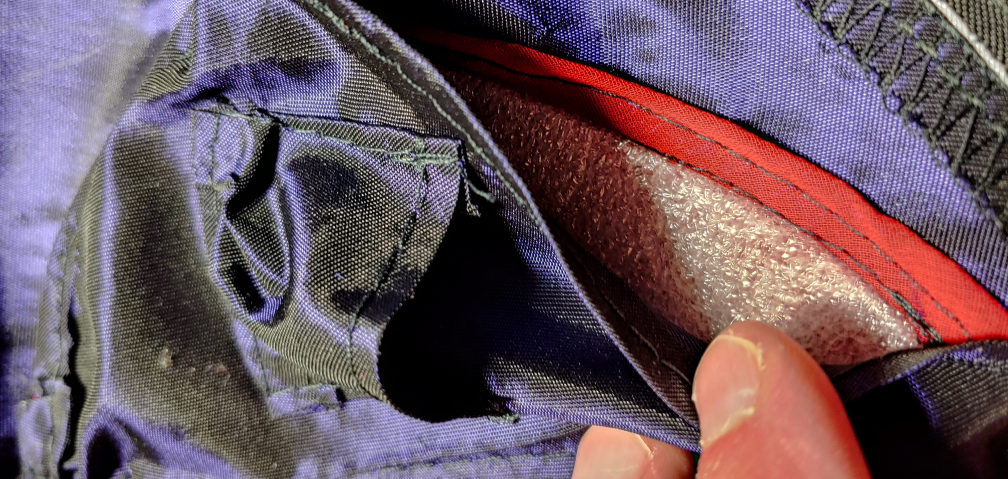
Now to finish sewing the back panel. If the opening were left this large, the lights would easily slip out as soon as you handle the kite. Instead, the opening should be large enough to fit the lights through but small enough that they won’t easily slip out.
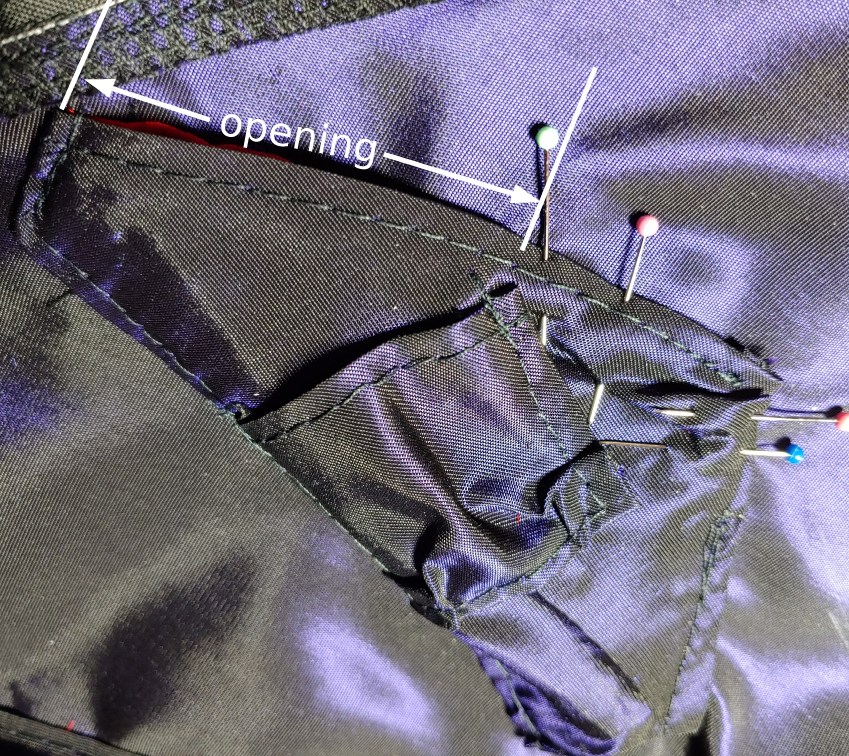
Pin the open edges closed, leaving around a 2-3″ opening. Start from the bottom, leaving the top open so the wiring can stick out. This is especially necessary if you have a battery pack pocket. Having the lights removable also means access to a switch or changing the batteries. Or if you decide you want a different color.
Sew the pinned section shut using a straight stitch along the edge.
After sewing up all your cutouts, tuck the lights inside and enjoy!

I hope you enjoyed this tutorial! Sewing my own kite was a fun project and now I have a cool prop. It now hangs on my wall above the TV, sitting there menacingly as I sew and watch speed runs. You can use this project to make your own prop or perhaps to make a custom kite! Both? Both are good.
Let me know what you decide to make. @ me on social media so I can admire your kites!
