The trouble with anime and game physics is that costumes sometimes forget gravity exists. The challenge as a cosplayer is to figure out how to make a gravity-defying costume while still (unfortunately) adhering to the laws of physics. When my sister wanted to cosplay May from Pokemon ORAS, I found myself questioning how to suspend a gravity-defying double circle skirt, make it look like magic, and that didn’t collapse under its own weight.

As a former ballet dancer, it came to me. Pancake tutus. No really, that’s what they’re called. These types of tutus defy gravity through the use of a large waistband called a basque and a tutu hoop nestled deep within the layers of tutu tulle. While this certainly wasn’t a tutu, it had the makings of one, but it also needed a certain feature that pancake tutus really don’t have. It has to survive a con.
Cons are brutal on cosplay. You have to watch out for people bumping you and getting stuck in doorways. In the end, the gravity-defying skirt must also defy crowds. The resulting skirt is a hybrid of a pancake tutu, double circle skirt, and gravity-defying cage that fits pretty easily through doors and will condense if bumped.
So much goes into making a gravity-defying skirt, I’ve broken it up into separate tutorials to make it easier to read so you can use each piece individually if you want. This tutorial will go over how to make the core support structure that sits around your waist: the basque! It can be used for a variety of gravity-defying skirts including tutus as well as defying anime gravity.
You can find the rest of the series to build this skirt here:
So let’s get started on that basque!
Skill level: advanced
Cost (whole project): moderate
Basque materials
- Duck canvas, less than 1 yd
- Outside basque fabric. For May, I used swimsuit lining to make it appear to be a midriff, but any fabric can be used. Less than 1 yd
- Soft inside basque fabric. This will be against your skin. Make it soft. I used quilting cotton to ensure it was comfy. Less than 1 yd
- Slider buckles or hooks and eyes, at least 3 pairs (needed after attaching the skirt)
Other materials
- Pens and pencils for marking placement
- Straight pins
- Universal sewing machine needles
- Thread to match. Make sure it is good, strong thread
- Paper for patterning. Can be printer paper
- Ruler. Recommended to have a tailor’s ruler or a clear ruler
- Pencils and pens
- Tape measure (recommended to have 2)
- Dress form or body double (highly recommended)
- Fabric scissors
- Scissors for paper (don’t dull your fabric scissors!)
Patterning the basque
Now let’s get to the support structure, the basque. This wide waistband is going to support the weight of the skirt plus the cage plus whatever gravity decides to do with the whole structure as you’re walking or dancing or jumping. It can hold a pancake tutu up for an entire 2+ hour ballet performance, it can hold your cosplay up too.
The trick to the basque is how tight it is. It must fit like a glove and be structured to your unique shape. This can be done either on a body double, a dress form, or on yourself. As I was making this for my sister, I made everything using a dress form dialed to her measurements. It’s going to be easiest to use a body double or a dress form for this. If you don’t have either, you’ll want some helping hands for this.
Before you start, you will need to know the exact measurements. A good basque is around 6″ wide. This allows for contouring to the body’s natural shape and using it for full support. But first, you need to find where that is.

Start with the waistline. This may be the smallest point on your body or it may be closer to the hips. Wherever it is, this should be a comfortable point on your body. Do not suck your gut in when taking this measurement. Having a basque too tight on your body can really hurt after a while, and we want this cosplay to last all day long without pain.
Take a tape measure and measure 6″ down. This will be the hip line (or hipline-ish if it’s lower than the actual hips). It should also be at a comfortable position, low enough to make the skirt appear to sit naturally at 3″ below the waistline but high enough it’s not rubbing against your crotch and slipping down your hips.
Now measure the circumference of your body at this 6″ point. Don’t pull the tape measure tight or suck anything in here either as the basque will not fit right and everything will be uncomfortable.
If you’re using a dress form, I suggest taping this hipline with some masking tape as you’ll need to know this exact position to make the pattern.
Cut strips of paper 6″ wide and tape them together until they’re the length of your hipline measurement with a little bit of leeway. Start pinning the bottom of the paper to your dress form or body double at the taped hipline. If you are using yourself as the dress form, you’ll need an assistant for this. Hold the paper at the waistline so it does not move.
Cut several sections along the top of the pattern down towards the bottom. I cut about 8 or so slits into the paper. Once you have the cuts, start folding the paper on top of each other. Make sure not to pull the sections when folding, simply press them towards the waist and let them cross each other without resistance.

Once they’re folded, tape them down. Repeat this for each section until all the sections have been taped down.
Now that everything is settled and snug, mark the center back. If you’re using a dress form, You can optionally mark the side and front as well. Otherwise, cut the basque off at the center back. Lay the paper down on a table, folding it in half. with the back matching up. mark this as center front. Fold the paper in half again, using this to mark the side.
Cut the paper at the center front and start labeling. Your half basque should look something kind of like this:
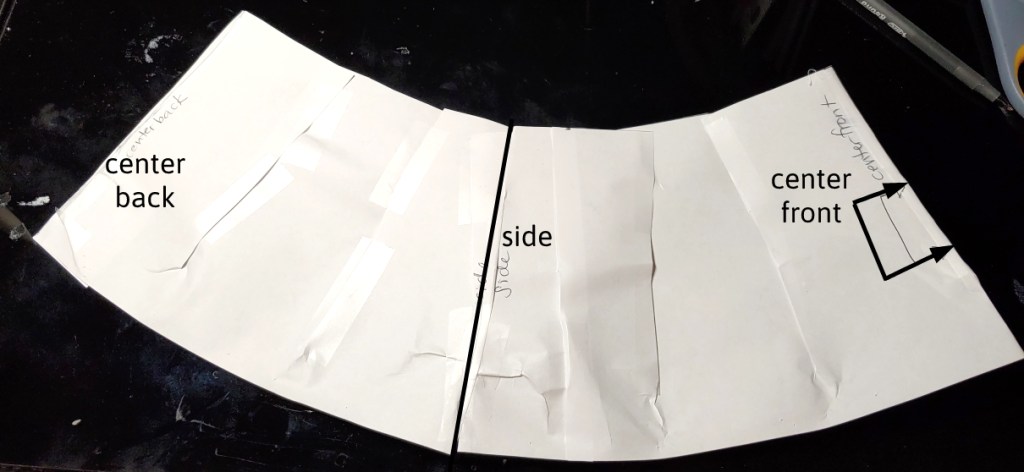
To make sure measurements and placement are even, the center front is marked to cut on the fold. The center-back will be left open for the clasps later. Once you’ve gotten everything marked, cut the side seam, and let’s get to sewing.
Sewing the basque
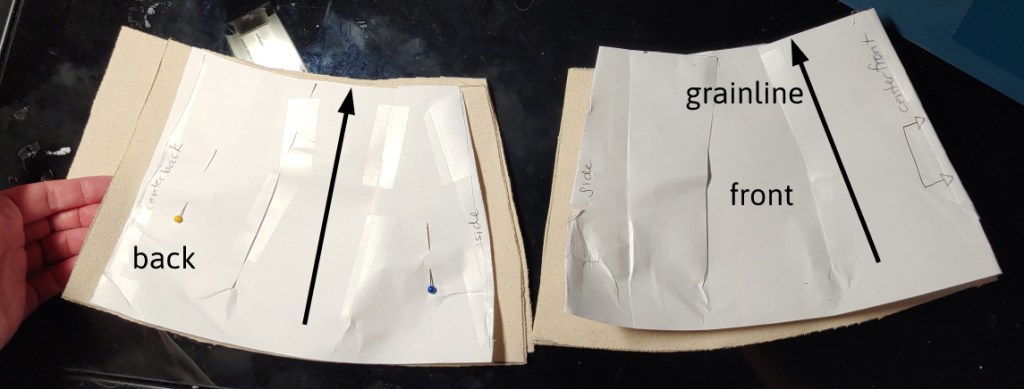
Start with the duck canvas. This will serve as the foundational base of the basque. Place your patterns down on the fabric, minding the grainline. We want this basque to be super strong and not sag under all the weight. The grain will follow the center front fold for the front piece and is about vertical on the back piece.
Add a 5/8″ seam allowance on the sides. For the back, add 5/8″ seam allowance to one side while at least doubling the other side. This will allow for any variance in the pattern and let you make any adjustments you need to get this basque sitting right. It also is a bit stronger to have the overlap so the edges don’t sag underneath all the weight.
Do not add a seam allowance on the top or the bottom. The outer layers will be wrapped snug around the canvas, so there is no need for extra allowance on the canvas.
Cut the pieces out, sewing them together at the side. Iron the seams open.
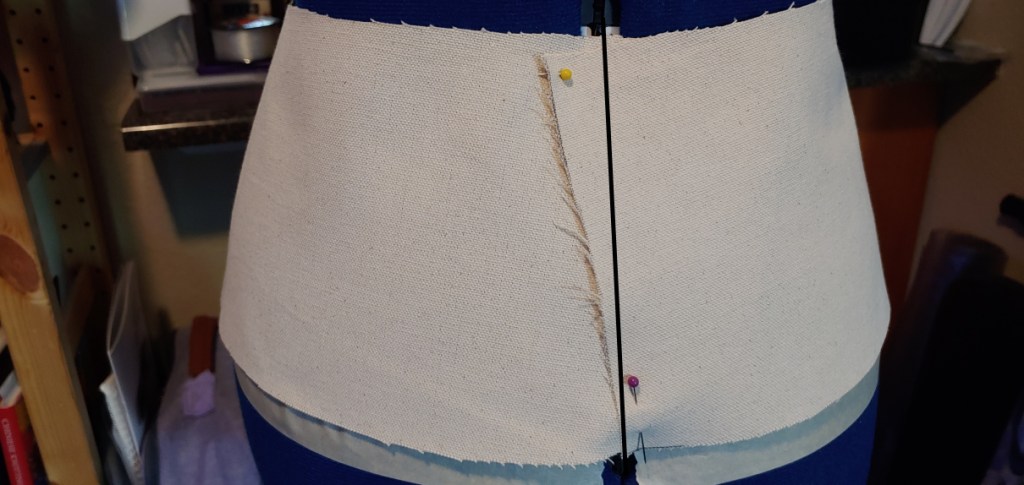
Place the basque on the dress form or on yourself and see how the seams match up on the back with the shorter back on top. You may have to trim the topmost back piece if it ends up a little sideways. You want it looking even and attaching vertically at the back seam
Next is to cut the inner and outer basque fabric. The inner fabric should be soft as it’s going to be sitting flush against your skin and probably moving with the weight of the skirt. I recommend something like quilting cotton as it’s not abrasive after a full con’s wear.
The outer fabric can be whatever you want it to be. For May’s skirt, I used swimsuit lining to give the illusion of a bare midriff.
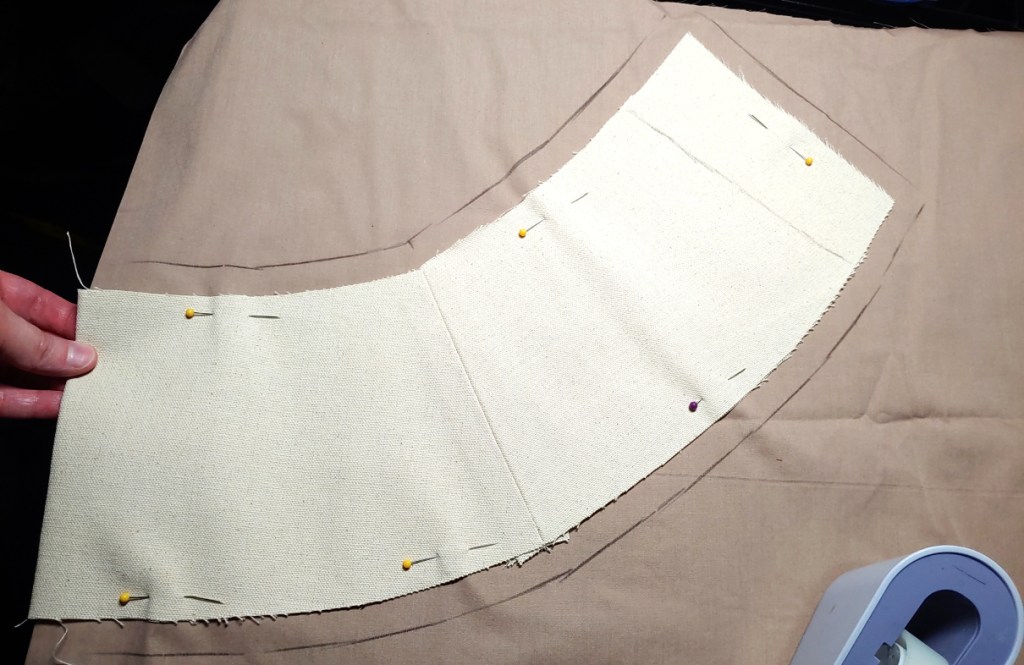
Pin the outer and inner fabrics together matching them up at the fabric fold. Pin the canvas to the fabric and add 5/8″ seam allowance on all sides then cut both pieces of fabric out. By making the lining all one piece, it removes any visible seams except in the back, making the skirt look like it’s floating.
Iron your fabric flat (if the fabric can be ironed), and sew the outer and inner basque together at the top seam. Now flip the seam open. To give the illusion of a floating skirt, we’ll be avoiding having stitches on the outside upper edge. This is the most visible edge so we’re going to hide all our stitches on the duck canvas and under the skirt.
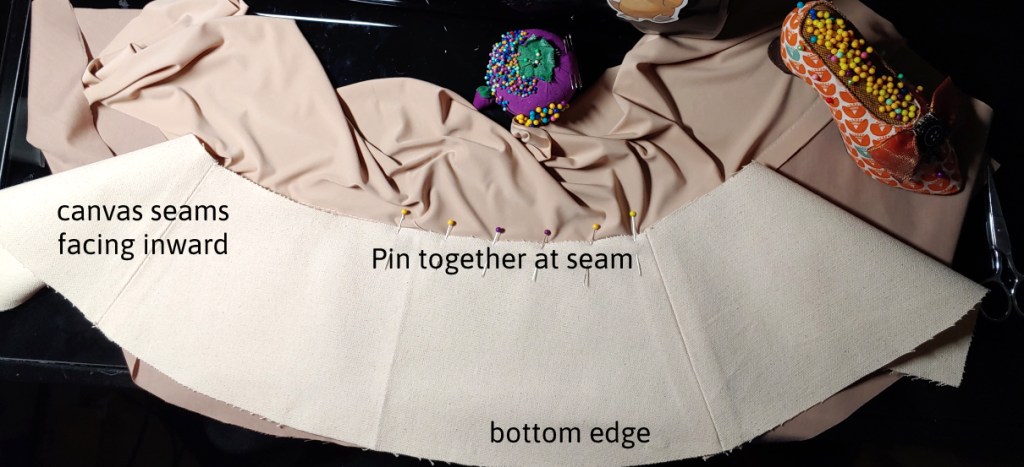
Place the outside fabric on your desk, seam facing you. Push the outer basque fabric out of the way and spread out the inner basque fabric. Place the canvas on top of the inner basque, lining the upper edge with the seam you sewed. Make sure the seams of the canvas are facing inward (down against your desk) so they aren’t visible through the outer fabric. This ensures the canvas does not shift inside your fabric sleeve.
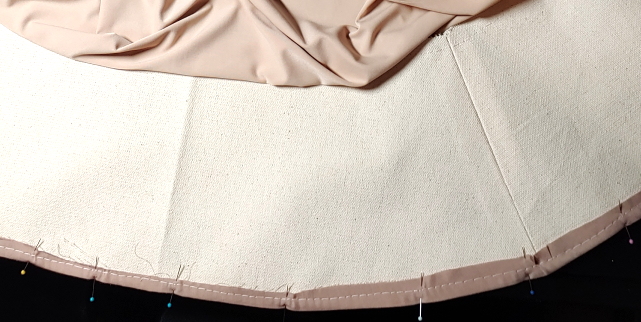
After pinning the entire upper seam, sew the canvas to the inner basque fabric near the seam and remove the pins. Roll the inner fabric over the bottom edge of the cotton, starting at the center front and moving outward. Use a steam iron to guide the fabric up as needed and press it flat. Once the entire bottom edge is pinned, sew the fabric flat and press as needed.
Remove the pins. Fold the outer fabric over the canvas and press the top seam flat. If you are using spandex or touchy material for the outer fabric, only iron on the inside on the cotton inner fabric flat.
Place the basque back on your table, starting at the center front. Wrap the outer fabric around the bottom of the canvas and pin it down. If you are using a stretchy fabric like spandex, use your hand to gently smooth the fabric downward and avoid any puckers. Do not pull as this will cause your basque to bend forward instead of sitting flat.

Sew the bottom edge down with thread that matches the outer fabric. While this stitch will be mostly hidden by the skirt itself, a stitch in a starkly different color in the fabric may still be noticeable.
Once the stitch is complete, gently iron the basque from the back.
Lastly, the back edge needs to be finished. Roll the fabric towards the inside of the basque and sew the fabric down over the canvas. This stitch will still be visible, but you can’t really avoid it. It needs this strong stitch for support. Make sure the thread matches the outer fabric color as closely as possible to make the stitch the least noticed. Trim off excess fabric underneath as needed.
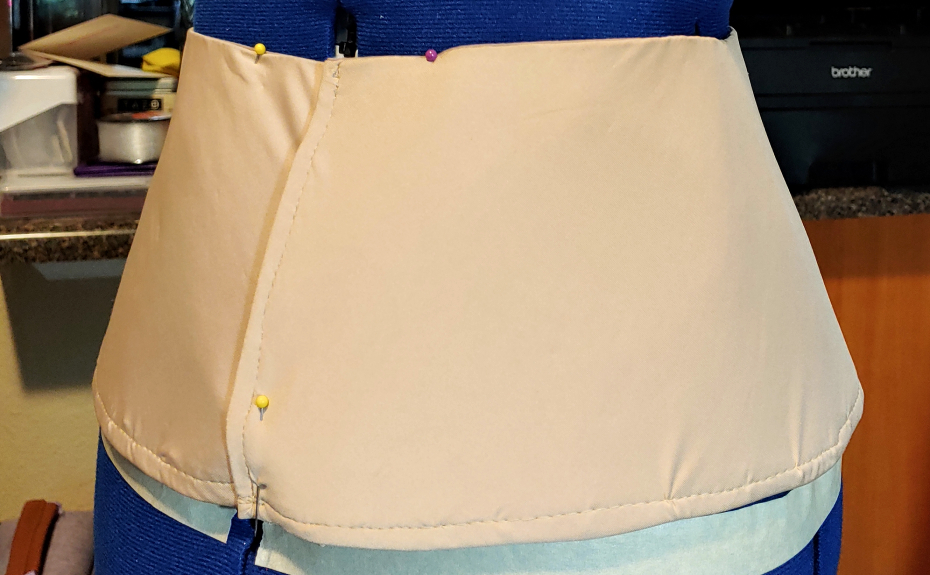
Congrats. You now have a basque. It’s not an easy feat! We’ll add clasps next week as it’s easiest to add them after attaching the skirt. That’s how tutus do it too!

We are one step closer to creating this suspended skirt! I hope this was helpful to get your suspended skirt project started, whether it’s a gravity-defying skirt like Mays or a pancake tutu. Next week, we’ll go over how to plan and attach the skirt to the basque and we’ll be one step closer to defying gravity!
Let me know how your progress is going! @ me on social media so I can admire your work!
