I love to use plushes in cosplay as props, and I am an avid collector of Pokemon plushes. And when I see a deflated plush on eBay asking for a good home or one a little less full at the thrift store, sometimes I cannot resist restoring it. My most recent project was restoring a very flat Pikachu I dubbed Flat-chu for a May cosplay.

Flat-chu arrived in a flat envelope. He barely had enough stuffing to fill up half his body. Poor thing. He looked like he needed some TLC, and I needed a large prop. So it was time to make Flat-chu less flat.
This tutorial will honestly work for any kind of plush. You don’t need many materials, and basic hand stitching will get you pretty far. If you’ve never sewn up a plush, time to learn! It’s a great way to fix up your collection or to stuff a prop to its fullest to use with your cosplay!
A word of warning. Some of these stuffings are pretty dusty, especially with Flat-chu. The inexpensive plushes often used styrofoam to fill them, and when it gets crushed, it does tend to get everywhere. Try to work in a place you can clean up or not cause too much of a mess during the unstuffing phase.
Skill level: beginner-friendly
Cost: budget-friendly (most flat friends are pretty cheap because they are very flat)
Materials:
- Seam ripper
- Matching thread
- Hand sewing needle
- Fiberfill batting (a small bag will do)
- A flat friend to stuff
Make him flatter
Before you stuff your friend, it’s best to remove that old filling inside first. You want fresh, plush, new filling instead. Start by removing any plush clothing and clipping the stitches attaching a tail or back accent. The best stitch to get inside the plush is the back neck seam.
Using your seam ripper, find a stitch within the back neck seam. Tuck the sharp side of the seam ripper behind the stitch and pull outward, snapping the thread.
Keep going along the neck seam until you’ve ripped out at least half the back neck. It should be large enough to at least get a few fingers inside to remove the old filling. If you have a large plush like Flat-chu, you’ll be able to fit your whole hand inside.
Once you’ve ripped the seam, be careful not to flip your friend over yet. Open him up and see what sort of stuffing is inside.
If you see something that looks like cotton candy (fiberfill), unless it’s really gross batting, you can reach inside and just pull the batting out and dump it in the trash can.
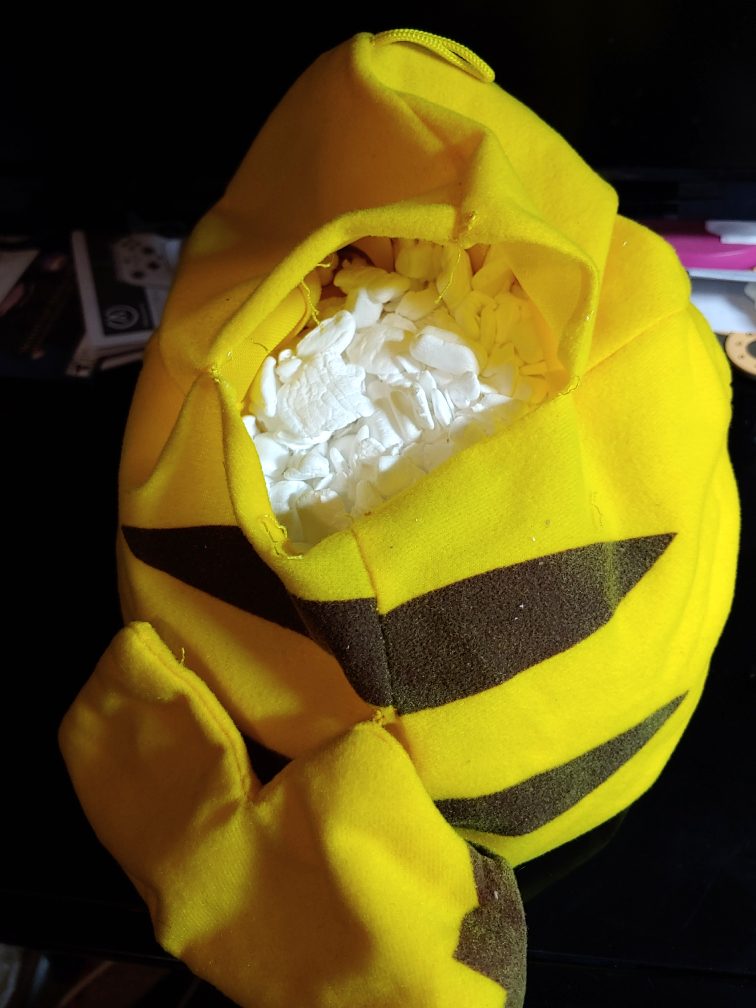
Now if you see something like beads or what I found in Flat-chu, you’ll need to make sure not to scatter it everywhere. Find a large garbage can and turn the open seam downward. Try not to shake as shaking will get this stuff everywhere. And it will scatter. My kitchen floor had to be vacuumed after this.
Once you’ve got the loose stuff out, start turning the head inside out, pushing the filling or fiber out with your fingers by pressing on the outside of the plush. Things like ears might be closed off, so you might not be able to get anything out of these sections. For Flat-chu, his ears were stuffed with the styrofoam filling, so those were turned inside out too.
Now turn the body inside out and repeat the process. The body will likely have more stuffing, so be careful when dumping the stuffing. Have a vacuum handy. Hands, feet, and tails may have the same trouble as ears where you can’t get into the sections easily. Flat-chu had fully stuffed hands and feet, and I only pulled the crushed styrofoam out of those sections.
Once you have most of the stuff out, if there seems to be more, take him outside and give him a good shake.

Now you have an even flatter friend.
Time for stuffing
Now that your friend is super flat, it’s time to make him un-flat.
Fiberfill is strands of fiber spun together and looks like cotton candy (no, it’s not edible). This stuff is pretty soft and fluffy, and it pulls apart from itself about as easily as cotton candy. Fiberfill is used in everything from pillows to plushes and is pretty versatile if you plan on making soft things or restuffing flat friends.

Start with the body. Grab a handful of fiberfill and stuff it inside the body. If you need to stuff legs, arms, or a tail, push the fiberfill into the opening with your finger. It’ll stuff pretty easily and start to condense as you push it in.
Take another handful and stuff it in. For extremities, make sure to pack the fiberfill in pretty tight to give those a nice solid feel.
The body does not need to be packed in tightly like the extremities. You can simply stuff the fiberfill inside and let the fluffiness fill the space for you.
Once you’ve reached the top of the body, it’s time to stuff the head. If you have ears or horns or something else that needs to be stuffed, pack them tightly first. Stuff the head much like the body, packing the fiberfill in enough to fill the body but not so much that it overflows out the back or looks lumpy.
Don’t pack the neck section completely. Most of this gap will be covered by placing the head back on the body, and any deficiencies will be handled during the sewing process.
Stitching the neck back up
We can’t leave your friend with his guts spilling out the back of his neck. The fiberfill will get dirty and probably will shed all over your room and the con floor. So we’ll need to stitch him up. The best stitch is a ladder stitch.
A ladder stitch is a nearly invisible basic hand stitch that is called that because it looks kinda like a ladder when you’re working with it.
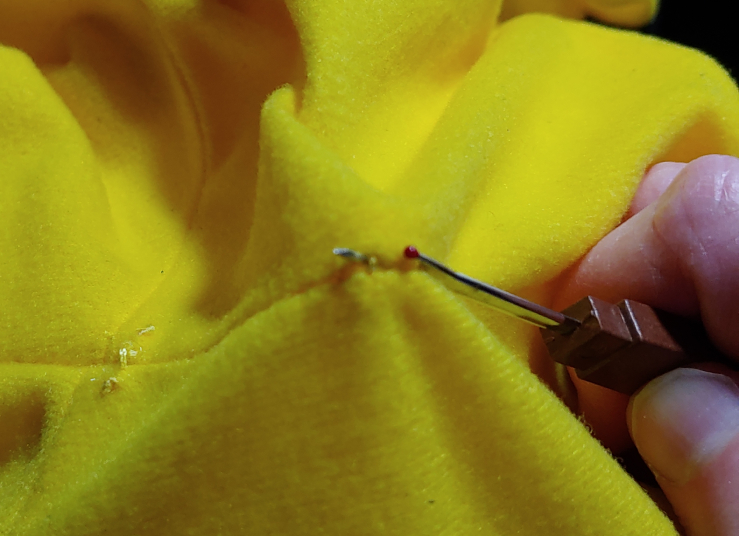
The trick to a ladder stitch is stitching along the seam line. This is where the fabric would meet up and form a finished seam. Since we want the stitch to be invisible, most of the stitchwork is actually done on the inside. Here’s what the stitch looks like:

The red lines are stitches done underneath the fabric and the black lines are the thread pulled across the open gap. You can create the lines underneath the fabric by plunging the needle into the fabric and back out just a little way out, much like the needle is sitting in the photo.
Since you’re working with a previously stitched seam, you can use the stitch holes as guidelines for making your ladder and where to put the stitches at the seam.
Start by knotting your thread. Feed the needle from the back of the fabric through one of those stitch holes then start making your ladder. After you’ve made a few ladder rungs, pull the needle all the way out and tug it. The thread should pull and the seam should close shut. Repeat and keep making more ladders then tugging them shut.
Stop about halfway across the back of the neck for a neck check. Now that the plush is partially closed, check for any section in the back of the neck where there isn’t enough fiberfill. It’s pretty easy to spot as there’s a gap forming in the fiberfill. You can also see how the neck appears to bunch a bit on the side you’ve already sewn.
You can feel it as well by sticking your finger inside the neck gap.
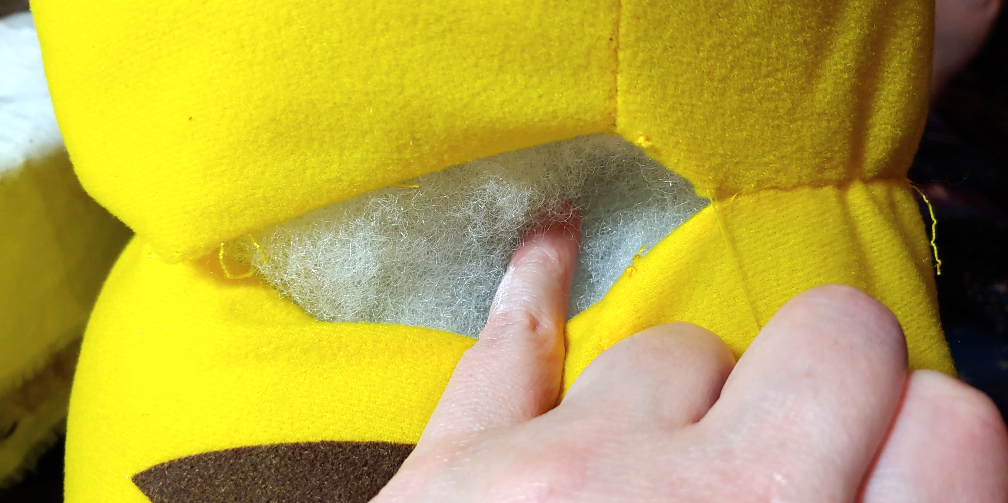
If your neck has some gaps, take some fiberfill and stuff it inside the gap. Push it towards the section of the neck you’ve already sewn and then fill in the open gap. Don’t overfill it else it will be really difficult to sew the rest of the neck up. You can tell when something is overfilled because you cannot pull the seams flush together with your fingers or the fiberfill is literally spilling out the back seam.
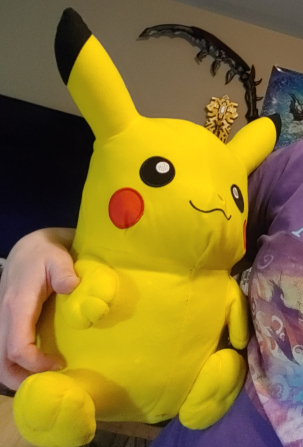
Continue to sew up your ladder stitch, completing the neck seam and filling in any fiberfill gaps as needed. Finish off your stitch with a tight knot and now your flat friend is no longer flat!
I hope you enjoyed this quick little tutorial. It’s a great skill to have, whether it’s to restore a plush prop or to make a new one.
After restoring Flat-chu, I realized he was much larger than I expected. Nearly 20″ tall! Sometimes when restoring a flat friend, you’re in for a surprise with the prize you’ve discovered and given new life to. It’s a great way to restore something instead of having to throw it away. My sister is very excited to get her fully stuffed friend.
Let me know what flat friends you restore! @ me on social media so I can see your newly stuffed friends too.
