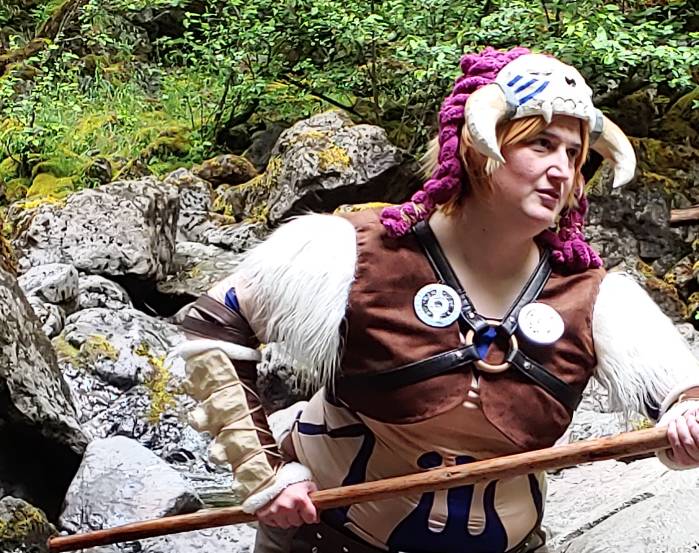
Link’s Barbarian gear from Breath of the Wild features a lot of bone armor. And when I set out to make the vertebrae on his forearm, I knew I couldn’t make it out of a moblin unfortunately. I needed another material that was solid and could take a beating at a con. So I turned to my good friend, paper mache.
This bone is pretty solid and was made almost completely from the recycle bin. It cost little more than a bottle of Mod Podge and some wire to make.
Skill level: beginner-friendly
Cost: budget-friendly
Materials:
- half a long tissue box or similar box
- heavy gauge wire. I used 14 gauge. Get it at the hardware store for cheap
- half a toilet paper roll (TP removed)
- aluminum foil
- masking tape
- non-glossy newsprint, printer paper, or the weekly ad
- acrylic paint
- matte varnish. Can use matte Mod Podge!
Supplies
- Mod podge (matte or glossy) or a glue mixture (1:1 glue:water) for paper mache mixture
- Small bowl to hold paper mache mixture
- Towel (washcloth works) for paper mache fingers
- Sandpaper, 220 grit. Get it cheap at the hardware store
- Scissors for paper (not for sewing)
- Pencil for marking
- Wire cutter. A cheap pair at the hardware store or in a jewelry kit work
- Paint brushes
If you haven’t played with paper mache before or need the recipe for mixture, check out my primer first: Paper mache for props and accessories.
Constructing the base
The base is where all the strength and structural supports live. And they’re not the most complex supports either. It’s all just cardboard and wire. But let’s start with shape first.
Cut your tissue box open and lay your arm (or leg) over the box. You’ll want the shape on the box approximately the same as your forearm with a few inches on either side so the bone can curve around your arm.
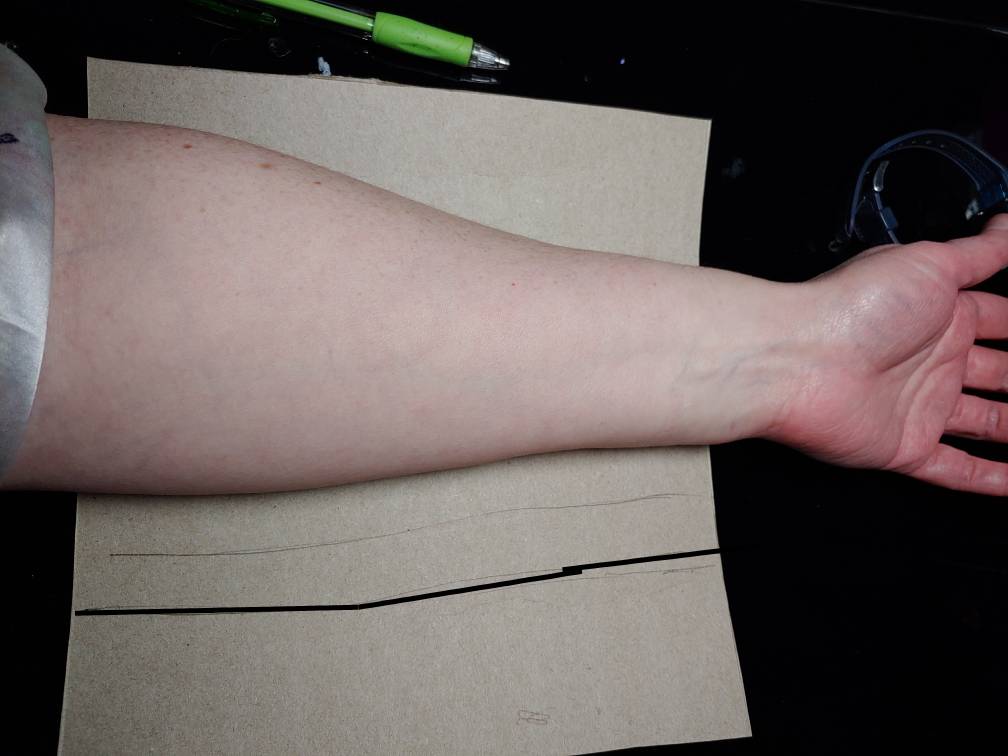
Trace both sides and cut the excess of the box off. If you aren’t sure how wide you want it, it’s better to cut it larger and trim it down later. You can also curl the box around your arm with your free hand (or with the help of a friend) to double-check the size.
Next is adding support. About 5 wires will work for a full forearm. The wire not only strengthens the box but also keeps it bent into the proper shape while you work.
Cut several wires the width of your tissue box base using your wire cutters. They can be slightly shorter than the width as long as it covers the majority of the box. Using your hands, gently bend the wire to shape and match it up as closely as possible to your forearm. Watch for sharp edges as cut wire can be quite sharp.
Once the wire is bent, place the tissue box underneath the curve and tape the wire down completely with masking tape, including masking those potentially sharp edges. Wire should sit at the wrist and near the elbow with the remaining wire spread evenly in between.
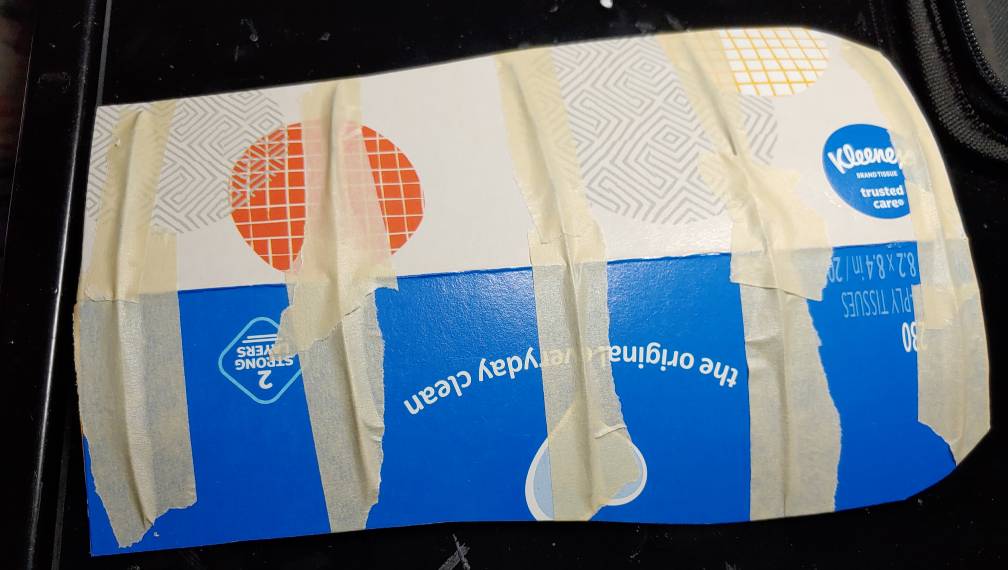
There is a slight curve at the top of my tissue box to prevent bumping an edge with my elbow while the bone is on my arm.
Taping the wire on the outside of the box works just fine as there will be raised details on the top to hide the wire shape underneath.
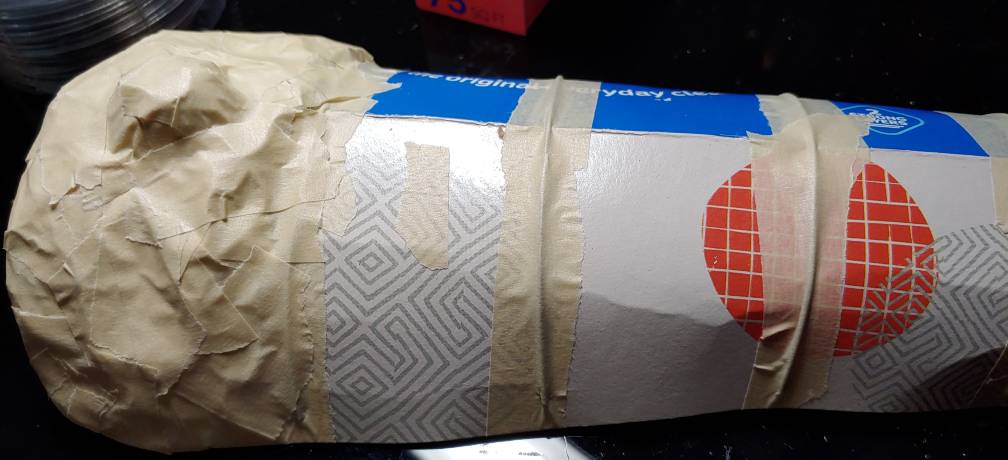
Adding volume
While the tissue box has a nice forearm shape now, it doesn’t really look like a bone just yet. And to make it more bone-like, we need to add volume. While there are a number of ways to add volume to your project including things like clay, I find that using aluminum foil from your kitchen gives you some nice solid volume without the weight.
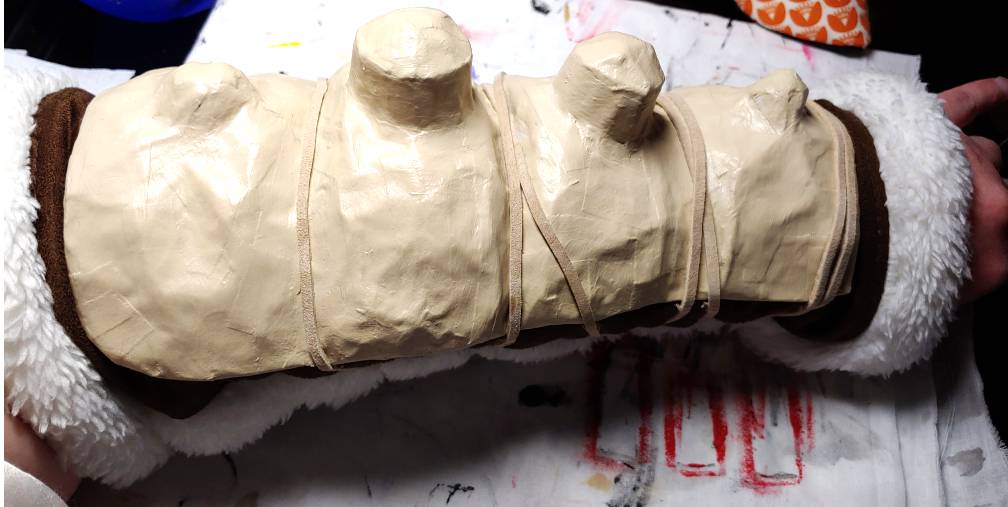
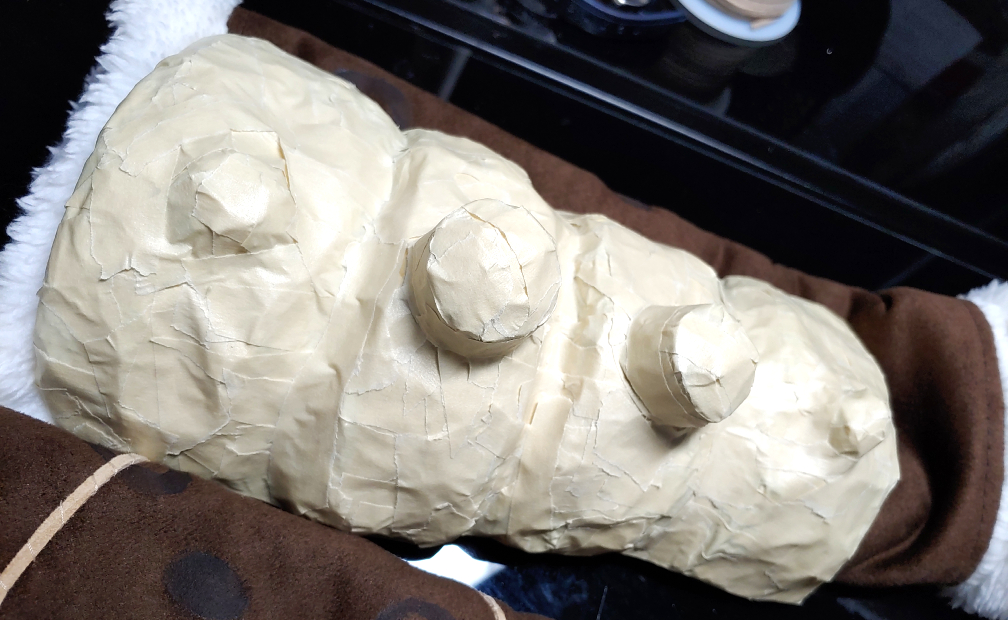
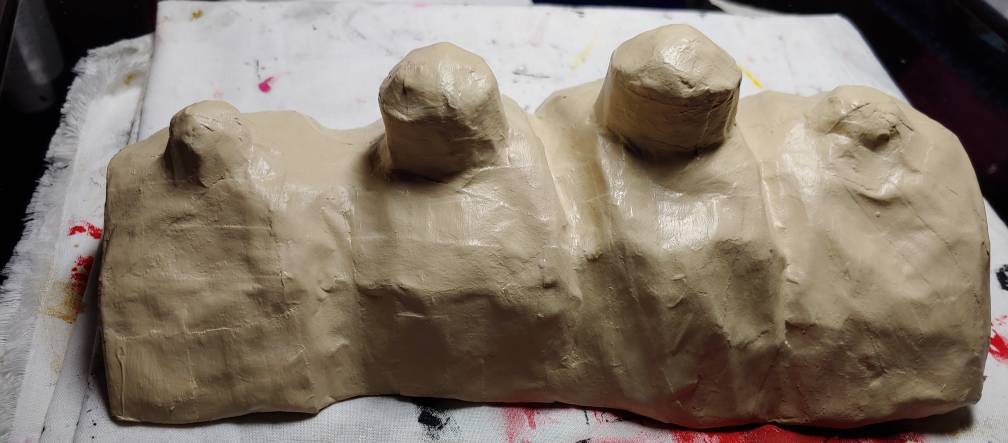
Start by dividing the bone into sections for the vertebrae. Link’s arm bone has 4 sections, so I used the wire as my dividing markers.
Start by taking some aluminum foil and crumpling it up into the relative shape of your section. While you could tape this foil down as is, we want it firm. So smash it with your hand. This creats a very dense section of foil and may create some dips and bumps to give your bone a more organic shape
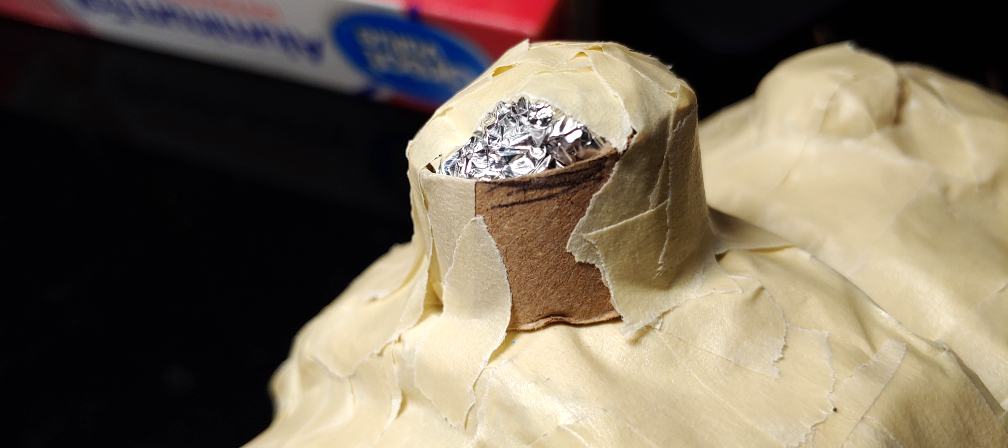
After crushing the foil, tape it down and cover it completely with masking tape. Paper mache will not stick to foil, but it sticks to the tape just fine.
If you have trouble with this process, Paper mache for props and accessories goes into more detail.
To make it look like vertebrae, you need the bumps along the middle of each bone. Link’s arm bone has two different sizes. The small ones are easy enough to make by balling up the foil, smashing it a bit to flatten the bottom, and taping it down.
The larger ones are made with toilet paper rolls! The bumps are approximately 1/2″ or shorter cuts of a toilet paper roll with aluminum foil densely balled up and shoved inside.
Keep making volume and bone bumps until you’ve completed your entire vertebrae.
Paper mache time
While masking tape is a nice bone color, all those individual strips and pieces don’t look very bone-like and after a while, the tape will start peeling off. So we need to paper mache it.
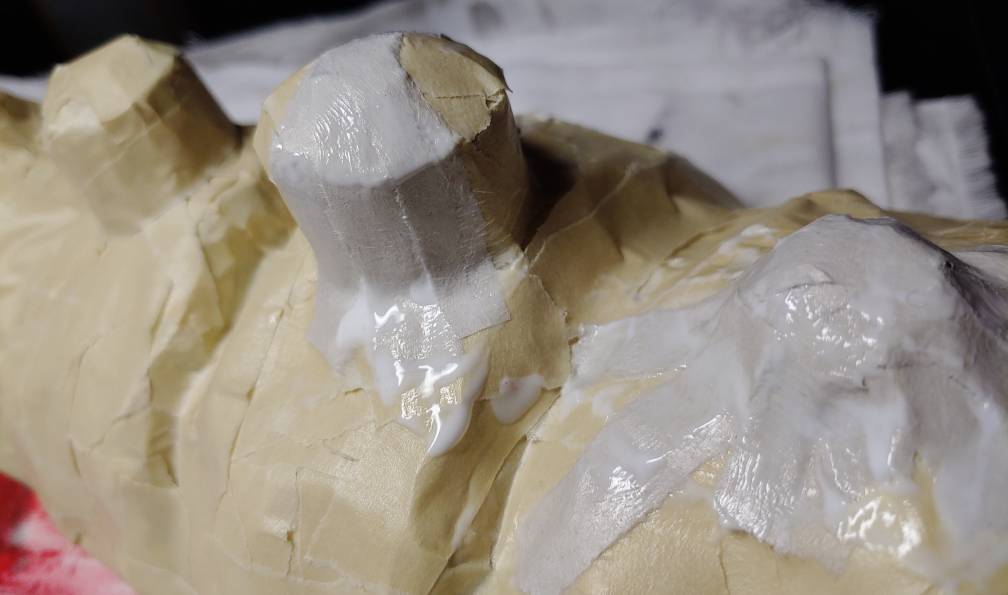
For the most part, the techniques to paper mache a vertebrae gauntlet are listed here in my primer Paper mache for props and accessories. This goes over what mixtures to use, how to tear paper strips, what kind of paper, and how to apply the paper smoothly. For a bone, you want to apply the paper as smoothly as possible, rubbing the edges down with glue or Mod Podge to hide them. The vertebrae bumps will likely give you the most trouble because they are round and strips are not.
The best approach for the bumps is to use thin strips of paper. When you apply thinner strips around a cylinder, it lays flatter than using the wider strips. You won’t have to worry about puckering around the top of the cylinder or where it meets the base.
This works well for the small humps as well, giving you the most control over these organic shapes.
Additionally, you’ll want to add paper mache to the underside of the bone as well, about 1″ in or so. This will give you a good surface to glue the bone to a gauntlet. If you plan to wear it right next to your skin, you’ll want to cover the entire underside of the bone so you don’t sweat directly on cardboard and compromise the tissue box structure.
Allow to dry about 12 hours and ensure it has good airflow. You can set it on a cookie rack to get extra airflow underneath if needed.
Sanding and painting
After the paper mache dries, it’s time to sand the edges of the strips down. No matter how much you stick the paper down with glue, the edges are still unfortunately there. While you can skip the sanding part, sanding makes the strips less noticeable and gives the surface a more organic, bone-like appearance. Sanding by hand does produce dust, so work in a place that’s easy to clean up and away from pets and kids. And if you’re dust-sensitive, wear a dust mask.
Cut thin strips of sandpaper and carefully rub the strip against the paper mache. When a strip becomes coated in paper dust, cut the coated section off and use the next section.
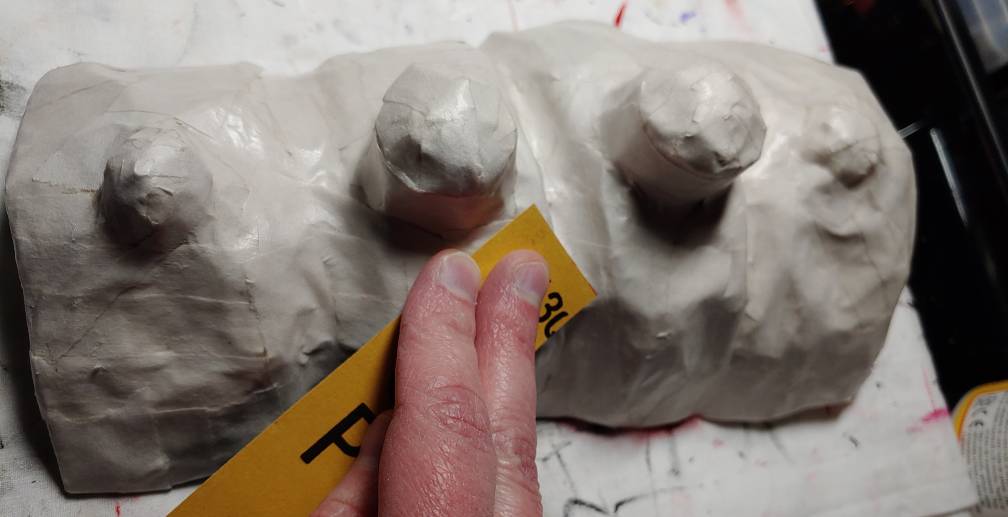
When sanding, you won’t visually notice a difference, but you should be able to feel it with your hands. Once the surface feels smooth, wipe the dust off with a damp paper towel.
For painting, you don’t need to use a base coat or a primer. Both glue and Mod Podge work great as a primer to protect the cardboard from wet paint and they’re already on there from the paper mache process! You can add a fresh coat of primer on the surface using a paintbrush if desired.
You can paint with your preferred method. Mine is to brush on paint with a soft paintbrush (the softer, the less you’ll see your brush strokes) and use a makeup wedge for detailing or dry brushing. You can also use spray paint as well.
Once you’ve finished painting, you’ll want to seal the paint to protect your work. This prevents chipping and scratching from bumps in a con or in your suitcase. For this, you’ll want a varnish. Matte Mod Podge works great as a varnish. Personally, I used DecoArt Ultra Matte for my bone. Whichever you choose, apply 2-3 coats of varnish, allowing each coat to dry in between.
Attaching
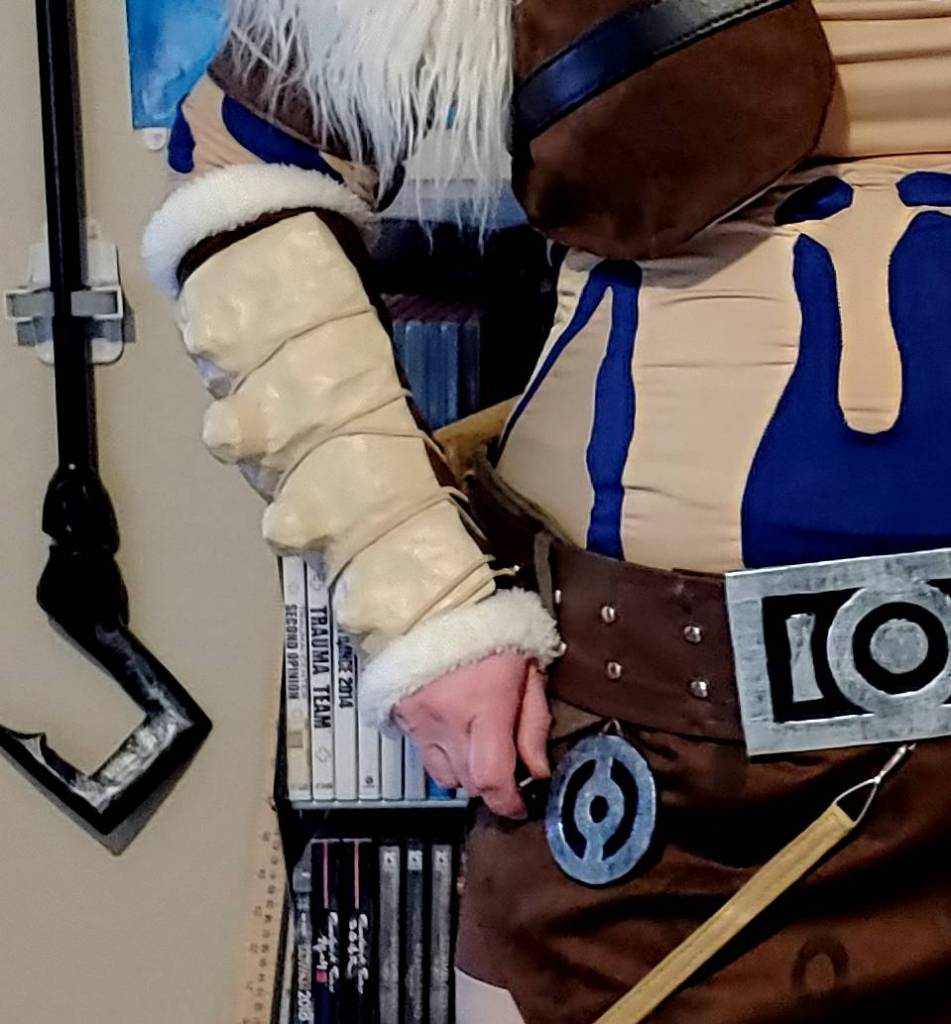
Having a bone is great, but you probably want to attach it to something. Fortunately, paper mache works with most glues since it’s really just paper in the end. You can use superglue, but for Link’s bone, I used tacky glue. Yep, that craft glue that comes in the brown bottle. It works great for adhering paper mache to fabric.
Whichever glue you do choose, follow the instructions on the bottle. Some require you to put pressure on the two surfaces to adhere them together, and others have longer curing times. Glue along the edges of the bone where you applied paper mache underneath and attach it to the fabric gauntlet.
You can also glue to the top of the bone. The suede cording on Link’s arm bone is glued down to keep it from moving. The laces are then glued to the fabric gauntlet using super glue and tacked down with some thread to ensure they don’t move.
I hope you enjoyed this tutorial on how to make your own vertebrae bone armor out of paper mache! It’s a budget-friendly trick using mostly recycled materials to create a sturdy, rather durable accessory. It could be used for large or small bones with many bumps or just a few. Either way, I hope it’s a useful technique for your next cosplay.
Let me know what you make with this tutorial. @ me on social media so I can admire your work.
