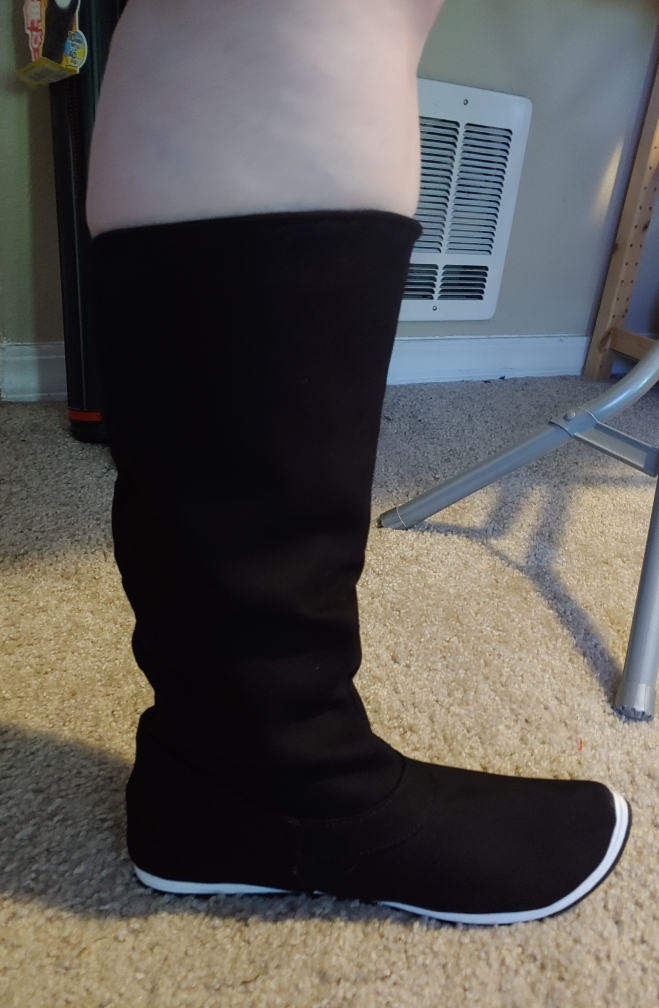
I have a problem with cosplay and fashion boots. They’re never big enough in the calf and half the time, they don’t even have zippers. How do I get my wide feet into these boots when I can’t squeeze them past the ankle? I’d honestly avoided buying boots for years, but when I wanted a pair of actual hanfu boots, I found them squeezing the life out of my leg despite saying they were wide-calf boots. I finally decided it was time to do something about this problem.
And by doing something, I don’t mean trying to slim down the muscle in my legs. We shouldn’t have to change our legs for fashion and cosplay, so there’s another option. Change the boots.
Cosplay boots and a lot of fashion boots are made to a specific leg size and honestly, it’s very specific. Most of us don’t fit that size, and that’s fine. So we modify the boot to make it work for our specific leg size. And I’m a big fan of zippers in boots, so let’s add one while we’re at it.
If the boot is made of canvas or thinner faux leather, you can modify it. As long as you can get a sewing needle through the material, this tutorial can work for you. This won’t however work for boots made of stretchy materials or thick leather.
This tutorial requires a ton of hand sewing as you cannot shove a full, complete boot underneath a standard home sewing machine.
This tutorial also shows the process done with only duck canvas, which ended up being shinier than my boot canvas. I later ripped this out and put a cotton outer layer over the canvas to blend the fabrics together better, following the same process to attach the expansion and the zipper.
Skill level: intermediate
Cost: moderate (for cost of boot. Modification materials are pretty cheap)
Materials:
- Scrap duck canvas for stability (about ¼yd) in a color close to your boot
- Matching outer fabric (about ¼yd as well)
- Scrap fabric for patterning
- Two invisible zippers, matching close to your boot color (length should be longer than the side of your boot)
Tools and supplies:
- Stick pins
- Seam ripper (for removing an existing zipper if present)
- Hand sewing needle. For canvas, use a standard sharp. For faux leather, use a heavy-duty or leather needle for extra strength
- Thimble
- Fabric scissors
- Non-fabric scissors to cut the zipper
- Pens and pencils for pattern marking
- Tailor’s ruler or clear ruler
- Sewing gauge (optional)
- Pinking shears (recommended for canvas)
- Iron for duck canvas. Please don’t try to iron faux leather or vinyl. You will ruin your iron.
- Sleeve roll (even without ironing, a sleeve roll will make this process easier). A ham is likely too big for a boot.
Making the first cut
Honestly, the most stressful part of this process is making the first cut into the boots. I was pretty nervous about cutting expensive boots, but if you want an expansion, you need to cut it.
The exception is if your boot already has a zipper. If it does, unzip the boot and carefully pick the stitches along the zipper to remove it and skip to the next section.
If your boot doesn’t have a zipper, it’s time to cut space for one. Insert the sleeve roll into the boot. If your boot has folds and is not a leather or vinyl material, iron any creases out of the boot.
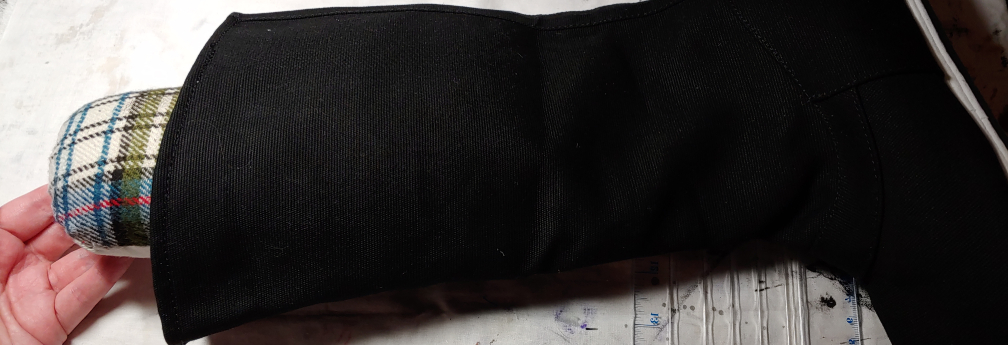
Even without ironing, the sleeve roll provides support inside the boot. With the roll inserted, take the ruler and draw a line up the inside (arch-side) of the boot from the insole to the top of the boot. You want the cut to be on the inside of the leg so it’s not visible from the outside when worn.
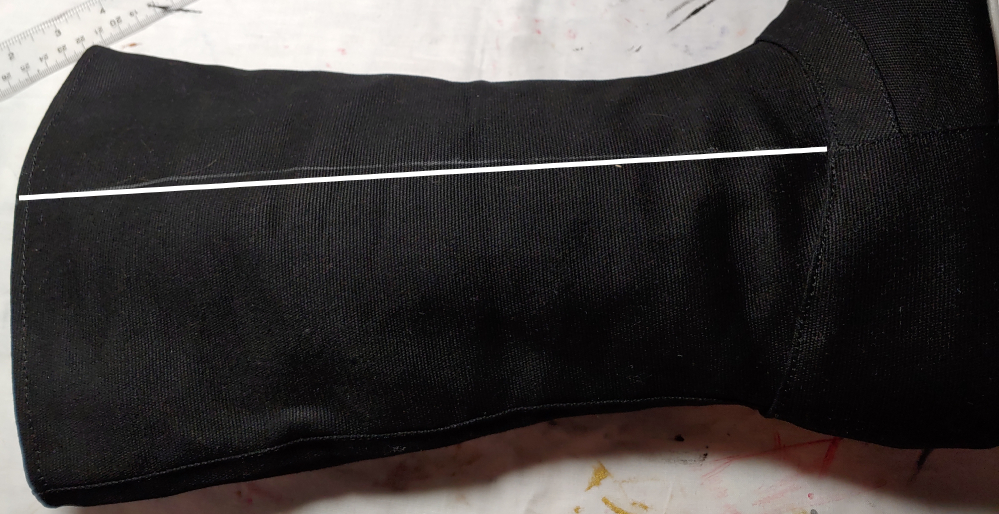
Once you’re satisfied with the line, carefully cut along the line to split your boot open. Cut down to nearly the insole to give yourself plenty of space to fit your foot comfortably inside.
Repeat this for both boots, making sure to cut both from the inside leg.
Drafting the expansion
Now that we’ve made the first incision, it’s time to make an expansion that will fit your leg specifically. If your legs are generally the same size, you only need to draft one boot. If they are not, repeat this process for both boots.
Slip the boot over your foot and pull it all the way up. Slip the scrap pattern fabric inside the boot, pushing it all the way down to the bottom of the incision. Take your straight pins and carefully pin your boot to the scrap fabric on both sides of the incision. (If you are unable to cross one leg over the other, prop your foot up on your desk or get a buddy to help you out with this process)
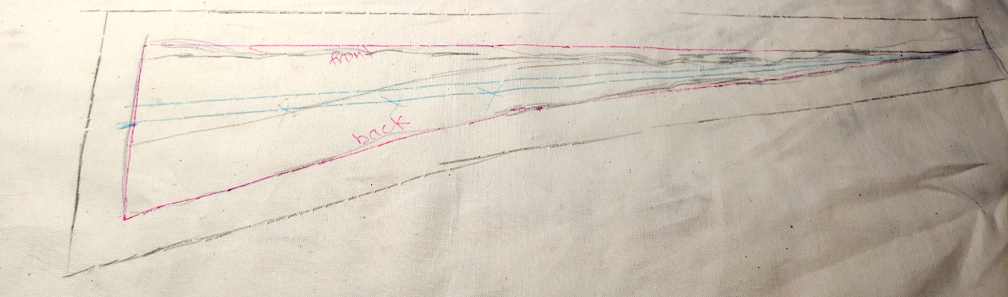
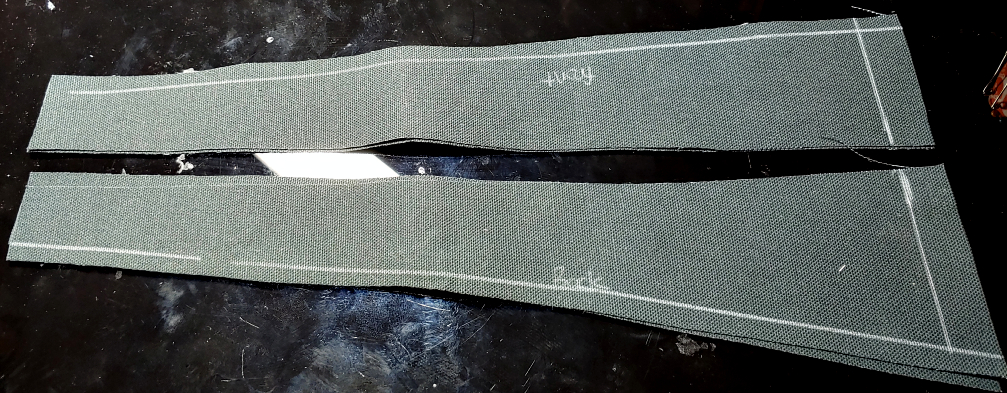
Take a pen and trace the edges of the boot as well as mark where the top of the boot sits along the scrap fabric. Along the edge markings, lightly label which side is the front of the boot and which side is the back.
Unpin the scrap from the boot and set the boot aside. Draw a line approximately down the center to mark the placement of the zipper. It will likely be wider on the back than the front but make a decent guess.
Add a seam allowance to all sides. If you have a tailor’s ruler, use a standard 5/8″ seam allowance. If you have a regular ruler, 1/2″ is easier to see.
Cut the pattern out of the scrap fabric, cutting down the center line to separate the front and back pieces. Pin the duck canvas and outer fabric together and fold in half, leaving the duck canvas facing you as it’s easiest to mark on. As there are two boots, you need two front and two back pieces to complete both boots. (If you needed to make two different pattern pieces for two different leg sizes, do not fold in half and simply cut 1 front and 1 back of each pattern piece, 4 pattern pieces in total.)
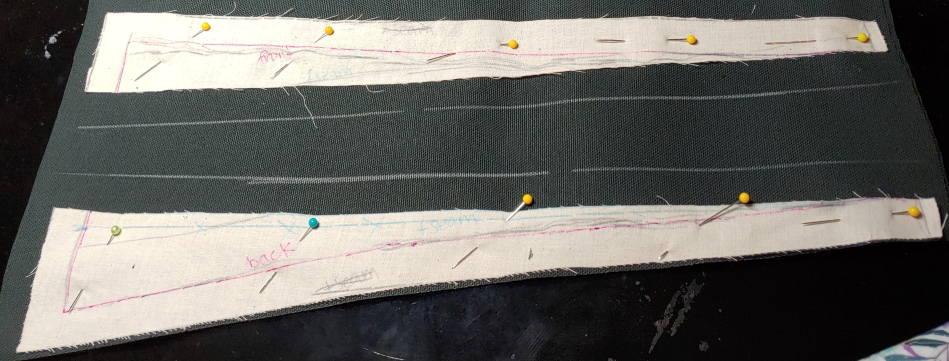
Pin the pattern pieces down to the fabric and add a seam allowance to the center seam, either 5/8″ or 1/2″, whichever you added before. Cut both sides out.
Sewing the expansion
Before sewing the expansion into the boot, you’ll want to mark your seam allowances. As you’re doing this by hand, you don’t have a sewing machine guide or a foot to tell you how wide things are. And I don’t know about you, I couldn’t tell you 1/4″ from 1/2″ if it hit me in the face. So instead, we’ll mark them. And do something a little weird.
Lay your pieces out flat, canvas-side up, and mark the side seams at 1/4″. Yes, half of what you marked earlier. After experimenting with widths, I found that 1/4″ gives you extra leeway around the zipper for pinking the edges down and ensures you have enough extra room as canvas doesn’t have a lot of give (but boot fabric sometimes does).
Mark which piece is front and which is back. Mark the top seam as standard seam allowance, either 5/8″ or 1/2″ that you drew earlier. Repeat this for all 4 pattern pieces.
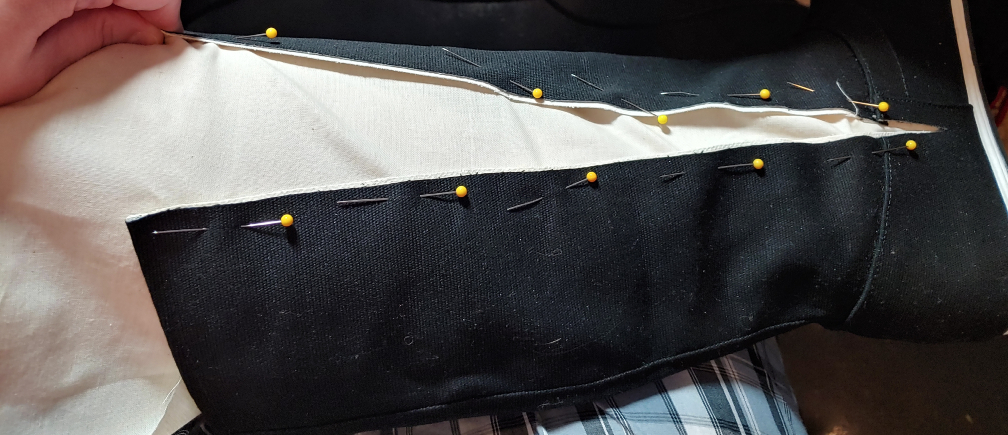
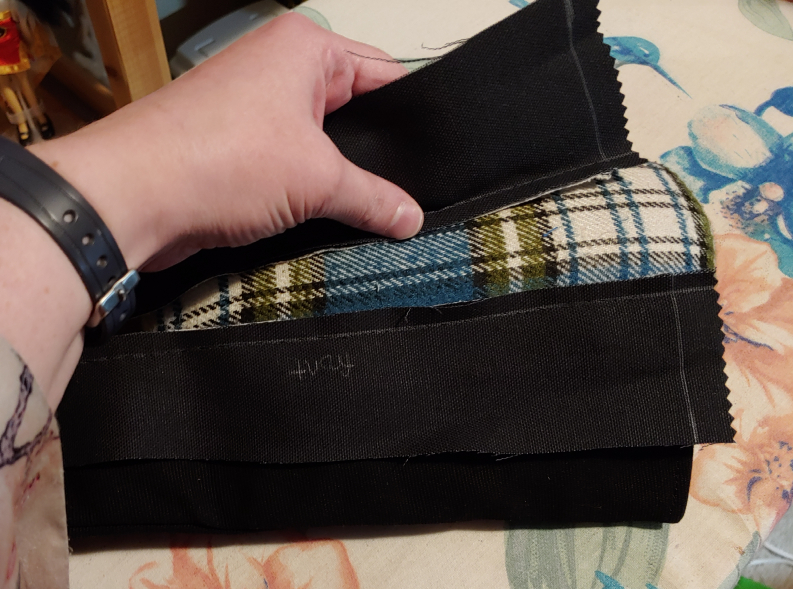
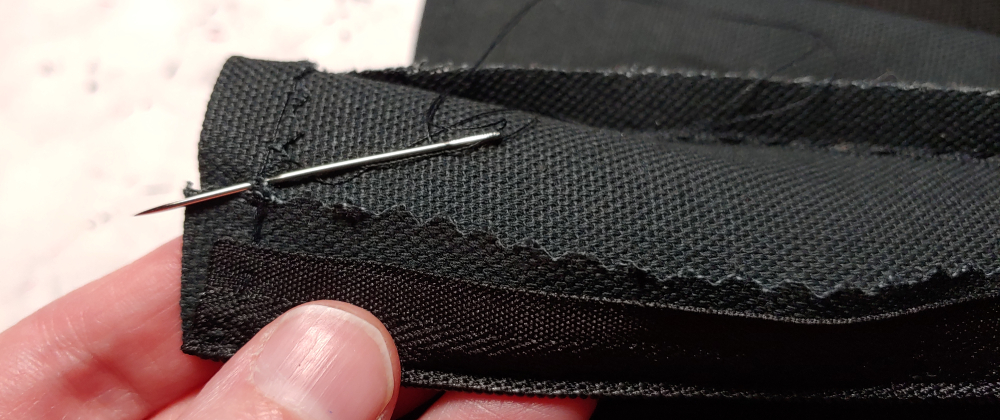
Take either the front or back piece. Does not matter which one you start with. Pin the right sides together with the expansion on the outside, matching the top of the boot with the top seam allowance line. Sandwich the outer fabric between the boot and the canvas.
Using a tight straight stitch, sew along your seam allowance line from the top to the bottom of your incision. Do not sew past the bottom of the incision as you’ll need to flip the canvas to the inside for the zipper later.
Repeat for the opposite side so you have both front and back sewn down.
With these pieces sewn, you could feasibly leave them as-is, but with how stiff duck canvas is, there’s a good chance your seams will look puffy. So we need to flatten them.
If your outer material is canvas or ironable materials like cotton or polyester, insert the sleeve roll into the boot and fold the fabric over at your sewn seams. Iron the seams flat.
If you are using pleather, vinyl, or similar fabrics as your outer fabric, your fabric might not take to ironing. For many vinyls, you can iron them gently with lower heat and a press cloth (check your fabric material for ironing instructions). If it is ironable, fold the boot fabric over the sleeve roll with the canvas side up. Iron the seam towards the opening on polyester or lower heat to gently press the seam flat. Do not iron directly on the other side of the fabric as you’ll ruin your iron and your fabric.
Now to finish off the top edge. Use pinking shears on the canvas to prevent fraying. If you are using a non-vinyl or pleather outer fabric, pink this too. Fold the top over at the seam lines marked earlier, pressing the two halves together to make sure your edges line up. If your fabric allows, press this seam down. Sew the seam along the top edge either by hand or by machine.
Trim the bottom edge up to the bottom of the incision in the boot itself.
Installing the zipper
Try the boot on, folding the raw seam over on both sides to test how wide your zipper seam needs to be. There is a pretty good chance it will be about how wide your seam allowance was at the start, either 5/8″ or 1/2″. You want to leave a little leeway around the calf when checking the sizing to prevent fraying and allow space for things like pants or socks.
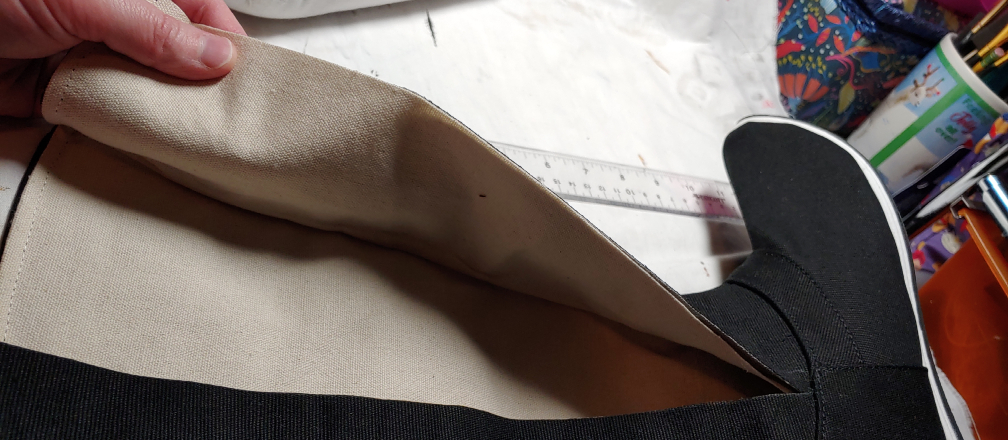
Once you’ve taken measurements, remove the boot. Set it beside your sleeve roll, open the boot fabric and flip it canvas side up. If you are using a vinyl-like outer fabric, push the fabric down and out of the way. If your outer fabric can be ironed, keep both that and the canvas together.
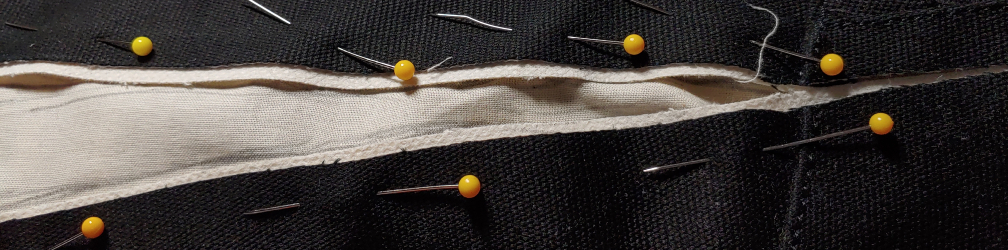
Carefully measure out the seam allowance. For accurate measurements, use a sewing gauge like I’m using here. Work from top to bottom, measuring small sections then ironing them down.

Repeat this for both sides of the opening. Pink the edges of the canvas (and outer fabric if needed). If you separated the canvas and outer fabric, fold the outer fabric back over the canvas, pinning it in place.
Open your zipper and clip the top edges, burning the edges of the fabric lightly with a lighter (at a distance. don’t douse it in flames. also don’t burn yourself.). This seals the zipper tape and keeps it from fraying. Do not trim the bottom of the zipper just yet.
Invisible zippers can seem tricky at first as they’re invisible, but there’s a trick to placing them. Start with one side. I usually start with the right side of the zipper because it makes sense to me. Fold your fabric over and place the zipper behind it. This is what the zipper will look like after installed.
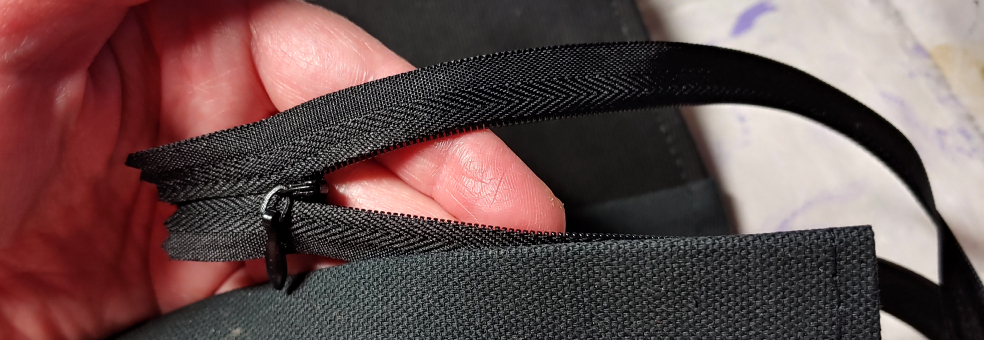
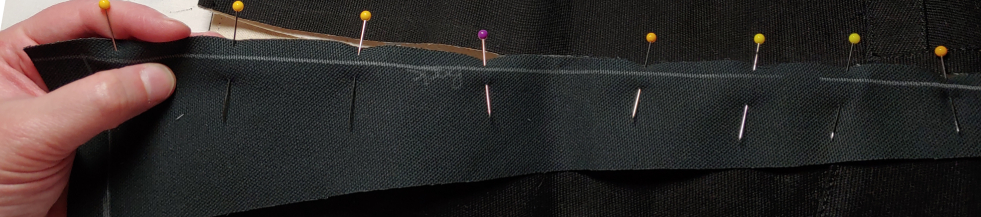
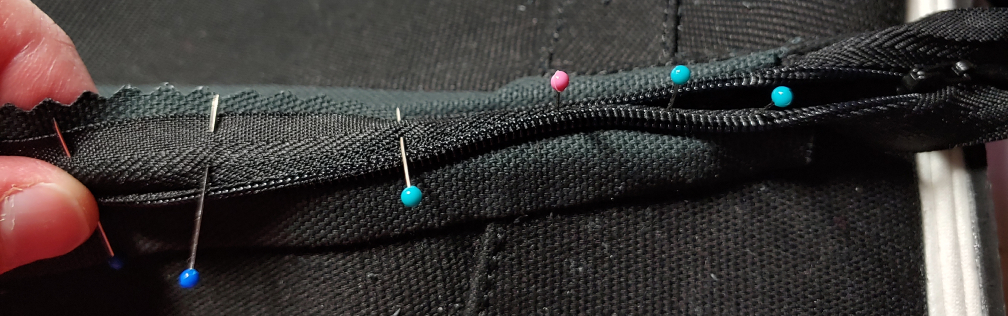
Open the fold of your boot fabric with the zipper still pressed against it. This tells you the side and direction in which the zipper should be pinned. Match the top of the zipper to the top of the boot, placing the zipper face down and pin it down with small pins. The teeth should line up with the fold of the canvas.

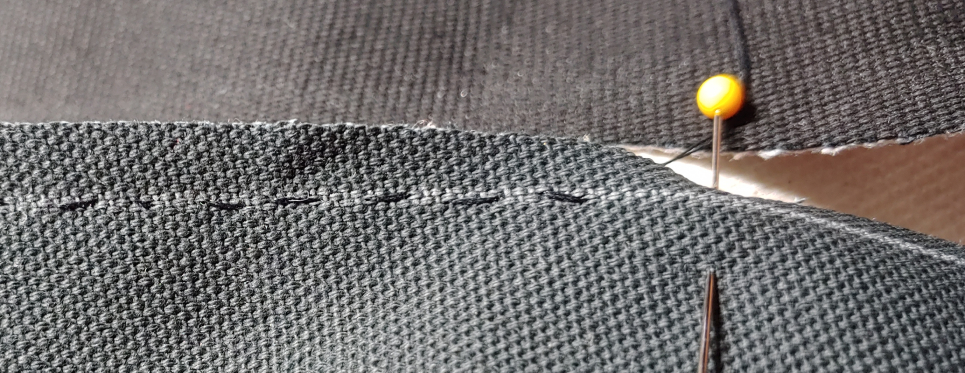
Sew a tight straight stitch along the fold of the zipper behind the teeth, careful not to sew the teeth themselves. You may need to push the teeth over a bit with your hand, but the fold should be easy to see and feel. Sew the zipper with the boot fabric fold open so you’re only sewing through two layers of fabric and not 4.

Sew to the bottom of the expansion as the bottom of the zipper will be tucked inside the outer boot later. Fold the boot fabric inward. The zipper should appear nearly invisible on the inside.
Now take the other side of the zipper, matching it up from the outside much like you did with the first side. Slip the zipper underneath to make sure the zipper isn’t twisted.

Once you have the placement, flip the fold open and pin the zipper down to the fabric once again. Match the teeth up to the ironed fold in the canvas.
Sew close to the zipper teeth like with the previous side to secure the zipper.
Zip the zipper close to the bottom of the expansion. Clip the zipper about 1/2″ from this point. Do not use your fabric scissors as zipper teeth dull them.

After clipping, zip the zipper up past the bottom of the incision in the boot itself. Give yourself a bit of leeway, around half an inch or so, so you can grasp the zipper pull later on. Take the bottom of the zipper and the expansion and shove it through the bottom of the incision. This may take a bit of work as it will fight you. Use a pen, the back of tweezers, or anything strong but not sharp to push that fabric to the inside.

At the top of the boot, secure the top of the zipper and expansion fold with a few straight stitches.
Repeat for both boots.
Adding a zipper cap
You’ve probably noticed that raw edge at the bottom of the expansion and zipper and we can’t leave that loose.
Cut a small square of outer fabric, folding the edges over to form a little cap a bit wider than the expansion fabric that’s left showing. Pin it down against the boot.
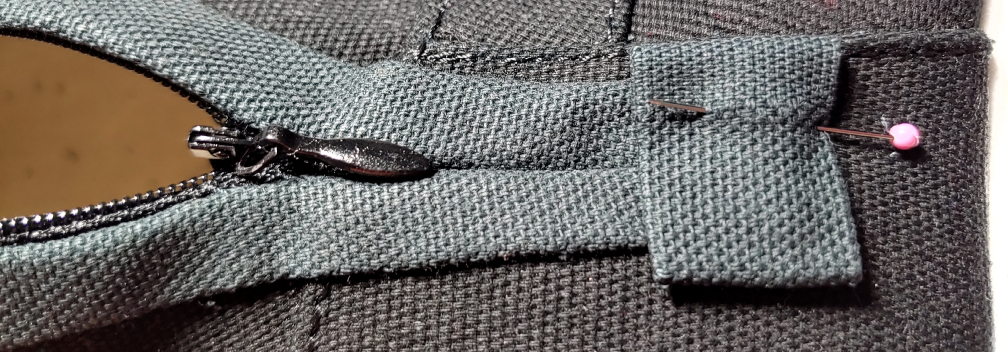
Sew the cap down with small, tight straight stitches, doubling over several times across the zipper teeth underneath. This secures the teeth and ensures they don’t come apart while rubbing against your foot.
And that’s it! you now have custom boots fit just for you!

I hope you enjoyed this tutorial! It’s a great way to customize purchased boots to fit your exact size and needs. It also makes them more comfortable and easier to get on. And we all know cosplay is already hard enough. Why not make things easy and comfy?
Let me know what boots you choose to modify. @ me on social media so I can admire your work!
