Gems. They’re shiny and are great cosplay accents. But in apartments or on a budget, using resin becomes a problem. You can’t do resin inside as it’s toxic to breathe. Even the so-called low-fume stuff is toxic. So if you’re in an apartment like me, you want a safe alternative.
That’s where my favorite budget- and apartment-friendly technique comes in. Resin-free gems made with fine glitter and hot glue. They’re pretty easy to make on a budget and in a small space and honestly, they look pretty cool. You can make them in all sorts of shapes and sizes. Round is my most used shape, though I have also made heart and teardrop shapes. If you have a push mold, you can generally make a glitter gem with it. Two-sided and full-shape molds have trouble with this method as you need to be able to push the glue out of its mold.
Heat warning with this tutorial: hot glue is like the name says – super hot. Make sure not to touch the glue itself or the tip of the glue gun to avoid burns.
Alright, let’s make some glitter gems!
Skill level: beginner-friendly
Cost: budget-friendly
Materials:
- Flexible mold. Can be a resin mold, a candy or food mold, or even a flexible ice cube tray
- Fine glitter. The larger the gem, the more you’ll need.
- High-temp glue gun (or a variable with a high setting)
- Extra glue sticks. Small gems take very little glue, but that large one above took 3 whole glue sticks to make
- Something to protect your workspace. Glitter gets everywhere.
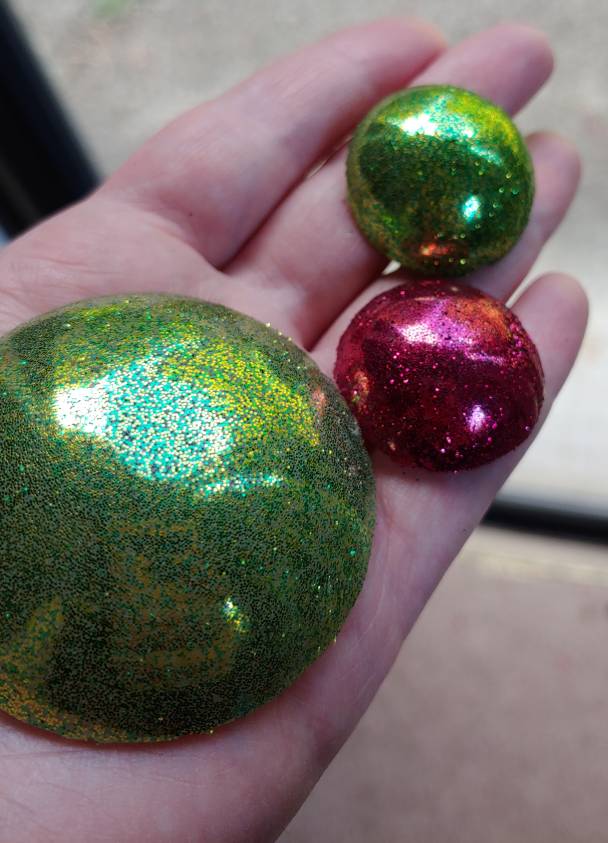
This tutorial shows mostly smaller gems in the pictures, but you can use the same techniques for massive gems as well. This is solid glue so it will have some weight, but it’s not heavier than a resin gem would be.
Your mold will likely have a bunch of glitter stuck to it, so you want a mold used solely to make gems. While I’m pretty sure glitter is nontoxic, you probably don’t want to eat it by reusing the mold for food. In general, don’t reuse craft stuff for food. I don’t want to eat glitter. There’s enough of it in my carpet already.
Prepping the mold
First is to glitterfy the mold. The larger the mold, the more glitter you will need. I keep a lot of glitter in my drawer solely for making giant glitter gems.
Add some glitter into the mold. Tap it from a shaker or a bag or pinch it and drop it in. If you pinch, make sure not to rub your hands on your pants or that glitter will get everywhere (I do this all the time and my apartment is full of glitter).
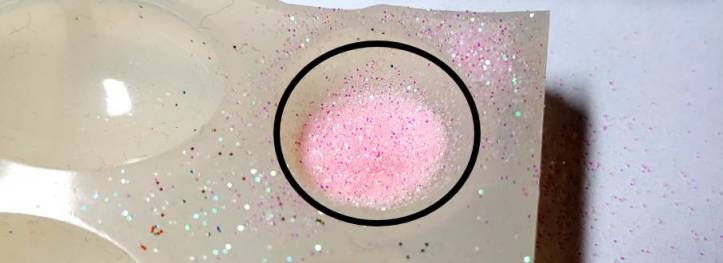
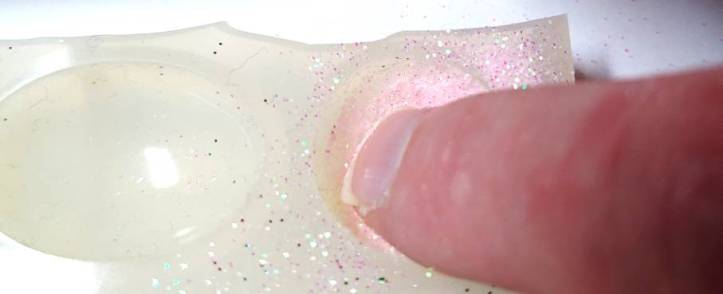
Take a finger (any finger) and pull the glitter upwards from the center towards the top of the mold. Use this to coat the sides of the mold. If you leave the glitter on the bottom, the sides will just look like glue.
When you’re done, the glitter should be spread pretty evenly around the mold. You should see all glitter and no mold.
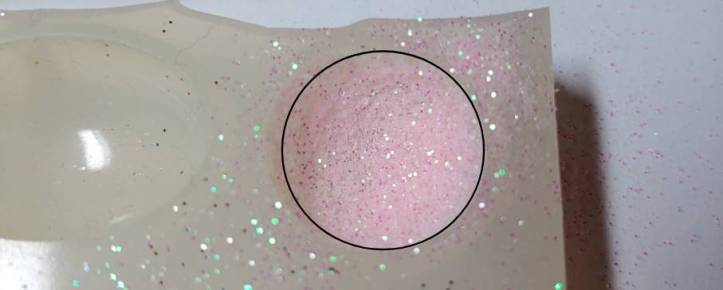
If you see any mold shining through, use your finger and spread the glitter around again. If there isn’t enough, add some more glitter and spread it around some more. Once again, make sure to not rub the glitter on your pants or yourself or it will get stuck in your carpet and your chair.
If you want to make colorful glitter gems, add various colors in stripes or spots, and spread it around the mold with your finger much like you would with a single-color gem. When using multiple colors, be mindful of where you’re pulling the glitter to keep the colors from blending (unless that’s what you’re after, then blend away!)
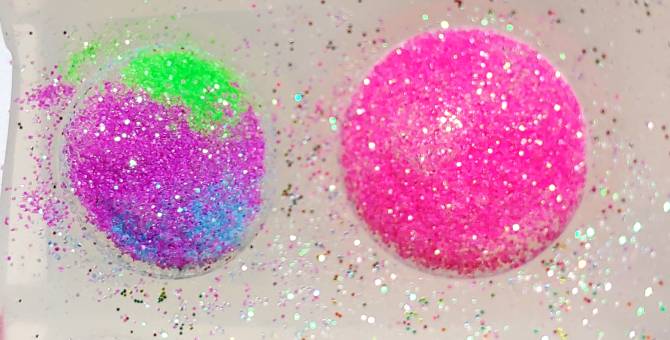
These gem molds here are very small, but if you use larger molds, you can get more interesting designs. You probably won’t be able to make stars or hearts, but you can do blends and stripes of colors.
Gluing gems
Now that your mold has been glitterfied, it’s time to make the actual gem. Heat up your glue gun and let’s make some gems.
Take the glue gun and start squeezing some glue into the mold. Make sure not to touch the tip with the glitter itself or it’s never coming off.
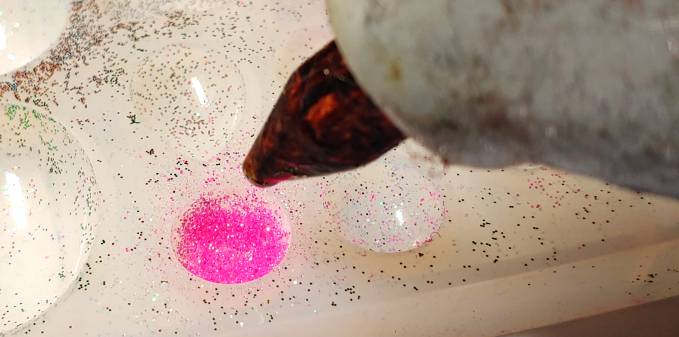
Small gems like this only take a little squeeze, but larger gems will take more. About 2″ diameter gems can take up to a whole stick of glue and my giant 4″ gems took about 3 glue sticks due to the mold’s depth.
When you need more glue for your mold, simply shove the glue stick into the back of the glue gun and keep gluing. You don’t want to wait too long while replacing the glue stick as the glue is already starting to cool. It’s not immediate but you want your gems to be even.
For smaller gems, you’ll probably want to fill the mold up completely. It’ll bubble over a bit like a very full glass of water, but that will settle during the cooling process.
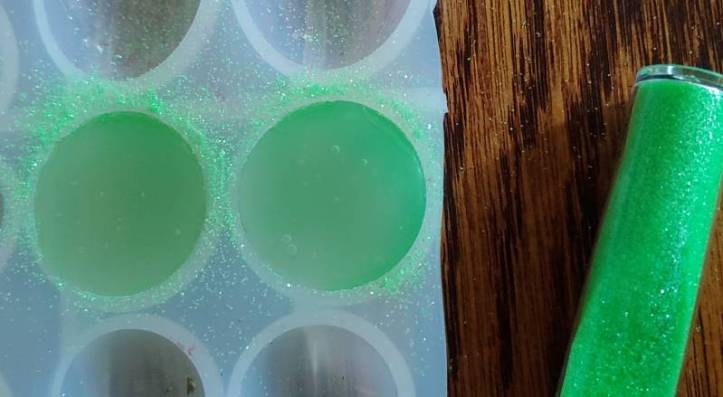
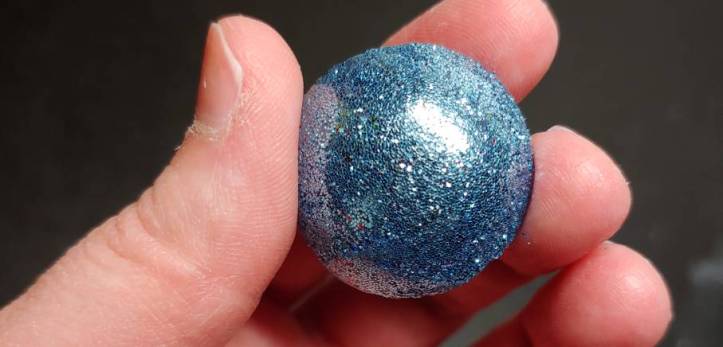
But what if you want a less deep gem? No worries. Just don’t fill up the mold completely. For my large Princess Daisy gems shown at the start of the article, I only filled up half the mold. It was a large cake mold and I didn’t need this massive gem pulling at my dress. You don’t need to fill up the mold all the way to make cool glitter gems.
Now it’s time to wait. Hot glue is still hot glue. While it cools pretty quickly when you’re using it normally, this isn’t a normal use for it. There is a lot of glue in this mold, and if you try to touch it right now, you’ll burn your fingers. I’ve done it, and it hurts like crazy and blisters.
Instead, simply pull the mold by the edges to the side of your workspace and let it cool. Smaller gems will take around 10-15 minutes while larger gems will take considerably longer. The more glue you shoved into the mold, the longer it will take for the core to cool off.
Popping out the gems
You can generally tell when it’s okay to remove the mold by how hot the bottom of the mold is. Of course don’t touch it right after you glue the gem, as you will hurt your fingers. But after 10 or so minutes, you can test how it feels. It should feel at the most slightly warm since the mold also takes time to actually cool.
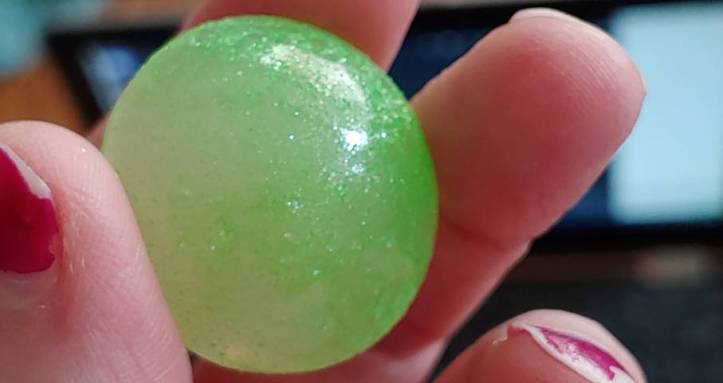
When it’s cool enough to hold, pick up the mold and push the gem out from the mold’s backside. If the mold is large, you may need to turn it upside down to do this. The gem should pop out easily and hold its shape.
If the glue starts moving around and sticking to the mold, it was too warm. Unfortunately, since it’s glue, there’s little chance to recover it and you may have to start over.
Tap the gem on a table or hard surface to knock any excess glitter off. The surface will be rough but all the glitter should stick in place and not scatter onto your cosplay.
Now you can glue it to a prop or accessory with some hot glue on the back. Or you could do other cool things with it.
Cool things you can do
Because you’re working with glue, you can do all sorts of cool things with your gems to accentuate them or give them a different purpose. While most of the time, I’m gluing my gems to other things like props, I’ve added stuff to them to make them look cool or make them into something else.
Painting
You can paint these gems without any sort of base coat! The surface is rough, but you can still paint them pretty easily with acrylic paint. You’ll want several layers to make sure the paint gets in between all the glitter flakes. It won’t be solid, but it’ll give you a nice paint coat.
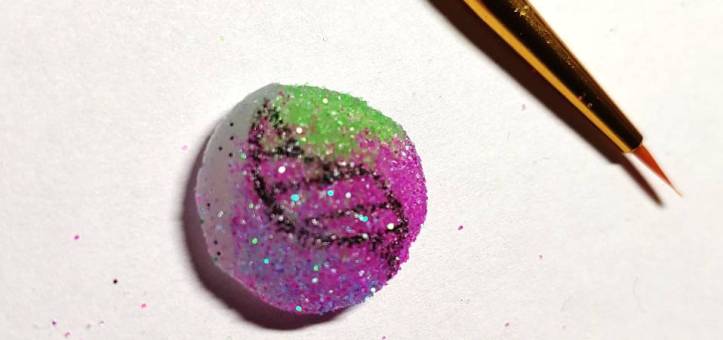
Smaller gems and gems made with coarser glitter will appear rougher when painted. Larger gems and gems made with more fine glitter will have a smoother paint coat.
Once you’re done painting, you can also seal the paint with a gloss varnish. The gloss will make it even shinier and make the glitter sparkle like crazy. This also protects your paint job from a con, and cons get rough with cosplay.
Adding backings
Since you’re working with glue, you can actually glue the backing right into the gem. This takes a little bit of patience, but you can add anything from pin backings to earrings right into it while the gem is cooling.
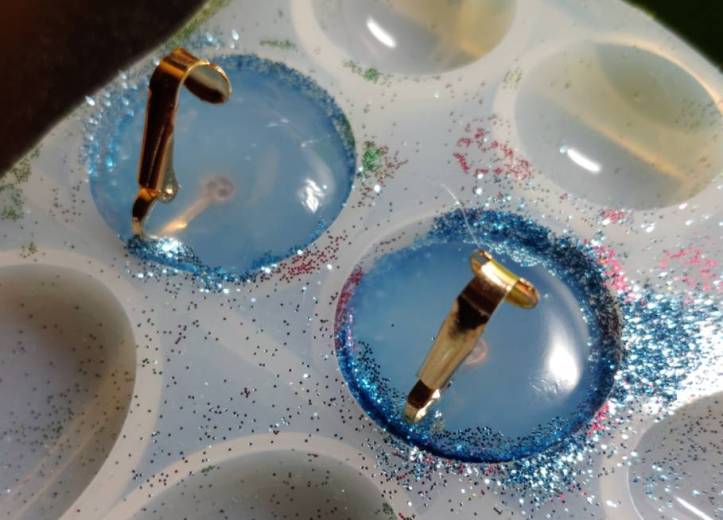
After creating the gems and before the gems are cooled, partially submerge the backing into the glue and hold it there. You will need to hold it for a few minutes while the glue cools around it. The surface area cools first, so if you let go of the backing and it doesn’t move, you can let go of it completely until the gem finishes cooling.
If the backing sinks, quickly pull it back upwards towards the surface, careful not to shift it too much. As the gem is cooling, shifts can cause puckers on the back of the gem and that can interfere with the backing you’re using.
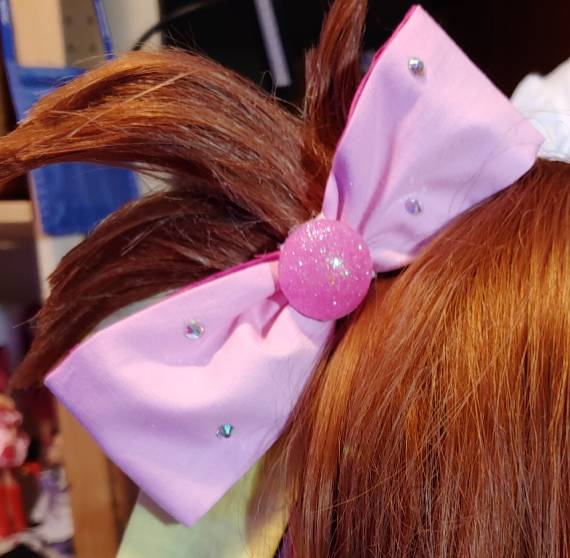
And there you have it! Cool glitter gems made without resin. You can make all sorts of gems and accessories with them in pretty much any color you can find in glitter. This is pretty much the only way I make my gems now. I’ve used them for everything from earrings to hairbows to accents on props and gems for princess crowns.
Let me know what you add your glitter gems to. Share your creations with me, @ me on social media, and let me admire your glittery work!
