
I recently bought my first cosplay for Flick from Animal Crossing, and despite giving accurate measurements, it was 5 sizes too big. They didn’t take returns, so it was time to tailor it!
Clothing modification is immensely useful, whether it’s altering a purchased cosplay or something you bought at a thrift store and want to take in. It takes something that doesn’t fit at all then matches it to your specific body shape. Remember each body is unique, and that’s okay. That’s why we learn to tailor!
This doesn’t require any prior tailoring knowledge. In fact, I have very little, only what I’ve taught myself out of a tailoring book from the 50s. You will, however, have to have a basic understanding of garment construction to make sure the cosplay isn’t shifted when you’re done with the tailoring.
This particular technique works for sleeveless tops and jackets as garments with sleeves require a different sort of technique to take in. If the top doesn’t have a zipper, make sure it has enough stretch to it to not get stuck on your shoulders. This technique may not work if your jacket or shirt has princess or similarly tailored seams as taking the sides in could shift these seams into the wrong position. This does work pretty well with darts as they’re not as specific as a princess seam.
Additionally, the garment should have armholes on the larger side. If they’re smaller, you’ll find the finished version pinching. You can make larger armholes, though this article doesn’t cover how to do this.
You can use this for jackets with lining, just don’t show anyone the inside seam.
Skill level: intermediate for understanding garment construction and advanced pinning (and trying not to spear yourself in the ribcage)
Supplies:
- Something to tailor
- Pen, pencil, or tailor’s chalk to make markings
- A ruler. A hem or tailor’s ruler is useful
- Pins
- A serger or pinking shears
- Dress form or body double is recommended. You can tailor on yourself but you’ll need a mirror for the process.
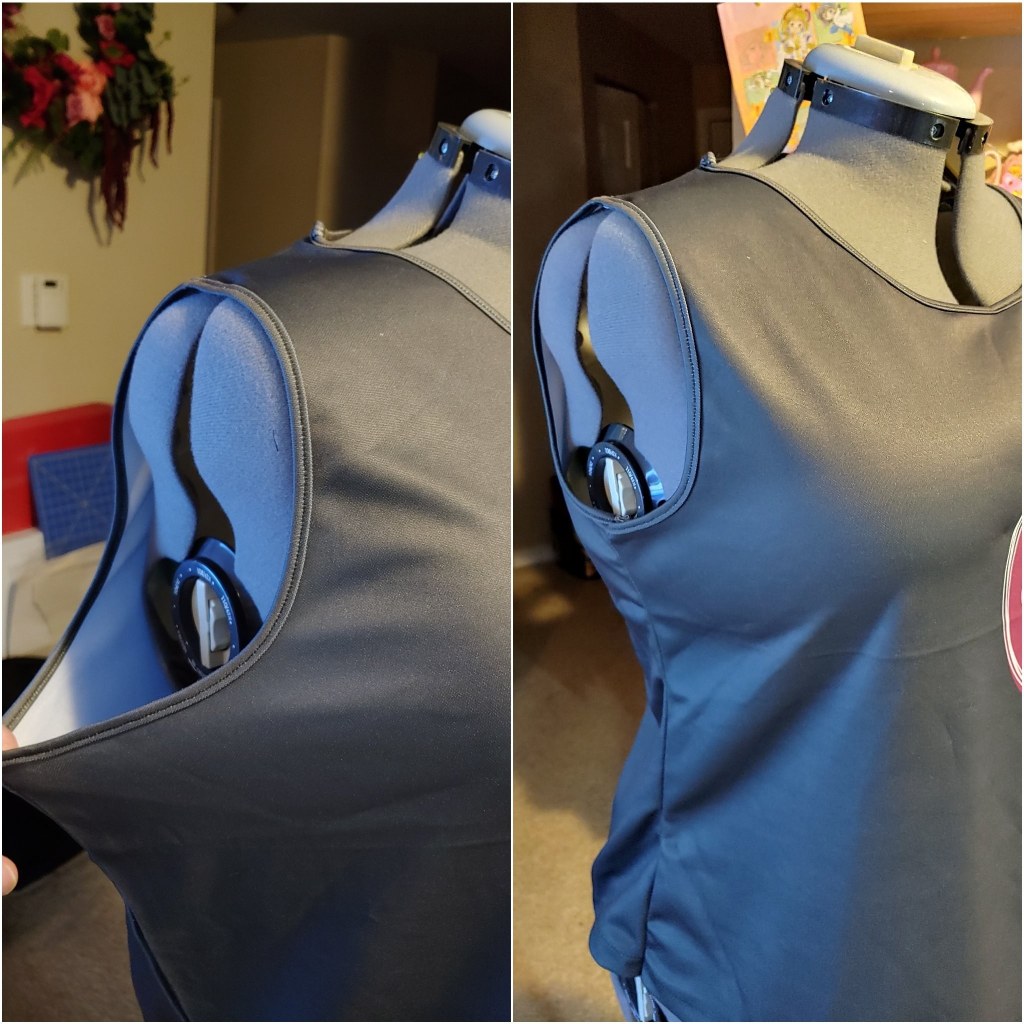
Try the garment on

This may seem like a no-brainer step, so why would you do this? Before you tailor anything, you need to see how something sits on your body as is. How does it sit on the shoulders? Where does the waist fall? Where are the dart and seam lines?
When you look at a big garment while worn, it gives you an idea of how you want to take it in and where the garment should sit. It also tells you how much room you have to work with.
For me, while I primarily use a dress form for all my work, my dress form is hourglass-shaped but my body is more of a pear. So I could feasibly tailor right off the dress form, but it wouldn’t fit my body because of the difference in how my waist tapers. So by getting a feel of how it sits untailored, I have an idea of what I need to take in. The waist was huge when I put the jacket on the dress form, but when I put it on myself, the waist was just slightly larger than my hips, making it very comfortable around the waist. If I hadn’t tried it on first, I would’ve taken in the waist far too much. It’s all about your body shape and what works for you.
Pinning
Now that you’ve seen how much room you have to work with and an estimate of how much you need to take in, it’s time to start pinning. You want to pin first to ensure that you have the right fit before actually sewing.
Before you start pinning, flip the garment inside out. If you’re working with a shirt or something without a center seam, mark the center front and center back positions lightly with a pen or with a pin. This will ensure that center front always stays center front during this process.

Slip the garment on a dress form or yourself. If you’re doing this in the mirror, be careful not to stab yourself with pins too much (it’s inevitable but try to avoid it). Position the center front position on your body or dress form and ensure the side seams are properly aligned with the side.
The pins should go in vertically-ish and not horizontally so you stab yourself in the ribcage. By putting the pins in vertically, it lets the proposed seam lay flat against your body and gives you a better feel of the fit before sewing.
When you pin, make sure to not let one side of the existing seam pucker. This will cause your tailored seam to be uneven. To do this, slip a finger into the existing seam and smooth it out as you pin with the two sides of the fabric as close to even as possible. If you’re doing this on your body, you’ll likely be doing this one-handed as twisting can cause bunches in the fabric when you’re working.
It is important to remember that your body is curved. While in some cases, you might get away with drawing a straight line from the underarm to the waist, it doesn’t always work. The curve generally happens around the waistline or near the underbust depending on how your body is shaped. Pears tend to have higher curves whereas others may have curves sitting more towards the natural waistline. It all depends on your body, and each body is unique after all.
Trying it on again
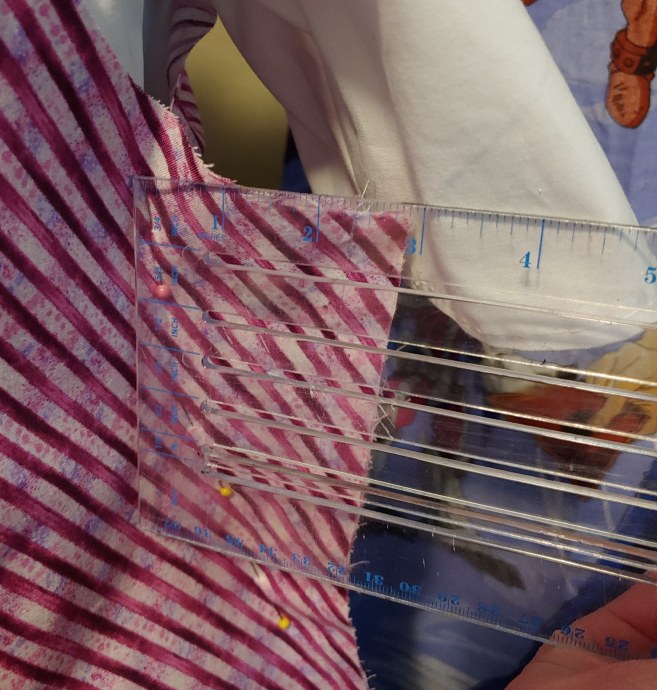
After pinning one side, you’ll need to pin the other side evenly. Eyeballing it doesn’t always work though with practice, you might come close. Instead, this is where a tailor’s or a clear ruler comes in.
Measure the pinned side then pin the other at the exact same measurement. Since the body is curved and tailoring may not be the same distance for the entire length of the garment, you’ll want to measure each pin one at a time then match the pin on the other side.
Once you have it pinned, it’s time to try the garment on again. If you’re working with a jacket, a vest, or something with an opening on the front, this part’s easy. Slip it on inside out and see how it fits. If you’re working with a tank top, this takes a bit of shimmying and maneuvering. You’ll want to carefully slip the shirt on inside out, careful not to move the pins on the side. You’ll have to do the same when taking it off. Carefully pull it at the shoulders so that the pins don’t shift and stab you in the side.
Making guidelines
Since you cannot sew pins when they’re vertical, you’ll need to shift the pins, but you don’t want to lose the exact fit you just spent time pinning. So the best way to do this is to create guidelines using the pins. Once drawn, these guidelines will serve as your stitch line.
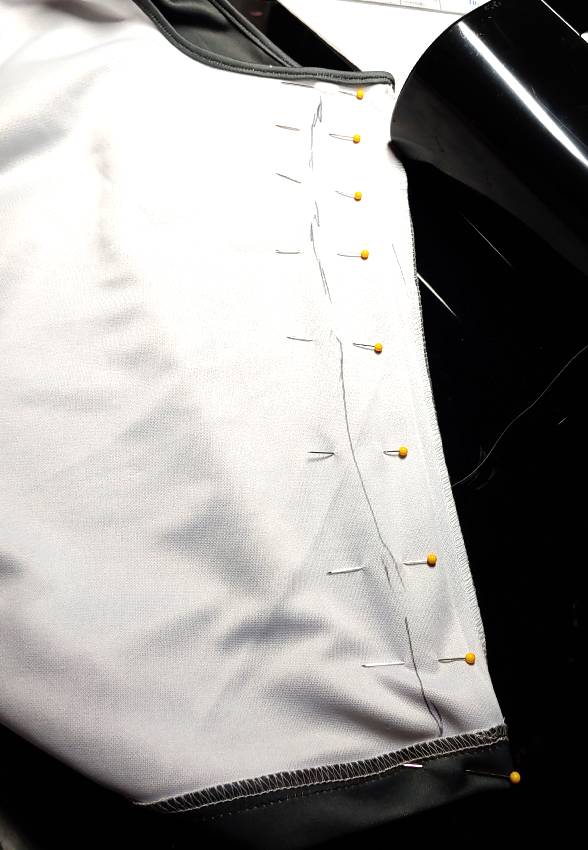
To make guidelines, you’ll need a flat surface and something to mark the fabric like a pen or chalk. Don’t use markers or sharpies as they bleed right into the fabric and leave a nasty mess.
Lay the garment down on the flat surface and trace the lines made by the pins. If your pins are slightly turned (as mine often are), your line won’t be exactly along the pins, but get as close as possible. You can freehand it or use a ruler or a french curve to get the lines nice and neat.
Once you have your lines drawn, turn your pins horizontally so you can sew over them. When turning the pins, you can smooth out any wrinkles or puckers that may have formed during the pinning process.
Sewing and finishing
Sewing is, amusingly enough, the easiest part of this process. Follow your guidelines! Sew right on top of them with a straight stitch. If you’re working with multiple layers or with lining like in a jacket, make sure each of the layers is smooth as you’re sewing.
Now it’s time to finish the seams. Lining fabric is a notorious shedder, and you can’t just leave the extra fabric inside your shirt. Well, you could, but it’s not gonna look good. So you’ll need to trim it then finish it.

If you’re using a serger, this process is pretty simple. Use a wide 3 or 4 strand serged stitch and let the serger knife cut the excess fabric off in the process. If you have a serger, I definitely recommend using it to finish your edges.
But what if you don’t have one? Pinking shears are your best friend. They’re scissors with a zigzag blade that prevents fraying. Before I got my serger, the pinking sheers were my best friend too.
To finish your edges using pinking shears, cut about 1″ seam allowance into your garment. Be careful not to cut any other part of the garment (we’ve all done it). Once you’ve cut the excess off, take the pinking sheers and cut a bit closer to the seam, leaving around 1/2″ of seam allowance or so. Any smaller and you’ll have to worry about the fibers of your garment separating and tearing through the stitches.
Once you finish all your seams, it’s time to wear your garment and be proud of the tailoring work you just did!

I hope this helps with some basic tailoring! It requires only some knowledge about how garments fit, a warm body, and no tape measure! Clothing is made to fit a specific body type that most people don’t have, and if you don’t fit that type, tailor it. If the perfect vest you just found for cosplay is way too big, a little tailoring magic will help you go a long way. It’s a good skill to have and something you can use with fashion clothing too! I hope it takes you a long way to fitting a garment to your specific body type!
If you have questions about this process or would like to show me what you’ve tailored, @ me on social media. I’d love to see what you’ve fitted with this technique!
