Sometimes you just need a cool-looking drinking horn for a cosplay. Sometimes you also want to make that drinking horn, and a proper horn should be hollow and thin. You could use thin foam, but I’d be afraid of bumping the thing and crushing it. So I turned to my good friend decoupage.

You may remember decoupage as a kid where you cut out pictures from a magazine and glue them to boxes or notebooks with Mod Podge. I decorated so many books and boxes this way. But decoupage is more than just plastering cutouts of Sailor Moon from a TV Guide over a notebook. When decoupaging with a fabric and a base, you can make thin hollow objects, and they’re quite sturdy too.
I wrote up a whole article on how much I love decoupage: Using decoupage and fabric for props and accessories. So let’s decoupage some drinking horns!
This process takes some time due to how much drying time is needed for all these elements. Make sure to leave yourself plenty of time before the con or faire to make this!
Skill level: late beginner
Cost: relatively budget-friendly (mostly for the clay)
Materials:
- About 1/4yd of scrap fabric cut into strips. It needs to be 100% cotton as this sticks best with this technique. I used some scrap quilting cotton and scrap muslin
- Aluminum foil. A lot of it. Make sure it’s not heavy-duty. Use the cheap generic store brand
- Plastic cling wrap, just a little bit
- Foam clay, any brand
Supplies
- Something to cover your table. This is messy
- Matte or glossy Mod Podge. If you use glossy, you can also use this as your paint varnish
- Hard coat Mod Podge (optional for extra durability)
- Acrylic paints and paint brushes
- Flat clay tool. If you don’t have clay tools, you can use a dull butter knife, a plastic spoon, or anything similarly shaped. Avoid using something you’ll use with food later if you can.
- Small bowl for Mod Podge and for water. I use a salsa bowl
- Towel. You’re gonna get messy with this.
- Masking tape (as needed)
Making a base form
The magic of this whole process is the removable base form. The form needs to be sturdy enough to apply decoupage to it but also easy enough to grip to wedge the form out of the dried horn. The best base form is densely packed aluminum foil shaped in a horn shape.
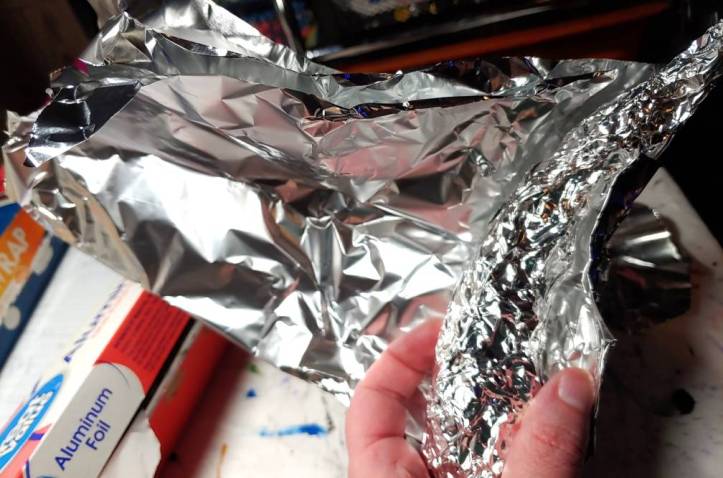
Start with a relatively large sheet of foil and fold it in half.

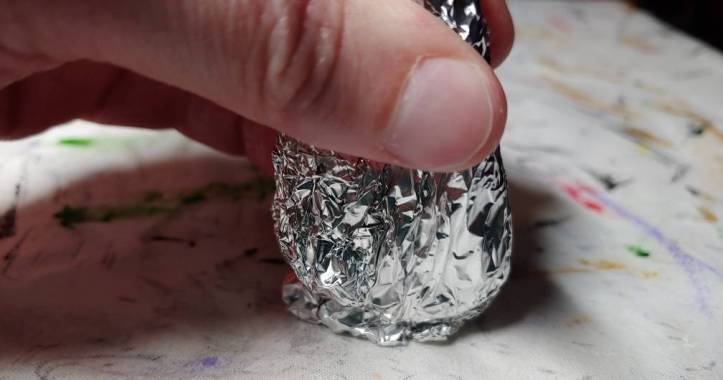
Start on either end, the fold or open edge, and start rolling this into a long tube. Take that tube in your hand and crush it with your palm to make it dense. Fold one end over onto itself just a few inches and crush it again with your hand to make one end wider than the other. Then gently bend the crushed tube into a curved shape.

The curve must be gentle else you won’t be able to pull the form out of your decoupage later.
Take the larger end of the foil and crush it against the table to flatten it.
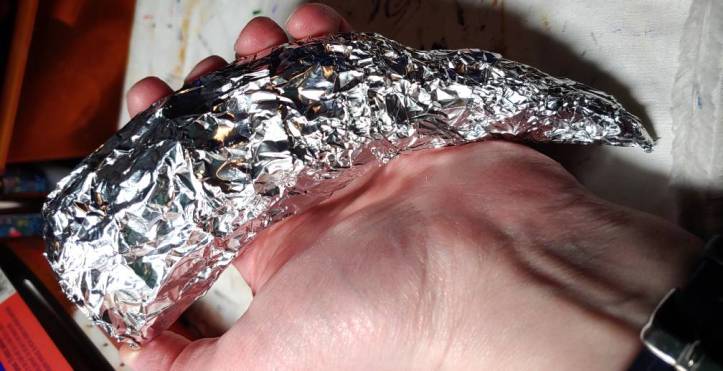
Now this is definitely not thick enough for a horn, so we need more volume! Take another large sheet of foil and fold it in half. Place your drinking horn at one end and roll the foil around it like rolling a burrito. Keep the bulk of the foil around the flat top of the horn.
Condense the foil around the horn by crushing it in your hand. And once again, flatten the top of the horn on the desk. Repeat this a few times, keeping the bulk of the foil near the flattened top so that the other end stays more pointed and thin.
Now as you work, you may notice lumps tend to form around the smaller end or that the wider end isn’t big enough for your liking. It’s time to do some more refined building.
Take a smaller sheet of foil and fold it multiple times until it looks like a strip. The strip should be approximately the width of the space you want to fill in. Wrap the strip around the base multiple times and then crush it with your hand to condense it. This also helps the foil pieces to blend together better. If the strip doesn’t want to stay, take a small piece of masking tape and tape it down.

The mouth of the drinking horn, the flat end you’ve been crushing, should be wider than the rest of the horn so that it’s easier to pull this monstrous chunk of foil out later.
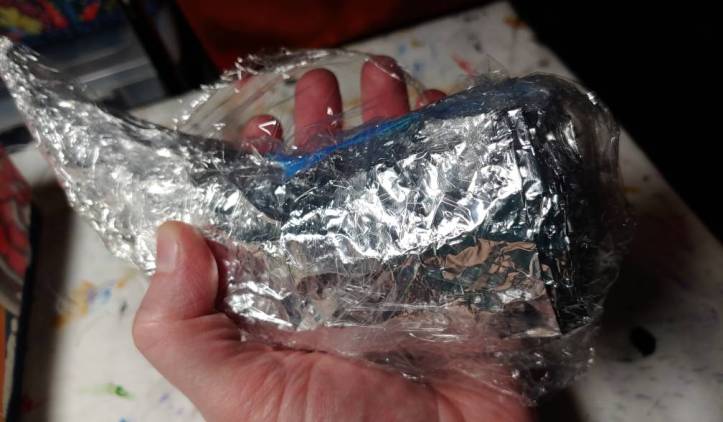
When you’re satisfied with the size and shape, there’s one more thing to do. Wrap the entire thing in plastic cling wrap. Make sure to leave a grabbable edge of plastic along the mouth of the drinking horn. This is going to help you with the decoupage process and removing the foil.
Decoupage
Cut your fabric into short thin strips. I didn’t really measure mine but they were generally around 1/2″ wide and a few inches long. Some were shorter than others but in the end, the length really doesn’t matter. It’s now time to get messy.
Pour some Mod Podge into a small bowl. I’m using my fingers for this, but you can use a foam brush for this as well.
Start by rubbing some Mod Podge on the tip of the horn generously. Take a small strip of fabric and wrap it around the tip, using some more Mod Podge to smooth the fabric down. The fabric will not stick to the plastic wrap (and we want that!) so you’ll want to wrap the fabric around and stick it to itself.
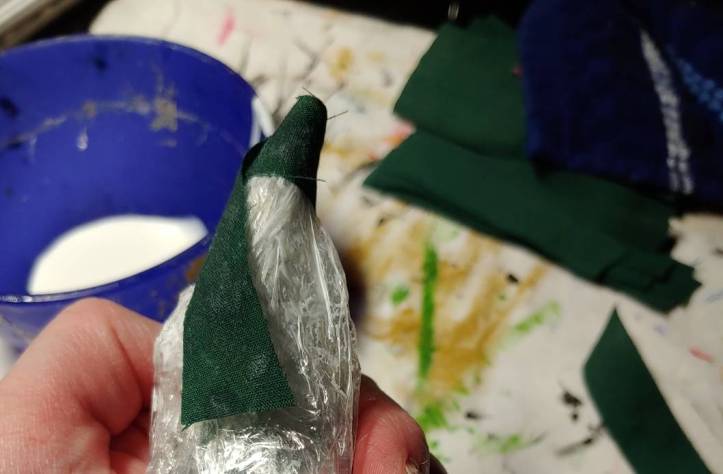
Wrap a few more strips around the tip, overlapping the strips just a bit so that they stick together. Smooth down with more Mod Podge and make sure everything is sitting flat.

If you don’t have a perfectly pointy tip, don’t worry too much about it right now. You can fix it with more layering and with the clay later on.
After a few wraps, you may enter chaotic mode. With the curve of the horn, your strips won’t all perfectly line up or span the full circumference of the horn. When you reach that point, you’ll simply want to overlap the strips where you can, gluing them down on one another until they stay put.

Cover the horn from the smaller tip to nearly the mouth of the horn. At the mouth, stop about 1″ away from the top edge of the foil and round off the edges with even strips. This 1″ border will help you pull the foil out once this is all dry.
Let this first layer dry for about 20 minutes then apply another layer. Let that dry, then apply a third. Three is sufficiently strong to hold the shape with decoupaged fabric alone. Two was still a little soft.
When you apply these other layers, stagger your strips from the previous layer. So lay the middle of a strip over the previous strip’s edge. This reinforces the strength of each strip as you apply them, ensuring there’s no weak point on the horn for potential breakage.

Now time to dry. With this many layers, decoupage takes about 24-48 to fully dry. There really isn’t a way to speed up this process with heat without risking damaging your work, so leave it out overnight to dry.
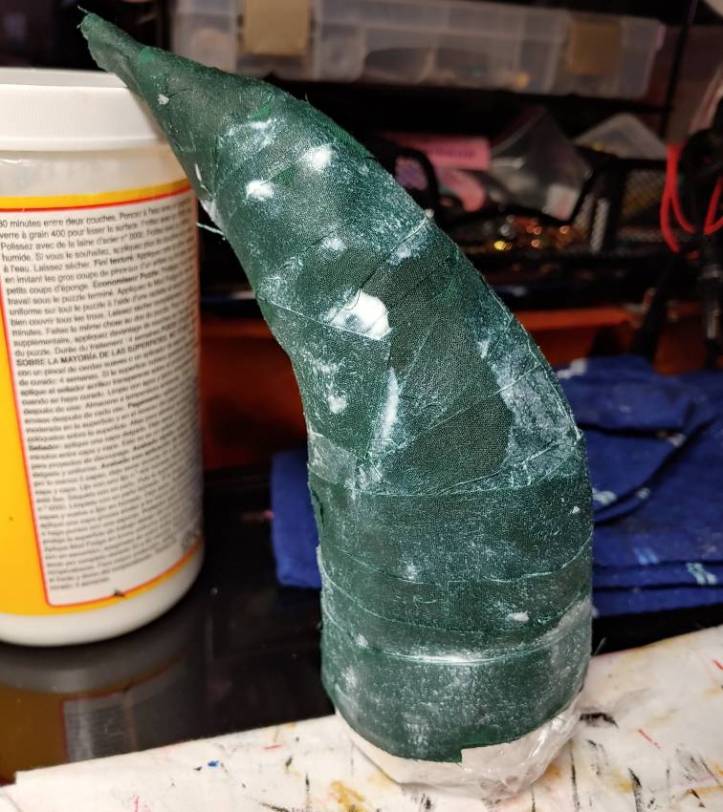
Set the horn up on the flat end of the foil, propping it up against your Mod Podge bottle or something else tall and just leave it be for a bit. It’ll start to feel dry after about half an hour but won’t fully solidify until about 24-48 given all the layers we’ve slapped on here.
If you remove the decoupage before it has fully dried through all the layers, you risk crushing the layers under your hand. Wet decoupage is literally just wet fabric, so it will bend like it too.
I gave mine about 24 hours to dry then overnight after removing the foil.
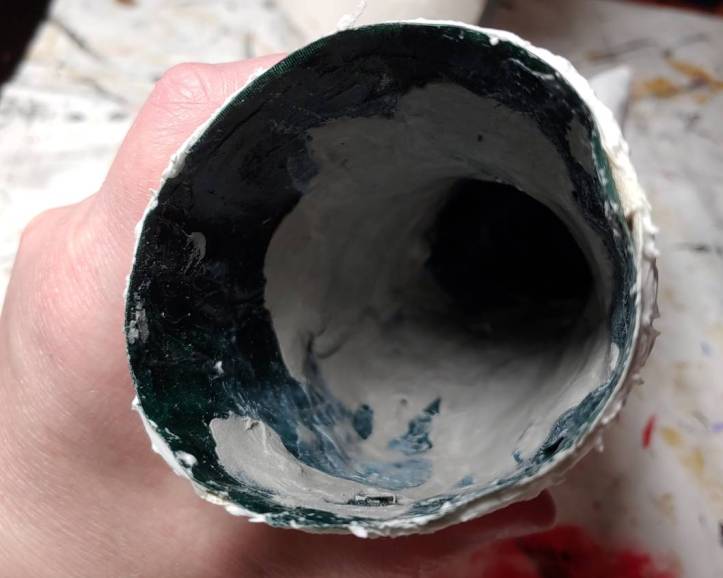
After waiting for it to dry, it’s time to remove the foil insert. This part you will need to do a little delicately. Pull open the plastic wrap at the mouth of the horn to expose the foil. It’s much easier to pull the layers apart one by one instead of trying to remove the plastic wrap with the foil.
Grasp the horn near the center and wiggle the foil just a little bit to try to coax it out. It may be stubborn like mine was and refuse to move at first. For this, you’ll need a flat tool. You can use your clay tools, a butter knife, or some sewing tool. I use my point turner for decoupage a lot.
Gently wedge the tool between the plastic wrap and the foil. Do this slowly as you don’t want to pull on the decoupage. Wiggle your tool a little bit side to side to unstick the foil and plastic wrap, and repeat this fully around the whole mouth of the horn. You don’t have to go too deep, just an inch or two to start the process.
Set the tool aside and try to coax the foil out again. It should start to move. If it gets stuck, use your tool and separate the plastic from the foil again before returning to pulling the foil out. After a while, the foil should easily slip out.

Next you want to coax the plastic wrap out of the inside. You may want your tool for this as well. Gently pull at the inner layers of the plastic wrap first, pulling them up and out of the way. Next pull gently at the layers sitting next to the decoupage. If the plastic wrap gets stuck, use your tool to coax the plastic away from the decoupage before pulling gently at it again.
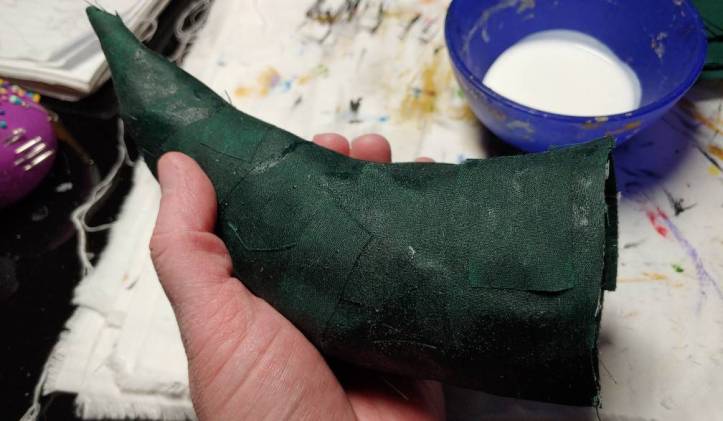
Once removed, use a pair of fabric scissors to trim any uneven edges along the horn’s mouth. If the horn is soft at all or the inside appears wet, set the horn on its side and leave it to dry overnight to ensure the inside is properly dry.
Applying clay
The clay is a big part of creating the illusion that this is a horn and not decoupaged fabric, covering up the texture of the fabric and giving the horn a smoother appearance. Foam clay can also fill in any dents created when coaxing the decoupage off the foil. I had a few of those and covered them up.
The magic of foam clay is water. Water makes the clay stick to the surface and to itself. It also prevents the clay from drying out while you’re working with it. If you get grossed out by slimy materials, you’ll want gloves for this part. Foam clay feels particularly slimy when wet. During this process, you want your fingers wet, but if they start feeling gummy or sticky, wipe them off with a towel and dip them in the water again to continue working.
Because of the shape of this horn, we can only do one side at a time. Let’s start with the outside. Work small sections at a time to keep the clay and the horn from drying out too fast.
Applying clay to the outside
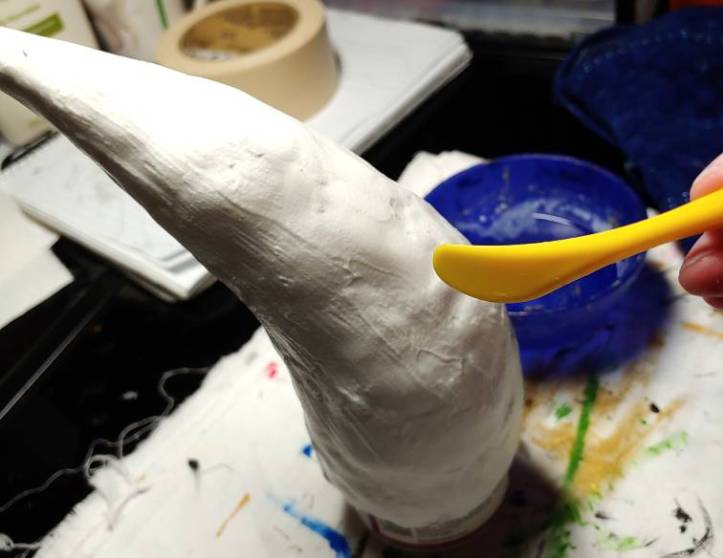
Start by rubbing some water at the tip of the horn and placing a small gob of clay over it. Using your fingers, spread the clay out from the gob, wrapping it around the horn as you work. With the clay, you can either round the tip out or you can make it a little more pointy.

Once you’ve smoothed out this section, wet the next section with a bit of water on your finger and place another gob on this section. Spread the gob out, making sure to take this gob to meet the edges of the last gob.
Where the two sections meet, you’ll have to do a little magic. Wet your finger and start rubbing it over the gap back and forth to reduce the visibility of the gap or any seam lines where the two sections meet.
Repeat this over and over until you’ve covered the entire horn. This may take some time (I believe it took me around half an hour to complete this process). Once you’re done covering, stick the horn on a jar to prop it up (I used the bottle of Mod Podge). The clay is still wet so you want to avoid smushing your fingers into the clay while you work.
Here’s the fun but also kinda gross part. Splash some water on your hand and use your palm to smooth out any last bumps or dips left between sections. This also wets the clay and ensures you can carve it. Get a towel to wipe the clay off. You’ll likely need it.
Carving the outside
Next, it’s time to carve the lines into it. This is optional, but it really adds a flair to it and makes it appear more horn-like. You’ll want a flat knife or similar shape for this. I’m using a flat clay knife.
The grooves should be varied along the horn to make it look more realistic. Some of the lines should be longer than others. A lot of them are pretty short on mine. Most end near the mouth of the horn but a few are simply hanging out in the middle.

Use the bottle or jar to turn your horn and avoid putting your fingers in the clay. Keep going around the horn until you’ve carved the entire thing.

Leave the horn to dry for about 24 hours. If you are impatient like me, you can stick this in the freezer for about an hour to dry it instead. Make sure nothing leans against it in the freezer during drying time.
Applying clay to the inside
You’ve probably noticed that the inside of the horn still looks a bit rough. Since it is hollow, you can see this to some degree. So we’ll use the magic of clay to hide these rough insides.
Now I’ve got pretty short fingers, so I can’t reach all the way inside the horn. I didn’t make the horn wide enough to shove my hand into either. So when applying clay, work at the furthest point you can first.
The process is pretty much the same as applying clay to the outside. Wet the decoupage with your fingers, apply a glob of clay, spread it around. You want to work at the lowest point first as you’ll bump the clay you’ve already smoothed out with your knuckles if you go the opposite way.
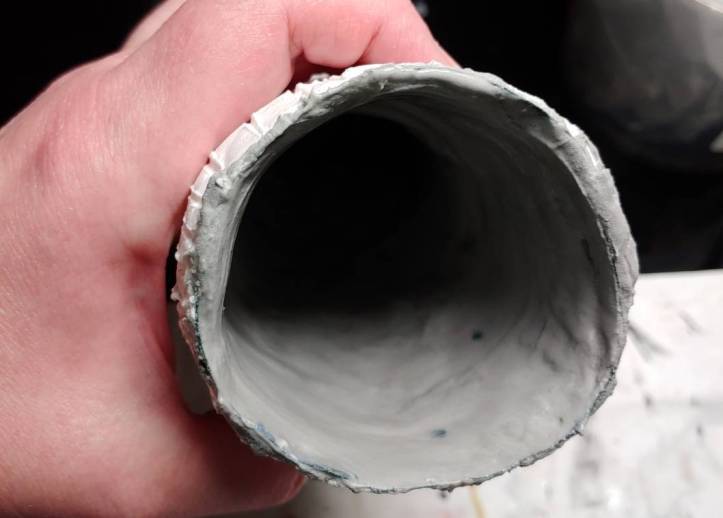
Smoothing out clay on the inside is a lot like cleaning a jar or a cup. Use the shape of the horn to your advantage, rubbing your fingers against it. I like to turn the horn as well with my free hand while I work. I just found it made a really nice smooth finish.
Take the clay all the way up to the lip of the horn, completely covering the decoupage.
Set it on a towel on its side and let it dry for 24 hours. The inside needs to be completely exposed to air to dry. If you want it to dry faster, set it on a towel in your freezer for an hour.
Painting
Drinking horns honestly have a wide variety of patterns. I did an image search to see what kind of pattern would fit my designs. For mine, I picked a half-and-half, black-white, striated design that really stood out from the rest of the cosplay.
When you pick out your design, grab your brushes. It’s time to paint.
Start by applying 2 coats of Mod Podge over your clay, allowing about 15-20 minutes in between coats to fully cover the clay. While you can paint directly on foam clay, I find that paint goes on smoother with a base coat on first.
Next, apply your lighter color. For mine, I painted the entire horn white. White is troublesome with how thin it can be, so it may take a few coats to get this properly covered.
Now let this lighter coat dry. If you are painting the outside, you can set the horn on the jar or bottle again to keep it from falling over while it dries.
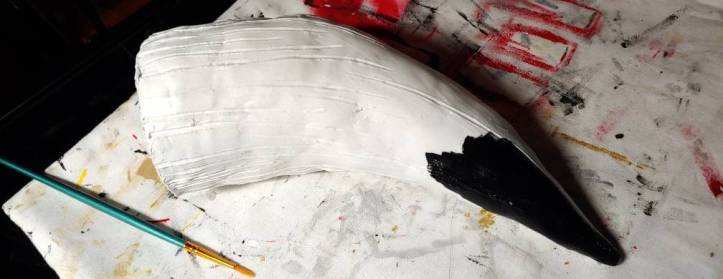
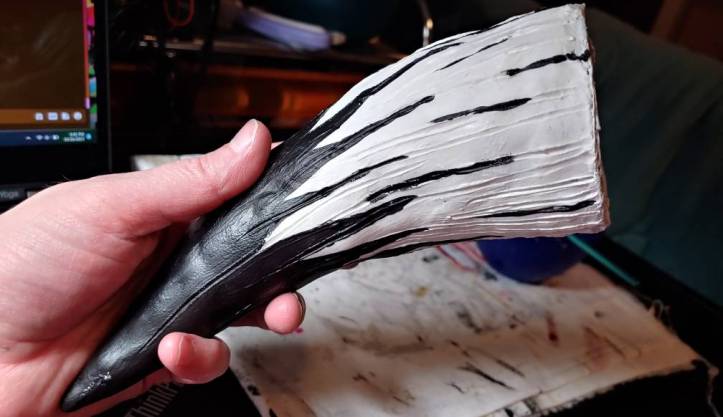
Next apply the second color if you’re making a striated pattern. To make it appear to be transitioning starkly from one color to the next, use the grooves as your guide to paint up toward the mouth of the horn.
My longest sections followed the long grooves nearly to the horn’s mouth. I haphazardly picked which lines to follow, connecting each section with a bit of a sloping line.
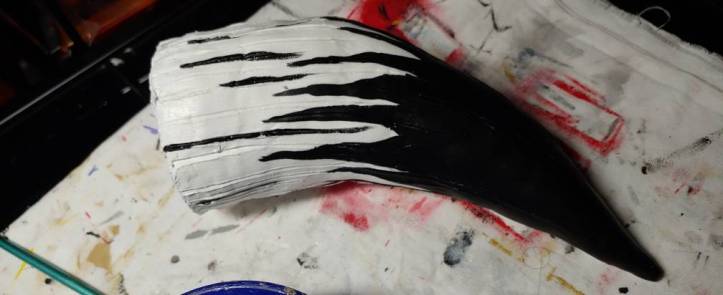
To add more to the pattern, I also added extra small lines not connected to the bottom section to give it more variety. These details were painted in the grooves.
With patterns like this, you’ll also want to paint a similar pattern on the inside. While real horns often have identical patterns on the inside (since it’s synthetic bone and all), trying to paint identical patterns on the inside and out of a clay and decoupage horn is a little bit unrealistic. Instead, you want something similar and in the same vein for both sides.
Like with the clay, start at the farthest point. My paintbrush was not long enough to reach into the crook at the tip, so I got as far as I could. You can’t even see that deep into the crook, so leaving it dark color of the decoupage fabric wasn’t a problem.

Because of its shape, it’s a bit difficult to get even striated lines. The lines inside ended up being a lot thicker and fewer than outside, though it got close. If you have problems, prop your painting hand up on something like some books or the back of the sofa to make your hand stable as you work.
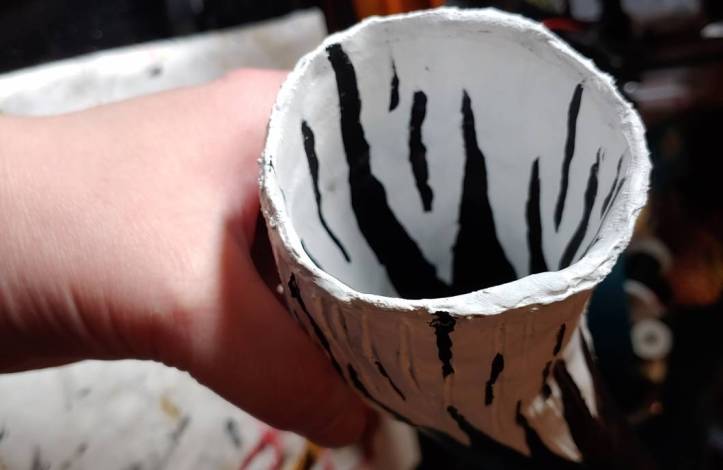
Add some shorter, floating lines like the outside to finish off your pattern.
Now that you’ve done this beautiful paint job, it’s time to protect it. Modern drinking horns tend to be shiny, so I’ve sealed mine with gloss varnish. You can use Mod Podge as a varnish as well. If you want it more rustic, you can finish it with matte to make it less shiny.
Seal with two coats on the outside, letting it fully dry between each coat before sealing the inside with two coats as well.
For the inside, I added two layers of Mod Podge Hard Coat. This coat makes your work incredibly stiff and durable. It takes 4 weeks to fully cure but will be dry pretty quickly. This stuff is often used to seal furniture or stiffen decoupage projects like cups and bowls, so it works great for props. If you aren’t using Hard Coat, simply seal it with the same varnish as the outside.
Cons are notorious for dinging your paint job. And repeatedly bumping your work can risk the paint rubbing off onto your cosplay. So by sealing the paint, you protect the paint job and the rest of our outfit.

I hope you enjoyed this fun way to create your own hollow drinking horn. It’s a great way to add that extra prop to your cosplay or even ren faire attire that’s actually pretty durable. The Hard Coat really helps make it sturdy and able to survive the con. And you can get drinking horn stands to display your work on the shelf if you so desire!
It’s also a relatively budget-friendly project and fun to just sit down and get your hands messy. I just find carving clay so fun and relaxing! I hope you do too!
Let me see your drinking horns! @ me on social media so I can admire your work.
