There’s a good chance you’ve seen shoulder tabs on cosplay or just a regular jacket and never knew what they were called. I honestly thought the tab was called an epaulet tab for a long time. But ‘shoulder tab’ is a pretty descriptive name.
Shoulder tabs are the little tabs that run along the shoulder seam on a jacket or a dress shirt and are used to hold military-style epaulets (or to just look formal or cool). They appear in anime and games with characters who are wearing military-style jackets and shirts.

When I set out to make my own shoulder tabs for my sister’s Attack on Titan jacket, I finally learned their proper name. And I also needed to draft them. Fortunately, I’ve done the drafting so you can get right to sewing your own tabs and attaching them to your next cosplay!
Skill level: intermediate
Cost: minimal (just use the scraps from your shirt or jacket)
Materials:
- Scrap of fabric matching your jacket or shirt. The best fabrics are ones that can handle ironing so your tabs will sit flat
- A button if desired
- A cosplay jacket or shirt without the sleeves attached (or partially remove the sleeve at the shoulder seam)
Supplies:
- paper for printing the pattern
- Pencil for marking placement
- Sewing machine with standard foot
- Buttonhole foot if adding a buttonhole
- Universal needle (or one that matches your fabric type)
- Straight pins
- Fabric scissors
- Paper scissors to cut out the pattern
- Point turner (recommended)
Download the pattern and print it out on standard printer paper and let’s get started!
Cutting the fabric out
As mentioned in the pattern, you’ll need to cut 2 shoulder tabs and 1 carrier per shoulder. Likely you’re making tabs for both shoulders, so cut out two sets.

The pattern pieces have extra on the ends to ensure you can make the tabs and carrier as long or as short as you need for your jacket or shirt. Note the seam allowance is only 3/8″ instead of the standard 5/8″. The larger seam caused bunching, so the smaller seam makes the tabs easier to sew.
Sewing the tab
Place the two tab pieces together, right sides together, and sew a straight stitch around all the edges except the shorted flat edge at the bottom (see the image below if you aren’t sure which one that is).
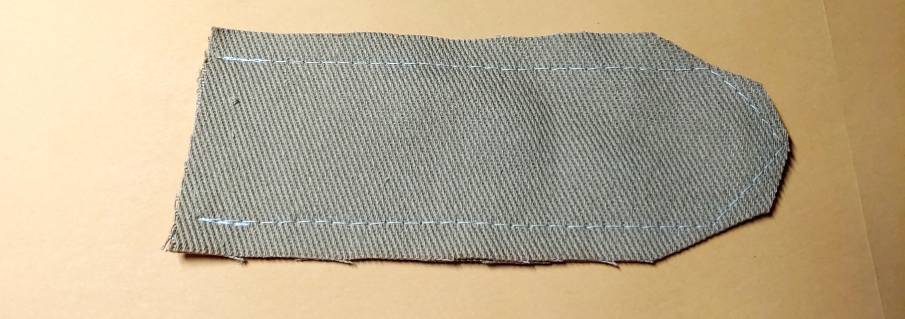
Sew at a 3/8″ seam allowance. If you have trouble seeing your seam allowance with a standard foot, you can use a clear foot or an open-toed foot to give you a clearer view of the fabric.
Once sewn, remove the pins and clip the corners. All three corners should be clipped to reduce the amount of fabric on the inside with the top center corner needing the most clipping.
Turn the tab right-side out. Use a point turner or long object like a chopstick to push out the corners of the tab then iron it flat.
If desired, sew a straight stitch around the edge of the tab to keep the shoulder tab flat (or just add decorative stitching to it).
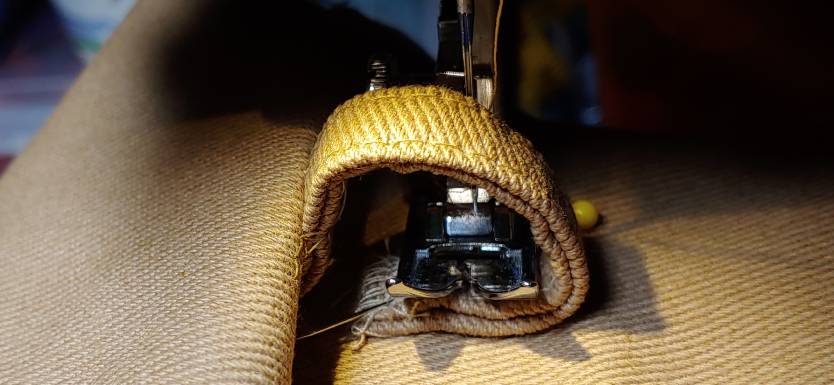
Also if desired, add a buttonhole near the peak of the triangle. The buttonhole should match whatever button you’re planning on using. If you need help with your buttonhole foot and have a 1-step stitch, check out my buttonhole guide: Using the one-step buttonhole option on a sewing machine.
Sewing the carrier
We’ll need the carrier before we add the tab to the jacket or shirt. The carrier is a small loop that keeps the shoulder tab from bowing and buckling when the shirt is worn. Some shoulder tabs do not have carriers, but if your design needs one, here’s how to make it.
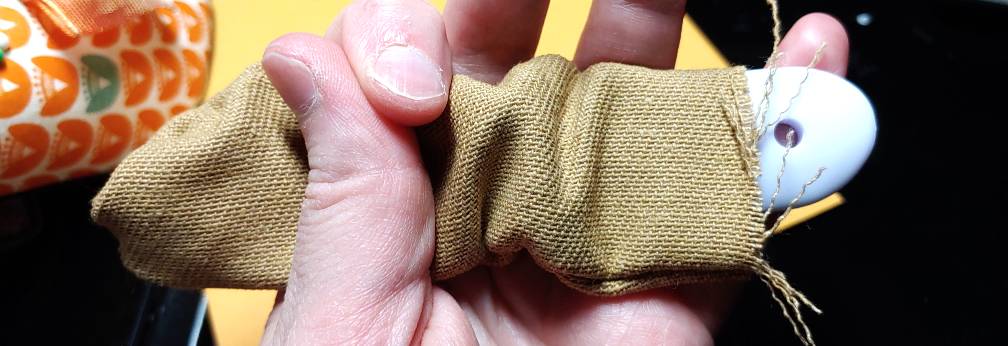
The carrier is made like a small strip of bias tape. For this, you’ll be working with some heat, so be careful of your fingers with the steam.
First, fold the carrier in half, wrong sides together, and iron it flat to create a crease in the center of the carrier.
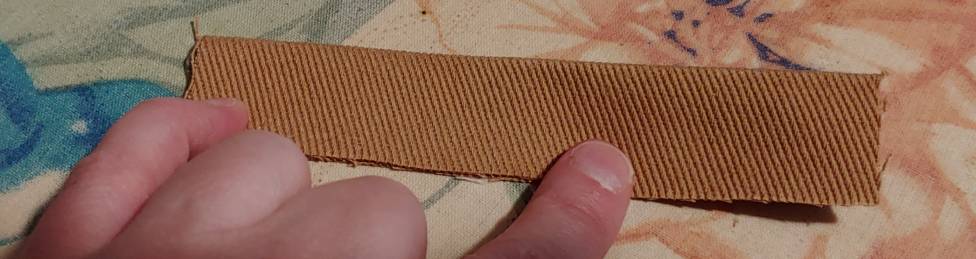
Open the carrier, laying it face down with the wrong side facing you. On one side or the other, it doesn’t matter which, fold the edge of the carrier up to meet the center crease. Iron a crease along the edge.
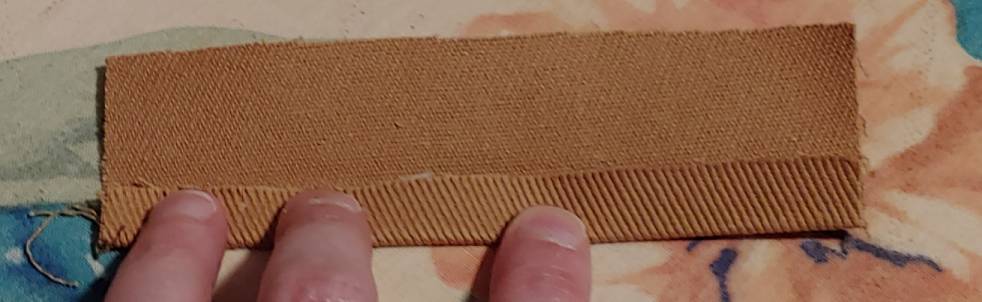
Fold the other side down to meet the center and iron flat.
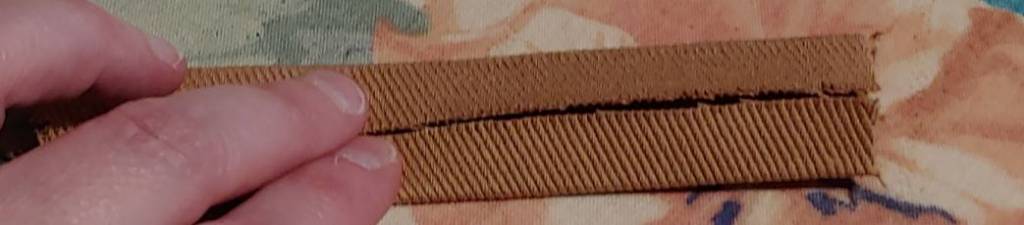
Fold the carrier at the center crease again and iron flat to complete the carrier. If your fingers are sensitive to heat, you may want to wait a moment for the fabric to cool down before doing this step.
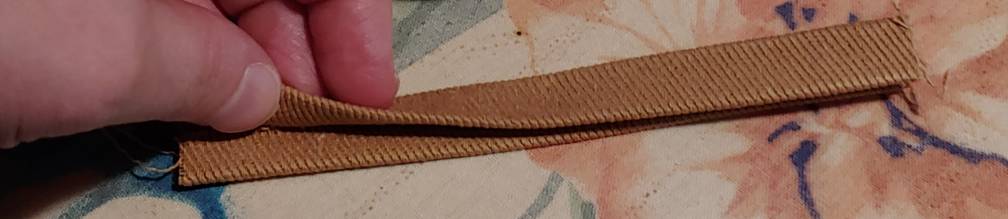
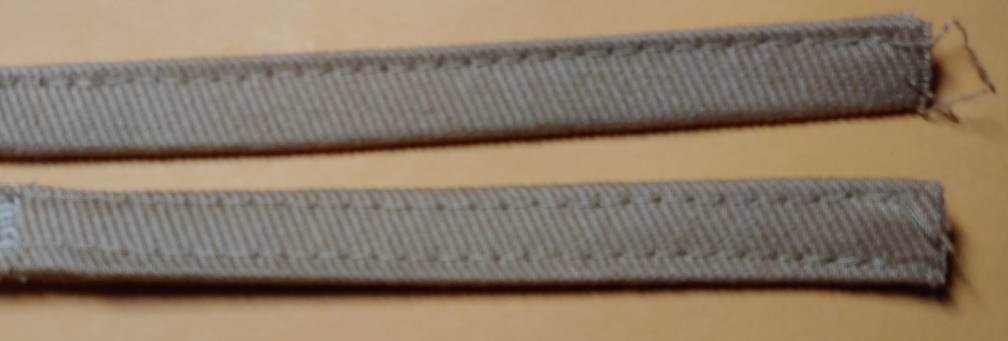
To fully finish the carrier, you’ll need to sew it shut. Sew a straight stitch up both sides. You only really need to sew the open edge shut, but by sewing both, it looks more finished.
Attaching the tab and carrier
Lay your jacket or shirt flat on a table, opening up the shoulder seam and laying it out flat. The sleeve shouldn’t be attached yet, and it works great if the collar and lining aren’t attached either. If the sleeve is attached, I recommend removing the sleeve at least a bit along the armhole seam.
Lay the shoulder tab along the shoulder seam, centering it at the peak of the triangle. The shoulder tab should be a few inches away from the neckline. I honestly use my fingers and place it a 3-finger-width from the neckline. Because the pattern has leeway, you may notice the raw edge of the tab hanging over the armhole.

Stay-stitch the tab to the garment at the armhole. Trim the excess fabric on the tab.
Next, decide where you want the carrier if you have one (if not, skip to the next section). Most carriers are pretty close to the armhole and sleeve seam, but the Attack on Titan jacket has them at the center. Check your references to decide where this tab should go.
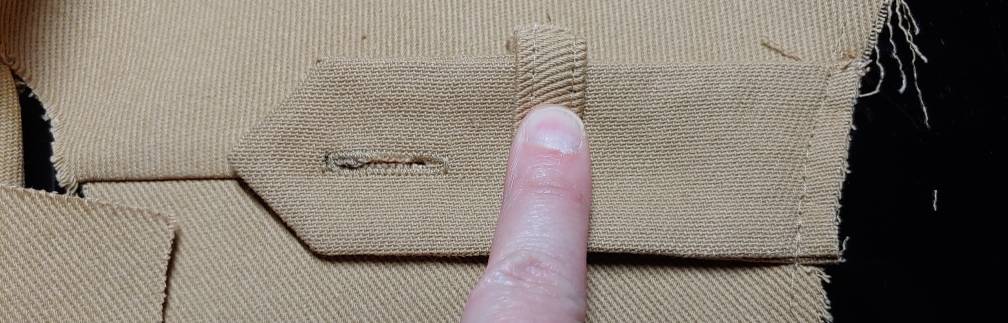
Once you’ve decided, tuck the carrier under the tab on one side (doesn’t matter which), and pin it down. Give yourself about 1/4″ or so of carrier underneath the tab. With the tab folded, lightly mark with a pen where the crease is and sew a straight stitch along that crease.

Fold the carrier over and tuck it underneath the shoulder tab on the opposite side. Pin the tab down. With the tab folded, mark the fold lightly with a pen. To sew the carrier here, pin the shoulder tab out of the way. Pull the fabric to the side so that the carrier makes a large enough loop to fit the sewing machine foot underneath and sew a straight stitch with a bit of fabric gymnastics. Be careful not to sew through the loop of the carrier.
Unpin the carrier and cut off the excess, making sure to leave yourself at least 1/8″ of fabric to prevent fraying. I’d recommend 1/4″ to be safe. Iron the carrier flat and slip the tab back inside.
Adding the button
The final touch of the shoulder tab is the button. How you attach the button will depend on if you added a buttonhole or not.
With buttonhole
Lay your shoulder seam flat on a table with the tab inserted into the carrier. Make sure the tab is laying flat along the shoulder seam. Take a pen and lightly transfer the inside of the buttonhole down onto the shoulder seam.
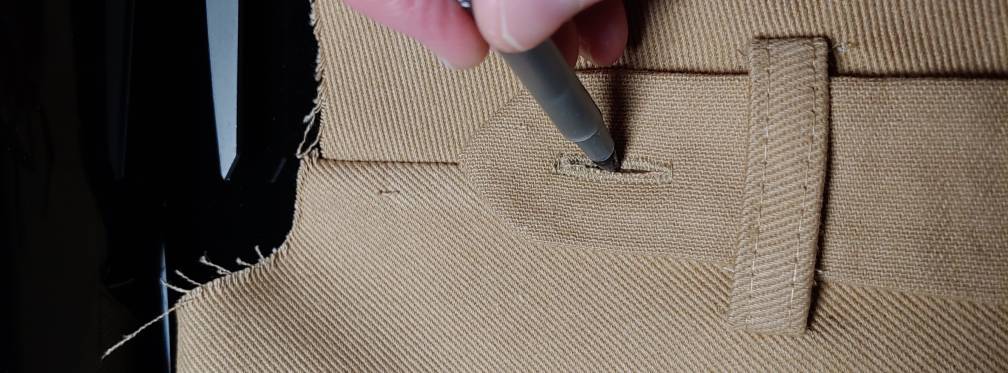
Remove the tab and pin it aside. You should see the marking for the buttonhole along the shoulder seam. Take your button and center it along this line. Sew the button down. Slip the tab back into the carrier and button the tab!
Without a buttonhole
Without a working buttonhole, you’ll likely be sewing the button and tab right down to the shoulder seam. On a flat surface, thread the shoulder tab through the carrier and pin it to the shoulder seam. Make sure that the tab or the shoulder seam isn’t buckling or warping. Take your button and place it in the center top of the tab near the triangle shape. There should be some space between the button and the top of the tab.
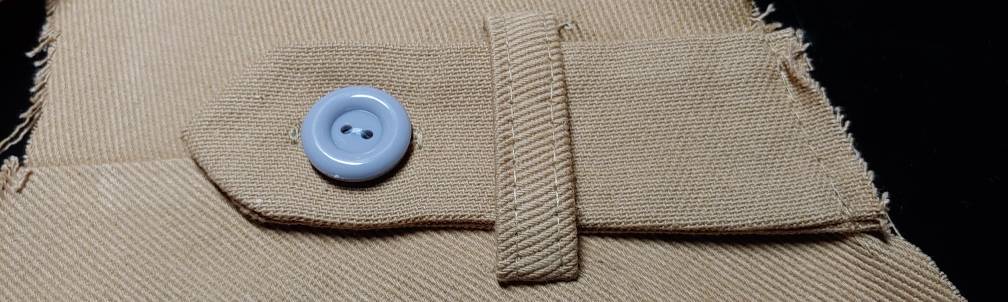
The AoT jacket had the button sit further down, but you can realistically get pretty close to the top of the triangle since you don’t need to worry about a buttonhole stitch.
Sew the button down to the tab and the shoulder seam below. If you have any problems getting your needle through, use a thimble to coax the thread through all the layers. Once you tie off your thread, your tab is now done!
Finishing the cosplay
Yes, this is a step. Now that you have your tab sewn and complete, you’ll need to finish the cosplay. Install the sleeve and collar as you normally would to complete your jacket or shirt. Then wear it and show off your hard work!
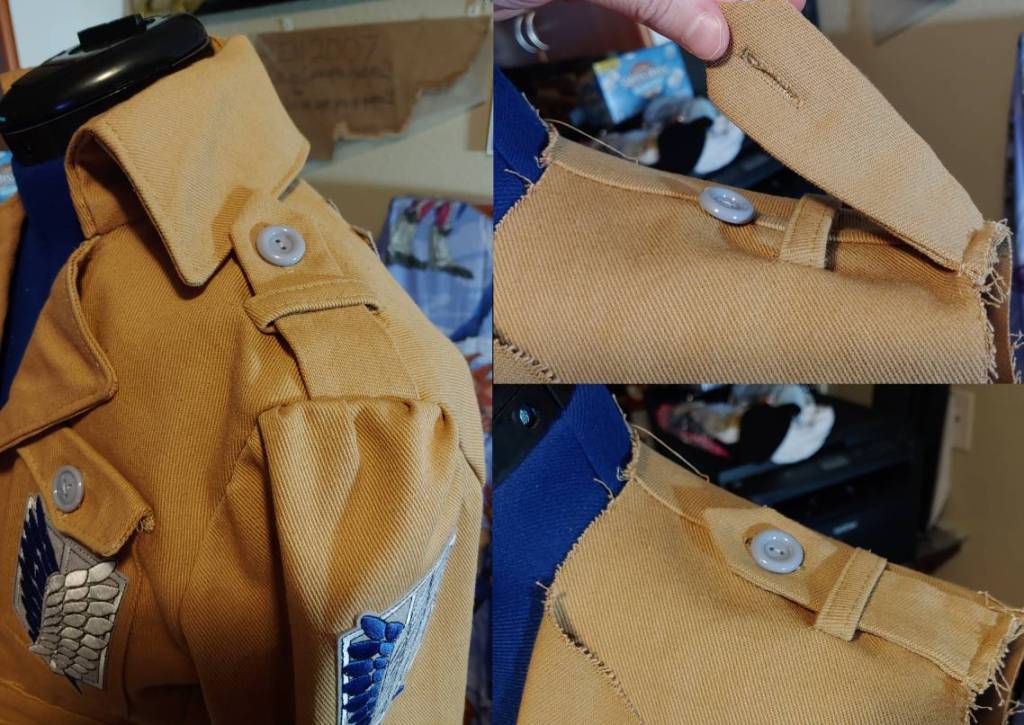
I hope you enjoyed this tutorial on how to make shoulder tabs (and to know what they’re properly called too!). It’s a good way to add details to a military-style shirt or jacket or just to add flair. If you need epaulets on your cosplay, this is one way to keep them in place! Make as many shoulder tabs as you need! Just remember to add them before you attach your sleeves.
Let me see your shoulder tabs! @ me on social media so I can admire your work!
