When I set out to make myself a Kiki cosplay from Kiki’s Delivery Service, I thought about buying a bag. Yet none of the bags quite worked for me. They were too small, the wrong color, not enough pockets, or not enough length in the strap. Who knows what was wrong with this one. So it’s time to make one instead that fits my needs exactly.

The result is a big bag that can hold my water bottle, wallet, phone, and even my tablet I use to give panel presentations.
And also important for me? It’s proportional to my height. I’m not Kiki’s height. I’m 5’6. Kiki’s bag is notably very large so I needed something to fit my taller height.
While Kiki’s bag is likely more of a hobo bag, this tutorial will walk you through how to pattern a large bag with a gusset as well as how to sew it fully lined with pockets and an adjustable strap. These types of bags are really good to start with if you’ve never patterned a bag before since they’re primarily a lot of rectangles. I started out with this type of bag, and it’s one of my favorites to sew. They’re also remarkably easy to add pockets to. And it’s a cosplay. You need to have pockets.
Skill level: intermediate
Cost: moderate
Materials:
- About 3/4 to 1yd of 60″ width duck canvas (also called cotton canvas). It can be waterproofed but it’s easier to sew non-waterproofed canvas
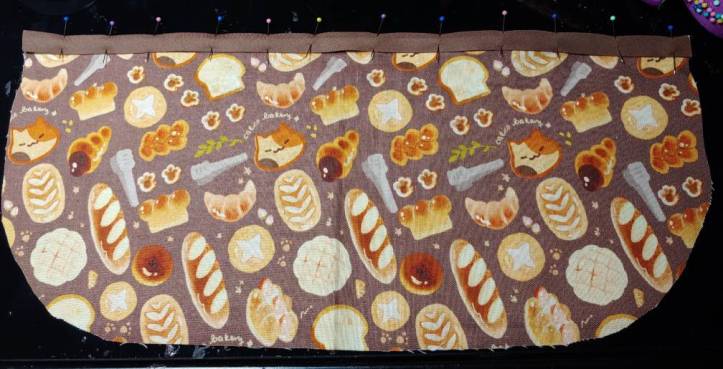
- About 1/2yd of 45″ to 60″ quilting cotton for the lining. I went with bread cats for a fun treat when I open my bag
- About 1/2 yd of scrap muslin or fabric for patterning
- Under 1/2yd of double-fold bias tape to edge the pocket (optional)
- 1 pair magnetic snap, purse snap, or sewing snap
- 1 D-ring, 1″ width
- 1 metal slider buckle, 1″ width
Supplies:
- Sewing machine with universal needle (erring on the heavier side)
- Polyester thread matching your canvas and your lining fabrics
- Standard foot. If you are having any trouble with waterproofed fabric, use a walking or nonstick foot to keep the fabric moving
- Sharp straight pins
- Pens/pencils for patterning
- Tailor’s ruler (highly recommended) or a clear ruler
- Tape measure
- Yardstick
- Steam iron with ironing board, iron mat, or thick towel
Patterning
Before cutting into the good fabric, it’s time to pattern to make sure the bag is the right size and will fit the stuff that you want it to. For mine, I knew I wanted to fit my tablet with its cover snugly inside and have room for my phone and other con goodies.
Body
Start with a large item you want to fit in and make that your item of choice. Mine is my tablet in its case. Lay this item down on muslin a couple inches away from the edge of your fabric to leave room for drawing seam allowances in a bit. Trace the shape around the item with a bit of leeway around all the edges. Since Kiki’s bag is a rounded shape, round the bottom edges in your sketch.

Now if you’re like me, you probably can’t draw a straight line. I never can. Use your ruler to straighten out the lines, using the edges of your fabric as guidelines as needed.

Around all four edges, add 5/8″ seam allowance. This is where the tailor’s ruler will help you out since you can draw in the guidelines on the ruler to get an accurate seam allowance every time. Tailor’s rulers also have metric, if that’s your preferred system to work with. 5/8″ in metric is some weird decimal, so the tailor’s ruler will help there too.
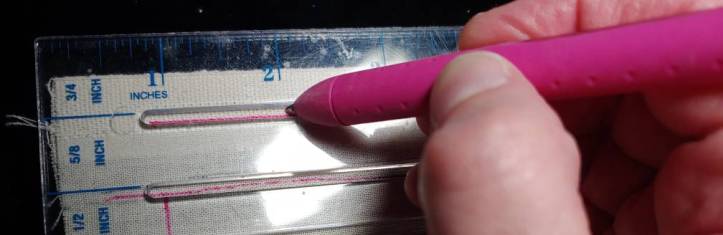
While the straight edges are much easier, the curves can be a little more challenging since you cannot simply bend your ruler. Instead, it’s easier to simulate a curve by drawing a series of short straight lines using the tailor’s ruler as you follow around the curve. Once you’ve drawn the short lines, smooth out the curve by hand with your pen.

Cut this piece out. This will be the body piece for your bag as well as the pattern for your lid flap.
Since this is a bigger bag, you’ll likely want a pocket to hold some of your smaller things. You’ll definitely want that pocket once you get to the con. For this, we’re making a simple large pocket that will be segmented later with stitch lines.
To start, trace your body pattern piece onto muslin and cut it out. To judge the size of your pocket, you’ll want another item of choice. Since I knew I wanted this pocket for my phone, my item was my phone case.
Lay the body pattern piece flat on the table with the pocket piece on top of it. Fold the pocket piece down and tuck the item of choice inside to test that the height of the pocket is right. If you’re using bias tape to edge the pocket, the top of your pocket will be the top of your pattern. If you plan on creating a seam, make sure to add 5/8″ seam allowance along the top edge of the pocket.
Once you’re satisfied with the height of the pocket, finger crease the fold by pressing on the seam with your fingers to make a crease. Cut along that crease to trim off excess fabric.
Gusset
The big width of this bag comes from the gusset along the outside perimeter of the bag. I wanted plenty of room for my tablet and water bottle so I decided on a 2″ gusset. 1″ also has a good amount of room if you want something thinner.
To start, you’ll need to know approximately how long the gusset should be. Stand a tape measure up on its side and pull it around the perimeter of your body pattern piece excluding the top edge of the bag (that’s where the opening will be after all!). This will give you a pretty close approximation of how long your gusset will be. Mine ended up being 33″ long.

Using a yardstick, draw out the length of the gusset on your muslin fabric. Next, draw the desired final width. Since I wanted a 2″ gusset, I drew a 2″ wide strip. Now we can’t sew the gusset as-is else we’ll end up with about a 3/4″ gusset in the end. So once again, it’s time to add seam allowance. Add it only to the long sides. Since I didn’t want to calculate what 5/8″ x 2 was on my ruler, I just drew a 5/8″ seam allowance twice. It doesn’t matter if you add the allowance on either side or two to one side as the strip will be even either way.
Cutting out the fabric
Whew, you’re done with drafting. Now time to get to actually cutting the fabric out!
Cut the lining
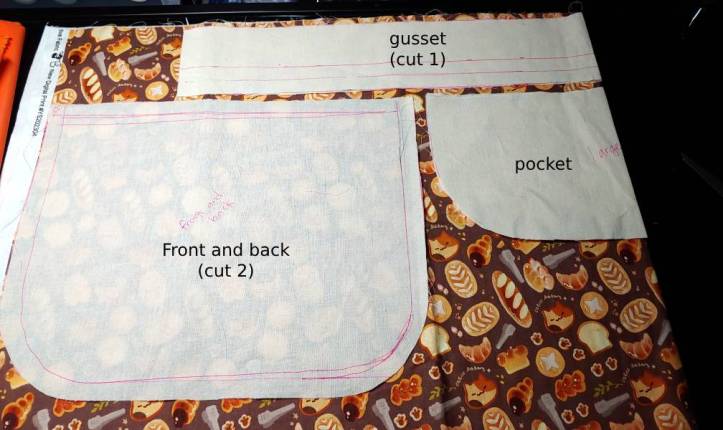
The lining will be only on the inside of the bag, not the lid or the strap, so cutting the lining is straightforward. You want each of the following:
- 2 body pieces
- 1 gusset
- 1-2 pockets, depending on how many pockets you want
If you fold your pocket and gusset pieces in half, you can cut them on the fold. Here’s how I laid my pieces out on my bread cat fabric. I went with only one pocket since my Kiki dress has pockets for smaller things:
Cut the outer shell
The outside fabric requires different pieces than the lining, though they do share a few pieces. Here are the pieces you need:
- 4 body pieces (2 for front and back and 2 for the lid)
- 1 gusset
- 1 60″ strap
- 1 small strap for the D-ring
There are no pockets in the outer shell since the lining takes care of that for us.
Make sure the body pieces match your grainline and the gusset runs along the crossgrain. Fold the canvas how you like to get the most out of your fabric. I folded mine multiple times to get as many pieces as I could out of a small amount of fabric.
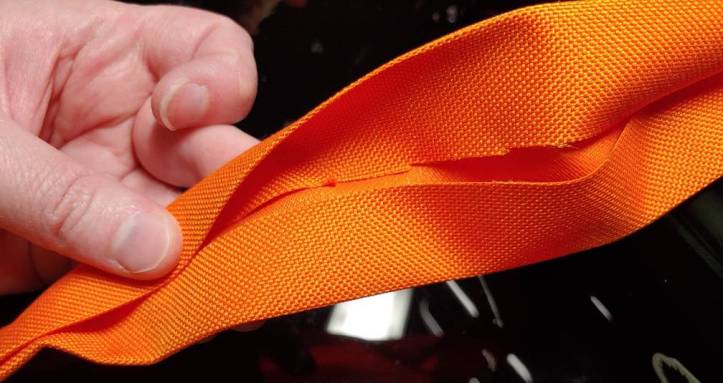
Now the strap is the additional part that we didn’t pattern above. Fortunately, it’s pretty easy. It’s a 4″ strap cut along the crossgrain at the full width of the fabric. My tailor’s ruler is exactly 4″ wide, so I use that as my measurement when making straps. You can fold the fabric multiple times in on itself to cut the strap if you desire, but make sure the fabric is even before doing this.
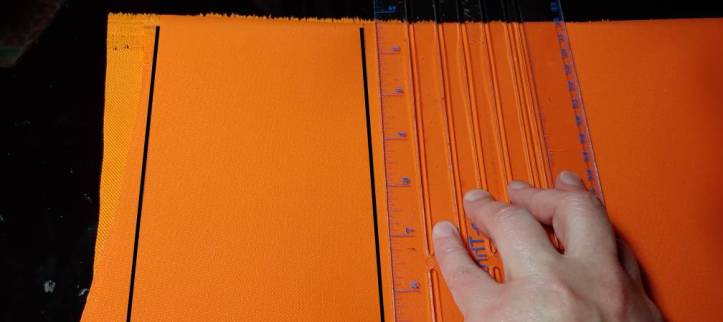
Pin your fabric together before cutting, as trying to cut all these layers can result in shifting.
Now the last is the small strap. It’s a smaller version of the shoulder strap that simply holds the D-ring on one side of the bag. You can cut it out of the strap you’ve already cut or cut a shorter version out of whatever scrap you have left. It should be 4″ wide and roughly about 4-6″ long.
Set these all aside, pin them together or with the pattern, and it’s time to start sewing!
Sewing time!
For sewing, we’ll be mostly working our way inside out, piecing together all the sections and making sure all our edges are nice and neat. I open my bag quite a lot during a day at a con, so I want those edges to be strong and not fray.
Before you get started, make sure to iron the wrinkles and creases out of all your pieces. If your canvas is waterproofed, only iron on the non-waterproof side. If you need to iron on the waterproof side, use a press cloth or parchment paper to prevent damaging your iron!
Sewing the lining
Let’s start with the lining first!
Take your pocket and add bias tape to the edge. Pin down and sew along the bottom edge to secure the bias tape to your pocket.
My pattern is very busy, so the bias tape breaks it up and also makes it easier to see the edge of the pocket. I also don’t have to worry about fraying when taking a bunch of stuff in and out of the pocket.
If you don’t want to use bias tape, you can use a finishing stitch or leave the edge raw. Fold the top edge of the pocket down and sew a simple straight stitch to secure the top of the pocket.
Next, lay the pocket on top of one of the body pattern pieces. Any will do. Lay the pocket’s wrong side to the body piece’s right side then use a basting stitch to secure the pocket to the body piece.

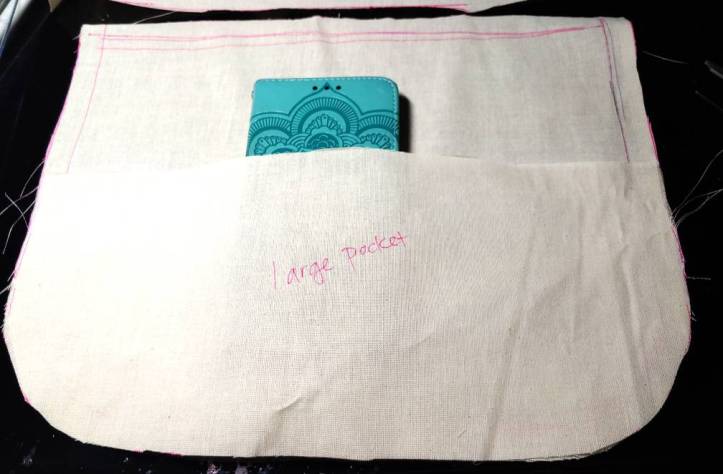
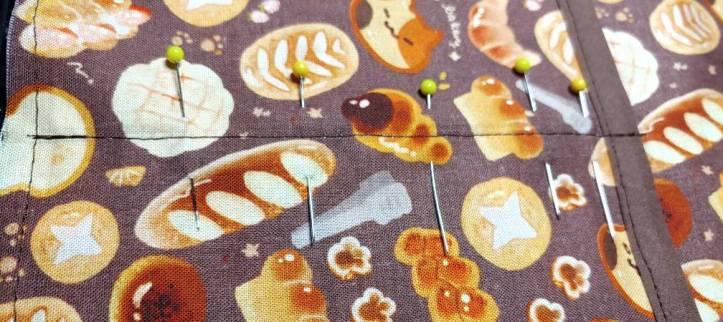
Next, decide where to separate the pocket. For mine, I wanted two large pockets, one for my phone and one for the wallet, so I split it down the middle. You can add more pockets in as well by repeating this separation for how many pockets you need. The calculation is # pockets – 1. So if you want 2 pockets, you need 1 separator line, 3 pockets need 2 lines, and so on.
Pick the location for your separation line. Pin the pocket down to the body piece perpendicular to the direction you want to sew your separator. Optionally, you can use a pen or pencil to lightly mark your sewing line. Once pinned (and marked), sew a straight stitch from the bottom to the lip of the pocket, going slightly over the edge to secure it and prevent the weight of things in the pocket from pulling at the stitches.
After you sew all your pocket lines, it’s time to add the gusset. Note that your gusset may be slightly longer than the actual perimeter of your bag, and that just happens with trying to measure the perimeter with a tape measure.
First start with the backside of the bag, the one that’ll go against your body. This will likely be the side with the pockets since putting the pocket next to your body means things are less likely to tip out of the pockets when you move.
The gusset does not get sewn to the top edge of the bag, only the rest of the bag along the curves. At the top edges of the gusset, mark 5/8″ away from the top edge of the bag. I forgot to mark that in my photos and had to rip the stitches later. So make sure to mark that seam allowance!
Start on one side of the bag, placing the gusset on top of the body piece, right sides together. Pin around the whole perimeter of the bag, leaving the top side empty. If your gusset is longer than the back piece on one side, lay the back and gusset flat. Use your ruler to mark a straight line long where the gusset meets the backpiece. Cut the excess off then add your 5/8″ mark here before sewing.

Sew a straight stitch along the perimeter of the bag, starting and ending at your 5/8″ marks.
Flip the bag over and lay the gusset-back combo on the remaining body piece. I find it easier to work with the bag with the gusset on top. It’s much easier to sew and you don’t have to worry about accidentally sewing your back piece to your front.
Much like with the back piece, pin the gusset to the front piece, and this time, you’ll want to sew the full perimeter of the gusset instead of 5/8″ down. If you are having trouble seeing what you’re doing, you can pin the gusset flat against the body piece to keep it from getting in your way.
Your lining is now sewn! Set this aside for now.
Sewing the outer body
Sewing the outer body will be pretty similar to sewing the lining. But we’ll need to do something first before adding the gusset. It’s much easier to sew part of the flap to the back piece right now.
Take two body pieces and pin them right sides together at the top flat edge. Sew a straight stitch then press the seam down. This will make a large rounded-corner rectangle shape with a seam in the middle. The seam isn’t visible since it’ll be against your body when the bag is worn.

The rest of the body will be sewn on the lower half of this piece (where the seam is pressed down towards). This piece will serve as our backpiece, and much like with the lining, we need a 5/8″ gap at the top. Here it will be most noticeable why. Instead of pinning the gusset at your seam line, this 5/8″ gap line needs to match the seam here. This accounts for the seam you’ve just sewn and makes sure your bag is still even.

While pinning, your gusset may once again be longer than your perimeter. Pin to the seam line then use your tailor’s ruler to mark a 5/8″ gap. Cut the excess gusset off at that gap (make sure not to cut off the gap! You need that for the rest of the bag!) Sew from 5/8″ gap to 5/8″ gap to attach your gusset to the back piece.
Repeat to attach the gusset to the front body piece, sewing all the way to the edge on both sides of the gusset.
Sewing the straps
It might seem like adding the lining and finishing the body should be next, but we want to sew the straps into the bag first (we won’t finish them yet) since it’s easier to add them now than trying to insert them into the lining later.
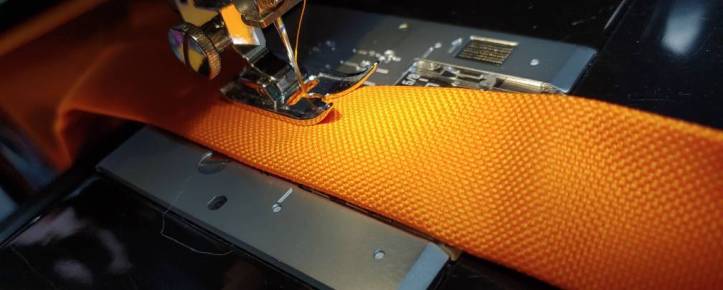
The straps, both long and short, are made just like double-fold bias or hem tape. When ironing them flat, make sure to give them a good steam. Canvas will take pretty well to ironing, but if the fabric has waterproofing on the inside, it may take a little pressing to get it to stay put.
Before sewing, pick one of the short ends and tuck the raw edge inside the double-fold strap. Iron the end flat. This end will be the exposed end underneath the buckle, so tucking the raw edge inside means no fraying when you wear the bag.
Now sew the strap shut. Sew on both sides to make it look like a finished strap. Sew the folded edge as well. The raw short top edge can be left as-is.
Repeat this for the shorter strap, leaving both short ends raw since you’ll be tucking those into the seam.
Take the shorter strap and thread it through a D-ring. Matching the raw edges up, pin them to the gusset.
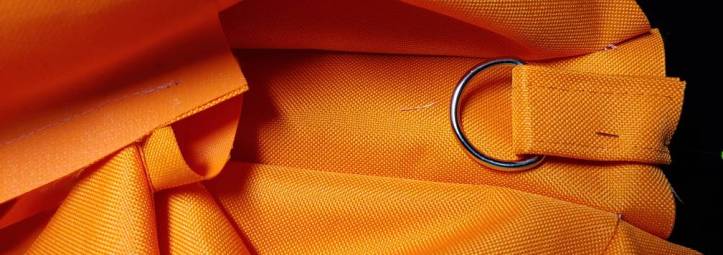
It doesn’t necessarily matter which side you put the D-ring on the bag. You can sew it on either side. I wanted mine to be less noticeable since Kiki’s bag doesn’t have a noticeable buckle, so I stuck it on the right side of the bag (when looking at it from the front) so it’s behind me when worn.
The long strap goes on the opposite side of the bag, on the other gusset. Match up the raw edge of the strap to the gusset in the same way as the D-ring.
Stay stitch both straps to the bag and tuck the strap inside the bag.
Finishing the body
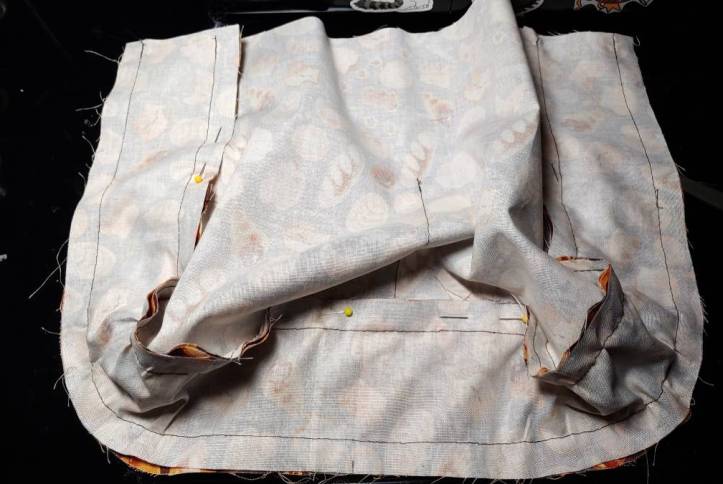
Now it really is time to finish the body and add the lining. This is going to be easiest with the shell inside out so the straps don’t try to spill all over the place.
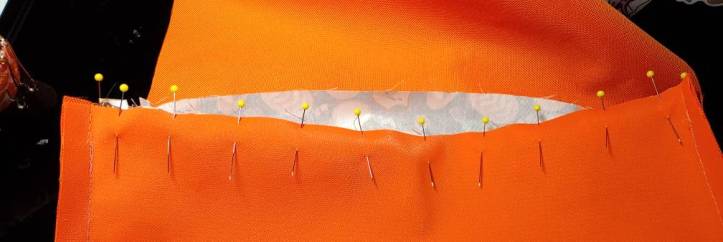
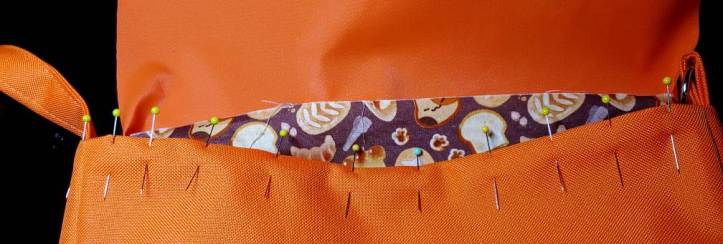
Flip the lining right-side out and tuck it inside the outer shell, making sure the long strap is completely inside the bag. The right sides of the lining and shell should be together. The side where you sewed the 5/8″ gap on the lining should match up with the backside of the shell where the flap is attached.
Pin along the front and sides of the bag’s body, leaving the back where the flap is attached unpinned. Due to the thickness of the straps, you may not be able to pin it directly but only on either side of the strap.
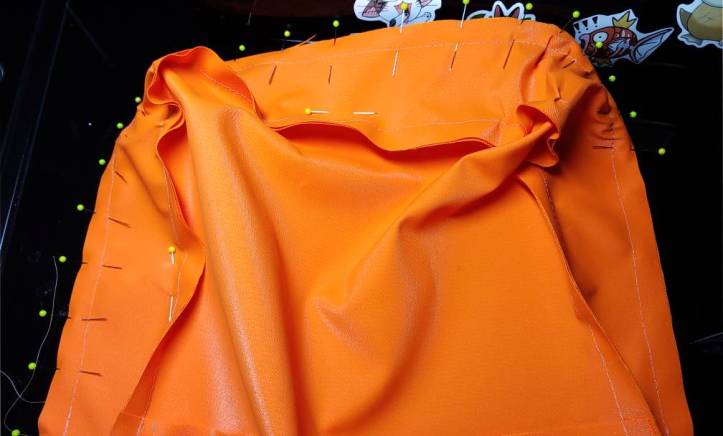
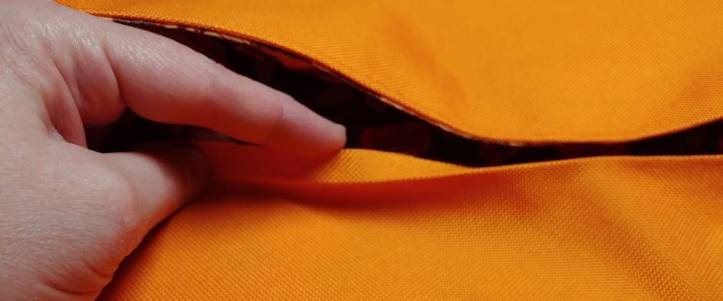
Sew the lining and sell together along the sides and back. Remove the pins and flip the lining out and around the shell, flipping that right side out as well. Tuck the lining inside the bag. since the canvas can be stiff, you may need to finger-press the outer shell seam allowance down to make the lining sit right. Iron the lining and shell seam flat with some steam and pin flat. Be mindful not to iron your D-ring.
Sew a small straight stitch along the edge to secure it. If your lining and shell are very different colors like mine are, use a different top thread and bobbin thread color to more closely match your designs. For mine, I used orange for the shell and brown to match the bread cats.
And that finishes up the body.
Finishing the lid and snap
We can’t leave the lid with raw seams, and you should have exactly one body piece left for this. Pin the body piece to the back of the lid, right sides together. Pin along the perimeter but leave that 5/8″ gap at the bottom near the flat part of the lid.
Sew the two pieces together, leaving the flat part unsewn. Clip the rounded corners before flipping the lid right-side out.
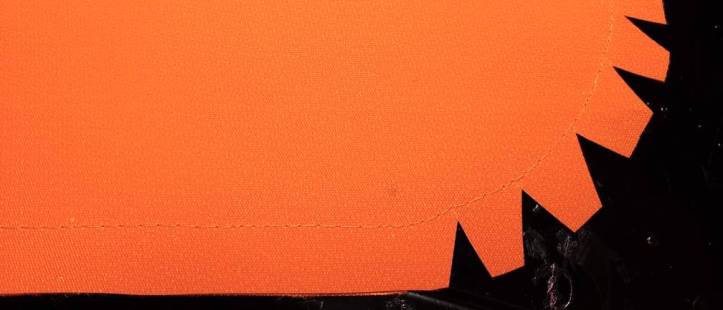
Since canvas can be stubborn, you’ll have to coax the fabric into the curves. You can use a point-turner, but honestly, I found sticking a finger into the curve works best with canvas. Once the curves are sufficiently turned, iron the lid flat and sew a stitch around the edge of the lid.
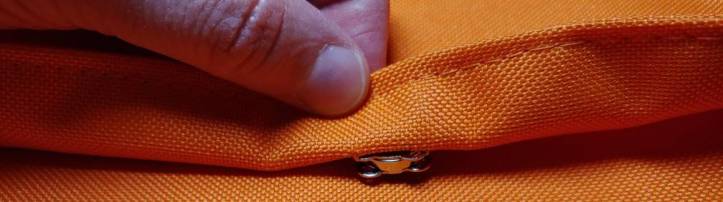
Before sewing the final lid seam shut, add the magnet or snap first. This ensures that the backside of the magnet or the stitches for the snap aren’t seen on the outside of the lid. Sew a single magnet or snap to the center of the lid near the top seam.

Now for the final lid seam. Iron the raw edge of the lid at 5/8″, turning it under towards the wrong side of the fabric. Use that 5/8″ gap as your guideline for this. No need to measure it. All of it has been done for you during the process.
Lay the bag flat on its back, smoothing the lining out and tucking the raw edge under the lid’s lip. Pin the lid lip down to secure the lid and the lining, sewing a straight stitch across the lip to secure it.
One last step for the lid is to add the matching snap or magnet to the body of the bag. Slip something thick and flat into your bag to give it some volume. For mine, I stuck my tablet inside. Books work too. This’ll give you a better idea of what the bag will be like when full and are still able to fully close the bag.
Snap the snaps or magnets together and lightly close the lid with a little bit of slack. Lift the edge of the lid and mark where the snaps meet the body of the bag.
Open the lid, remove your object, and sew the snap at the marked location. Make sure your lining isn’t bunched up inside before sewing. If you have pockets on the front side of your bag, sew inside the pocket so you don’t accidentally sew your pocket shut.
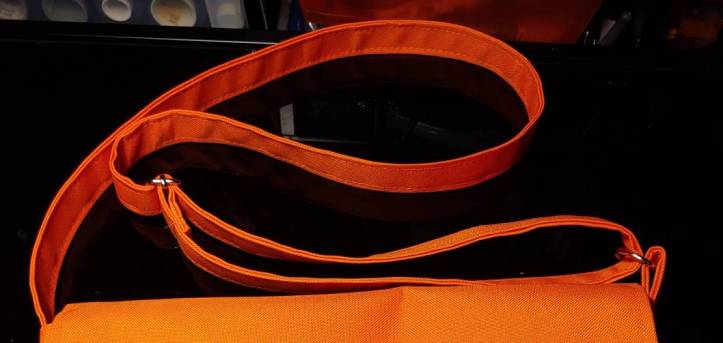
Finishing the strap
Last is to add the slider buckle to the long strap and sew the strap down. Start by sliding the long strap through the slider buckle from the back and thread it through the D-ring, from the outside of the bag towards the inside so the strap doesn’t twist.
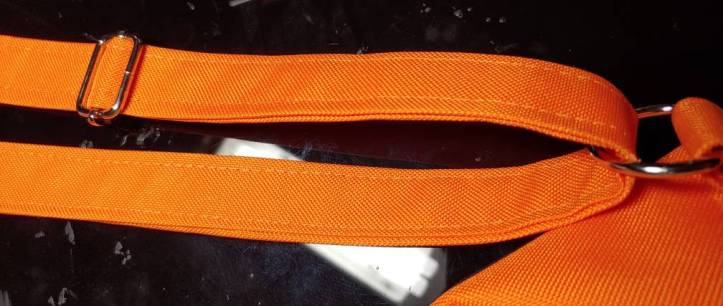
Push the strap partially through the slider buckle to give it some slack and room underneath to reach the buckle bar. Slip the tail of the strap underneath the first strap and through the slider buckle in the same direction as you did the first time. This will hide the tails in between the two straps and will be unnoticeable when worn.
Here’s a picture of the threading order:

Pin the tail down to the strap. Make a little loop around the D-ring and only sew it to the back strap. If you sew it to the front strap you first threaded through, the buckle cannot move.
You’ll want to leave a few inches of leeway since getting a machine foot next to a slider buckle and an entire strap here can prove difficult. It’s easier to give yourself a bit of room to sew.
Sew the tail down and pull the straps taut. You’ve just completed your bag.
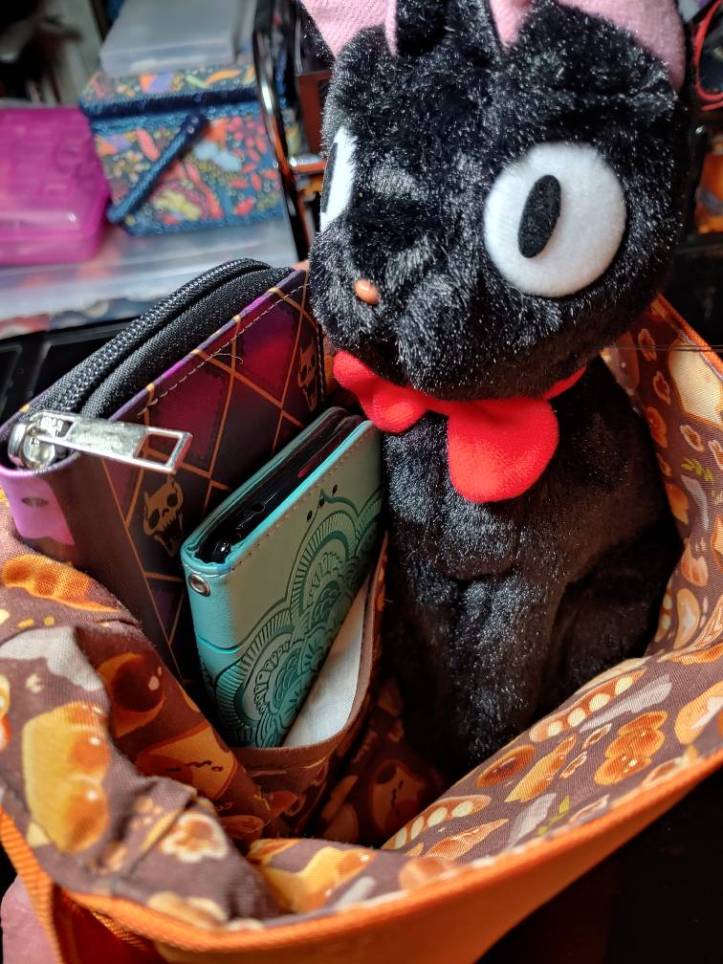
Thanks for reading my tutorial! It was a lot of fun to draft and sew this bag and get the strapping to look right for her design. This bag fits so much stuff and is perfect for carrying whatever you need for a con (or for just fun!) You can add any cute pattern you like on the inside. I had to go with bread cats for her. It’s such a cute fabric that I get to see every time I open up her bag.
Let me see your Kiki bags. Let’s share the love for Kiki and for making roomy and practical cosplay bags! @ me on social media so I can admire your work!

Your work always turns out so amazing! I wish I had the patience to make such great costumes and accessories too!
LikeLike
Thank you! I’m glad you like my work! Now I don’t really list the time requirements, but there are some shorter tutorials that take less time you could start with! You can generally judge by how many sections I have in an article. Maybe start with gems or tassels and work up to larger projects from there.
LikeLiked by 1 person