When making shoe, boot, and sandal covers, you need a pattern. However, pinning muslin to your legs tends to result in pinpricks and uneven patterns. And honestly, muslin tends to slip down your leg when you’re working. So it’s time to use a different material, and you probably have it in your kitchen.

Enter plastic cling wrap and some box tape. These simple materials make a good cast of your leg and shoe’s exact shape and can help you make a pretty decent pattern for any shoe, whether they are heels, wedges, or flats.
I use this same technique for making shoe covers and leg bands for my sister who lives across the country. She can make a plastic cast of her leg, and I can use that as the base for my own pattern.
So let’s talk about the basics of how to wrap your foot and leg and the important part of how to remove it without hurting yourself.
Skill level: intermediate (while the wrapping process is easy, the patterning is intermediate)
Cost: budget-friendly
Materials:
- plastic cling wrap
- clear box tape
- a shoe
Supplies:
- sharp, non-fabric scissors
Why these materials?
So why plastic cling wrap and clear box tape?
Plastic wrap is pretty useful because it sticks to itself and it protects your leg and shoes from the tape. It’s really good at contouring and taking the shape of your leg and shoe relatively accurately. However, cling wrap alone isn’t good for making patterns for as soon as you cut it off your leg, it starts to lose shape and you lose the accuracy of your pattern.
So that’s where tape comes in. Clear tape lets you see your leg and shoe easily so you know where the top of your shoe is and can properly cover it.
But there’s more than just visibility that gives clear tape an advantage. It’s much easier to cut than duct tape, doesn’t gum up your scissors, and makes the cling wrap hold its shape. This helps when you’re drawing the pattern on the form on your desk since I don’t know about you. I cannot contort and bend my leg enough to see all the way around to draw a proper pattern.
And after you’ve drawn the pattern, when you cut the whole thing apart, the tape keeps everything together so you get the most accurate pattern pieces once you’re done.
Wrap it up
When you’re ready to wrap, slip your foot into the pair of shoes you plan on wearing with this shoe cover. If you’re making a pair of boots, I recommend wrapping a short sock around your ankle and taping it with a piece of clear tape. This gives you more room to move your ankle in the boot when you walk.
When you pull strips of cling wrap from the box, you’ll want to use larger strips for larger sections like your upper leg and for flat shoes around the foot, but smaller strips when contouring around things like the heel of a shoe or around a sharp curve of your high heels. How big or small you want will take some experimentation, and it is just cling wrap. You can always add more or cut some off.
Starting wraps
Your starting wraps are going to be your foundation. You want to secure the shoe to your foot and wrap the ankle sock if you’ve got one for boots.
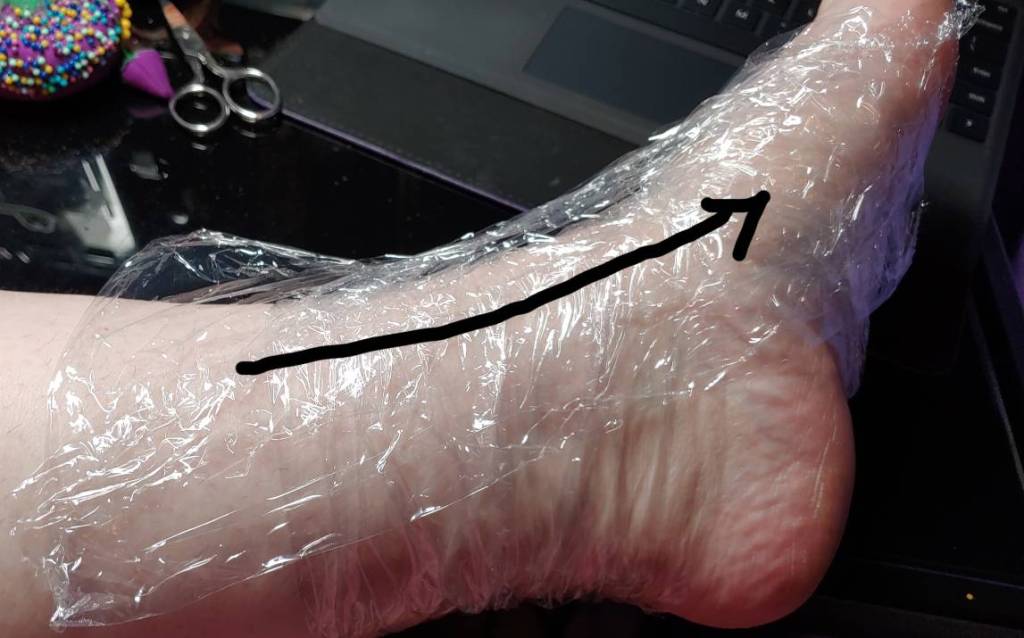
Start with wrapping a strip around the bridge and arch of your foot a few times. This secures the shoe to your foot.

Next wrap the ankle a few times. Even if I’m not doing boots, I will still wrap the ankle so that the plastic wrap at the top of the shoe has something solid to cling to. When patterning, you can always cut it off.
Connecting ankle to foot
No matter what type of shoe you have, you’ll want to secure the section around the ankle and the top of the bridge. Even if you have peep toe or peep heel shoes, you need to complete the bridge.
Place strips of cling wrap along either side of the foot, going from the ankle toward the toes. One wide strip will generally do for each side.
Once the side strips are down, wrap the arch/bridge and the ankle a second time to secure the strips.
Wrap the toes
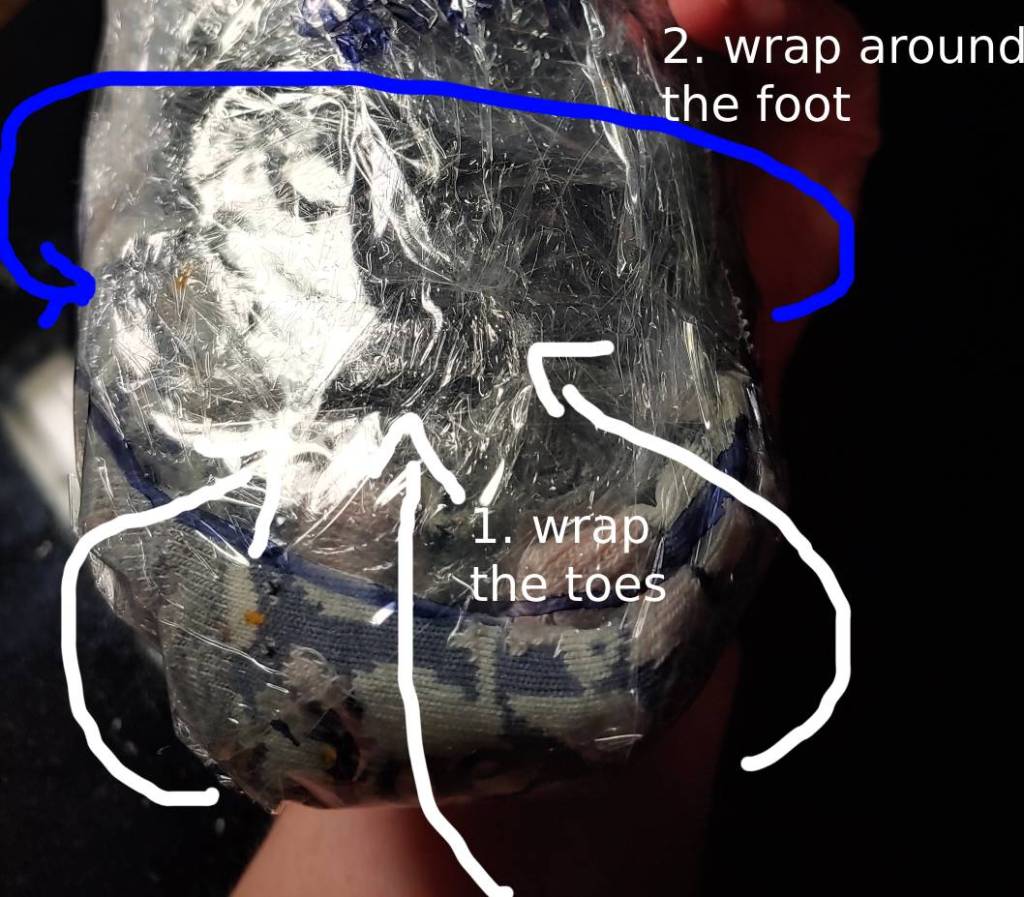
Wrapping the toes requires layering. The easiest way to layer is to fold the strips of cling wrap to make them thinner. Folding lets you adjust how wide or thin your strips will be as you work. Once you pick a size, wrap the strip from the sole of the shoe to the top. Do this all the way around the toe.
Once those are wrapped, wrap cling wrap around the full foot at the top of your toe strips to secure them.
Wrap the heels (flats or wedges)
Wrapping flats and wedges is the easier of the two heel wraps as you don’t have to worry about the heel itself. Wrapping the heel here is much like wrapping the toes: it involves a series of wraps around the curve of the heel which is then secured using a perpendicular strip.

When wrapping around and underneath the heel, you can use a strip long enough to wrap from one side of the heel to the other. This makes wrapping the heel much easier and requires fewer strips to complete. You do want the bottom of the shoe covered for drawing the edge of the shoe for patterns, so stabilizing it here is always a good idea.
Wrap the heels (heels)
Wrapping the heel takes a few extra steps because, well, you have a heel to deal with! When I make my heel patterns, I’ll often wrap fabric around the heel itself to conceal what color shoe I have underneath. So the whole heel should be covered to make an accurate pattern!
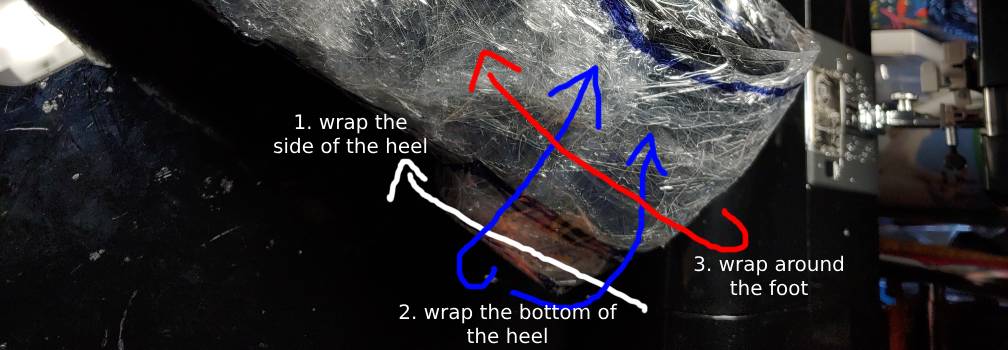
Start by wrapping thin strips around the heel underneath the bottom of the shoe. Follow that up with wrapping the plastic over the bottom of the heel much like you’d do with flats. Then secure it by wrapping a piece of plastic around the back of the foot.
You may not need to do this if you’re working with spike heels. Generally, you’ll pattern around the spike and leave the heel itself uncovered. Sewing stiff fabric around a spike heel is really difficult (if it works at all) and it’s easier to leave it exposed.
Wrap the leg
Wrapping the leg is probably one of the easier parts with some caveats. You want to make sure you can still get a pair of scissors underneath the plastic to cut it off.
When wrapping the plastic wrap around your leg, use long wide strips to cover as much space as possible. Don’t pull it tight so that your leg looks like it’s being strangled. Keep it just a little loose so the wrap isn’t clinging to your leg for dear life.
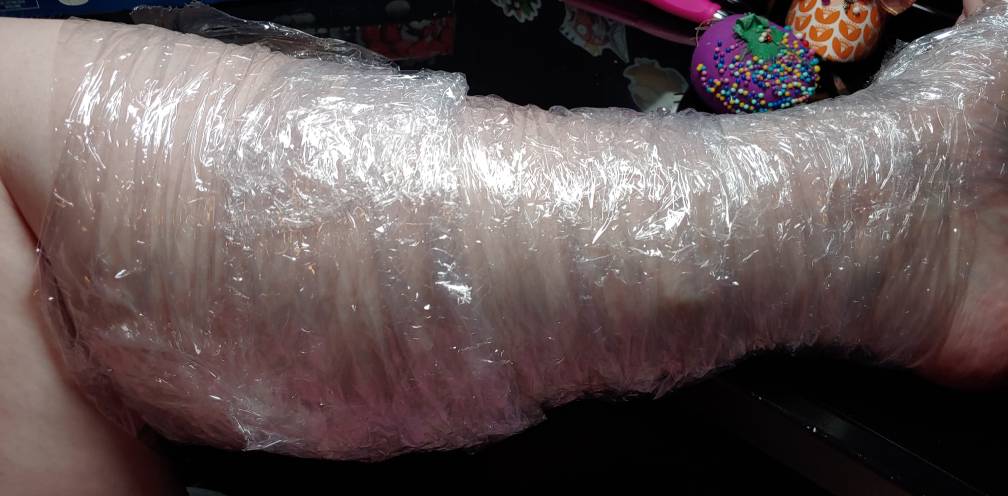
The wraps may look a bit messy as you work and that’s okay. It’ll be smoothed out when you tape everything down. As long as it completely covers your skin and contours to the shape of your leg, that’s what we want.
If you are making over-the-knee boots, tuck some socks behind the knee. This will give you enough space to bend your knee in the final boots. If the boot fabric contours too closely to the back of your leg, you may just not be able to bend your legs and probably won’t sit down at the con. So make sure to give yourself some movement space while you’re making the pattern!
Tape it up
Once you’re done wrapping your leg in cling wrap (and probably sweating like crazy because it doesn’t breathe), it’s time to make sure this plastic pattern form keeps its shape with some tape. You’ll want to tape much like you did with the plastic wrap above.
When taping, however, don’t tape so tightly that you strangle your foot and leg. The tape on the shoe should be pretty close to the shape of the shoe, but on the leg especially, you want to give yourself some room.
A good way to judge the space is to see if you can stick your hand under the plastic. A few fingers are fine around the foot and ankle, but ideally, you want multiple fingers or possibly even your whole hand to fit around the calf. You want this space to fit the scissors underneath to cut this thing off. If it’s too tight, it’s going to be very painful to get off.
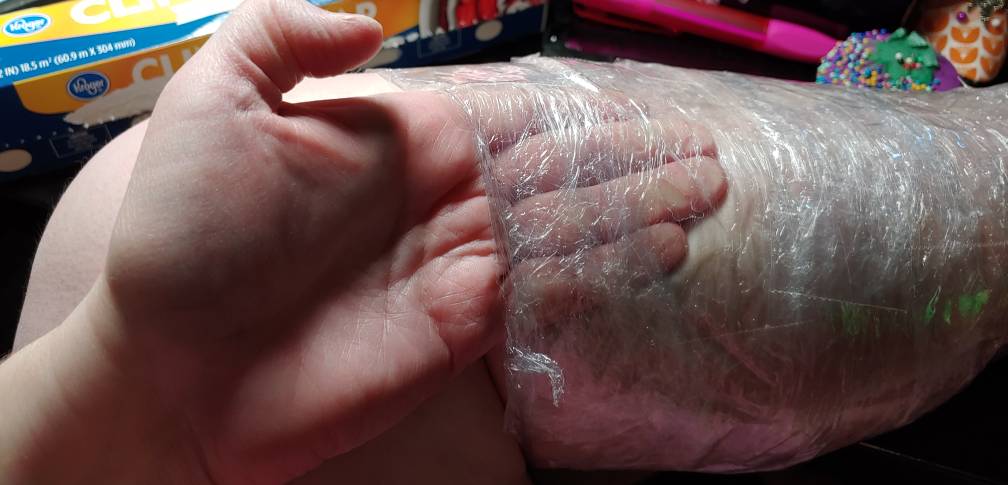
I’ve definitely had scratch lines down my arms and legs before by making it too tight. So give yourself some leeway!
Cut it off
Now that everything’s taped up, we need to get this thing off. It’s much easier to draw your patterns with the wrap off, and honestly, this thing is hot. It’s a good idea to let your leg breathe.
When cutting the wrap off, you can honestly pick where you want to cut. I prefer the side of the calf as I can just prop my leg on the table and start cutting. You can cut down the back or front if that’s easier.
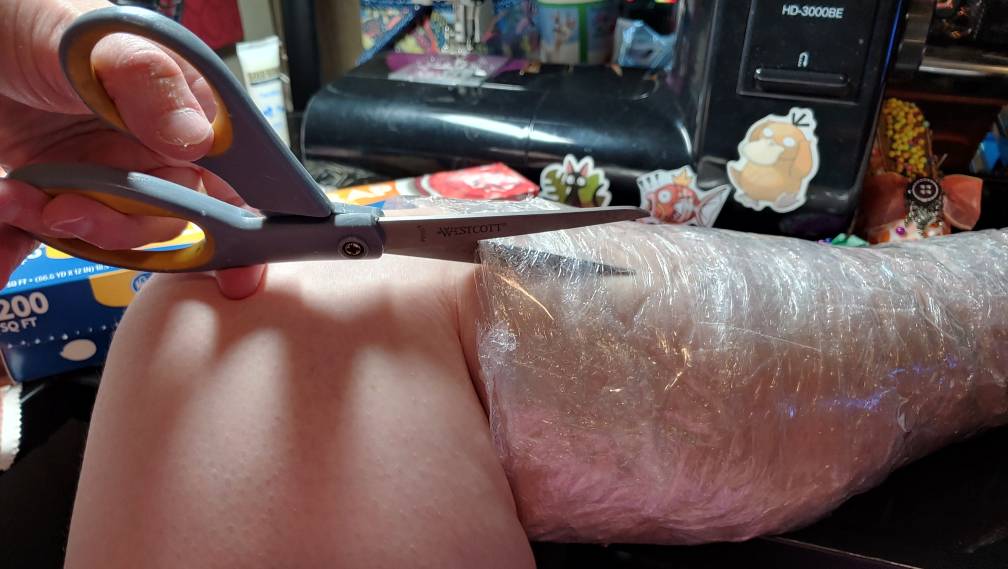
When cutting the wrap off, cut down to nearly the sole of the shoe, making sure not to cut you or your shoe. If you start feeling anything uncomfortable with the scissors (it usually feels a little sharp), pull the plastic wrap up with your free hand to get the scissors comfortably underneath it.
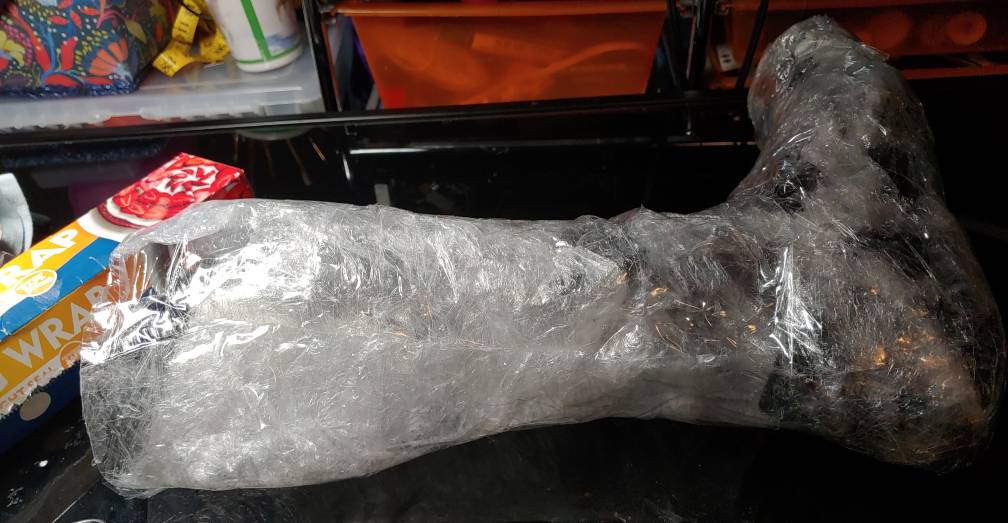
When cutting to the shoe, you want to cut far enough to pull your foot out easily but not the shoe. Keep the shoe inside for now as it helps with matching the pattern up with the edge of the shoe.
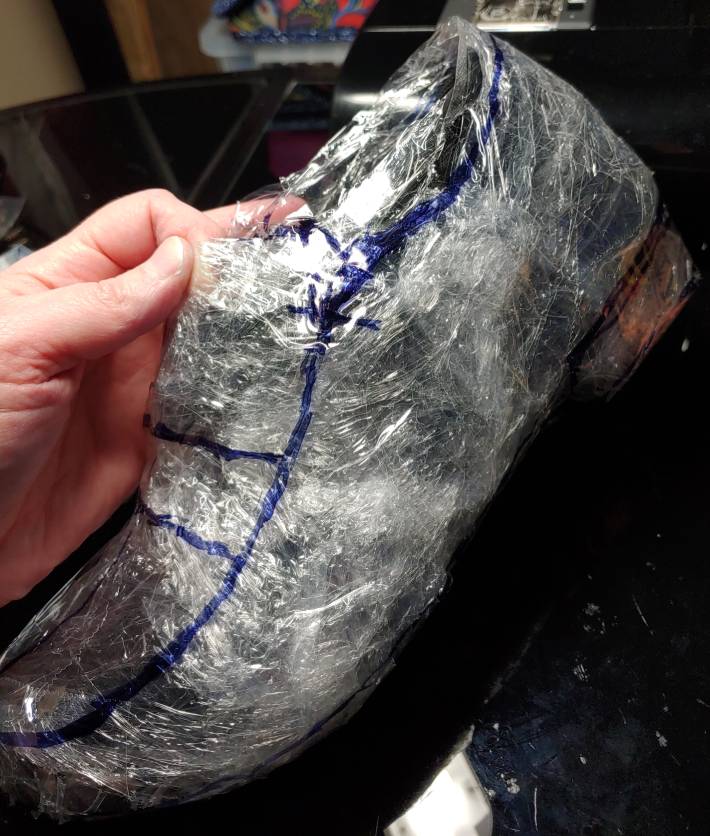
After freeing your leg, it’s time to repair the pattern. Take some box tape and match up the cut seams, taping them back together.

Keep going and you’ll soon have a nice double of your leg and shoe.
Now go pattern!
I hope you enjoyed this tutorial on how to make a double of your leg and shoe for patterning! You can use this to make your own patterns or hand the form off to a friend to make them for you! Works for nearly every kind of shoe. I’ve used this for everything from sandals to flats and chunky heels.
I’ll have some tutorials up as I make more shoes if you want to know how to pattern yourself and make all sorts of different shoe covers. Just check out the Tutorials Index. They have their own section under Shoes
So in the meantime, let me see what you make with this tutorial. @ me on social media so I can admire your work!
